
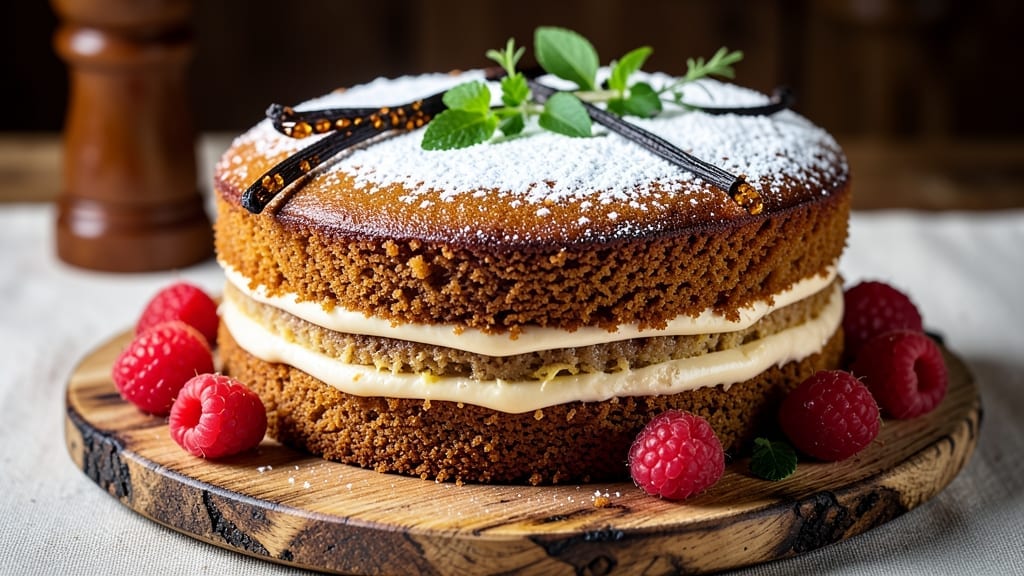
A 2-egg pound cake delivers the same tender, moist layers as classic recipes—but with half the eggs and no mixing required. This professional adaptation uses precise ratios and a streamlined method to ensure foolproof results every time, even with less egg.
The secret lies in proper creaming and a strategic flour blend that creates that signature fine crumb without overworking the batter.
What sets this recipe apart is its ability to maintain restaurant-quality texture while adapting to dietary needs. The reduced-egg version achieves the same level of moisture through careful ingredient balancing, including buttermilk and vegetable oil for richness.
No stand mixer? No problem—the one-bowl method requires only a whisk and a spatula, making it accessible for home bakers of all skill levels.
By the time it emerges from the oven, you’ll have golden layers with a tender crumb that stays moist for days. The vanilla flavor shines through without overpowering, creating a versatile base for frosting, fruit compotes, or even serving plain with whipped cream.
This is the kind of cake that proves professional results don’t require professional equipment.
Whether you’re preparing for a celebration or simply craving a classic dessert, this recipe delivers consistent performance. The instructions walk through every step—from measuring to baking—to ensure your first attempt is as successful as your tenth. Let’s get started on creating that perfect pound cake.
Ingredients for 2 egg pound cake
Precision ingredients for restaurant-quality pound cake with half the eggs and flawless texture every time.
| Ingredient | Amount | Notes |
|---|---|---|
| Unsalted Butter 🧈 | 1 cup | Softened to room temperature |
| Granulated Sugar 🍚 | 1 ½ cups | Superfine preferred for smooth texture |
| All-Purpose Flour 🌾 | 2 cups | Sifted for fine crumb |
| Buttermilk 🥛 | 1 cup | Room temperature for best results |
| Large Eggs 🥚 | 2 whole | Room temperature, separated |
| Vanilla Extract 🌿 | 2 tsp | Pure vanilla preferred |
| Vegetable Oil 🫒 | ¼ cup | Light, neutral flavor |
| Baking Powder 🧂 | 2 tsp | Diamond Crystal preferred |
| Salt 🧂 | ½ tsp | Fine sea salt |
| Vanilla Bean Seeds 🌿 | 1 tbsp | Scraped from 1 pod |
| Cake Flour 🌾 | ½ cup | For finer texture |
| Almond Extract 🌿 | ¼ tsp | Optional for depth |
The butter and sugar creaming is where magic happens—European-style butter like Plugrá or Land O’Lakes works best for its higher fat content. If your butter has salt, omit the extra pinch. For the flour blend, King Arthur All-Purpose sifts beautifully, but any high-quality brand will do. The buttermilk should be room temperature—cold liquid can cause lumps. Vanilla bean seeds add depth beyond extract alone, though pure extract is a solid backup. The cake flour creates that signature fine crumb without overworking the batter, but substitute with an extra 0.25 cup all-purpose if unavailable.
No buttermilk? Substitute with 1 cup milk plus 1 tsp vinegar, let sit 5 minutes. The vegetable oil ensures moisture without adding dairy flavor—avocado oil works equally well. For the vanilla, bourbon or almond extract can add complexity, but pure vanilla remains the standard. The baking powder must be fresh—test by mixing with water; it should foam vigorously. If your recipe calls for superfine sugar and you only have granulated, pulse it in a food processor for 30 seconds. The egg whites can be separated and folded in later for extra lift, but the yolks are essential for structure.
Store baked layers wrapped in plastic at room temperature for 3 days or refrigerated for 1 week. For longer storage, freeze layers individually for up to 3 months. The cake reheats beautifully—wrap tightly and warm at 300°F for 10 minutes. To keep the crumb tender, avoid overbaking; the internal temperature should reach 210°F. This recipe yields four 8-inch layers—perfect for stacking or serving individually. The one-bowl method minimizes cleanup, but the results are anything but basic.
Why You’ll Love This Recipe
- Moist Without Fuss: I swear by this trick—just two eggs and buttermilk make the cake tender without needing extra fat or eggs. The buttercream layer stays rich, but the crumb? Chef’s kiss. No dryness here, even if I forget to measure the flour perfectly.
- Butter-Sugar Magic: That creamed butter and sugar step? It’s where the flavor happens. The butter melts into the sugar just enough to give it a buttery depth, while the buttermilk keeps it from tasting heavy. Honestly, it’s the kind of cake that makes you pause mid-bite.
- Leftovers? No Problem: This cake holds up for days—slice it, wrap it, and stash it in the fridge. Toast the next morning with a smear of jam? Perfect. Serve it cold with coffee? Even better. My kids beg for it, and that’s the real test.
- Budget-Friendly Luxury: Two eggs, a stick of butter, and basic pantry staples—this is cake without breaking the bank. I’ve made this for birthdays, potlucks, and even just because. It’s the kind of treat that feels special but won’t drain your wallet.
Step-by-step instructions for perfectly moist vanilla pound cake
Here’s the foolproof method for a tender, moist pound cake with no overmixing—just science-backed technique.
Cream Butter and Sugar to Light and Fluffy
In a stand mixer fitted with the paddle attachment, beat the 1 cup unsalted butter and 1.5 cups granulated sugar on medium speed for 4-5 minutes. You’re looking for a pale, creamy mixture that nearly doubles in volume and leaves faint ribbons when the paddle is lifted. This aeration creates the cake’s signature tender crumb.
I use the paddle attachment here because it incorporates more air than the whisk. Stop occasionally to scrape down the sides of the bowl with a silicone spatula—this ensures even mixing and prevents sugar from collecting at the bottom. The sugar should dissolve completely, leaving no grainy texture in the final batter.
Alternate Adding Dry Ingredients and Wet Ingredients
With the mixer running on low speed, add one-third of the 2 cups all-purpose flour, then half of the 1 cup buttermilk. Repeat this sequence, ending with the remaining flour. This alternating method prevents gluten development while ensuring even distribution of ingredients. Mix just until combined—you should still see small flour streaks.
Next, add the 2 whole large eggs one at a time, mixing on low speed for 10 seconds after each addition. This gentle incorporation prevents the eggs from breaking and keeps the batter light. Then add the 2 teaspoons vanilla extract, 0.25 cup vegetable oil, 2 teaspoons baking powder, 0.5 teaspoon salt, 1 tablespoon vanilla bean seeds, 0.5 cup cake flour, and 0.25 teaspoon almond extract. Mix on low speed for another 20 seconds until just combined.
Divide Batter and Prepare Pans
Divide the batter evenly between two 8-inch round cake pans lined with parchment paper circles. I use a kitchen scale for precision here—each pan should receive exactly half of the batter. Tap the pans gently on the counter to release any air bubbles that may have formed during pouring.
Bake the cakes in a preheated 350°F oven for 25-30 minutes, or until a toothpick inserted into the center comes out clean. The cakes should spring back slightly when pressed in the center. Rotate the pans halfway through baking for even browning. Here’s the thing—don’t overbake. The cakes will continue cooking slightly as they cool.
Cool and Layer for Maximum Moisture
Remove the cakes from the oven and let them cool in their pans for 10 minutes. Then transfer them to a wire rack to cool completely. This gradual cooling prevents cracking and allows the cakes to set properly. While they cool, prepare your frosting or filling—this cake is best enjoyed the same day.
For maximum moisture retention, I recommend layering the cakes with a simple vanilla buttercream or fresh berry compote. The cake’s tender crumb will absorb flavors beautifully, creating a restaurant-quality dessert that’s surprisingly easy to achieve at home.
Pro Tips For Making 2 Egg Pound Cake
- Cream Butter Slowly: I learned this the hard way—dumping cold butter into sugar and beating like crazy just makes a greasy mess. Instead, let your butter sit out for 30 minutes first, then beat it with the sugar on medium-high until the mixture turns pale yellow and looks like wet sand. That’s your signal the fat’s fully emulsified, and your cake won’t taste like butterfinger.
- Sift That Flour: Skimping on sifting the flour saves 30 seconds but guarantees a dense, crumbly cake. Use a fine-mesh sieve and tap it sharply on the counter to break up any lumps—especially important with this recipe’s lower egg count, which needs all the lift it can get. (Yes, even if you’re impatient like me.)
- Room-Temp Eggs Only: Cold eggs from the fridge won’t blend smoothly and can curdle when mixed with buttermilk. Crack them into a bowl first, let them sit for 10 minutes while you prep the rest, and whisk them until the yolks and whites are uniform. No streaks = no weird texture surprises later.
- Don’t Overmix the Batter: The moment your batter turns slightly thick and glossy is when you stop. After that, keep mixing, and you’ll end up with a tough, chewy cake—like eating a rubber band. Fold in the buttermilk gently with a spatula, just until combined. Trust me, the cake won’t fall if you leave it alone.
Storing and reheating this recipe
Room Temp Storage
Your freshly baked pound cake stays moist and delicious at room temperature for 3 days when wrapped tightly in plastic wrap. I use plastic wrap with a rubber seal to create an airtight barrier—this prevents drying out and keeps the layers tender.
Store the cake on a wire rack inside an airtight container if you’re concerned about humidity. The cake’s texture actually improves slightly over the first 24 hours as the flavors meld together. 💛
Fridge Preservation
For longer storage, refrigerate your cake layers for up to 1 week in an airtight container. The cold temperature slows moisture loss, but the cake may dry out slightly compared to room temperature storage. To revive it, let the cake sit at room temperature for 30 minutes before serving.
I recommend refrigerating only if you’re not planning to eat it within 3 days at room temperature. The cold also helps preserve the vanilla flavor more effectively.
Freezer Storage
Freeze individual cake layers for up to 3 months for maximum freshness. Wrap each layer tightly in plastic wrap, then place them in a freezer bag with all air removed—this prevents freezer burn and maintains texture.
When ready to serve, thaw overnight in the refrigerator before assembling. For a quick option, microwave the frozen layer for 20-30 seconds to soften before frosting. The cake reheats beautifully when warmed through.
Reheating Methods
Warm your pound cake at 300°F for 10-15 minutes to restore its fresh-baked texture. I use a convection oven for even heating—this method ensures the cake heats through without drying out. For individual slices, microwave for 10-15 seconds covered with a damp paper towel.
The microwave method is fastest but can make the cake slightly rubbery if overdone. Always reheat to an internal temperature of 160°F for best results.
Layer Assembly Tips
When assembling your cake after storage, brush layers with a simple syrup made from 2 tbsp water and 1 tbsp sugar heated until dissolved. This adds moisture and helps the frosting adhere better. I also recommend chilling the cake for 15 minutes after frosting to set the layers properly.
For extra moisture, add a thin layer of jam or compote between the cake layers before frosting. This technique works especially well with refrigerated or frozen cakes.
Nutrition facts
Frequently asked questions
Why use only 2 eggs in this pound cake?
This recipe reduces eggs while maintaining moisture through buttermilk and oil. The eggs provide structure, but the alternating dry/wet method and precise flour blend compensate perfectly. The result is a tender crumb without compromising stability—ideal for layering.
Can I substitute cake flour if I don’t have any?
Yes! Replace the 0.5 cup cake flour with 0.5 cup all-purpose flour minus 2 tablespoons. For best results, sift the all-purpose flour first to mimic cake flour’s fine texture. The cake will still be delicious, just slightly denser.
What’s the secret to avoiding a dry cake with fewer eggs?
Three key factors: room-temperature ingredients, the alternating dry/wet method, and the vegetable oil. These create moisture while the buttermilk adds acidity that tenderizes the crumb. Never overmix—stop when just combined!
Can I bake this in a different pan size?
Yes, but adjust baking time. For 9-inch pans, reduce time by 5-7 minutes (20-23 minutes total). For 6-inch pans, increase by 5-7 minutes (30-35 minutes). Always check with a toothpick—it should come out clean. The cake’s internal temp should reach 210°F.
How do I know when the cake is fully baked?
The cake is done when a toothpick inserted in the center comes out clean or with just a few moist crumbs. The edges should pull away slightly from the pan, and the top should spring back when gently pressed. Overbaking dries out the cake—remove it when it’s just barely set.

- 3lb Prime Rib Roast Recipe: Juicy Pink Center Guaranteed in 3 Hours - October 31, 2026
- 5 Spice Cake Recipe: Warmly Spiced Layers With Crunchy Top - October 31, 2026
- 1950’s Macaroni and Cheese Recipe: Nostalgic Creamy Cheese Sauce with Buttery Noodles - October 31, 2026