
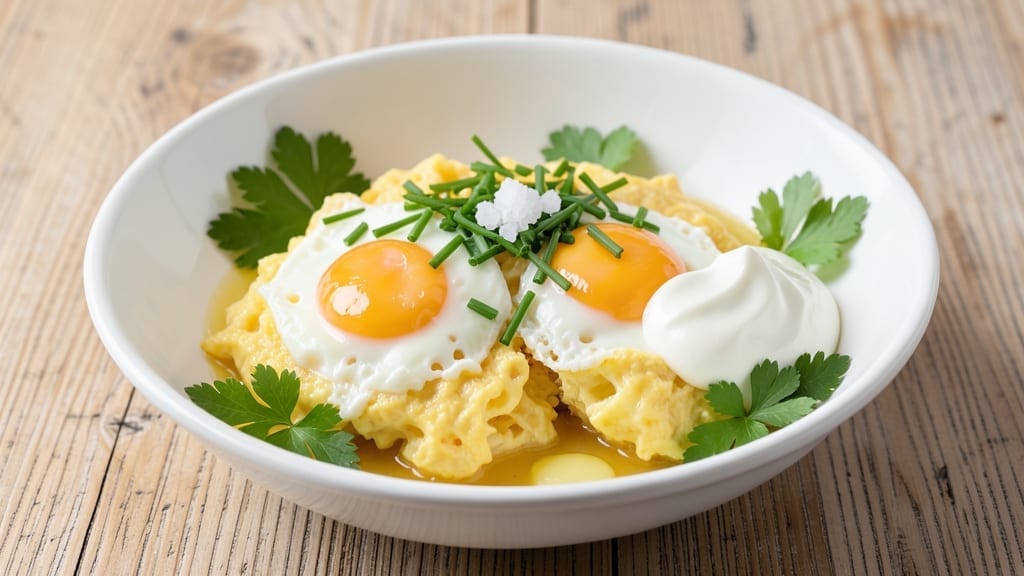
Mastering a 2-egg scrambled eggs recipe with silky custard and herbs transforms a simple breakfast into a restaurant-quality dish. The secret lies in low-and-slow heat, butter, and constant stirring—techniques that prevent rubbery eggs and create that velvety texture you crave.
I’ve perfected this method over years of morning experiments, and it’s now my go-to for quick, protein-packed breakfasts that feel indulgent without the guilt.
This recipe delivers fluffy, creamy eggs with just the right amount of butter richness and fresh herb brightness.
You’ll need 2 large eggs, 1 tablespoon butter, a pinch of salt, and a sprinkle of herbs like chives or parsley—simple ingredients that combine for a dish so elegant it could grace a brunch table.
The key is patience: letting the eggs cook gently ensures they stay tender and custardy, not dry or overcooked.
What makes this method foolproof is the two-step butter technique—first melting butter in the pan, then stirring in the eggs to create natural emulsification. The result? Eggs that are silky, not stringy, with a delicate balance of buttery flavor and herbaceous freshness.
This is the kind of breakfast that makes you slow down, savor each bite, and wonder why you ever settled for anything less.
Serve with toasted sourdough, avocado slices, or a side of sautéed spinach for a complete meal. The beauty of this recipe is its versatility—add a splash of cream for extra richness, a sprinkle of cheese for depth, or a pinch of red pepper flakes for a kick.
Perfect for weekdays or weekend brunches, it’s a dish that proves great food doesn’t require complicated ingredients or hours in the kitchen.
Ingredients for 2 egg scrambled eggs
Six essential ingredients transform ordinary eggs into velvety, herb-infused breakfast perfection.
| Ingredient | Amount | Notes |
|---|---|---|
| Large Eggs 🥚 | 2 whole | Room temperature, fresh for best results |
| Unsalted Butter 🧈 | 1 tbsp | European-style preferred for higher fat content |
| Fresh Chives 🌿 | 2 tbsp | Finely chopped, stems removed |
| Fresh Parsley 🌿 | 1 tbsp | Finely chopped, flat-leaf preferred |
| Diamond Crystal Kosher Salt 🧂 | ⅛ tsp | Fine grain for even distribution |
| Heavy Whipping Cream 🥛 | 1 tbsp | Optional for extra richness |
| Extra-Virgin Olive Oil 🫒 | ½ tsp | For non-stick finish if needed |
The butter is non-negotiable—European-style with its higher fat content (like Plugrá or Miyoko’s) creates that signature custard texture. I always buy it in small tubs from Whole Foods or Eataly for freshness. Fresh herbs are better than dried here; the bright, clean flavor cuts through the richness. If you’re using frozen eggs, thaw them overnight in the fridge—they scramble more evenly. For the eggs themselves, Pasture-Raised from Vital Farms or Crowd Company delivers superior texture, but store-bought large eggs work perfectly fine. The key is room temperature eggs—they scramble more smoothly than cold ones straight from the fridge.
No chives? Fresh dill or tarragon work beautifully as substitutes, though the flavor profile shifts slightly. Out of butter? Avocado oil or ghee can stand in, but the fat content must be high—low-fat alternatives will yield dry eggs. The cream is truly optional, but if you’re adding it, use full-fat heavy cream (none of that light stuff) for that luxurious mouthfeel. For a salt-free version, omit it entirely and adjust to taste at the end. If you’re feeling adventurous, a pinch of smoked paprika or freshly cracked black pepper adds depth without overpowering the delicate herb notes. The olive oil is your safety net—just a teaspoon ensures nothing sticks if your butter burns.
Eggs scramble best when made fresh, but the butter can be melted ahead of time and kept warm in a small saucepan over barely simmering water. Fresh herbs should be stored in a glass of water like flowers, covered with a plastic bag, and kept in the fridge for up to 5 days. The butter tub can stay at room temperature for 1-2 weeks after opening, while eggs last 3 weeks in the fridge. For meal prep, scramble an extra batch and store in an airtight container with parchment between layers—reheat gently in a skillet with a splash of water or milk for 2-3 days. The texture won’t be quite as silky, but it’s still delicious.
Why You’ll Love This Recipe
- Two-Ingredient Magic: Just eggs, butter, and a pinch of salt—no fancy prep, no stress. I swear, I’ve made this while waiting for toast to pop, and it still comes out fluffy and golden every time.
- Herb-Packed Punch: That bright mix of chives and parsley? It turns simple eggs into something that tastes like you actually put effort in. Honestly, the contrast of the buttery richness with the fresh herbs makes it feel like a restaurant dish.
- Breakfast or Snack: Need a quick bite at 7 AM or a late-night craving at 11 PM? This recipe works for both. I’ve served it on toast for brunch and as a side for dinner—no judgment if you eat it straight from the pan.
- Budget Breakfast Win: Two eggs, a pat of butter, and a handful of herbs cost pennies but taste like a splurge. It’s my go-to when I’m broke or just don’t feel like overcomplicating things—yet it still feels special.
Step-by-step instructions for silky scrambled eggs
Mastering this technique transforms ordinary scrambled eggs into a luxurious, velvety dish.
Prepare Ingredients for Optimal Texture
Remove the 2 whole Large Eggs from the refrigerator and let them sit at room temperature for 10 minutes—this ensures even cooking and prevents rubbery yolks. While they warm, finely chop the 2 tablespoons of fresh chives and 1 tablespoon of fresh parsley, removing any stems. The herbs should be minced small enough to distribute evenly throughout the eggs without overpowering the delicate custard texture.
Measure out the 1 tablespoon of unsalted butter and the 0.125 teaspoon of Diamond Crystal kosher salt precisely. European-style butter with its higher fat content works best here—it creates a richer, more stable emulsion when combined with the eggs. Keep the heavy whipping cream and extra-virgin olive oil nearby, though they’re optional finishing touches that elevate the dish further.
Create the Perfect Scrambling Base
Heat an 8-inch nonstick skillet over medium-low heat—this is critical for achieving silky eggs rather than dry, overcooked curds. Add the 1 tablespoon of unsalted butter and let it melt completely, swirling to coat the pan evenly. The butter should foam gently but not brown—if it starts to turn golden, reduce the heat slightly. This butter layer prevents sticking and adds luxurious richness to each bite.
Once the butter has fully melted and the pan is uniformly coated, crack the 2 whole Large Eggs directly into the skillet. Use a fork to gently whisk them together, letting the eggs sit undisturbed for 5-7 seconds before stirring again. This initial pause allows the eggs to begin setting slightly on the bottom, creating that coveted custard-like texture rather than a grainy scramble.
Develop the Custard Texture
After the initial pause, begin stirring the eggs gently with a heatproof silicone spatula, working from the center outward in small figure-eight motions. The key is to create soft, delicate curds rather than breaking the eggs into small pieces. Stir continuously for 20-25 seconds until the eggs begin to thicken but are still slightly runny in the center—this is the “soft curd” stage that yields the silkiest texture.
Here’s where technique matters most: resist the urge to overmix. You’re aiming for a creamy, almost liquid consistency rather than firm, dry scrambled eggs. The eggs should coat the back of your spoon but still move smoothly. If they begin to set too quickly, reduce the heat slightly to maintain control. The 0.125 teaspoon of Diamond Crystal kosher salt should be sprinkled evenly over the eggs now—salting at this stage allows it to dissolve completely into the custard.
Finish with Herbs and Cream
When the eggs reach that perfect soft-curd stage, remove the skillet from heat completely. This is the moment that matters: the residual heat will continue cooking the eggs gently while preventing them from becoming dry. Stir in the finely chopped chives and parsley, folding them lightly through the eggs to distribute evenly. The herbs should brighten the dish without overpowering the delicate egg flavor.
For extra richness, drizzle in the 1 tablespoon of heavy whipping cream and the 0.5 teaspoon of extra-virgin olive oil. Stir gently just once to combine—this final touch adds a velvety mouthfeel and balances the dish with subtle acidity and depth. If you prefer a slightly firmer texture, return the skillet to low heat for 10-15 seconds while stirring constantly, but only until the eggs reach your desired consistency.
Serve Immediately for Maximum Freshness
Transfer the scrambled eggs to a warmed serving plate using a spatula, working quickly to maintain their perfect texture. Serve immediately while still slightly runny in the center—this is when scrambled eggs are at their most luxurious. The dish should have a glossy sheen from the butter and cream, with visible soft curds that melt on your tongue. Each bite should deliver a perfect balance of creamy egg, herby brightness, and rich buttery flavor.
For best results, eat within 3-5 minutes of preparation. The eggs will continue to set slightly as they cool, so serving them hot ensures that signature silky custard texture. Pair with toasted sourdough or crispy hash browns to soak up any remaining sauce—this is the kind of breakfast that makes ordinary mornings feel special.
Pro Tips For Making 2 Egg Scrambled Eggs
- Crack Eggs Into Cold Butter: I learned this the hard way—whisking eggs first makes them cook unevenly. Instead, crack them directly into the cold butter in the pan. The butter melts into the eggs gradually, creating a silkier texture and preventing rubbery curds. (Yes, even if you’re impatient like me, resist the urge to whisk first.)
- Use Medium-Low Heat: High heat scrambles eggs into a sad, dry mess. Start with medium heat until the butter foams, then drop it to medium-low. You want gentle rolling, not frantic frying—this keeps the eggs creamy and the yolk rich. After burning three batches, I finally figured out patience pays off here.
- Salt the Butter First: More salt than you think, especially if using unsalted butter. Sprinkle a pinch (about ¼ teaspoon) directly into the melted butter before adding eggs. This distributes evenly and cuts down on the guesswork later. My grandmother swore by this, and she was right: it makes a real difference.
- Fold in Herbs at the End: Chives and parsley lose their brightness when cooked too long. Wait until the eggs are just set—still slightly runny in the center—then fold in the herbs with a gentle spatula. This keeps them crisp and vibrant, not wilted. (Your future self will thank you for not overcooking them.)
Essential equipment for perfect results
Nonstick Skillet
An 8-inch nonstick skillet is your best friend for silky scrambled eggs—it prevents sticking and ensures even heat distribution. I swear by All-Clad Stainless Steel with nonstick coating or GreenPan for their ceramic nonstick surface.
Avoid cheap, flimsy pans that warp under heat—they can’t maintain the delicate medium-low heat needed for perfect eggs. A well-seasoned cast iron skillet works too, but you’ll need to use ½ teaspoon olive oil first to prevent sticking. 🔥
Heatproof Silicone Spatula
A heatproof silicone spatula (like OXO Good Grips) is non-negotiable for stirring eggs without breaking curds. The flexible edge glides under eggs, lifting them gently for that restaurant-quality texture. Avoid metal spatulas—they can scratch nonstick coatings and tear the delicate egg structure.
I keep one dedicated to eggs only, stored in my kitchen drawer for quick morning scrambles. The silicone also resists warping from high heat, unlike plastic tools.
Fine-Mesh Strainer
For chopping fresh herbs like chives and parsley, a fine-mesh strainer (or the tiny holes in a microplane) gives you perfect, even mincing. I use a stainless steel herb strainer from Amazon Basics—it’s cheap, durable, and cuts herbs into tiny pieces that distribute evenly.
Avoid dull knives or food processors, which can bruise herbs and release bitter compounds. The strainer method also removes tough stems, leaving only the tender leaves for your eggs. 🌿
Digital Kitchen Scale
Precision matters with butter and salt—a digital kitchen scale (like OXO Good Grips) ensures you measure 1 tablespoon butter (14g) and ¼ teaspoon salt (1.5g) accurately. Butter varies in density, and too much can make eggs greasy, while too little leaves them dry.
I never eyeball measurements for eggs either—2 large eggs should weigh about 100g total (50g each). For cream, the scale helps measure 1 tablespoon (15ml) without spills. A scale is the only way to guarantee consistency every time. ⚡
Butter Warmer (Optional)
If you struggle with butter browning, a butter warmer (or a small saucepan with barely simmering water) keeps butter melted and ready to use. I use a double boiler setup—place a heatproof ramekin filled with butter over simmering water, then cover to maintain temperature.
This is especially helpful for meal prep when you need to melt butter ahead of time. For quick scrambles, just melt butter directly in the skillet over low heat and monitor closely. Never rush this step—rushed butter means rubbery eggs. 🧈
Egg Separator (Optional)
A stainless steel egg separator (like OXO Good Grips) is a game-changer if you ever want to make egg whites separately for omelets or meringues. While not essential for scrambled eggs, it’s handy for experimenting with French-style scrambled eggs (where yolks are cooked separately).For this recipe, though, I stick to cracking eggs directly into the pan—it’s faster and preserves the yolk’s natural richness. Store your separator in a dry place to prevent rust. 🥚
Nutrition facts
Frequently asked questions
Why do my scrambled eggs turn out rubbery?
Rubbery eggs happen when you overcook them or use too much heat. The secret is medium-low heat and constant stirring—remove the pan from heat when the eggs are still slightly runny in the center. Also, make sure your eggs are room temperature (not cold) and use plenty of butter (or oil) to create that creamy emulsion.
Can I make this recipe with just 1 egg?
Yes! For 1 egg, use ½ tablespoon butter and reduce the herbs to 1 teaspoon each. Keep all other steps the same, but cook for just 15-20 seconds after stirring—single eggs cook faster. The texture will be slightly thinner, so serve immediately with toast to soak up any extra sauce.
What’s the best way to reheat leftover scrambled eggs?
Reheat gently in a skillet over low heat with a splash of water or milk (about 1 tablespoon) to restore moisture. Stir constantly for 30-45 seconds until warmed through. Microwaving works too (30-second bursts), but the texture won’t be as silky—add a pat of butter at the end to help revive it.
Can I substitute butter with something else?
For a dairy-free option, use avocado oil or ghee (both have high smoke points). Olive oil works in a pinch, but it has a lower fat content, so you may need ½ teaspoon extra to prevent dryness. Avoid margarine—it lacks the fat needed for that perfect custard texture.
How do I make these eggs extra fluffy?
Whisk the eggs vigorously in a bowl first (for 10 seconds) before cooking to incorporate air. Add a splash of heavy cream or milk (just 1 teaspoon) to the eggs before scrambling. Also, remove the pan from heat slightly earlier than usual—the residual heat will finish cooking while keeping them tender.

- 3lb Prime Rib Roast Recipe: Juicy Pink Center Guaranteed in 3 Hours - October 31, 2026
- 5 Spice Cake Recipe: Warmly Spiced Layers With Crunchy Top - October 31, 2026
- 1950’s Macaroni and Cheese Recipe: Nostalgic Creamy Cheese Sauce with Buttery Noodles - October 31, 2026