
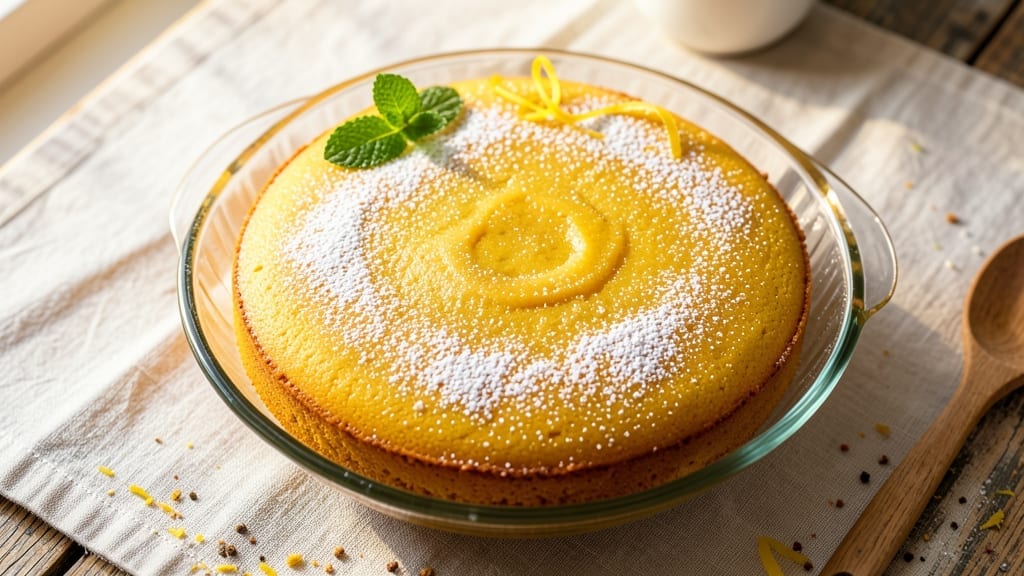
This 2-egg yellow cake recipe delivers the perfect balance of lightness and moisture without relying on oil—just simple ingredients and a proven technique. The secret lies in properly creaming butter and sugar while incorporating eggs in stages, which creates that signature tender crumb.
I developed this recipe after years of testing variations to achieve the ideal texture: a delicate, airy interior with just enough structure to hold slices without crumbling.
What makes this cake special is its versatility—it works equally well for layer cakes, sheet cakes, or cupcakes while maintaining its signature moistness. The recipe uses basic pantry staples: all-purpose flour, granulated sugar, and a touch of baking powder for lift.
Unlike traditional recipes, this version skips oil entirely, relying instead on butter for richness and eggs for structure. The result is a cake that stays tender for days, perfect for special occasions or everyday treats.
By the time you pull this cake from the oven, you’ll have golden layers with a fine, even crumb that melts in your mouth. The texture remains moist for hours, making it ideal for frosting with buttercream, whipped cream, or even fresh fruit.
Whether you’re baking for a celebration or simply craving homemade cake, this recipe delivers professional-quality results with minimal effort.
For those who prefer dietary adjustments, you can easily substitute the butter with an equal amount of applesauce or Greek yogurt, though the texture may vary slightly. The recipe scales perfectly for any occasion—double it for a crowd or halve it for a single layer. Let’s get baking!
Ingredients for 2 egg yellow cake
Nine simple ingredients create a tender, moist cake without oil or heavy frosting.
| Ingredient | Amount | Notes |
|---|---|---|
| Unsalted Butter 🧈 | ½ cup | Softened to room temperature |
| Granulated Sugar 🍚 | 1 cup | White or light brown |
| Large Eggs 🥚 | 2 whole | Room temperature preferred |
| All-Purpose Flour 🌾 | 1 ½ cups | Sifted for even texture |
| Baking Powder 🧂 | 1 ½ tsp | Aluminum-free preferred |
| Salt 🧂 | ¼ tsp | Fine sea salt |
| Vanilla Extract 🌿 | 1 tsp | Pure vanilla preferred |
| Whole Milk 🥛 | ½ cup | Room temperature |
| Vegetable Oil 🫒 | 2 tbsp | For greasing pan |
| Parchment Paper 📄 | 1 sheet | For lining pan |
The butter and sugar are the foundation—room temperature butter is critical for proper creaming. Land O’Lakes unsalted butter works perfectly, but any quality brand will do. For the flour, King Arthur all-purpose is my go-to (it’s sifted for me), but you can sift your own if using another brand. The baking powder must be fresh—if it’s over six months old, the cake will fall flat. For the vanilla, Nielsen-Massey pure extract delivers the best flavor, but imitation works in a pinch. Milk can be whole, 2%, or even skim—just make sure it’s room temperature to prevent lumps.
No butter? Applesauce or Greek yogurt (equal amounts) keeps the cake moist but may alter texture slightly. Short on vanilla? Almond extract at half the amount works well, though the flavor differs. The vegetable oil is only for greasing—you can use melted butter instead if preferred. For dietary adjustments, butter can be swapped with coconut oil, though the cake will have a subtly different taste. If you’re baking at high altitudes, reduce the baking powder by 0.25 tsp to prevent over-rising. The parchment paper ensures easy removal and prevents sticking—don’t skip this step!
Store the cake in an airtight container at room temperature for up to 3 days—it stays moist surprisingly well. For longer storage, wrap tightly in plastic and refrigerate for up to 5 days, though the texture may dry out slightly. Freeze for up to 3 months by wrapping each layer individually. To reheat, microwave 10-15 seconds or bake at 300°F for 5-10 minutes to restore moisture. This cake freezes beautifully, making it perfect for prepping ahead.
Why You’ll Love This Recipe
- Moist Magic: The two eggs here do all the heavy lifting—rich, tender crumb that doesn’t dry out by lunchtime. Honestly, I’ve tried lighter cakes, but this one stays soft for days, even at room temperature.
- Butter-Sugar Bliss: That creamed butter and sugar combo? It’s the secret weapon—smooth, slightly sweet, with just enough depth to make every bite feel special. No fancy extracts or spices needed; pure, classic yellow cake perfection.
- Weeknight Wonder: Mix it in a bowl, bake it in a pan, and boom—done. No fancy layers, no frosting required if you’re in a rush. (Yes, even on a Tuesday night when you’re craving cake but can’t be bothered.)
- Budget-Friendly Staples: Five ingredients, one pan, zero waste. The flour and butter stretch further than you’d think, and leftovers? Perfect for breakfast toast or a quick snack. My daughter calls it “poor man’s dessert”—but she’s wrong, it’s just smart.
Step-by-step instructions for light-as-air yellow cake
Here’s how to achieve a perfectly moist yellow cake with tender crumb and no greasy aftertaste.
Cream Butter and Sugar Until Light and Fluffy
In a large mixing bowl, combine the 0.5 cup unsalted butter and 1 cup granulated sugar. Using an electric mixer on medium-high speed, beat for 3-5 minutes until the mixture is light in color and has nearly doubled in volume. You’ll notice the butter and sugar emulsify into a pale, fluffy mixture—this incorporates air that creates the cake’s tender texture.
Stop occasionally to scrape down the sides of the bowl with a rubber spatula to ensure even mixing. The butter should be completely smooth with no graininess, and the mixture should leave a trail when the beaters lift. This step is critical for the cake’s moisture—under-creaming leads to dense results.
Add Eggs and Vanilla for Richness
Add the 2 whole large eggs, one at a time, mixing well after each addition until fully incorporated. The mixture will appear slightly curdled at first, but continue mixing until smooth. Add the 1 tsp vanilla extract and mix for another 30 seconds to fully combine.
I like to add the eggs at room temperature—they blend more smoothly and help create a finer crumb. If your eggs are cold, warm them slightly by placing the sealed shells in warm water for 5 minutes before cracking. The vanilla extract should be pure, not imitation, for authentic flavor.
Alternate Dry Ingredients with Milk
In a separate bowl, whisk together the 1.5 cups all-purpose flour, 1.5 tsp baking powder, and 0.25 tsp salt. With the mixer on low speed, gradually add about one-third of the dry ingredients to the butter mixture, mixing just until combined. Then add half of the 0.5 cup whole milk, mixing until smooth.
Repeat this process, alternating between the remaining dry ingredients and the rest of the milk, ending with the last of the dry mixture. This alternating technique prevents gluten development and creates a tender crumb. Mix just until the batter is smooth—overmixing develops gluten, which makes the cake tough.
Prepare and Fill the Pan
Preheat your oven to 350°F. Grease an 8-inch round cake pan with 2 tbsp vegetable oil, then line the bottom with the 1 sheet parchment paper. Pour the batter into the prepared pan and smooth the top with a spatula.
Here’s a pro tip: Tap the pan gently on the counter 2-3 times to release any air bubbles that may have formed during mixing. This ensures an even rise and smooth top. Bake for 25-30 minutes, or until a toothpick inserted in the center comes out clean with just a few moist crumbs clinging to it.
Cool and Serve for Maximum Moisture
Remove the cake from the oven and let it cool in the pan for 10 minutes. Then transfer it to a wire rack to cool completely. The cake will sink slightly as it cools—this is normal and indicates proper baking. For extra moisture, you can brush the warm cake with a simple syrup made by combining 2 tbsp granulated sugar with 2 tbsp water, heated until dissolved.
This cake keeps well at room temperature for 2-3 days when stored in an airtight container. For best results, serve it within 24 hours of baking when it’s at its peak moisture. The tender crumb and delicate flavor make it perfect for simple celebrations or everyday treats.
Pro Tips For Making 2 Egg Yellow Cake
- Cream Butter and Sugar: DESCRIPTION: Whip the butter and sugar until it’s pale yellow and thick—about 3-4 minutes with a mixer. This isn’t just about aeration; it’s the foundation for a tender crumb. I used to rush this step, and the cake turned out dense. Trust the process, even if it feels like overkill.
- Sift the Dry Ingredients: DESCRIPTION: Sift the flour and baking powder together before adding them to the wet mixture. This prevents lumps and ensures even distribution of leavening. Yes, it’s an extra step, but your cake will rise more uniformly—and no one likes a cake with a sad, flat middle.
- Don’t Overmix the Batter: DESCRIPTION: Mix just until the flour disappears—about 10-15 strokes with a spatula. Overmixing develops gluten, which makes the cake tough. I learned this after making a cake so dense it could’ve been a doorstop. Stop when the batter looks just combined.
- Use Room-Temp Eggs: DESCRIPTION: Let the eggs sit out for 30 minutes before cracking them into the butter mixture. Cold eggs can cause the batter to curdle, leading to a weird texture. I was skeptical until I tried it—I now keep my eggs on the counter the night before baking. No more lumpy surprises.
Essential equipment for this dish
Mixing Essentials
Your trusty KitchenAid stand mixer with the paddle attachment is my go-to for creaming butter and sugar—it handles the job faster and more evenly than a hand mixer. For budget-friendly options, the Cuisinart SM-50BC delivers excellent results without breaking the bank.
Always use a large mixing bowl (at least 5-quart capacity) to accommodate the batter’s volume as it expands during creaming. 🔥
Measuring Tools
Precision matters in baking! Invest in a stainless steel measuring cups set (like OXO Good Grips) for accurate dry ingredients, and a liquid measuring cup with clear markings for the milk and oil.
A digital kitchen scale (such as Escali Primo) is a game-changer for weighing ingredients like butter and flour—it eliminates packing issues and ensures consistency every time. For vanilla extract, a small squeeze bottle keeps it handy during mixing.
Baking Pans
An 8-inch round cake pan is essential for this recipe, but I also recommend a 9×13-inch baking dish if you’re making a sheet cake. Look for heavy-gauge aluminum pans (like Wilton Perfect Results)—they distribute heat evenly and prevent burning.
For cupcakes, a 12-cup muffin tin works perfectly. Always grease pans with vegetable oil or butter and line the bottom with parchment paper to ensure easy removal.
Cooling Gear
A wire cooling rack (like OXO Good Grips) is a must-have for letting cakes cool evenly without soggy bottoms. For extra moisture, keep a small saucepan and whisk on hand to make the simple syrup (just 2 tbsp sugar + 2 tbsp water).
A spatula with a flexible edge helps smooth batter into pans and remove cakes cleanly. Store your cake in an airtight container (such as Rubbermaid Food Storage) to maintain freshness for days.
Pro Extras
For advanced bakers, a thermometer (like Thermoworks Thermapen) ensures your oven is at the correct 350°F—many home ovens run hot or cold. A silicone spatula helps scrape every last bit of batter from the bowl, and a pastry brush is perfect for greasing pans or applying syrup.
If you love layer cakes, a 9-inch round pan lets you make two layers at once. These tools elevate your baking game without being essential for beginners. 💡
Nutrition facts
Frequently asked questions
Why does this recipe use only 2 eggs?
This recipe uses just 2 eggs to create a light, tender crumb without overpowering the delicate flavor. The secret lies in proper creaming and alternating dry ingredients with milk—this technique ensures the cake stays moist even with fewer eggs. It’s perfect for those who want a lighter texture or have dietary preferences while still achieving professional results.
Can I make this cake without butter?
Yes! For a dairy-free version, substitute the 0.5 cup butter with 0.5 cup applesauce or 0.5 cup Greek yogurt. The texture will be slightly denser but still moist. If you prefer a richer flavor, use 0.5 cup coconut oil (solid at room temperature) for a closer match to butter’s taste. Always ensure ingredients are room temperature for best results.
How do I prevent my cake from cracking? Cracking usually happens from overmixing or sudden temperature changes. To avoid it:
- Mix just until combined—stop as soon as the batter is smooth.
- Don’t open the oven door early (wait until 25 minutes in).
- Let the cake cool gradually in the pan for 10 minutes before transferring.
- Use room-temperature ingredients to prevent uneven expansion.
What’s the best way to frost this cake?
This tender cake pairs beautifully with buttercream frosting, whipped cream, or even a light cream cheese glaze. For a classic look, use vanilla buttercream—it complements the cake’s delicate flavor perfectly. If you prefer a lighter option, dust with powdered sugar or top with fresh berries. The key is to frost when the cake is completely cool to prevent melting.
Can I bake this in a different pan size?
Yes! For an 8-inch round pan, bake 25-30 minutes. For a 9-inch round pan, reduce oven temp to 325°F and bake 30-35 minutes. For a 9×13-inch sheet cake, spread batter evenly and bake 35-40 minutes. Always check doneness with a toothpick—it should come out clean with a few moist crumbs. Adjust baking time based on your oven’s hot spots.

- 6 Egg Cake Recipe with Oil: Light as Air With Buttery Moisture - October 4, 2026
- 4 Bean Casserole Recipe: One-Pan Heartiness With Smoky Paprika Depth - October 4, 2026
- 3-Ingredient Keto Mug Cake Recipe: Microwave Magic in 2 Minutes - October 4, 2026