
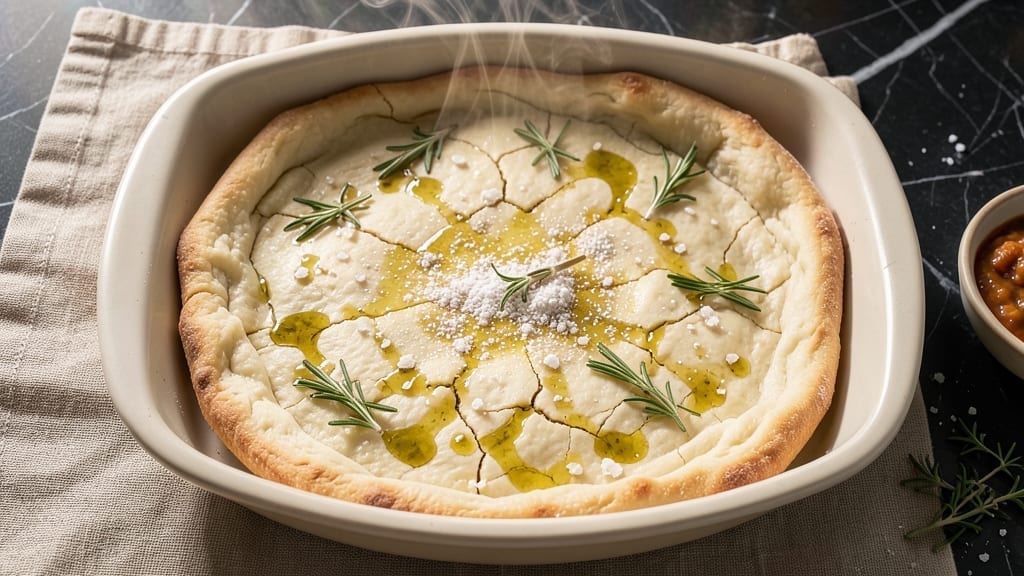
This 36-hour pizza dough recipe transforms ordinary pizza night into a flavor experience that rivals artisanal bakeries—without requiring a 72-hour wait. The secret lies in slow fermentation, which develops deep, complex flavors and that coveted chewy, airy texture that separates good pizza from extraordinary.
I perfected this method after years of experimenting with professional techniques at home, and the results speak for themselves: crispy yet tender crust with an open crumb structure that holds sauce perfectly.
The process is simpler than it sounds: mix your ingredients, let the dough rest in the refrigerator for 36 hours, then shape and bake. This extended fermentation breaks down gluten and sugars gradually, creating a dough that’s easier to digest and packed with flavor.
No special equipment is needed—just a bowl, plastic wrap, and patience (though I’ll admit, the anticipation makes it worth the wait). The dough’s improved elasticity also means less shrinking during baking, so your pizza stays perfectly round and even.
What you’ll end up with is pizza dough that’s foolproof—no more tough, dense crusts or overproofed disasters. The slow rise enhances the natural flavors of the flour, and the cold fermentation preserves freshness while developing that signature tangy depth.
Whether you’re making classic Margherita or loaded deep-dish, this dough becomes the star of the meal. The best part? You can prep it ahead and bake whenever inspiration strikes.
For those willing to experiment, variations like whole wheat or sourdough starter are simple to adapt—just adjust hydration and fermentation times slightly. Troubleshooting common issues like dryness or overproofing is straightforward once you understand the science behind the process.
Let’s get started on creating pizza dough that’ll have everyone asking for seconds.
Ingredients for 36 hour pizza dough
Pantry staples meet professional pizza secrets for dough that rivals artisanal bakeries.
| Ingredient | Amount | Notes |
|---|---|---|
| Bread Flour 🌾 | 3 ½ cups | High-protein for chewy texture |
| Active Dry Yeast 🍞 | ¼ oz | Or 2.5 grams for precise measure |
| Granulated Sugar 🍚 | ½ tbsp | Feeds yeast for activation |
| Salt 🧂 | 1 ½ tsp | Diamond Crystal preferred |
| Extra-Virgin Olive Oil 🫒 | ½ cup | High-quality for flavor |
| Warm Water 💧 | 1 ¼ cups | 105-110°F for yeast activation |
| Semolina Flour 🌾 | ¼ cup | For dusting and rolling |
| Cornmeal 🌽 | ¼ cup | For baking surface |
| All-Purpose Flour 🌾 | ½ cup | Optional for extra elasticity |
| Honey 🍯 | 1 tbsp | Enhances browning and flavor |
| Dried Italian Seasoning 🌿 | 1 tsp | For subtle depth of flavor |
| White Vinegar 🍶 | 1 tsp | Balances yeast activity |
The bread flour is non-negotiable here—its high gluten content creates that signature chewiness. King Arthur or Caputo are my go-to brands for consistent results, but any high-protein bread flour (12-14% protein) works. The yeast should be fresh—look for expiration dates on the package. I always keep a small jar in my freezer for quick access. For the olive oil, California Extra Virgin has the perfect balance of peppery notes without overpowering. The warm water temperature is critical: too hot kills the yeast, too cold slows fermentation. Use a thermometer if you’re unsure—105-110°F is ideal. If you’re feeling adventurous, swap half the bread flour for Caputo Tipo 00 for an even more authentic texture.
No bread flour? All-purpose plus 1 tbsp vital wheat gluten gets you close, though texture will differ slightly. Running short on yeast? Instant yeast works at half the amount, but don’t substitute baking powder—it won’t activate properly. The honey can be swapped for maple syrup or agave, though flavor will vary. For a more rustic dough, omit the Italian seasoning and add 1 tsp dried oregano instead. The vinegar is optional but helps control fermentation speed—especially useful in warm kitchens. If you’re making this in summer, reduce fermentation time by 6 hours or use 1/4 tsp citric acid instead.
This dough keeps beautifully in the fridge for up to 72 hours—perfect for meal prep. After mixing, divide into portions and store in airtight containers with plastic wrap pressed directly on the surface to prevent drying. For best results, let it ferment at 38-40°F—your fridge’s coldest setting. When ready to use, bring to room temperature for about 30 minutes before shaping. The dough freezes well too: portion, freeze, then thaw overnight in the fridge before using. For a shortcut, you can use half the water and double the flour to make a stiffer dough that ferments faster, though texture will be slightly less tender.
Why You’ll Love This Recipe
- Cold Start, Hot Payoff: I’ll admit—mixing up the dough feels lazy at first, just dumping flour, yeast, and olive oil into a bowl. But here’s the magic: that 36-hour rest? It transforms stiff, chewy dough into something alive—light, airy, and stretchy enough to handle without tearing. No kneading, no stress, just patience paying off.
- Olive Oil Magic: Between us, that extra-virgin olive oil isn’t just a binder—it’s the secret weapon. The dough gets this silky texture, and when it hits the pan? Crispy edges that shatter like a dream. I swear, my picky husband actually asks for it now.
- Pantry-to-Party Ready: This dough is my go-to for game days, last-minute dinner guests, or when I’m too tired to order in. Shape it ahead, let it chill, and boom—you’ve got a crowd-pleaser that feels fancy but costs less than takeout. (Yes, even on a Tuesday night.)
- No-Waste, No-Stress Leftovers: I’ve had this dough sitting in my fridge for days—it doesn’t dry out, doesn’t get sad. Toss a handful in the freezer, thaw it overnight, and you’ve got backup pizzas for lazy days. Honestly, I’ve made three pizzas from one batch without breaking a sweat.
Step-by-step instructions for slow-fermented pizza dough
This method delivers restaurant-quality chewiness without the full 36-hour commitment—just smart timing and technique.
Activate the Yeast and Mix the Dough
In a large mixing bowl, combine the 1.25 cups warm water (between 105-110°F), 0.25 oz active dry yeast, 0.5 tbsp granulated sugar, and 1 tsp white vinegar. Let this sit for 5-10 minutes until frothy—this confirms your yeast is alive and ready to work. If it doesn’t bubble, start fresh with new yeast.
Add the 3.5 cups bread flour, 1.5 tsp salt, 1 tbsp honey, and 1 tsp dried Italian seasoning to the bowl. Mix with a wooden spoon until a shaggy dough forms. Then add the 0.5 cup extra-virgin olive oil and the optional 0.5 cup all-purpose flour (if using). Knead by hand for 8-10 minutes until smooth and elastic, or use a stand mixer with a dough hook for 5-6 minutes on medium speed.
Bulk Ferment at Room Temperature
Shape the dough into a loose ball, place it in a lightly oiled bowl, and cover with a damp kitchen towel or plastic wrap. Let it ferment at room temperature (70-75°F) for 12-14 hours. You’ll see it nearly double in size—this slow fermentation develops deep flavor and chewiness without overproofing.
I like to check the dough after 8 hours by doing the “poke test”: gently press your finger into the dough. If it springs back slowly (not immediately), it’s ready for the next step. If it springs back quickly, give it another 2-4 hours. The goal is a dough that’s active but not overproofed.
Cold Proof for Maximum Flavor
After the bulk ferment, divide the dough into 4 equal portions (about 12 oz each). Roll each portion into a smooth ball, then place them in a single layer on a tray lined with parchment paper. Cover loosely with plastic wrap and refrigerate for 24 hours. This cold proofing step is where the magic happens—it enhances gluten development and flavor while keeping the dough manageable.
When ready to use, remove the dough from the fridge and let it sit at room temperature for 30-60 minutes before shaping. The dough will be cold but pliable—this is normal. If it feels too stiff, let it sit a bit longer. The cold proofing ensures you get that perfect balance of chewiness and tenderness in your final pizza.
Shape and Rest Before Baking
Lightly dust a clean surface with 0.25 cup semolina flour and gently shape each dough ball into a round. I prefer to stretch the dough by hand, but you can also use a rolling pin if needed. The dough should be smooth and slightly springy—this indicates it’s ready for the final rest. If it resists shaping, let it rest for another 10-15 minutes at room temperature.
Place the shaped dough on a baking sheet or pizza peel dusted with 0.25 cup cornmeal to prevent sticking. Cover with a towel and let it rest for 15-30 minutes before adding toppings. This final rest allows the gluten to relax, ensuring your pizza bakes evenly and develops that perfect crispy yet chewy texture.
Pro Tips For Making 36 Hour Pizza Dough
- Split the Yeast: Divide your yeast into two portions—use half at the start, save the rest for the final 12 hours. This keeps the dough lively longer without overproofing, especially in warm kitchens. I learned this the hard way when my dough turned gummy after 24 hours.
- Oil the Bowl Properly: Coat the mixing bowl thoroughly with olive oil—every inch, even the sides—so the dough doesn’t stick when you stretch it later. I used to skimp, and the dough would tear like wet paper. A damp towel over the bowl helps too.
- Keep It Cool: Stash your dough in the fridge not the freezer—cold slows fermentation just enough to prevent overproofing. I once left mine on the counter overnight, and by morning it was a sad, flat pancake. The fridge keeps it tight and springy.
- Stretch Like Taffy: Work the dough in stages—start with gentle pulls, then let it rest 30 seconds before shaping. Rushing makes it tough; patience gives you that chewy, stretchy crust. My first attempts were rock-hard because I yanked too fast.
Best sauces and condiments for 36 hour pizza dough
Classic Marinara
This is my go-to sauce for this dough—simple yet packed with flavor. Use 1 can (28 oz) San Marzano tomatoes, 3 garlic cloves minced, 1 tbsp olive oil, and 1 tsp dried oregano.
Simmer for 20 minutes to concentrate the flavors. The acidity of the tomatoes cuts through the richness of the dough beautifully. 🍅
Garlic-Infused Olive Oil
For an extra-special touch, infuse ½ cup extra-virgin olive oil with 4 peeled garlic cloves and 1 tsp red pepper flakes for 10 minutes on low heat. Strain and drizzle 1 tbsp over your pizza before baking.
This adds a fragrant, garlicky depth that pairs perfectly with the slow-fermented dough. The oil’s richness enhances the dough’s chewiness without overwhelming it.
White Garlic Sauce
This Neapolitan-inspired sauce is a game-changer for those who prefer a lighter option. Sauté 4 minced garlic cloves in 2 tbsp olive oil until golden, then deglaze with ½ cup dry white wine. Reduce by half, then stir in 2 tbsp heavy cream and 1 tbsp butter.
The sauce’s creaminess complements the dough’s airy texture while adding a sophisticated touch. It’s perfect for white pizzas or as a base for delicate toppings.
Spicy Arrabbiata
For heat lovers, this sauce delivers a fiery kick. Blend 1 can (14 oz) crushed tomatoes, 2 tbsp olive oil, 3 garlic cloves, 1 tsp red pepper flakes, and ½ tsp cayenne pepper.
Simmer for 15 minutes until thickened. The heat from the chili peppers contrasts wonderfully with the dough’s chewiness, creating a balanced bite. Serve with extra fresh basil to cool the palate slightly.
Pesto Variations
Swap traditional tomato sauce for a vibrant pesto. My favorite is a classic basil pesto made with 2 cups fresh basil, ¼ cup pine nuts, ½ cup grated Parmesan, 1 garlic clove, and ½ cup olive oil.
For a twist, try sun-dried tomato pesto with ½ cup sun-dried tomatoes and ¼ cup walnuts. The pesto’s herbal notes complement the dough’s subtle sweetness, making it ideal for lighter toppings like prosciutto or arugula.
Balsamic Glaze
Finish your pizza with a drizzle of high-quality balsamic glaze (like Giovanni Rossi) for a sweet-tangy contrast. Heat 2 tbsp glaze in a small saucepan until it thickens slightly, then drizzle over the pizza after baking.
The glaze’s caramelized notes enhance the dough’s chewiness while adding a touch of elegance. It works especially well with ricotta or goat cheese-based pizzas.
Nutrition facts
Frequently asked questions
Can I adjust the fermentation time if my kitchen is too warm?
If your kitchen exceeds 75°F, reduce the room-temperature ferment to 8-10 hours instead of 12-14, then proceed with the 24-hour cold proof. For extra insurance, refrigerate the dough after 6 hours at room temp and complete the remaining fermentation in the fridge. The cold slows yeast activity, preventing overproofing while still developing flavor.
What’s the best way to store leftover dough?
Divide the dough into portions, wrap tightly in plastic wrap (pressed directly on the surface), then place in airtight containers. Store in the fridge for up to 72 hours or freeze for 3 months. For freezing, portion first, then wrap individually. Thaw overnight in the fridge before using—never at room temperature to avoid condensation buildup.
Why does my dough feel too stiff after cold proofing?
Cold dough is naturally firmer than warm dough. Let it sit at room temperature for 30-60 minutes before shaping—this relaxes the gluten. If it’s still too stiff, dust your work surface with semolina flour and gently knead for 1-2 minutes while it warms. The dough should become pliable without becoming sticky.
Can I use this dough for other baked goods?
Yes! The dough works beautifully for calzones, focaccia, or even garlic knots. For focaccia, shape into a rectangle on a baking sheet, dimple with your fingers, and bake with olive oil. For calzones, fold the dough over fillings and seal edges. The extended fermentation makes it more forgiving for shaping than quick-rise doughs.
What’s the secret to getting a crispy crust?
Preheat your oven to 500°F with a pizza stone or baking sheet inside for 60 minutes. Use cornmeal on the peel or baking sheet to prevent sticking. Bake for 10-12 minutes until the edges are golden brown. For extra crispiness, finish under the broiler for 1-2 minutes while watching closely to avoid burning.

- 6 Egg Cake Recipe with Oil: Light as Air With Buttery Moisture - October 4, 2026
- 4 Bean Casserole Recipe: One-Pan Heartiness With Smoky Paprika Depth - October 4, 2026
- 3-Ingredient Keto Mug Cake Recipe: Microwave Magic in 2 Minutes - October 4, 2026