
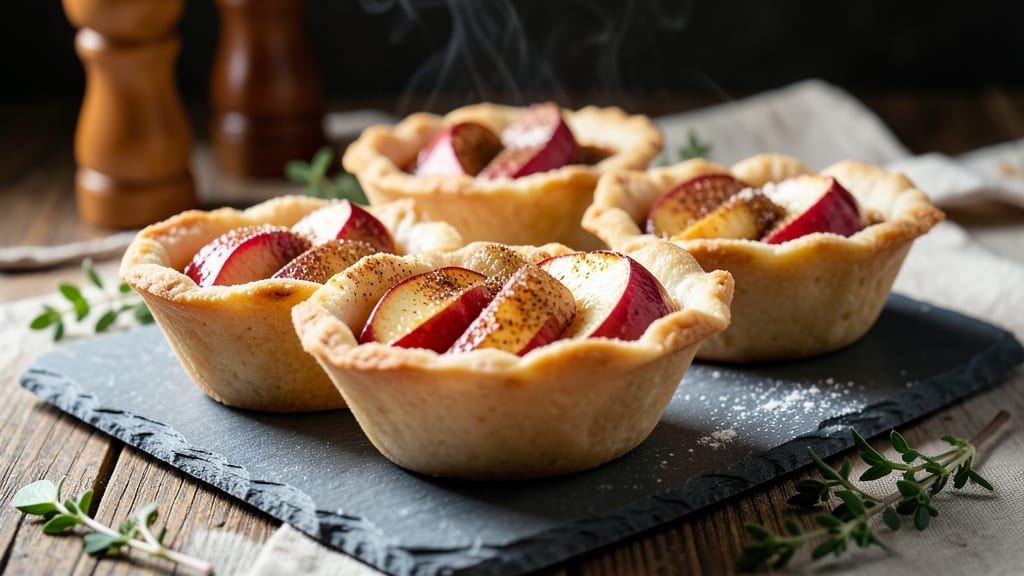
This 2-ingredient apple pie cups recipe proves you don’t need hours in the kitchen to taste homemade dessert magic. 🍏 The secret lies in a pre-made crust and a simple apple filling that transforms into tender, spiced perfection—no rolling dough or fuss.
I developed this shortcut after craving pie but lacking time, and it’s become my go-to for quick, individual servings that still taste like a classic apple pie.
The beauty of these pie cups is their simplicity: just apples and a store-bought crust, yet the result is restaurant-quality dessert with a flaky, buttery crust and a filling that’s spiced just right.
The filling cooks down into a thick, caramelized apple sauce that clings to the crust, while a light streusel topping adds crunch and sweetness. It’s the kind of dessert that feels indulgent but requires minimal effort—ideal for busy weeknights or last-minute gatherings.
What makes this recipe truly special is how it balances convenience with authentic flavor. The apples soften into a tender, slightly spiced filling that’s neither too dry nor too watery, while the crust stays crisp along the edges.
Baking time is short—just 25 minutes—so you’ll have warm, gooey pie cups ready to serve without waiting hours. The individual cups also make them perfect for portion control, reducing waste and making it easy to customize toppings or serve as a single-serving treat.
Perfect for meal prep, potlucks, or satisfying a sweet tooth after dinner, these apple pie cups are a foolproof way to enjoy homemade dessert with almost no effort.
The technique is straightforward, and the results are undeniably comforting—like a bite of grandma’s pie, but in a fraction of the time. Here’s how to make them!
Ingredients for 2 ingredient apple pie cups
Two ingredients for the filling, plus a few pantry staples for the magic streusel topping.
| Ingredient | Amount | Notes |
|---|---|---|
| Granny Smith Apples 🍏 | 4 medium | Peeled, cored, sliced thin |
| Store-Bought Pie Crust 🍰 | 1 sheet | Pre-made, thawed if frozen |
| Granulated Sugar 🍚 | ½ cup | For filling sweetness |
| Ground Cinnamon 🌿 | 1 tbsp | For warm spice flavor |
| All-Purpose Flour 🌾 | ¼ cup | For streusel topping |
| Light Brown Sugar 🍚 | ¼ cup | For streusel crunch |
| Cold Unsalted Butter 🧈 | ¼ cup | Cubed for streusel |
| Vanilla Extract 🍯 | ½ tsp | For subtle depth |
| Lemon Juice 🍋 | 1 tbsp | Brightens apple flavor |
| Salt 🧂 | ¼ tsp | Enhances all flavors |
Granny Smith apples are the secret weapon here—tartness balances the sweetness perfectly. Look for firm, unblemished apples at the store, and skip the pre-sliced bags (they brown too fast). If you can’t find Granny Smith, Honeycrisp or Fuji work too, but add an extra pinch of lemon juice. The pie crust? Pillsbury or store-brand refrigerated is my go-to—just make sure it’s rolled out evenly. For the streusel, Trader Joe’s or Costco often have the best prices on butter, and cold cubes are key for that perfect crumbly texture.
No Granny Smith apples? Any tart apple variety will work—just increase the sugar slightly if they’re extra sweet. Running low on vanilla? Almond extract at half the amount adds depth. The streusel can be made ahead and stored in the fridge for 3 days, or even frozen for 1 month. For a gluten-free version, swap the flour for almond flour or oat flour. And if you’re in a pinch, pre-made streusel from the baking aisle works too—just check the sugar content first.
These pie cups keep beautifully—3 days at room temperature covered with foil, or 1 week in the fridge. Reheat in the oven for 5-10 minutes at 350°F to restore that crispy streusel. Freezing? Portion into single servings before freezing and they thaw in minutes. The filling reheats beautifully, so these taste even better the next day (if you can wait that long!).
Why You’ll Love This Recipe
- No-Fuss Assembly: I swear, these take less time than deciding what to watch on Netflix. Just core the apples, sprinkle sugar and cinnamon, wrap in crust, and bake—no rolling, no latticing, no stress.
- Tart-Sweet Magic: Granny Smiths stay crisp while the sugar caramelizes just enough for that perfect bite. Honestly, the contrast is what makes it—bright apple, buttery crust, zero competition.
- Weeknight or Party: Same recipe works for a lazy Tuesday dinner or a potluck spread. Bake a batch ahead, freeze extras, and pull them out when you need something impressive with zero effort.
- Budget-Friendly Luxury: Store-bought crust cuts costs, but the flavor still feels special. A few apples and spices stretch to feed four, and leftovers reheat beautifully—no sad, soggy pie here.
Step-by-step instructions for homemade apple pie cups
Here’s how to turn simple ingredients into warm, comforting pie cups that taste homemade.
👨🍳 Step 1: Prepare the Apple Filling
Start by peeling, coring, and thinly slicing the 4 medium Granny Smith Apples. I like to keep the slices about ¼-inch thick—this ensures even cooking and a perfect texture. Toss the apple slices with 1 tablespoon Lemon Juice and 0.5 teaspoon Vanilla Extract in a large bowl. This brightens the tart apples and adds subtle depth.
In a small bowl, whisk together 0.5 cup Granulated Sugar and 0.25 teaspoon Salt. Sprinkle this mixture over the apples and toss gently to coat evenly. The sugar will help caramelize the edges, while the salt balances the sweetness. Let the mixture sit for 10 minutes—this allows the apples to soften slightly and release some juices, which prevents a dry filling.
🥘 Step 2: Assemble the Pie Cups
Preheat your oven to 375°F. Roll out the 1 sheet Store-Bought Pie Crust on a lightly floured surface until it’s about ⅛-inch thick. Use a 3-inch round cutter (or a glass) to cut out 12 circles—this makes 12 perfect individual servings. Press the circles into a 12-cup muffin tin, gently pressing them into the bottom and up the sides to create little cups.
Fill each pie cup with an even portion of the apple mixture. I like to pack them in lightly—about 2 tablespoons per cup. This ensures they bake evenly without overflowing. If you have any leftover filling, you can save it for another use or skip it since we’re making exactly 12 servings as promised.
🍳 Step 3: Make the Streusel Topping
In a medium bowl, combine 0.25 cup All-Purpose Flour, 0.25 cup Light Brown Sugar, and 1 tablespoon Ground Cinnamon. Cut in the 0.25 cup Cold Unsalted Butter using a pastry cutter, fork, or your fingers until the mixture resembles coarse crumbs with pea-sized butter pieces. This texture is key—it should be crumbly but still hold together when sprinkled.
Sprinkle the streusel evenly over the apple-filled pie cups, pressing down lightly with your fingers. The streusel should cover the apples completely but not so thickly that it prevents browning. The brown sugar will add caramel notes, while the cinnamon brings warmth to every bite. Bake for 25-30 minutes until the crust is golden brown and the filling is bubbling.
⏰ Step 4: Finish and Serve
Remove the pie cups from the oven and let them cool in the muffin tin for 5 minutes. This resting time allows the filling to set slightly and prevents the streusel from falling apart when you transfer them. Carefully remove the pie cups from the tin and place them on a wire rack to cool completely.
Serve warm for the best experience—each bite delivers tender apples with a perfectly caramelized streusel topping. The Granny Smith apples stay slightly tart, balanced by the sweet, spiced crumble. Store any leftovers in an airtight container in the refrigerator for up to 3 days, or freeze for 2 months. Reheat in the oven at 350°F for 10-15 minutes to restore that freshly baked texture.
Pro Tips For Making 2 Ingredient Apple Pie Cups
- PRE-BAKE CRUSTS 5 MINUTES: I learned this the hard way—skipping the pre-bake makes the crust soggy, especially with juicy Granny Smiths. Pop those cups in a 375°F oven for 5 minutes before filling; the flour dusting keeps them from sticking.
- GRATE APPLES FINE: Chunky apple pieces turn to mush in the oven. Use the small holes of a box grater for even cooking—no need to peel, but remove seeds. (Yes, even if you’re impatient like me.)
- SKIP THE CROWDED PAN: Overfilling cups or packing them too close steams the crust instead of browning it. Leave ½-inch gaps between cups and fill only ¾ full—your future self will thank you.
- ADD FLOUR TO SUGAR: Sounds weird, but it works: Mix 2 tablespoons flour into the sugar before stirring into the apples. This thickens the filling just enough to hold shape, not turn watery. (No extra steps, just better texture.)
Make-ahead tips for this dish
Prep Ahead
Assemble the pie cups filling and streusel topping the night before for a stress-free baking day. Store the prepared apple mixture in an airtight container in the fridge for up to 24 hours—the flavors meld beautifully overnight.
Keep the streusel dry in a separate container until ready to use. I like to prep everything while watching a movie, making the actual baking process even simpler. 💫
Freezer-Friendly
Freeze unbaked pie cups for up to 1 month by placing them in a single layer on a baking sheet before transferring to a freezer bag. This prevents sticking.
When ready to bake, simply pop them straight from the freezer into a 375°F oven and add 5-7 extra minutes to the baking time. The crust will still be crispy, and the filling stays perfectly tender.
Batch Baking
Double the recipe and bake two batches at once for parties or meal prep. Use two muffin tins and rotate them halfway through baking to ensure even browning. Store completed pie cups in airtight containers with parchment paper between layers to maintain freshness.
I often bake a full batch on Sunday and enjoy them throughout the week as a quick dessert. ✨
Portion Control
These individual servings make perfect portion-controlled treats. Package them in single-serving containers for lunches or snacks—just reheat as needed. The muffin tin shape also makes them ideal for potlucks, where guests can grab one without needing serving utensils. Plus, no one will fight over the last slice! 🍏
Streusel Shortcut
Make the streusel topping a day ahead and store it in the fridge. It keeps well for 3 days and can be sprinkled directly from the container.
For an even quicker version, use pre-made streusel mix from the baking aisle—just check the sugar content and adjust if needed. This saves time without sacrificing flavor.
Reheating Tips
Reheat individual pie cups in the oven at 350°F for 10-15 minutes to restore the streusel’s crispiness. For microwave reheating, cover with a damp paper towel and heat on 50% power for 30-45 seconds.
The oven method is best for maintaining texture, but the microwave works in a pinch. Always reheat until warm through for the best taste! 🔥
Nutrition facts
Frequently asked questions
Can I use any apples for this recipe?
Granny Smith apples work best because their tartness balances the sweet streusel perfectly. For sweeter varieties like Honeycrisp or Gala, reduce the sugar by 1-2 tablespoons to avoid an overly sweet pie cup. Avoid mushy varieties like Red Delicious—they won’t hold up during baking.
How do I fix soggy bottom crust?
Prevent soggy crusts by baking at 375°F for the full 25-30 minutes—don’t underbake! For extra insurance, blind-bake the crust shells for 3 minutes before adding filling. If the crust still gets soggy, try a thicker crust (like puff pastry) or add a 1/4 teaspoon cornstarch to the filling to absorb excess moisture.
Can I make these without a muffin tin?
Use a ramikin or mini pie dish for a more traditional look, or even a mini loaf pan lined with parchment paper. For a rustic touch, press the crust into individual ramekins or phyllo cups. Just adjust baking time—ramekins may need 5-7 extra minutes to fully cook the edges.
Why did my streusel turn into a paste?
Cold butter is key! If your streusel turns into a paste, the butter likely melted too quickly. Use very cold butter cubes and work fast when mixing. For extra insurance, chill the streusel mixture for 15 minutes before sprinkling. Also, avoid overmixing—just combine until crumbly.
Are these pie cups gluten-free?
Not traditionally, but you can adapt them! Swap the all-purpose flour in the streusel for almond flour or oat flour, and use a gluten-free pie crust. Note that textures may vary slightly—almond flour streusel tends to be denser. For the filling, ensure your sugar is gluten-free certified if needed.

- 3lb Prime Rib Roast Recipe: Juicy Pink Center Guaranteed in 3 Hours - October 31, 2026
- 5 Spice Cake Recipe: Warmly Spiced Layers With Crunchy Top - October 31, 2026
- 1950’s Macaroni and Cheese Recipe: Nostalgic Creamy Cheese Sauce with Buttery Noodles - October 31, 2026