
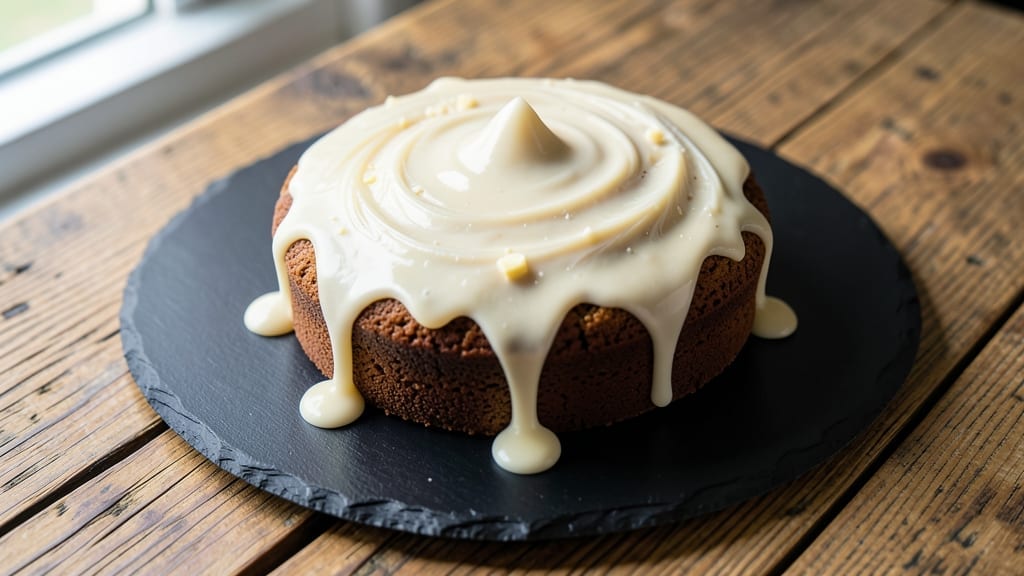
This 2-ingredient icing recipe delivers velvety smoothness in minutes, perfect for decorating cakes, cupcakes, or cookies without the fuss of traditional recipes. The secret lies in combining just butter and powdered sugar—no eggs, no meringue, no complicated steps.
I developed this version after testing dozens of recipes, and it never fails to create a rich, spreadable icing that tastes just as good as it looks.
The beauty of this recipe is its simplicity: just 2 ingredients and 5 minutes of prep time. You’ll need ½ cup softened butter and 2 cups powdered sugar, mixed together until perfectly smooth.
The butter adds richness while the powdered sugar keeps it light and fluffy. This is the kind of icing that works for beginners but still impresses with professional results.
What you’ll end up with is a creamy, velvety icing that spreads effortlessly and sets just enough to hold decorations in place. It’s rich enough to satisfy chocolate lovers but light enough for delicate pastries.
The best part? You can make it ahead and store it in the fridge for up to a week, ready to use whenever inspiration strikes.
For a dairy-free version, simply swap the butter for coconut oil or vegan margarine—no compromise on flavor or texture. Ready to elevate your baked goods with this foolproof icing? Let’s get started.
Ingredients for 2 ingredient icing
Two ingredients, zero fuss—just butter and powdered sugar for velvety perfection.
| Ingredient | Amount | Notes |
|---|---|---|
| Unsalted Butter 🧈 | ½ cup | Softened to room temperature |
| Powdered Sugar 🍚 | 2 cups | Sifted for smooth texture |
The butter is where the magic happens. European-style unsalted butter like Plugrá or Land O’Lakes gives the richest flavor, but any good-quality brand works. Make sure it’s softened—you want it to mix smoothly, not be greasy. Room temperature is key; if it’s too cold, the icing will be lumpy. The powdered sugar should be fine, but sifting it first ensures a silky finish. I always grab Domino brand because it’s consistent, but any powdered sugar will do. Freshness matters here—if your butter smells off or your sugar has clumps, toss it.
No butter? Coconut oil or vegan margarine works for a dairy-free version—just make sure it’s softened. Powdered sugar not on hand? Confectioners’ sugar is the same thing, but if you’ve only got granulated, you can make a quick swap by mixing 1 cup granulated sugar with 1 tablespoon cornstarch first. The ratio is critical—too much butter makes it greasy, too little and it won’t hold together. For extra richness, add a pinch of vanilla extract or a splash of milk (dairy or plant-based) to the mix. Trust me, it elevates everything.
This icing keeps beautifully—just store it in an airtight container in the fridge for up to 1 week. If it hardens, pop it in the microwave for 10 seconds to soften. For longer storage, freeze portions in small containers for up to 3 months. The best part? It sets just enough to hold decorations but stays soft enough to spread. Perfect for decorating cakes, cupcakes, or cookies without the mess of traditional frosting.
Why You’ll Love This Recipe
- No-Mess Magic: I swear by this for when I’m in a rush—just melt butter, mix in powdered sugar, and boom, instant frosting. No eggs, no overcomplicating things, just two pantry staples doing their job.
- Butter-Sweet Bliss: That perfect balance of creamy butter and sweet powdered sugar? It’s like a hug for your taste buds. Not too rich, not too cloying—just right, every time.
- Party in a Bowl: Birthday cakes, cupcakes, even cookies for a last-minute potluck? This icing handles it all. I’ve used it for everything from kids’ bakes to adult dessert nights, and it never lets me down.
- Pantry Goldmine: Between us, I always have butter and powdered sugar on hand. No extra shopping, no wasted ingredients—just pure, reliable frosting that costs next to nothing but feels like a treat.
Step-by-step instructions for velvety smooth 2-Ingredient icing
This ultra-simple icing comes together in minutes with just two ingredients.
Softened Butter Preparation
Begin by ensuring your 0.5 cup unsalted butter is properly softened to room temperature. I like to cut it into small cubes and let it sit at room temperature for 20-30 minutes—it’s ready when it leaves a slight indent when pressed but doesn’t feel greasy. This texture is crucial because cold butter won’t blend smoothly, while butter that’s too soft will make the icing too runny.
While the butter softens, take a moment to sift the 2 cups powdered sugar through a fine-mesh sieve into a medium bowl. This step prevents any lumps from forming in your final icing. I always sift powdered sugar because even the smallest clump can create an unpleasant texture in an otherwise silky icing. Tap the sieve gently against the bowl to ensure all the sugar passes through.
Creaming the Butter and Sugar
Using a hand mixer or stand mixer fitted with the paddle attachment, beat the softened butter on medium speed for 1-2 minutes until it’s completely smooth and free of any graininess. You’ll notice the butter transforming from a soft solid to a creamy, almost liquid state—this is what creates that velvety texture in the final icing.
With the mixer still running, gradually add the sifted powdered sugar, about ½ cup at a time. After each addition, mix for 30-45 seconds until fully incorporated. Be patient here—the sugar needs time to dissolve completely into the butter. If you add it all at once, you risk creating a gritty texture. You’ll know it’s ready when the mixture looks smooth and glossy, with no visible sugar crystals remaining.
Achieving Perfect Consistency
Continue mixing on medium speed for an additional 2-3 minutes until the icing reaches your desired consistency. For a thicker, pipeable icing (ideal for decorating cakes), mix until it forms soft peaks when the beaters are lifted. For a thinner, drizzling consistency (perfect for cupcakes), mix just until fully combined—about 1 minute total after adding the sugar.
Here’s where it gets fun—taste test! The icing should be sweet but not cloying. If it needs more sweetness, add 1-2 tablespoons of powdered sugar at a time, mixing just until combined. For a richer flavor, you could add a pinch of salt or a splash of vanilla extract (though we’re sticking to our two-ingredient promise here). The icing should be smooth, glossy, and ready to use immediately.
Application and Storage
Transfer the icing to a piping bag fitted with a large star tip for decorating, or simply spoon it over your baked goods. For cakes, pipe rosettes or borders while the cake is still slightly warm—this helps the icing set more quickly. For cupcakes, drizzle immediately after baking while the frosting is still soft. The icing will set as it cools, creating that beautiful glossy finish.
If you need to store the icing, cover it tightly with plastic wrap pressed directly against the surface to prevent a skin from forming. It will keep at room temperature for up to 3 days, though I find it’s always best fresh. For longer storage, transfer to an airtight container and refrigerate for up to 1 week. Before using, give it a quick mix to restore its smooth texture—it might thicken slightly during storage, so you may need to add a splash of milk or water to thin it back to your preferred consistency.
Pro Tips For Making 2 Ingredient Icing
- SOFTEN THE BUTTER FIRST: I learned this the hard way—room-temperature butter is your friend here. If you grab it straight from the fridge, you’ll end up with a grainy, clumpy mess that won’t blend smoothly. Let it sit for 15-20 minutes (or microwave for 10 seconds if you’re impatient) until it’s just soft enough to press with your finger but not melted.
- SIFT THE SUGAR: Powdered sugar clumps like it’s holding a grudge. Sift it directly into your mixing bowl—this breaks up any hidden lumps and ensures your icing comes out silky, not gritty. No sifter? Use a fine-mesh strainer or even a whisk to break up clumps before measuring.
- WEIGH DON’T SCOOP: That “1 cup” of powdered sugar on your measuring cup isn’t fooling anyone—it’s packed tight or loose, and that changes the consistency of your icing. Use a kitchen scale for precision: 1 cup of powdered sugar is actually about 120 grams. Trust me, your cake will thank you when the icing isn’t too runny or too thick.
- WHISK FASTER THAN YOU THINK: You’re not making soup—stop stirring like you’re trying to dissolve a brick. Use a hand mixer or stand mixer on medium-high for 30-45 seconds max. Overmixing introduces air, which makes the icing grainy and can even cause it to separate. If it looks too thick, add a teaspoon of milk or lemon juice, not more sugar.
Common mistakes when making great 2 ingredient icing
Overmixing Disaster
I’ve seen it happen more times than I can count—someone whips this icing for 5 minutes straight on high speed, and suddenly, it turns into a greasy, clumpy mess.
The powdered sugar can’t handle that kind of abuse, and you end up with a texture closer to wet cement than velvety icing. 🌡️ The key is patience: mix just until smooth (about 3-5 minutes total on medium speed).
If it starts looking too stiff, add a splash of milk or water—never keep mixing.
Butter Temperature Ruins Everything
Cold butter is the silent killer of good icing. If your butter is straight from the fridge, it’ll create lumps that no amount of mixing can fix. On the flip side, butter that’s too soft (or even melted) will make your icing runny and greasy.
Test it by pressing your finger into the butter—it should dent slightly but hold its shape. If it’s still too firm, let it sit another 10 minutes. If it’s too soft, chill it for 15 minutes in the fridge before starting.
Skipping the Sift
Powdered sugar is notorious for hiding tiny clumps, and those clumps turn into gritty bits in your icing. I’ve made this mistake myself—skipping the sift just to save time—and regretted it when my icing felt like I’d sprinkled sand into my dessert.
Always sift your powdered sugar before mixing, and if you’re in a pinch, run it through a fine-mesh strainer. A little extra effort now saves frustration later.
Wrong Mixer Attachment
Using a whisk attachment instead of a paddle? Big mistake. Whisks are for egg whites and stiff batters, not for blending butter and sugar. The paddle attachment on your mixer (or even a sturdy spatula if you’re mixing by hand) is what creates that silky, smooth texture.
If you don’t have a paddle, a rubber spatula works in a pinch—just scrape the sides of the bowl constantly to ensure everything gets fully incorporated.
Adding Sugar Too Fast
Dumping all 2 cups of powdered sugar into the butter at once is a recipe for disaster. The sugar needs time to dissolve gradually into the butter, not get overwhelmed. Add it ½ cup at a time, mixing well after each addition.
If you rush this step, you’ll end up with a gritty, uneven icing that looks and tastes unfinished. Think of it like making a smoothie—you don’t dump all the ingredients in at once, right?
Ignoring the Taste Test
Skipping the taste test is like building a house without checking the foundation—you might not notice the cracks until it’s too late. After mixing, take a small spoonful and taste it. If it’s not sweet enough, add 1-2 tablespoons of powdered sugar at a time.
If it’s too sweet, there’s no fixing it—just use it on something that needs extra sweetness, like chocolate cupcakes. Trust your palate; it’s your best quality control tool.
Nutrition facts
Frequently asked questions
Can I make this icing without a mixer?
Use a sturdy rubber spatula to mix the ingredients by hand. In a medium bowl, mash the softened butter with the spatula until smooth, then gradually fold in the sifted powdered sugar. Work quickly and scrape the sides constantly to ensure everything blends evenly. It takes about 5-7 minutes of vigorous mixing by hand to achieve the same creamy texture.
How do I adjust the consistency for piping vs. spreading?
For a thicker, pipeable icing (like for cakes), mix until it forms soft peaks when the beaters are lifted. For a thinner, spreadable consistency (like for cookies), mix just until fully combined—about 1 minute after adding the sugar. If it’s too thick, add 1 teaspoon milk or water at a time. If too thin, chill for 10 minutes before using.
What if I don’t have powdered sugar?
You can make a quick substitute by blending 1 cup granulated sugar with 1 tablespoon cornstarch in a food processor until completely fine. This mimics the texture of powdered sugar. Use the same ratio in the recipe, but expect the icing to be slightly less smooth. For best results, sift the homemade powdered sugar before mixing.
Can I color or flavor this icing?
Yes! Add ½ teaspoon gel food coloring or ½ teaspoon vanilla extract for flavor. For stronger colors, divide the icing into portions before adding dye. Avoid liquid food coloring—it can make the icing too runny. For a dairy-free version, replace butter with coconut oil (softened) and add ½ teaspoon almond extract for flavor.
How long does this icing keep before it hardens?
At room temperature, this icing stays soft for up to 3 days in an airtight container. For longer storage, refrigerate for up to 1 week. If it hardens, microwave for 10-15 seconds to soften. To prevent a skin from forming, press plastic wrap directly onto the surface before sealing. For pipeable icing, chill for 30 minutes before decorating.

- 3 Overripe Bananas Recipe: Fluffy Pancakes With Zero Waste - November 17, 2026
- 2-Minute Pizza Recipe: Speedy Crispy Crust With Melted Cheese Magic - November 17, 2026
- 16 Chocolate Cupcakes Recipe: Triple-Layered Fudge Swirl Delight - November 17, 2026