
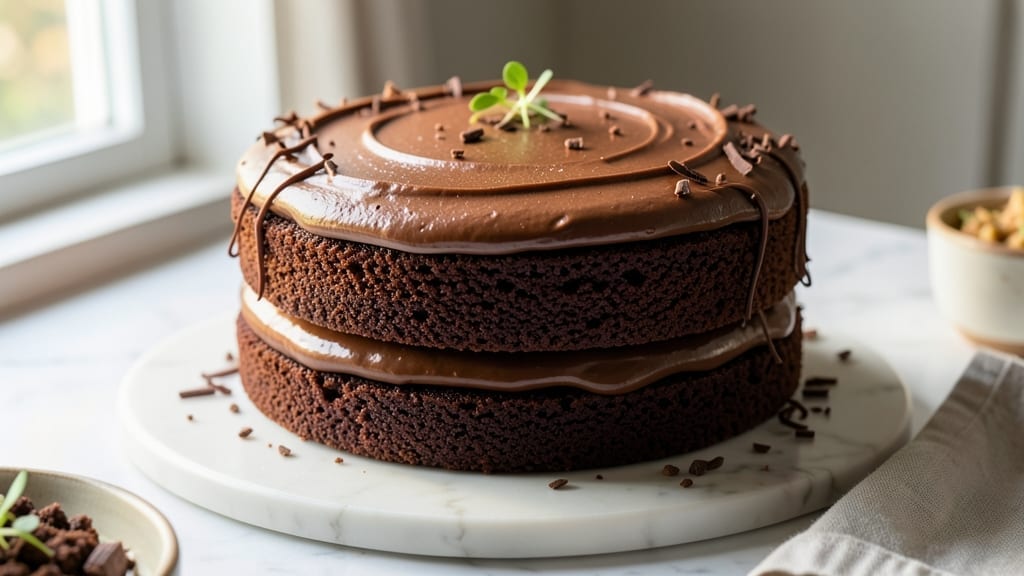
This 2-layer 8-inch chocolate cake recipe delivers moist, rich layers with a velvety fudge frosting that melts in your mouth. 💛 The secret lies in precise measurements and a gentle baking approach that keeps the cake tender without drying it out.
I’ve perfected this recipe over years of baking, ensuring every slice is as impressive as it is delicious.
The foundation starts with a simple yet effective batter that combines cocoa powder, buttermilk, and a touch of instant coffee for depth. Baking at 350°F for 25-30 minutes ensures even cooking, while the frosting—made with melted chocolate, butter, and powdered sugar—creates a smooth, glossy finish.
This isn’t just a cake; it’s a showstopper that tastes even better than it looks.
What sets this recipe apart is the foolproof layering technique—no domed tops or uneven slices. The frosting, spread carefully between layers and on top, seals in moisture while adding a luxurious texture.
Whether you’re baking for a celebration or a quiet dessert night, this cake delivers restaurant-quality results without the fuss.
Ready in about 2 hours (including cooling and frosting), this recipe is perfect for beginners and seasoned bakers alike. The key to success? Patience—letting the cake cool completely before frosting ensures clean layers and a professional finish. Here’s how to make it flawless every time.
Ingredients for 2 layer 8 inch chocolate cake
Precision matters here—these carefully measured ingredients create restaurant-quality chocolate cake layers.
| Ingredient | Amount | Notes |
|---|---|---|
| All-Purpose Flour 🌾 | 2 ½ cups | Sifted for lightness, spoons packed |
| Unsalted Butter 🧈 | 1 ½ cups | Room temperature, cut into cubes |
| Granulated Sugar 🍚 | 2 ¼ cups | Divided for batter and frosting |
| Cocoa Powder 🍫 | ¾ cup | Dutch-processed for smooth texture |
| Buttermilk 🥛 | 1 ¼ cups | Room temperature for best results |
| Large Eggs 🥚 | 2 whole | Room temperature, separated for stability |
| Instant Coffee Granules ☕ | 1 tbsp | Enhances chocolate depth |
| Vanilla Extract 🌿 | 2 tsp | Pure Madagascar bourbon preferred |
| Baking Powder 🧂 | 1 ½ tsp | Aluminum-free for tender crumb |
| Salt 🧂 | ½ tsp | Fine sea salt for balance |
| Semisweet Chocolate Chips 🍫 | 1 ½ cups | High-quality for fudge texture |
| Heavy Cream 🥛 | 1 cup | Cold for glossy frosting |
| Powdered Sugar 🍚 | 3 cups | Sifted for smooth frosting |
The cocoa powder and butter form the cake’s soul. Dutch-processed cocoa like Callebaut delivers that velvety texture, while European-style butter (like Plugrá) adds richness. For the frosting, Ghirardelli chocolate chips melt into a silky base—avoid the grocery store brands with waxy coatings. Measure your flour by spooning and leveling, not scooping directly from the bag. The buttermilk should be at 68°F when mixed, and those 25g egg whites (about 2 large eggs) need to be whipped separately for stability. King Arthur flour is my go-to for consistent results.
No Dutch-processed cocoa? Natural cocoa powder plus 1/4 tsp baking soda mimics the effect. Short on butter? Vegetable shortening at the same weight keeps the cake tender, though flavor suffers. The instant coffee granules can be swapped for 1 tsp brewed coffee cooled, but fresh is better. For a lighter frosting, whip the heavy cream to soft peaks before folding into the melted chocolate mixture. Prefer a darker frosting? Add 1 tbsp extra cocoa powder to the powdered sugar mixture. The chocolate chips should be at least 60% cacao—cheaper brands melt unevenly.
Store cake layers in an airtight container between parchment-lined cake boards for up to 3 days at room temperature. The frosting keeps 5 days refrigerated or 3 months frozen in a sealed container. For make-ahead convenience, bake the layers 1 day ahead—they actually improve overnight. Refrigerate the assembled cake 30 minutes before slicing for cleaner cuts. Leftovers? Reheat slices in the microwave for 10 seconds to restore the frosting’s gloss.
Why You’ll Love This Recipe
- No Mixer Needed: I swear by this recipe when I’m in a rush—just cream butter and sugar by hand, then fold in the dry stuff. The buttermilk keeps it tender without needing to whisk for ages, and the cocoa powder gives that deep, rich flavor with zero fuss.
- Rich Without Overpowering: That balance of melted butter and sugar? It’s like a hug for your taste buds. The cocoa’s not bitter—it’s smooth, with just enough depth to satisfy a chocolate craving, and the buttermilk adds a subtle tang that makes every bite feel special.
- Birthday or Breakfast: Honestly, this cake works for anything. Serve it with whipped cream for a birthday, slice it into squares for a quick breakfast, or even pack it for a picnic. The 8-inch size means it’s perfect for two people or a small crowd—no leftovers going to waste.
- Pantry Staples Only: Between us, this recipe’s a lifesaver when I’m low on ingredients. Flour, butter, sugar, cocoa, and buttermilk? I always have those. It’s budget-friendly, too—no fancy add-ins, just pure chocolate goodness that doesn’t break the bank.
Step-by-step instructions for 2 layer 8 inch chocolate cake
Here’s the method for achieving professional-quality chocolate cake with fudgy layers and velvety frosting.
👨🍳 Step 1: Prepare the Cake Batter
Preheat your oven to 350°F and grease two 8-inch round cake pans, lining the bottoms with parchment paper. In a medium bowl, whisk together the 2.5 cups all-purpose flour, 1.5 tsp baking powder, and 0.5 tsp salt. Sift the mixture to remove any lumps and set aside.
In a large mixing bowl, cream together the 1.5 cups unsalted butter and 1 cup of the 2.25 cups granulated sugar until light and fluffy, about 3-4 minutes. Add the 2 whole large eggs one at a time, mixing well after each addition. Stir in the 0.75 cup cocoa powder, 1 tbsp instant coffee granules, and 2 tsp vanilla extract until fully combined.
Alternate adding the dry ingredients and 1.25 cups buttermilk, beginning and ending with the dry ingredients. Mix on low speed until just combined—do not overmix. Fold in the 1.5 cups semisweet chocolate chips by hand using a spatula. Divide the batter evenly between the prepared cake pans.
🔥 Step 2: Bake to Perfect Doneness
Bake for 30-35 minutes or until a toothpick inserted into the center comes out clean. The edges should be set, but the center should still have a slight springiness. Rotate the pans halfway through baking for even browning.
I know it’s tempting to open the oven door early, but resist! The cake needs that steady, even heat to develop its moisture. If the tops brown too quickly, tent the pans with aluminum foil. Once baked, transfer the pans to a wire rack and let the cakes cool in the pans for 10 minutes before removing them.
Allow the cakes to cool completely on the rack before frosting. This prevents the frosting from melting and ensures clean layers. The cooling process also allows the flavors to meld and the texture to set properly.
🥘 Step 3: Make the Fudge Frosting
In a medium saucepan, combine the remaining 1.25 cups granulated sugar, 1 cup heavy cream, and 0.75 cup cocoa powder. Cook over medium heat, stirring constantly with a wooden spoon, until the mixture reaches a gentle boil.
Boil for 1-2 minutes, then remove from heat and let it cool for 5 minutes. The mixture should thicken slightly as it cools. Add the 3 cups powdered sugar and mix until smooth. Transfer to a large bowl and beat with an electric mixer until light and fluffy, about 3-4 minutes. This step is crucial for achieving that professional, airy frosting texture.
If the frosting is too thick, add 1-2 tablespoons warm water to reach a spreadable consistency. If it’s too thin, add a bit more powdered sugar. The frosting should be smooth enough to pipe but still hold its shape when spread.
👨🍳 Step 4: Assemble the Cake
Place one cake layer on a cake stand or plate. Spread a thin layer of frosting over the top to create a “crumb coat.” This helps prevent crumbs from getting into the final frosting layer. Chill the cake in the refrigerator for 15 minutes.
Apply the remaining frosting to the top layer and spread evenly. Place the second cake layer on top and gently press down to create a level surface. Frost the sides of the cake with the remaining frosting, using a spatula to smooth the edges. For a polished look, dip the spatula in warm water and wipe off any excess frosting.
Chill the cake in the refrigerator for at least 2 hours before serving. This allows the frosting to set completely and the flavors to meld together. The cake will keep well in the refrigerator for up to 3 days, though I promise it won’t last that long!
Pro Tips For Making 2 Layer 8 Inch Chocolate Cake
- Sift That Cocoa: I learned this the hard way—lumpy cocoa powder is the fast track to a cake with uneven texture. Sift it with the flour before measuring, then whisk the mixture to break up any stubborn clumps. Your layers will be smoother, and the chocolate flavor will distribute evenly instead of hiding in pockets.
- Cream Butter Cold: Unsalted butter straight from the fridge is your friend here. If it’s too soft, chill the mixing bowl first or even the butter itself for 15 minutes. You’re aiming for a light, airy batter, not a dense one—warm butter makes for a cake that’s more like a brick.
- Don’t Overmix: After folding in the buttermilk, give it one gentle turn with a spatula. Overmixing develops the gluten, and your cake will end up tough instead of tender. Stop when the batter just looks combined—no need to make it a science project.
- Rotate the Pan: The oven’s hot spots are real, and an 8-inch cake is small enough to notice them. After 20 minutes, swap the pans front to back (and maybe side to side if your oven’s uneven). This guarantees even baking, so the center doesn’t stay underdone while the edges turn to leather.
Wine and beer pairings for this 2 layer 8 inch chocolate cake
Rich Red Wine
For this decadent chocolate cake, a bold red wine like Cabernet Sauvignon or Malbec complements the deep cocoa flavors beautifully. The tannins in these wines cut through the richness, cleansing your palate between bites.
I recommend a 2018 Argentine Malbec—its dark fruit notes and smooth finish mirror the cake’s intensity. Serve slightly chilled to enhance the wine’s complexity. 🍷
Port or Dessert Wine
If you’re serving this cake as a dessert, Ruby Port or Tawny Port adds an elegant touch. The caramel and chocolate notes in port harmonize perfectly with the cake’s fudge frosting.
A 10-year Tawny Port pairs especially well, offering a balance of sweetness and depth. Keep the cake at room temperature while you enjoy your wine—both will taste even better together. 🍷
Light Beer Options
For beer lovers, a stout or dark lager works surprisingly well. A Guinness or Black IPA provides a malty contrast that enhances the chocolate’s richness. The roasted notes in stouts complement the cake’s cocoa depth, while the creaminess of a Belgian Dubbel adds a fruity balance.
Serve the beer slightly colder than room temperature for the best pairing. 🍺
Coffee Pairing
The instant coffee in the cake’s batter makes it a natural match for espresso or dark roast coffee. The bitterness of a strong brew highlights the cake’s chocolate notes, while the warmth of the coffee enhances the dessert’s cozy appeal.
For an extra treat, serve a small cup of hot chocolate alongside the cake—it’s like dessert twice! ☕
Non-Alcoholic Choices
Don’t overlook sparkling water with lemon or chilled hibiscus tea for a refreshing contrast. The acidity in lemon brightens the cake’s richness, while the floral notes in hibiscus tea add a unique twist.
For a festive touch, try sparkling grape juice—it’s sweet, bubbly, and pairs surprisingly well with chocolate. 💫
Nutrition facts
Frequently asked questions
Why does this recipe use buttermilk instead of regular milk?
The buttermilk adds moisture and tenderness to the cake layers while creating a subtle tang that balances the sweetness. It also helps activate the baking powder for a lighter texture. For a quick substitute, mix 1 tablespoon vinegar or lemon juice with 1 cup milk and let it sit for 5 minutes before using.
Can I make this cake in a 9-inch pan instead of 8-inch?
Yes, but you’ll need to adjust the baking time. A 9-inch pan will require about 25-30 minutes at 350°F instead of 30-35 minutes. The cake will be slightly thinner, but the flavor and frosting techniques remain the same. Reduce the frosting by about 1/3 cup to match the smaller volume.
How do I prevent the cake from cracking?
Cracking usually happens when the cake cools too quickly or the frosting is too warm. Always let the cakes cool completely in their pans for 10 minutes, then transfer to a wire rack. When frosting, chill the cake for 15 minutes after the crumb coat to help the frosting set properly. Avoid overmixing the batter—just combine until smooth!
What’s the best way to store leftovers?
Wrap the cake tightly in plastic wrap or store it in an airtight container. It stays fresh at room temperature for 2 days or in the refrigerator for up to 5 days. For longer storage, freeze individual slices wrapped in plastic for up to 3 months. To revive the frosting, let slices sit at room temperature for 10 minutes before serving.
Can I make this cake gluten-free?
Yes, but with adjustments. Replace the all-purpose flour with a 1:1 gluten-free baking flour blend like Bob’s Red Mill, plus 1/2 teaspoon xanthan gum. You may also need to reduce the buttermilk by 2 tablespoons to account for the blend’s moisture differences. Test the batter consistency—it should be slightly thicker than the original recipe.

- 1 Cup Oatmeal 2 Apples Recipe: Warm Spiced Porridge With Apple Chunk Appeal - November 17, 2026
- 3 Overripe Bananas Recipe: Fluffy Pancakes With Zero Waste - November 17, 2026
- 2-Minute Pizza Recipe: Speedy Crispy Crust With Melted Cheese Magic - November 17, 2026