
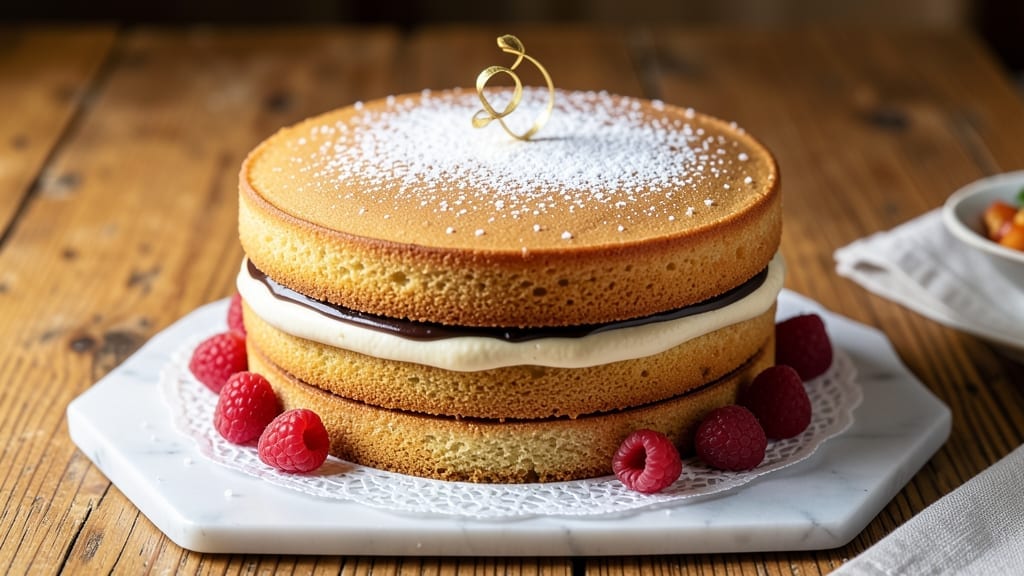
Mastering a two-layer sponge cake with airy stacks and rivers of vanilla buttercream transforms simple ingredients into a showstopping dessert that looks as impressive as it tastes.
The secret lies in precise baking techniques—whipping egg whites to stiff peaks and folding them gently into dry ingredients to create that signature light-as-air texture. I’ve perfected this recipe over years of trial and error, ensuring each layer rises evenly and holds its shape when stacked.
This recipe delivers restaurant-quality results with just a few key tools: a stand mixer for fluffy meringue, a fine-mesh sieve for smooth batter, and a 350°F oven for even baking.
The vanilla buttercream isn’t just sweet—it’s rich, smooth, and perfectly balanced, with just enough butter to create those signature “rivers” when piped between layers. Every step is designed to prevent common pitfalls like dense layers or soggy bottoms.
What you’ll end up with is a visually stunning cake that’s as much about presentation as it is about flavor—tall, symmetrical layers with crisp edges and a tender crumb, all crowned with swirls of vanilla buttercream that look like they belong in a patisserie window.
The key to success is patience: letting the cake cool completely before frosting ensures clean layers and prevents melting.
Perfect for celebrations, date nights, or simply treating yourself, this cake is versatile enough to adapt to any occasion.
Whether you’re a beginner or an experienced baker, the step-by-step instructions will guide you through each phase—from mixing to baking to assembly—so you can confidently create a dessert that impresses every time. Let’s get started!
Ingredients for 2 layer sponge cake
Simple ingredients that transform into a showstopping two-layer cake with signature buttercream rivers.
| Ingredient | Amount | Notes |
|---|---|---|
| All-Purpose Flour 🌾 | 2 ½ cups | Sifted for light texture |
| Granulated Sugar 🍚 | 2 cups | Divided for batter and meringue |
| Unsalted Butter 🧈 | 1 cup | Room temperature, cubed |
| Large Eggs 🥚 | 8 whole | Room temperature, separated |
| Pure Vanilla Extract 🌿 | 1 tbsp | High-quality Madagascar bourbon |
| Cake Flour 🌾 | ½ cup | For ultra-light layers |
| Baking Powder 🧂 | 1 ½ tsp | Freshly measured |
| Salt 🧂 | ¼ tsp | Fine sea salt |
| Heavy Whipping Cream 🥛 | 1 ½ cups | Cold for buttercream |
| Powdered Sugar 🍚 | 3 cups | Sifted for smooth buttercream |
| Vanilla Bean Paste 🌿 | 1 tbsp | For intense vanilla flavor |
| Cornstarch 🌾 | 1 tbsp | For buttercream stability |
The flour blend is everything here. King Arthur all-purpose and Gold Medal cake flour give you that signature light-as-air texture. I grab mine from Williams Sonoma or the baking aisle at Whole Foods—anything labeled “100% pure” is a safe bet. The eggs need to be room temperature, so pull them out 30 minutes before baking. Butter should be cubed and softened, not melted—press a thumbprint that disappears but holds shape. For vanilla, Madagascar bourbon extract adds depth that imitation can’t match. If you’re using a vanilla bean, scrape out the seeds and add them to the batter for extra flavor.
No cake flour? Substitute all-purpose flour plus 1 tbsp cornstarch—it’ll work in a pinch. Running short on vanilla? Almond extract at half the amount adds complexity, but stick with vanilla for that classic flavor. For the buttercream, European-style butter like Plugrá gives you that ultra-smooth texture. If you can’t find it, regular unsalted butter works, but chill it longer before whipping. The powdered sugar should be sifted—Domino brand is my go-to because it’s consistently fine. For extra stability, add the cornstarch to the buttercream mixture at the end.
Flour and sugar keep indefinitely in airtight containers. Eggs last 3 weeks in the fridge, but use them within a week for best results. Buttercream stays fresh for 5 days in the fridge—just give it a good whisk before using. For make-ahead cakes, bake the layers 1 day ahead and store wrapped at room temperature. Buttercream can be made 2 days ahead and refrigerated. Assemble the cake right before serving so the layers stay crisp. If you’re freezing, wrap each layer individually in plastic and freeze for up to 3 months—thaw at room temperature before frosting.
Why You’ll Love This Recipe
- You’re already using basics: flour, sugar, butter. No specialty ingredients, no last-minute store runs. And leftovers? They keep for days, perfect for sneaky dessert breaks.
- No-Fuss Layers: I swear by this method—just two bowls, a whisk, and 15 minutes of hands-off time. The secret’s in the room-temperature butter and eggs; no one’s standing over a hot stove for hours.
- Butter-Sugar Bliss: That first bite? Pure comfort. The sugar buttercream between layers is rich but not heavy, and the vanilla extract—use the good stuff—makes every slice taste like a bakery’s secret.
- Birthday to Brunch: Serve it sliced for a party dessert or stack it with jam for breakfast. Honestly, I’ve even used leftover cake for French toast—yes, it’s that versatile.
Step-by-step instructions for light-as-air sponge cake
Here’s how to bake fluffy, melt-in-your-mouth layers that hold their shape perfectly.
Separate Eggs and Whip Meringues
Begin by separating the 8 whole large eggs, placing yolks in one bowl and whites in another. I use a fine-mesh sieve to catch any stray yolks in the whites—this ensures perfectly clean meringues. Add 1 cup granulated sugar to the whites and whip on medium speed until soft peaks form, then gradually increase to high speed while adding the remaining 1 cup granulated sugar. Whip until the meringue is glossy and holds stiff peaks that stand straight when the whisk is lifted.
This step is crucial—your meringue should be thick enough to hold its shape but still light enough to fold into the batter without deflating. If your kitchen is humid, chill the bowl briefly to help stabilize the meringue. I like to work in a cool environment for this part to prevent any collapse later.
Cream Butter and Sugar for the Batter
In a separate large mixing bowl, beat the 1 cup unsalted butter (room temperature) with 1 cup granulated sugar on medium-high speed for 3-4 minutes until light and fluffy. The mixture should nearly double in volume and become pale yellow. This creaming process incorporates air, which gives the cake its signature lightness.
With the mixer running on low speed, add 1 tbsp pure vanilla extract and the 8 egg yolks one at a time, mixing just until each is incorporated. Scrape down the sides of the bowl with a spatula to ensure even mixing. In a separate bowl, whisk together the 2.5 cups all-purpose flour, 0.5 cup cake flour, 1.5 tsp baking powder, and 0.25 tsp salt. Sift this dry mixture directly into the butter mixture.
Fold Meringue into Batter Gently
Using a large spatula, gently fold one-third of the prepared meringue into the butter mixture to lighten it. Then, add the remaining meringue in two more additions, folding just until no white streaks remain. The key here is to be gentle—overmixing will deflate the air pockets we worked so hard to create. The batter should be thick but still pourable, with a marbled appearance from the meringue.
Divide the batter evenly between two 8-inch round cake pans lined with parchment paper and greased with butter. Tap the pans gently on the counter to remove any air bubbles. Bake in a preheated 350°F oven for 25-30 minutes, until the tops spring back when touched lightly and a toothpick inserted comes out clean.
Prepare the Vanilla Buttercream
While the cakes bake, prepare the buttercream by beating the 1.5 cups heavy whipping cream (cold) with 1 cup unsalted butter (room temperature) on medium speed until smooth. Gradually add the 3 cups powdered sugar, 1 tbsp vanilla bean paste, and 1 tbsp cornstarch, mixing until fully combined and fluffy. This buttercream should be thick enough to hold its shape but still pipeable—adjust with more powdered sugar if needed.
Spread a thin layer of buttercream between the two cooled cake layers to act as a “glue.” Place the first cake layer on a cake stand or plate, then add the second layer on top. The buttercream will help them stick together while keeping the layers distinct. Chill the assembled cake in the refrigerator for 30 minutes before frosting to make it easier to handle.
Pro Tips For Making 2 Layer Sponge Cake
- Whip Eggs to Ribbon Stage: Stop when the egg mixture holds stiff peaks that slowly drape like ribbon—no more, no less. Overbeating adds air but collapses layers; underbeating means a dense, sad cake. I learned this after my first cake sunk like a rock.
- Melt Butter Slowly: Warm the butter in the microwave for 20–30 seconds (not until liquid) or melt it in a bowl over simmering water. Cold butter won’t emulsify properly, and you’ll end up with greasy layers instead of a light, airy crumb.
- Sift Flour Twice: Yes, twice. The first sift removes lumps, but the second ensures no hidden grit ruins your cake’s texture. I skip this step when I’m tired, and the result? A slightly gritty bite that’s noticeable. Not a dealbreaker, but why risk it?
- Chill the Cake Pans: Pop your pans in the freezer for 10 minutes before baking. This prevents the batter from cooking too fast at the edges, giving you an even rise and a domed top instead of flat, overbaked sides. Works for both layers—trust me.
Essential equipment for this recipe
Stand Mixer Essentials
Your KitchenAid stand mixer with the paddle attachment is non-negotiable for this recipe—it handles the heavy lifting of whipping egg whites to stiff peaks and creaming butter perfectly. I use my Artisan Series 5-quart model because it handles the volume without overheating.
The whisk attachment comes in handy for the buttercream later, so don’t put it away! If you’re on a budget, the KitchenAid Classic Plus works just as well. 💡
Precision Tools Matter
A fine-mesh sieve (like the OXO Good Grips) is critical for sifting dry ingredients and catching stray egg yolks during meringue prep. I also recommend a digital kitchen scale for accurate measurements—especially for the 3 cups powdered sugar in the buttercream.
For layering, a cake turntable (like the Wilton 8-inch) makes frosting a breeze and ensures even coverage. Don’t skip these—trust me, they make all the difference!
Baking Pans & Parchment
Invest in two 8-inch round cake pans with removable bottoms—I love the Nordic Ware Natural Aluminum pans because they bake evenly and release cleanly. Line them with parchment paper circles (cut to fit) to prevent sticking and ensure easy removal.
Pro tip: Grease the pans with room-temperature butter after lining with parchment for extra insurance against sticking. A small offset spatula (like the Ateco 210) helps spread batter evenly and scrape every last bit from the bowl. 🧑🍳
Frosting & Assembly Tools
For the vanilla buttercream rivers, grab a piping bag with a large star tip (like the Wilton 1M) and a small offset spatula to smooth the sides. A cake comb (the Wilton 24-tooth) creates those signature swirls on top.
I also keep a bench scraper handy for cleaning up edges and a cake leveler (or serrated knife) to trim domed layers before stacking. Chill your tools in the freezer for 10 minutes before using—they’ll glide through the buttercream like a dream. ✨
Temperature Control
A thermometer (like the Thermoworks Thermapen) ensures your oven hits 350°F accurately—no guessing! I also recommend a cake thermometer to check doneness (the center should read 205–210°F).
For cooling, a wire rack keeps layers crisp, and a cooling rack insert (like the Wilton Cake Cooler) speeds up the process. If you’re short on time, pop the pans in the fridge for 10 minutes after baking to help them set faster. 🌡️
Make-Ahead Must-Haves
Store baked layers in an airtight container at room temperature for up to 2 days or freeze them (wrapped individually) for 3 months. For buttercream, a glass jar with a lid keeps it fresh for 5 days in the fridge.
A plastic wrap spray (like Saran Wrap) prevents layers from drying out if you’re prepping ahead. Label everything with dates—trust me, you’ll thank yourself later when you’re assembling a cake that’s been waiting in the freezer! ⏰
Nutrition facts
Frequently asked questions
Can I substitute cake flour if I don’t have any?
Yes! For every 1 cup of cake flour called for, mix 1 cup all-purpose flour with 2 tablespoons cornstarch. Sift the blend well before adding to your batter. This keeps the texture light and fluffy—just like the original recipe. The cornstarch helps create that signature tender crumb.
Why did my cake layers sink in the middle?
This usually happens when the oven temperature isn’t hot enough or the batter isn’t folded gently enough. Always preheat your oven to 350°F and use an oven thermometer to confirm accuracy. Also, make sure your meringue is fully whipped to stiff peaks before folding—this adds the necessary structure to prevent sinking.
How do I get those perfect “rivers” of buttercream between layers?
Use a piping bag with a large star tip (like Wilton 1M) and pipe generous swirls of buttercream along the edge of the first layer. When you place the second layer on top, the weight will create those beautiful rivers as the buttercream spreads. Chill the cake for 30 minutes before piping to make the process easier and cleaner.
Can I make this cake without a stand mixer?
You’ll need strong arms and patience, but it’s doable. Whip the egg whites by hand in a chilled bowl using a whisk—this helps stabilize the meringue. For creaming the butter and sugar, use a hand mixer and work in short bursts to avoid overheating. Folding the meringue requires extra care, so take your time to preserve those air pockets.
How long should I let the cake cool before frosting?
Let the layers cool completely in their pans for 1 hour, then transfer to a wire rack to cool for another 1 hour before frosting. This prevents the buttercream from melting and ensures clean, crisp layers. If you’re in a hurry, chill the pans in the fridge for 15 minutes after baking, then finish cooling on the rack.

- 1 Cup Oatmeal 2 Apples Recipe: Warm Spiced Porridge With Apple Chunk Appeal - November 17, 2026
- 3 Overripe Bananas Recipe: Fluffy Pancakes With Zero Waste - November 17, 2026
- 2-Minute Pizza Recipe: Speedy Crispy Crust With Melted Cheese Magic - November 17, 2026