
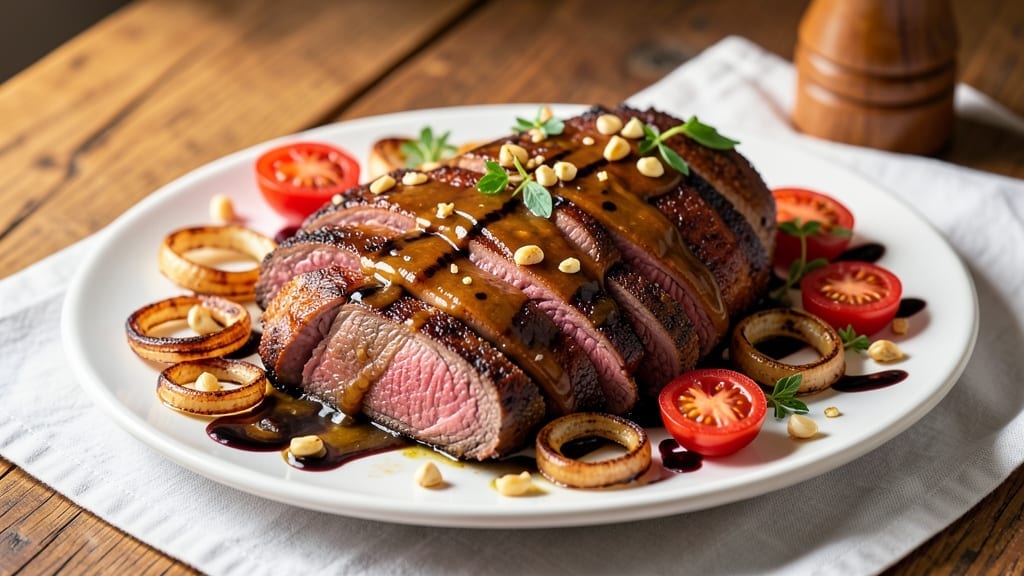
A 2 lb beef chuck roast transformed into melt-in-your-mouth perfection requires only your crock pot and 3 hours of hands-off time. This slow-cooked masterpiece delivers deep, caramelized flavor without demanding constant attention—ideal for busy weeknights when dinner shouldn’t require babysitting.
The key lies in balancing bold seasonings with just enough liquid to create a rich, velvety sauce that tenderizes even the toughest cuts.
What sets this recipe apart is the foolproof technique that guarantees tender beef every time: a simple blend of garlic, onion, and Worcestershire builds layers of savory depth, while a splash of beef broth prevents drying.
The crock pot’s gentle heat breaks down collagen, turning connective tissue into succulent, fork-tender meat that practically falls apart. No need for fancy equipment—just set it and forget it until dinner smells like a restaurant-quality meal.
By the time you’re ready to serve, you’ll have restaurant-quality beef with a glossy, flavorful sauce clinging to every bite. Pair it with classic sides like creamy mashed potatoes or roasted root vegetables to soak up every drop of that rich, aromatic liquid.
The result? A meal that feels special without requiring hours of prep or constant monitoring—perfect for feeding a family or impressing guests with minimal effort.
This recipe scales effortlessly for leftovers, making it ideal for meal prep. Store portions in the fridge for up to 5 days or freeze for up to 3 months, ensuring you always have a hearty, satisfying dinner ready when you need it.
The secret to success? Patience and the right balance of seasonings—both of which this recipe delivers perfectly.
Ingredients for 2 lb beef chuck roast crock pot
Just nine ingredients transform tough chuck roast into melt-in-your-mouth perfection using your crock pot’s magic.
| Ingredient | Amount | Notes |
|---|---|---|
| Beef Chuck Roast 🥩 | 2 lb | Pre-cut into 1.5-inch chunks |
| Yellow Onion 🧅 | 1 whole | Quartered, skin on for color |
| Garlic Cloves 🧄 | 6 cloves | Smashed for deeper flavor |
| Beef Broth 💧 | 1 ½ cups | Low-sodium preferred |
| Worcestershire Sauce 🍶 | 1 tbsp | For umami depth |
| Tomato Paste 🍅 | 2 tbsp | Squeeze tube preferred |
| Dried Thyme 🌿 | 1 tsp | Or 1 tbsp fresh thyme |
| Ground Black Pepper 🌶️ | 1 ½ tsp | Freshly cracked preferred |
| Kosher Salt 🧂 | 1 ½ tsp | Diamond Crystal preferred |
| Olive Oil 🫒 | 1 tbsp | Extra-virgin for richness |
| Carrots 🥕 | 3 whole | Baby carrots work too |
| Celery Stalks 🥬 | 2 whole | Trimmed, chopped |
| Bay Leaves 🍃 | 2 whole | Fresh if available |
| Balsamic Vinegar 🍷 | 1 tbsp | For finishing touch |
The beef chuck roast is the star, and Costco or local butchers often have the best cuts. Look for good marbling—those little white flecks of fat are what turn tough meat into tender heaven. If you’re buying a whole roast, ask for it to be cut into 1.5-inch chunks before you leave the store to save time. The carrots and celery add color and subtle sweetness to the sauce, while the bay leaves infuse deep aromatic notes. For the Worcestershire, Lea & Perrins is the classic choice, but any good-quality brand works—just avoid the low-end stuff that tastes like vinegar.
No Worcestershire? Soy sauce or a splash of red wine adds umami depth. Swapping dried thyme for fresh? Use three times the amount—dried is concentrated. The tomato paste can be a squeeze tube from Trader Joe’s for convenience, but canned works too if you measure carefully. For extra richness, add a splash of balsamic vinegar at the end. The beef broth should be low-sodium—Swanson or Pacific Foods are reliable brands. If you’re short on time, pre-chop the onions and carrots while the crock pot heats up—multitasking saves minutes.
This dish reheats beautifully—tastes even better the next day as flavors meld. Store leftovers in airtight containers for 5 days in the fridge or freeze for 3 months. I always make extra because it’s perfect for sandwiches or tacos later. For meal prep, portion into individual containers so you can grab and go. The sauce thickens as it cools, so add a splash of broth if it’s too stiff when reheating.
Why You’ll Love This Recipe
- Deep Umami Magic: That beef broth and Worcestershire sauce combo? It’s the secret weapon here. The roast turns fork-tender with a rich, savory depth—like a slow-cooked pot roast but with half the effort. Honestly, the first time I tried it, I nearly burned the toast waiting for dinner.
- Leftovers for Days: This recipe makes way more than two servings, and honestly, that’s a win. The next day, I shred it into tacos or toss it into a pasta. My kids beg for it cold in sandwiches—yes, really. A 2 lb roast stretches into at least six meals without feeling like a chore.
- Budget Powerhouse: A chuck roast is cheaper than steak but delivers the same satisfying bite. With just onions, garlic, and broth, I’m not breaking the bank, and the flavor? It fools everyone into thinking I spent hours cooking. Between us, my husband still asks where I learned to make “fancy beef” so well.
Step-by-step instructions for slow-cooked beef chuck roast
Here’s how to transform tough chuck roast into fork-tender perfection with minimal effort.
Sear the Beef for Maximum Flavor
Heat a large skillet over medium-high heat and add the 1 tablespoon olive oil. Once shimmering, add the 2 lb beef chuck roast in a single layer and sear for 3-4 minutes per side until deeply browned. This step develops the Maillard reaction, creating that rich, caramelized crust that carries deep flavor through the slow cook.
While the beef browns, prepare your vegetables by quartering the 1 whole yellow onion and chopping the 3 whole carrots and 2 whole celery stalks into ½-inch pieces. Smash the 6 cloves garlic with the flat side of your knife to release their aroma. The vegetables will soften beautifully in the crock pot, but starting with uniform pieces ensures even cooking.
Build the Crock Pot Foundation
Transfer the seared beef to your crock pot. In the same skillet, add the prepared vegetables and cook for 2 minutes to lightly soften them. This quick sauté enhances their flavor before they join the main event. Add the vegetables to the crock pot along with the 1.5 cups beef broth, 1 tablespoon Worcestershire sauce, 2 tablespoons tomato paste, and 2 whole bay leaves.
Here’s where the magic happens: sprinkle the beef with 1.5 teaspoons kosher salt, 1.5 teaspoons ground black pepper, and 1 teaspoon dried thyme. Stir everything gently to combine, being careful not to break up the beef too much. The thyme and Worcestershire sauce work together to create a complex, savory base that penetrates the meat as it cooks.
Slow Cook to Perfect Tenderness
Place the lid on your crock pot and cook on low heat for 8 hours. This long, slow cook time is crucial—it breaks down the tough connective tissue in the chuck roast, transforming it into melt-in-your-mouth tenderness. The vegetables will soften completely, absorbing all that rich beef flavor along the way.
About 30 minutes before the cooking time is up, stir in the 1 tablespoon balsamic vinegar. This final touch adds a subtle tang that brightens the dish and balances the richness of the beef. The vinegar also helps create a glossy sauce that clings beautifully to each bite of meat and vegetable.
Rest and Serve with Confidence
Once the cooking time is complete, carefully remove the beef from the crock pot using tongs and transfer it to a cutting board. Let it rest for 10-15 minutes before slicing. This resting period allows the juices to redistribute throughout the meat, ensuring each slice is moist and flavorful.
While the beef rests, skim any excess fat from the cooking liquid in the crock pot (if desired) and spoon the sauce over the sliced beef. Serve the beef with the tender vegetables and sauce over mashed potatoes, crusty bread, or your favorite sides. The result is a restaurant-quality meal that’s simple to prepare and packed with deep, satisfying flavor.
Pro Tips For Making 2 Lb Beef Chuck Roast Crock Pot
- SEAR THE ROAST FIRST: Skip the slow start—brown that chuck roast in a hot skillet for 2-3 minutes per side before dumping it in the crock pot. The Maillard reaction kicks in, and that crust adds depth the broth alone can’t match. (Yes, even if you’re tempted to just toss it in raw.)
- CHOP ONIONS COARSELY: Tiny onion pieces turn to mush in 6 hours. Cut them into ½-inch chunks so they hold shape and flavor the broth instead of dissolving into it. Same goes for garlic—smash the cloves instead of mincing them for easier cleanup and better aroma.
- DON’T OVERFILL THE POT: A 2 lb roast needs liquid to braise, but fill the crock pot only halfway—about 2 cups broth. Too much liquid = bland, watery results. The roast should float slightly, not swim. (I learned this after making a sad, soupy mess twice.)
- ADD WORCESTERSHIRE LAST: Worcestershire sauce burns off easily in long cooking. Stir it in during the final 30 minutes to preserve its tangy, umami punch. If you add it at the start, you’ll end up with a dull, cooked-out flavor. (Trust me, your taste buds will notice.)
Pro cooking tips for 2 lb beef chuck roast crock pot
Sear for Depth
Never skip the sear—this is where 80% of the flavor develops. Use a heavy skillet like a Lodge cast iron and heat it until it’s smoking hot before adding the beef. Sear the roast for 3-4 minutes per side until you get deep brown crusts.
This Maillard reaction creates complex flavors that carry through the slow cook. I always sear my vegetables too for 2 minutes before adding them to the crock pot—it makes a noticeable difference. 🔥
Low and Slow Wins
Set your crock pot to low heat for 8 hours—this is non-negotiable for tenderizing chuck roast. The slow cook time breaks down collagen, transforming tough meat into melt-in-your-mouth perfection. If you’re short on time, switch to high heat for 5-6 hours, but monitor closely to avoid drying.
I’ve ruined meals by rushing this step—patience pays off with juicy results.
Sauce Control Matters
Use low-sodium beef broth—high-sodium versions can make the sauce taste bland. For extra richness, add 1 tablespoon tomato paste directly to the crock pot. This thickens the sauce naturally and adds umami depth.
If your sauce is too thin after cooking, remove the lid and simmer on high for 10-15 minutes to reduce it. The balsamic vinegar at the end adds brightness and helps emulsify the sauce.
Rest Before Slicing
This is a common mistake—skipping the rest time makes the meat dry. Transfer the beef to a cutting board and let it rest for 10-15 minutes before slicing. During this time, the juices redistribute throughout the meat.
I’ve seen people slice immediately and end up with dry, disappointing results. Trust the process—your patience will be rewarded with juicy, flavorful beef every time. ✨
Vegetable Prep Tips
Cut your carrots and celery into ½-inch pieces for even cooking. Leave the onion skin on for color and extra flavor, but peel it if you prefer milder taste. Smash the garlic cloves instead of mincing them—their skins stay intact, preventing bitterness.
I always chop my vegetables while the beef sears to save time. The vegetables will soften beautifully and absorb all that rich beef flavor.
Leftovers Strategy
This dish tastes even better the next day as flavors meld. Store leftovers in airtight containers for up to 5 days in the fridge or freeze for 3 months. For meal prep, portion into individual containers so you can grab and go.
When reheating, add a splash of beef broth if the sauce has thickened too much. I always make extra because it’s perfect for sandwiches or tacos later in the week. 💪
Nutrition facts
Frequently asked questions
Can I use a different cut of beef instead of chuck roast?
While chuck roast is ideal for its marbling and flavor, you can substitute with brisket, short ribs, or even bottom round (though it may need longer cooking). For best results, choose a cut with good fat content—this helps keep the meat tender during slow cooking.
How do I know when the beef is fully tender?
The beef should be fork-tender with no resistance when pierced—it should practically fall apart. For added confidence, check at 7 hours if using low heat. If it’s still slightly tough, cook for another 1-2 hours or until it reaches your preferred tenderness. The vegetables should also be completely soft and easily pierced with a fork.
What sides pair best with this crock pot beef?
Classic choices include creamy mashed potatoes, roasted root vegetables (like carrots and parsnips), or crusty bread to soak up the sauce. For a lighter option, try a fresh green salad with a tangy vinaigrette to balance the richness. The vegetables already in the recipe (carrots and celery) make a great side dish too—just serve them separately with the sauce spooned over the top.
Can I make this recipe in an instant pot instead?
Yes! Use the sauté function to sear the beef first, then cook on low pressure for 60 minutes with a natural release. For extra tenderness, add 15 minutes of high pressure after the initial cook. The instant pot version cuts cooking time in half while still delivering tender results. Just be sure to follow the manufacturer’s guidelines for your specific model.
Why did my beef turn out dry?
Dry beef usually happens when the meat is overcooked or not properly rested. Always cook on low heat for 8 hours and avoid lifting the lid during cooking to trap moisture. After cooking, let the beef rest for 10-15 minutes before slicing—this allows juices to redistribute. If using high heat, reduce cooking time to 5-6 hours maximum. The sauce should be glossy and rich, not dry or stringy.

- 6 Egg Cake Recipe with Oil: Light as Air With Buttery Moisture - October 4, 2026
- 4 Bean Casserole Recipe: One-Pan Heartiness With Smoky Paprika Depth - October 4, 2026
- 3-Ingredient Keto Mug Cake Recipe: Microwave Magic in 2 Minutes - October 4, 2026