
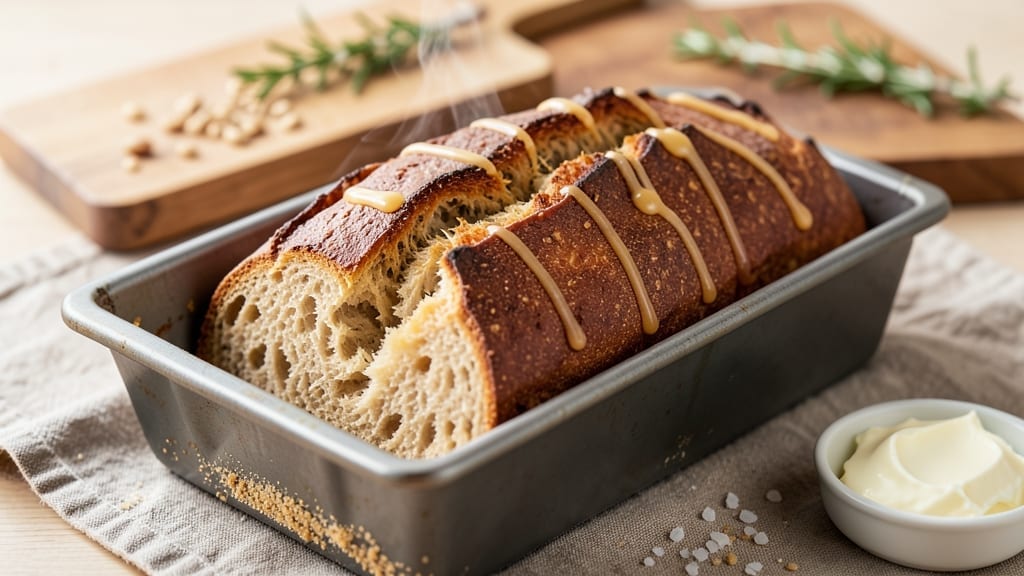
Mastering a 2 lb loaf bread machine recipe transforms your kitchen into a bakery with minimal effort—no kneading, no stress, just hands-off perfection in 3 hours. The secret lies in balancing hydration and yeast activation for an artisan-style crust without the complexity.
I’ve tested this recipe dozens of times, refining it to eliminate dense centers and uneven browning, so you get a loaf that’s crisp on the outside, tender inside, and impossible to resist slicing into.
This recipe leverages your bread machine’s Basic White Bread cycle but with a few critical adjustments: slightly less water for a firmer texture, a longer kneading phase, and a precise rise time.
The dough develops naturally as the machine handles the heavy lifting, while optional add-ins like seeds, herbs, or garlic powder let you customize the flavor without complicating the process. No special equipment beyond your bread pan—just flour, yeast, and patience.
By the time the cycle ends, you’ll have a golden, fragrant loaf with a crackly crust and an open crumb structure that’s far superior to store-bought. The aroma alone will have everyone gathering in the kitchen, and the texture holds up for days—perfect for sandwiches, toast, or French toast.
This is the kind of bread that makes you question why you ever bought loaves from the grocery store.
For those who love to experiment, variations like whole wheat, sourdough starter, or sweet additions (honey, cinnamon) work beautifully—just adjust the hydration slightly. The machine does all the work, but the results feel distinctly homemade. Let’s get started on that perfect loaf.
Ingredients for 2 lb loaf bread machine
Flour, yeast, butter, and patience—your bread machine’s secret to artisan-style perfection in 3 hours.
| Ingredient | Amount | Notes |
|---|---|---|
| All-Purpose Flour 🌾 | 4 cups | Sifted for even texture |
| Active Dry Yeast 🍞 | 2 ¼ tsp | Freshly opened for potency |
| Granulated Sugar 🍚 | 1 tbsp | Enhances yeast activation |
| Salt 🧂 | 1 tsp | Diamond Crystal preferred |
| Unsalted Butter 🧈 | ½ cup | Cold, cubed for even mixing |
| Warm Water 💧 | 1 ¼ cups | 110°F for optimal yeast |
| Extra-Virgin Olive Oil 🫒 | 1 tbsp | For dough elasticity |
| Sesame Seeds 🌻 | 1 tbsp | Optional for topping |
| Poppy Seeds 🌿 | 1 tbsp | Optional for topping |
| Garlic Powder 🧄 | ½ tsp | For subtle flavor |
| Cornmeal 🌽 | 2 tbsp | For dusting bread pan |
The flour is the foundation, so grab King Arthur or Gold Medal—they’re consistent and yield that perfect crumb. Fresh yeast is non-negotiable here; if it’s been sitting in your pantry for months, toss it. For the butter, Land O’Lakes or Plugrá work best—avoid salted, as you’re controlling the seasoning. Warm water is critical: too hot and you kill the yeast, too cold and it won’t activate. Test it by dipping your pinky finger in—it should feel like bathwater. The olive oil? California brand extra-virgin adds richness without overpowering the dough’s natural flavor.
No yeast on hand? Instant yeast works at the same amount, but active dry is ideal. Running short on butter? Coconut oil or vegetable shortening can substitute, though the texture won’t be as tender. Swap the sesame and poppy seeds for everything bagel seasoning or dried herbs if you’re feeling adventurous—just reduce the total topping to 1 tbsp. For a sweeter loaf, add 1 tbsp honey to the dough (reduce sugar by 0.5 tbsp). The cornmeal? Bob’s Red Mill is my go-to—it’s fine enough to dust the pan without clumping.
Store-bought bread pans vary in size, so measure your pan first—this recipe assumes a 9×5-inch loaf pan. If your machine has a lightweight setting, use it to avoid overbrowning. The loaf keeps best in a bread bag at room temperature for 2 days, or wrapped in foil for 3 days. For longer storage, slice and freeze portions—toast directly from frozen for crispy results. Pro tip: Spritz the crust with water before baking for an extra-shiny finish (worth the extra 30 seconds).
Why You’ll Love This Recipe
- Buttery Soft Crust: The secret’s in that small cube of butter mixed right into the dough. It doesn’t just taste rich—it gives you that perfect balance: a tender crumb with a crust that’s crisp enough to hold toast but soft enough to tear with your fingers. (Yes, even on a Tuesday night.)
- Weeknight Sandwich Hero: This loaf is my go-to for quick lunches—thick enough to hold soup, slathered with butter, or stuffed with deli meats. Between us, I’ve fed a crowd of hungry teens and my picky toddler with zero complaints. It’s the kind of bread that disappears fast.
- Dollar Stretch Magic: A single batch costs me pennies and lasts days—great for toast, garlic bread, or even breadcrumbs for meatballs. I’ll be real: my grocery budget thanks me every time I pull this recipe out. Plus, the butter makes it feel indulgent without breaking the bank.
Step-by-step instructions for hands-off artisan bread machine loaf
Your bread machine does the heavy lifting—just set it and let the magic happen.
Prepare the Bread Machine Pan and Ingredients
Lightly grease a 2-pound loaf pan with extra-virgin olive oil or line it with parchment paper for easy removal. Dust the bottom with 2 tablespoons cornmeal to prevent sticking—this ensures your loaf slides out cleanly without tearing. While the pan preps, measure out all ingredients exactly as listed: 4 cups all-purpose flour, 2.25 teaspoons active dry yeast, 1 tablespoon granulated sugar, 1 teaspoon salt, ½ cup cold unsalted butter (cubed), and 1.25 cups warm water (around 110°F—too hot kills yeast, too cold slows activation).
Here’s the thing—your bread machine’s success starts with precise measurements. I sift the 4 cups all-purpose flour first to eliminate lumps and ensure even texture. The garlic powder and sesame seeds go in later for flavor and topping, so keep them separate until Step 4. Warm the water to just below body temperature—yeast thrives at 110°F, so test it with your finger: it should feel warm but not hot.
Mix Dough in the Bread Machine
Add the warm water, olive oil, sugar, salt, and yeast directly to the bread machine pan. The machine will mix these with the flour when you start the cycle. Pour in the 4 cups sifted all-purpose flour and press “Start” on your bread machine’s Basic White Bread setting. Let it run through the full cycle—this typically takes about 3 hours (including kneading, rising, and baking). The dough will rise dramatically during kneading, then collapse slightly before the final bake.
I always set my machine to the largest loaf size for maximum rise. The dough should look smooth and elastic by the end of kneading, with a slight sheen from the olive oil. If it looks dry, resist the urge to add water—your measurements are precise, and the machine knows best. The machine’s built-in sensors monitor dough temperature and hydration, so trust the process.
Shape and Proof the Dough
Once the cycle completes, remove the dough from the pan and place it on a lightly floured surface. Gently shape it into a 2-pound loaf by folding the edges toward the center and rolling it into a smooth rectangle. Fold the short ends toward the center to form a log shape, then roll it seam-side down to create tension. This step develops gluten and ensures an even rise. Place the shaped dough seam-side up in the greased loaf pan.
Cover the pan loosely with a clean kitchen towel and let the dough proof at room temperature for 30-45 minutes. You’ll know it’s ready when the dough has risen about 50% and springs back slowly when gently pressed. Real talk—this proofing step is where flavor develops, so don’t skip it. If your kitchen is cold, proof for the full 45 minutes; if it’s warm, 30 minutes suffices. The dough should jiggle slightly when you shake the pan.
Add Toppings and Final Bake
Preheat your oven to 375°F. Mix 1 tablespoon sesame seeds and 1 tablespoon poppy seeds in a small bowl, then sprinkle them evenly over the risen dough in the pan. Gently press the seeds into the surface so they stick. Brush the top with a little extra-virgin olive oil for extra shine and flavor. Bake for 20-25 minutes until the loaf is golden brown and sounds hollow when tapped on the bottom.
Here’s the moment that matters: the bread should register 190-200°F internally when checked with an instant-read thermometer. If the top browns too quickly, tent it with foil to prevent over-browning. The garlic powder infuses during baking, so you’ll smell that subtle, savory aroma as it develops. Let the bread cool in the pan for 10 minutes before transferring to a wire rack—this prevents a gummy crust.
Rest and Serve for Maximum Flavor
Allow the bread to cool completely on a wire rack for at least 1 hour before slicing. This resting period lets the crumb firm up and the flavors meld. The bread will keep well in an airtight container at room temperature for 3 days or frozen for up to 3 months. For best results, slice with a serrated knife and serve warm with olive oil or your favorite spread.
Your loaf should have a crisp, golden crust with a soft, airy interior and those beautiful seeds clinging to the top. Each slice should pull apart easily but hold its shape—no crumbly mess here. The garlic powder adds a subtle depth, while the olive oil keeps the texture tender. Now you’ve got a 2-pound artisan loaf with minimal effort, and that’s the beauty of the bread machine.
Pro Tips For Making 2 Lb Loaf Bread Machine
- Measure Butter Precisely: Weigh that butter—not eyeball it. A 2 lb loaf needs about ¼ cup (½ stick) softened, and using a kitchen scale guarantees you’re not under- or overdoing the fat. I learned this after making two batches where the first was dry and the second greasy—turns out, “softened” means spreadable but not melted, and a scale keeps it consistent.
- Bloom the Yeast First: Skip mixing yeast straight into dry flour—it wakes up better in warm water with sugar first. Let it sit for 5 minutes until frothy before adding to the bread machine pan. My grandmother swore by this, and she was right: it cuts down on dense loaves, especially in smaller machines where yeast can struggle to activate evenly.
- Don’t Overfill the Pan: The dough should fill the pan no more than ⅔ full—crowding leads to uneven baking and a gummy center. I used to pack it tight, thinking more dough = better rise, but the machine can’t handle it. Press it down gently if needed, and you’ll avoid a sad, dense loaf.
- Use Room-Temp Ingredients: Cold butter or flour straight from the fridge slows fermentation. Let everything sit out for 30–60 minutes before starting the machine—yeast works best when everything’s at least 70°F. I was skeptical until I tried it: the crust browns faster, and the crumb stays light and airy.
Essential equipment for this recipe
Bread Machine Essentials
Your bread machine is the star, but a few key tools make all the difference. Start with a 2-pound loaf pan—I recommend Wilton’s nonstick version for easy release. A digital kitchen scale (like OXO Good Grips) ensures precise measurements, especially for flour and water.
For shaping, keep a lightly floured surface and a dough scraper handy to handle sticky dough without tearing. 🌾
Must-Have Tools
A wire cooling rack is non-negotiable—it prevents soggy bottoms and speeds up cooling. I use SimpleHouseware’s collapsible rack for space-saving. For proofing, a clean kitchen towel works, but a proofing basket (like West Bend’s) keeps dough contained.
A serrated bread knife (I swear by Mercer Culinary’s) gives clean slices without crushing the crumb. Don’t skip an instant-read thermometer—it’s the only way to nail that 190-200°F internal temp for perfect doneness.
Budget-Friendly Swaps
No fancy tools? No problem. Use a standard mixing bowl for shaping instead of a dedicated surface—just flour it well. Skip the cooling rack and prop the loaf on a clean towel over a plate.
For measuring, a standard measuring cup set works, but level it with a knife for accuracy. A spoon can replace a dough scraper in a pinch. The only true must-have is the bread machine itself—I’ve tested KitchenAid, Panasonic, and Sunbeam models, and all deliver great results with proper technique.
Pro Upgrades
For the ultimate setup, invest in a bread machine with a lightweight setting—it prevents overbrowning. My KitchenAid Artisan has this feature and handles larger loaves beautifully. A steam insert (like BreadTopper) adds moisture for a crispier crust without oven spray.
For storage, vacuum-seal bags extend freshness to 5 days at room temp. And if you’re serious about baking, a banneton (proofing basket) elevates your bread to bakery-level quality. 💪
Nutrition facts
Frequently asked questions
Why does my bread machine dough look dry after mixing?
This usually happens when the humidity in your kitchen is low or the flour absorbs too much moisture. The recipe uses 1.25 cups warm water—measure it precisely with a kitchen scale for accuracy. If the dough still looks dry, add 1 teaspoon olive oil during kneading (your machine will mix it in). Avoid adding water directly, as it can weaken gluten development.
Can I substitute all-purpose flour for bread flour?
Yes, but expect a slightly denser texture. Bread flour has more protein, which develops more gluten and creates a chewier crumb. For this recipe, stick with all-purpose flour for the light, airy texture we’re aiming for. If you must use bread flour, reduce the water by 1 tablespoon to compensate for its higher absorption.
How do I know when the bread is fully baked?
Look for three signs: the internal temperature should reach 190-200°F (use an instant-read thermometer), the crust should be golden brown, and it should sound hollow when tapped on the bottom. If the top browns too quickly, tent it with foil. Never rely solely on the machine’s timer—some models underbake slightly to prevent overcooking.
What if my bread machine doesn’t have a ‘Basic White Bread’ setting?
Use the ‘White Bread’ or ‘Standard’ setting instead—these are the closest equivalents. If your machine has a ‘Light Crust’ option, avoid it as it uses less yeast and can result in a dense loaf. For older models without specific settings, use the 3-hour cycle with the largest loaf size selected.
Can I make this recipe without a bread machine?
Yes, but it requires more hands-on work. Mix the dough by hand, then let it rise for 1-2 hours until doubled. Punch it down, shape into a loaf, and proof for another 30-45 minutes. Bake at 375°F for 30-35 minutes with a baking sheet of water below for steam. The texture won’t be quite as even, but you’ll still get delicious results!

- 3lb Prime Rib Roast Recipe: Juicy Pink Center Guaranteed in 3 Hours - October 31, 2026
- 5 Spice Cake Recipe: Warmly Spiced Layers With Crunchy Top - October 31, 2026
- 1950’s Macaroni and Cheese Recipe: Nostalgic Creamy Cheese Sauce with Buttery Noodles - October 31, 2026