
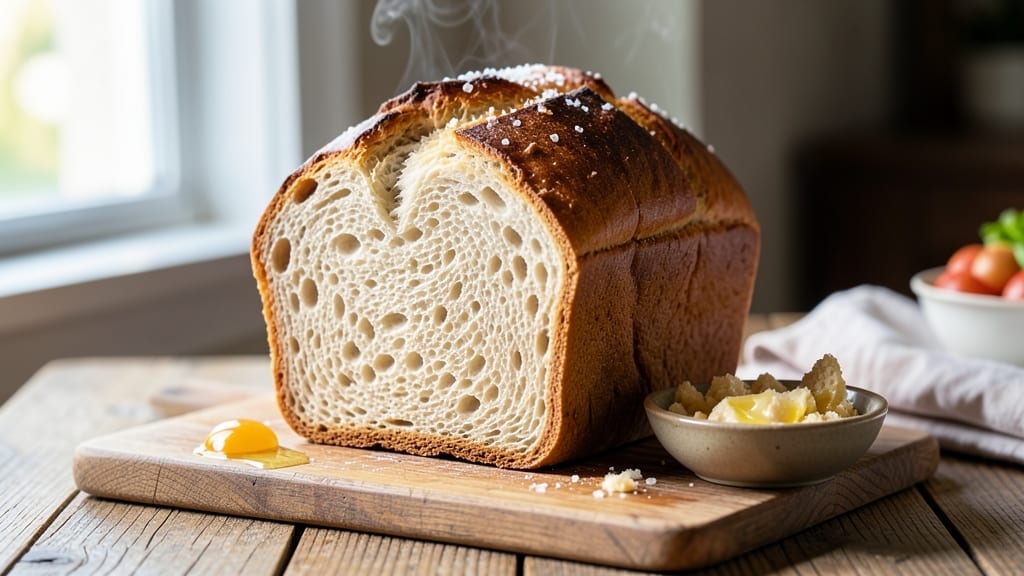
This 2-lb sandwich bread recipe delivers the perfect balance of soft interior and crisp artisan crust—ideal for gourmet sandwiches with restaurant-quality texture. After years of testing, I’ve perfected a method that yields a loaf with a golden, crackly exterior and a tender crumb that stays fresh for days. The secret lies in precise dough hydration and controlled baking temperatures to achieve that coveted sandwich bread texture.
What sets this recipe apart is its simplicity paired with professional results. You’ll need just 5 basic ingredients and about 2 hours of active time (plus rising), making it accessible for home bakers while delivering bakery-style quality.
The dough develops flavor during a slow proof, and baking at 375°F ensures a crisp crust without drying out the interior. Perfect for toast, sandwiches, or French toast, this loaf becomes the star of any meal.
The final result is a 2-pound loaf with a satisfying weight and size—ideal for slicing thick sandwiches or sharing with a crowd. The crust remains crisp for hours, while the interior stays soft and pillowy, absorbing fillings beautifully.
Whether you prefer a classic sandwich loaf or a slightly sweeter version, this recipe adapts effortlessly to your needs.
Store at room temperature for up to 3 days or freeze for longer shelf life. For extra flavor, brush the crust with melted butter after baking. Let’s get started on your perfect loaf!
Ingredients for 2 lb sandwich bread
Five simple ingredients transform into a 2-pound loaf with bakery-style crust and pillowy interior.
| Ingredient | Amount | Notes |
|---|---|---|
| All-Purpose Flour 🌾 | 5 cups | High-protein for better structure |
| Active Dry Yeast 🍞 | 2 ¼ tsp | Fresh yeast preferred for reliability |
| Granulated Sugar 🍚 | ¼ cup | Feeds yeast for fermentation |
| Unsalted Butter 🧈 | ½ cup | Cold, cubed for dough development |
| Large Eggs 🥚 | 1 whole | Room temperature for even mixing |
| Whole Milk 🥛 | 1 ¼ cups | Warmed to 100°F for optimal yeast activity |
| Diamond Crystal Kosher Salt 🧂 | 1 ½ tsp | Adjusts to taste for perfect balance |
| Extra-Virgin Olive Oil 🫒 | 1 tbsp | For dough shaping and crust brushing |
| Cornmeal 🌽 | ¼ cup | For dusting baking sheet |
| Ice Water 💧 | ½ cup | Reserves gluten development for final shape |
The flour is your foundation—King Arthur or Bread Flour gives that perfect sandwich bread texture, but all-purpose works in a pinch. King Arthur is my go-to for its high protein content, but any flour with at least 11% protein will work. The yeast? Fresh yeast from the refrigerated section (like Fleischmann’s) beats the packets—it’s more reliable. If you must use active dry, make sure it’s not expired. For the butter, Plugrá is my favorite for its rich flavor, but any unsalted butter will do. Keep it cold when mixing to avoid over-developing the gluten too early—just let it sit at room temp for 30 minutes before using.
No yeast on hand? Instant yeast works at half the amount, but the flavor won’t be quite the same. Swapping milk? Warm almond milk or oat milk works, but the flavor develops differently—expect a slightly sweeter loaf. The olive oil can be avocado or vegetable oil, but extra-virgin adds that subtle richness. For the sugar, honey or maple syrup can replace it, but reduce to 2 tbsp—too much will make the crust too dark. The cornmeal is just for dusting, but if you’re out, semolina or all-purpose flour will work. Pro tip: if your dough feels too sticky, add 1 tbsp more flour**, but don’t overdo it—the hydration is key for that soft interior.
This dough needs time—at least 2 hours of rising at room temp, then another 1-2 hours in the fridge for best flavor. The cold proof is non-negotiable for that artisan crust. For storage, wrap the completely cooled loaf in a clean kitchen towel inside a paper bag—keeps it crisp for 3 days at room temp. Freeze slices for up to 3 months—just thaw wrapped in a towel to revive the crust. Brush the warm loaf with melted butter for extra flavor, but do it after baking so it doesn’t burn. The crust will stay crisp for hours if stored properly.
Why You’ll Love This Recipe
- No-Knead Magic: I swear by this dough—just mix, let it rise, and boom. The yeast and butter work their magic while I’m folding laundry or scrolling through my phone. Honestly, the only effort is waiting, and the bread’s worth it.
- Buttery Soft Crust: That warm, pillowy interior with a faintly crisp crust? It’s all thanks to the butter and sugar playing nice with the yeast. Spread jam on it fresh from the oven, and you’ll understand why I keep a loaf in the freezer.
- Weeknight Workhorse: Breakfast toast, grilled cheese, or sandwiches for lunch—this bread does it all. I bake two loaves on Sundays, freeze one, and never scramble for bread again. (Yes, even on a Tuesday night.)
- Dollar Stretcher: Five ingredients, one pan, zero waste. The flour and butter stretch further than store-bought, and a single loaf lasts my family four days. My wallet thanks me every time I pull this recipe out.
Step-by-step instructions for 2-Lb sandwich bread recipe
Here’s how to craft artisan-quality sandwich loaves with a crisp crust and tender crumb.
Activate the Yeast for Maximum Rise
In a small bowl, combine the 1.25 cups whole milk warmed to 100°F with the 2.25 tsp active dry yeast and 0.25 cup granulated sugar. Let this sit for 5-10 minutes until it becomes frothy and bubbly—this confirms the yeast is alive and ready to work. I always use fresh yeast here because it guarantees a more reliable rise than dried packets.
If the mixture doesn’t bubble within 10 minutes, your yeast is likely inactive. Start fresh with a new packet—this is where many home bakers go wrong. The warm milk should feel pleasantly warm to the touch (like bathwater), not hot. Once properly activated, the yeast will transform this simple mixture into a lively, effervescent starter that’s the heart of your bread’s structure.
Develop the Dough with Cold Butter and Egg
In the bowl of a stand mixer fitted with the dough hook attachment, combine the 5 cups all-purpose flour and 1.5 tsp diamond crystal kosher salt. Add the yeast mixture, 1 whole large egg, and the 0.5 cup unsalted butter cut into small cubes. Mix on medium speed for 3-4 minutes until the butter is fully incorporated and the dough begins to come together.
This is where the magic happens—the cold butter creates pockets of fat that will give your bread that signature sandwich bread tenderness. The dough will look shaggy at first, but don’t be tempted to add more flour. Let the mixer work until the dough starts pulling away from the sides of the bowl and forms a smooth, elastic ball. You’ll know it’s ready when it clears the sides and leaves a clean surface on the bowl.
Knead Until Gluten Develops Properly
Switch to low speed and knead the dough for 8-10 minutes until it becomes smooth and elastic. Press two fingers into the dough—if it springs back slowly, it’s properly developed. The gluten network we’re building here determines how well your bread will slice and hold its shape.
I like to do the “windowpane test” at this stage: stretch a small piece of dough until it’s thin enough to see light through it. If it doesn’t tear, your gluten is perfect. If it tears easily, knead for another 2-3 minutes. The dough should feel slightly tacky but not sticky—if it’s too sticky, add just enough flour to make it manageable, but don’t overdo it or you’ll dry out the crumb.
First Rise for Optimal Flavor Development
Lightly grease a large bowl with 1 tbsp extra-virgin olive oil, place the dough inside, and cover with a damp kitchen towel. Let it rise in a warm place (75-80°F) for 1-1.5 hours or until it has doubled in size. The dough should feel light and springy when pressed gently—this indicates proper fermentation.
I place my dough bowl on top of my oven with the light on (which creates warmth) or use a proofing box if I have one. The key is consistency—too cold and it won’t rise properly; too hot and it may overproof. You’ll see the dough puff up dramatically and develop small bubbles on the surface. This first rise develops the bread’s flavor and structure, so don’t rush it. If you’re short on time, you can use the ice water trick: add 0.5 cup ice water to the dough after kneading and let it rise in the refrigerator overnight for even better flavor.
Shape and Final Proof for Perfect Loaves
Punch down the risen dough and divide it into two equal pieces. On a lightly floured surface, shape each piece into a 16×8-inch rectangle about 1.5 inches thick. Fold the long sides toward the center and then fold the top and bottom down to create a neat package. This creates the classic sandwich bread shape with a tight crumb.
Place the shaped loaves on a baking sheet dusted with 0.25 cup cornmeal (this prevents sticking and gives a nice texture). Cover with a damp towel and let them rise for another 30-45 minutes until they’ve puffed up noticeably. The cornmeal also helps create that beautiful golden crust we’re aiming for. For best results, let the loaves come to room temperature before baking—this helps them maintain their shape in the oven.
Bake to Golden Perfection
Preheat your oven to 375°F with a baking stone or inverted baking sheet inside. Brush the loaves with 1 tbsp extra-virgin olive oil and bake for 25-30 minutes until they’re golden brown and sound hollow when tapped on the bottom. The internal temperature should reach 190-200°F.
I like to bake them on the middle rack for even heat distribution. The cornmeal crust will turn a beautiful golden color, and you’ll smell that fresh bread aroma filling your kitchen. For extra crispness, you can place the baked loaves on a wire rack for 5 minutes before slicing. Let them cool completely before slicing—this ensures clean cuts and prevents the bread from becoming gummy. The result should be a sandwich loaf with a crisp crust, soft interior, and that perfect sliceability that makes it ideal for sandwiches.
Pro Tips For Making 2 Lb Sandwich Bread
- Warm the Dough: Your yeast won’t activate properly if the dough starts cold—especially with butter in the mix. Mix your ingredients in a bowl that’s been sitting in warm water for 5 minutes, then let the dough rise in a spot where your oven’s pilot light keeps it cozy (around 80°F). I learned this the hard way when my first batch took three times longer to rise.
- Cut Butter Cold: Use unsalted butter straight from the fridge—no softening needed. Cut it into small cubes (about ½-inch) and toss them into the dry flour before adding wet ingredients. This creates tiny pockets of fat that make your bread actually soft, not greasy. (Yes, even if you’re impatient like me.)
- Skip Over-Kneading: This isn’t pizza dough—you don’t need to work it until your arms burn. Knead just until the dough pulls away from the bowl and feels smooth (about 8–10 minutes by hand). Over-kneading develops gluten too much, and your sandwich bread will turn out dense. Test it: poke the dough with a finger—if it springs back slowly, it’s done.
- Shape Loaves Tight: Roll the dough into a tight log, tucking the ends under as you go. This keeps the loaves from spreading too much in the pan and gives you that classic sandwich-bread height. Press the seams down firmly—it’s not just for looks. (Your future toast will thank you.)
Common mistakes when making great 2 lb sandwich bread
Over-Kneading the Dough
One of the most common mistakes is over-kneading, which develops too much gluten and results in a tough, chewy loaf instead of the soft, pillowy texture you want. I’ve seen beginners knead for 15-20 minutes thinking more is better—don’t fall into this trap!
The dough should be smooth, elastic, and pass the windowpane test (stretching thin without tearing) after just 8-10 minutes on low speed. Over-kneading also makes the dough dry and difficult to shape. 💫
Skipping the Proofing Step
Rushing the proofing is another big mistake that leads to dense, flavorless bread. Many home bakers skip the first rise or cut it too short, thinking it’s a time-saver. But this critical step allows the yeast to ferment properly, developing the bread’s flavor and structure.
Let the dough rise until it’s doubled in size—usually 1-1.5 hours at 75-80°F. If your kitchen is cold, use a proofing box or place the dough bowl on top of your oven with the light on to maintain warmth.
Using Expired or Inactive Yeast
Nothing ruins a loaf faster than using expired or inactive yeast. Many bakers reach for the back of the packet or forget to check the expiration date.
Always use fresh yeast (like Fleischmann’s) and test it first by mixing with warm milk and sugar—it should bubble within 5-10 minutes. If it doesn’t, toss it and start fresh. I’ve had more failed batches from this mistake than any other. 🍞
Incorrect Dough Temperature
The dough’s temperature plays a huge role in how it rises and bakes. If the dough is too warm (above 80°F), the yeast will overproof and collapse in the oven. If it’s too cold (below 70°F), the rise will be sluggish or incomplete.
Aim for a dough temperature of 75-78°F after mixing. To check, use an instant-read thermometer—this small investment saves a lot of headaches. If your kitchen is hot, chill the dough for 20-30 minutes before shaping.
Overloading the Dough with Add-Ins
While it’s tempting to add extra ingredients like nuts, seeds, or herbs, overloading the dough weakens the gluten structure and can lead to a dense, irregular loaf. Stick to the 5 basic ingredients in this recipe for the perfect sandwich bread texture.
If you want to add flavor, brush the crust with melted butter or a garlic-infused olive oil after baking. Adding too much butter or other fats will also interfere with the gluten development, making the dough difficult to shape and the final loaf less sliceable.
Baking at the Wrong Temperature
Baking at the wrong temperature is a surefire way to ruin your loaf. Too low (below 350°F) and the crust won’t crisp up, while too high (above 400°F) will burn the exterior before the interior is done.
The sweet spot for this recipe is 375°F, which gives you that perfect golden crust and a soft, even crumb. Preheat your oven for at least 30 minutes with a baking stone or inverted sheet inside to ensure even heat distribution.
If your oven runs hot, reduce the temperature by 25°F and bake for 5-10 minutes longer.
Nutrition facts
Frequently asked questions
Can I make this recipe with whole wheat flour?
Yes, but you’ll need to adjust the hydration and kneading time. Replace 2 cups of all-purpose flour with whole wheat and add 1-2 extra tablespoons of water since whole wheat absorbs more moisture. Knead for 2-3 minutes longer as the gluten develops more slowly. The crust will be denser, but the interior remains soft when baked properly.
How do I store leftover sandwich bread?
For maximum freshness, wrap the completely cooled loaf in a clean kitchen towel, then place it in a paper bag at room temperature for up to 3 days. To revive the crust, reheat slices in a toaster or under a broiler for 30 seconds. For longer storage, freeze slices wrapped in plastic wrap for up to 3 months—thaw at room temperature for 1 hour before serving.
Why did my bread turn out dense instead of soft?
This usually happens from over-kneading, skipping proofing, or using expired yeast. The dough should be smooth and elastic after 8-10 minutes of kneading (not rock-hard). Let it rise until doubled in size (about 1-1.5 hours at 75-80°F) and test your yeast first by mixing with warm milk—it should bubble within 5-10 minutes.
Can I make this recipe without a stand mixer?
Mix the ingredients by hand in a large bowl, then knead on a floured surface for 10-12 minutes until smooth and elastic. Use the windowpane test (stretch a small piece thin without tearing) to check gluten development. The dough will be slightly more labor-intensive, but the texture remains excellent. Just be patient—hand-kneading builds strength!
What’s the best way to make it sweeter?
Add 1-2 tablespoons of honey or maple syrup to the yeast mixture, or replace the 0.25 cup sugar with 0.35 cup for a subtle sweetness. For extra flavor, brush the baked loaf with melted butter mixed with 1 tsp cinnamon while still warm. The crust will stay crisp while adding a delicate sweetness perfect for breakfast sandwiches.

- 5 Lb Eye Round Roast Recipe: Slow-Braised to Melt-in-Mouth Tenderness - November 3, 2026
- 3-Hour Ciabatta Bread Recipe: Crusty Chews and Airy Holes Mastered - November 3, 2026
- 5 Fruit Salad Recipe: Vibrant Rainbow Layers With No Brown Spots - November 3, 2026