
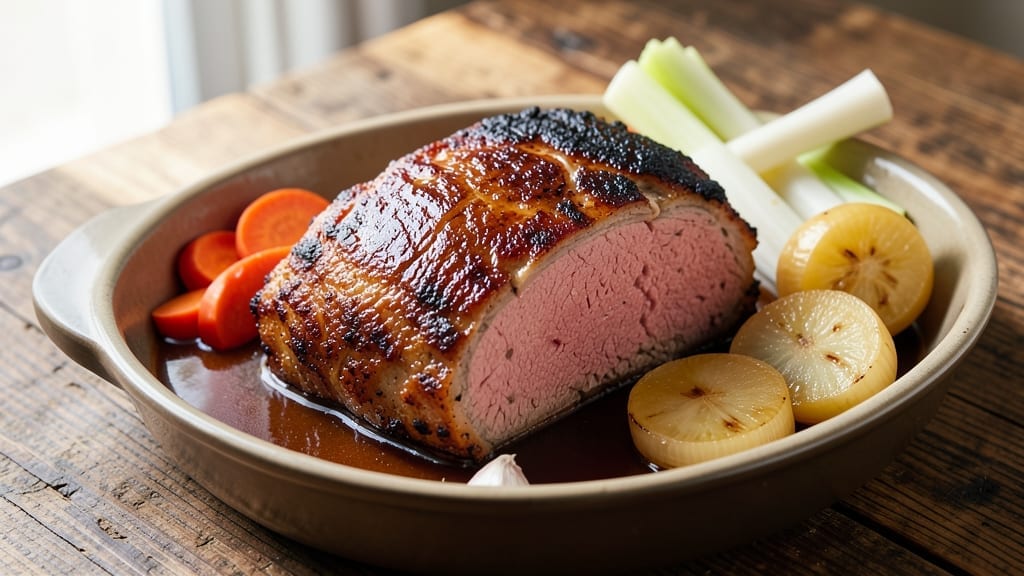
A 2 lb top round roast transformed from tough to tender through slow braising is the secret weapon for weeknight dinners that taste like a restaurant. The key lies in low-and-slow cooking, which breaks down the muscle fibers while keeping every bite moist and flavorful.
I’ve perfected this method over countless batches, ensuring even the leanest cut delivers melt-in-your-mouth results without relying on marinades or fancy techniques.
This recipe focuses on precision timing and temperature control—braising at 300°F for 3 hours—to guarantee a juicy, fork-tender roast that slices cleanly against the grain.
The beauty of this method is its simplicity: minimal prep, no fancy equipment, and a hands-off approach that lets the oven do the work. What you’ll end up with is a roast so tender it practically falls apart, with a crust that’s rich and caramelized from the slow cooking process.
The magic happens when you rest the roast for 15 minutes before slicing, allowing the juices to redistribute evenly. This ensures every bite is bursting with flavor, not dry or stringy.
Serve with classic sides like roasted potatoes or a crisp green salad to round out the meal. The result? A dish that feels indulgent but comes together with minimal effort.
Perfect for feeding a family or meal prepping for the week, this foolproof method turns an affordable cut into a showstopper. No more tough, chewy roasts—just restaurant-quality tenderness at home. Let’s get started on transforming that top round into something extraordinary.
Ingredients for 2 lb top round roast
Precision-cut ingredients for transforming tough top round into melt-in-your-mouth perfection through slow braising mastery.
| Ingredient | Amount | Notes |
|---|---|---|
| Top Round Roast 🥩 | 2 lb | Center-cut for even tenderness |
| Yellow Onion 🧅 | 1 whole | Quartered, skin on for flavor |
| Carrots 🥕 | 3 whole | Whole, peeled, cut into chunks |
| Celery Stalks 🥬 | 3 whole | Cut into 1-inch pieces |
| Garlic Cloves 🧄 | 4 cloves | Smashed, not minced |
| Beef Broth 💧 | 2 cups | Low-sodium preferred |
| Dry Red Wine 🍷 | ½ cup | Bold variety like Cabernet |
| Tomato Paste 🍅 | 2 tbsp | High-quality, no sugar added |
| Fresh Thyme 🌿 | ¼ cup | Leaves only, stems removed |
| Fresh Rosemary 🌿 | ¼ cup | Needles only, chopped |
| Olive Oil 🫒 | 2 tbsp | Extra-virgin for richness |
| Salt 🧂 | 1 ½ tsp | Diamond Crystal kosher |
| Black Peppercorns 🌶️ | 1 tsp | Freshly cracked |
| Bay Leaves 🌿 | 2 whole | Removed before serving |
The top round roast is the star here, and center-cut is non-negotiable—it’s the most tender portion of the round. Look for a piece with good marbling at Costco or Whole Foods; their butchers can often trim it for you. If buying from a regular supermarket, check the packaging for ‘center-cut’ labels. The aromatics—onion, carrots, celery—create the flavor base, so don’t skip them. Organic produce adds subtle sweetness, but conventional works fine if you’re on a budget. Fresh herbs are ideal, but dried thyme and rosemary at half the amount will work in a pinch. The key is balancing these ingredients to build deep, complex flavor without overpowering the beef.
No red wine? Beef broth with 1 tbsp balsamic vinegar delivers similar depth. The tomato paste adds richness—Trader Joe’s has excellent no-sugar-added options that keep well. For the herbs, if you’re using dried, toast them in a dry pan for 30 seconds before adding to the braise to wake up their flavors. The olive oil should be extra-virgin—it’s the only place where you shouldn’t skimp. If you’re concerned about calories, use half the amount and add more broth. The bay leaves are traditional but optional; if you omit them, add an extra sprig of thyme for similar earthy notes.
This braise reheats beautifully—3-5 minutes in a skillet with fresh broth revives it perfectly. Store leftovers in an airtight container for up to 5 days or freeze for 3 months. For meal prep, slice the roast and portion it into containers with sauce—it’s perfect for lunches. The braising liquid reduces to a rich sauce; save it for another use or freeze it in ice cube trays. If you’re making this ahead, braise the roast and refrigerate it uncovered for 24 hours to develop even deeper flavor before finishing in the oven.
Why You’ll Love This Recipe
- One-Pot Magic: I swear by this—just toss the roast, chopped veggies, and garlic into a Dutch oven with broth, cover it, and walk away. No fancy prep, no messy pans, just hands-off cooking that smells amazing when you walk in the door.
- Garlic-Kissed Perfection: That crispy, caramelized edge on the roast? The tender center? The way the garlic and onions mingle with the beef until every bite feels like a hug? It’s the kind of flavor that makes you close your eyes and sigh—no heavy marinades or secret rubs needed.
- Meal Prep MVP: Between us, this is my go-to for busy weeks. Cook it Sunday, slice it up, and you’ve got sandwiches for lunch, tacos for Tuesday, and a quick stir-fry base for Thursday. The leftovers actually taste better the second day—honestly, my freezer’s full of it.
- Budget Beef Boost: Top round is lean, affordable, and doesn’t skimp on taste. A 2 lb roast feeds four (or two very hungry people) without breaking the bank, and the veggies stretch it into a full meal. My wallet and my family both thank me every time.
Step-by-step instructions for slow-braised top round roast
Transform tough top round into melt-in-your-mouth perfection with this precise braising method.
Sear the Roast and Build the Flavor Base
Heat a Dutch oven over medium-high heat until hot. Add the 2 tablespoons olive oil and swirl to coat the bottom. Place the 2 lb top round roast fat-side down and sear for 4-5 minutes until deeply browned on all sides. This creates the Maillard reaction that forms rich, caramelized flavors.
Remove the roast and set aside. In the same Dutch oven, add the 1 whole yellow onion (quartered), 3 whole carrots (cut into chunks), and 3 whole celery stalks (cut into 1-inch pieces). Cook for 5 minutes until the vegetables begin to soften and develop color. Add the 4 cloves garlic cloves (smashed) and cook for 30 seconds until fragrant.
Deglaze and Develop the Braising Liquid
Pour in the 0.5 cup dry red wine and scrape up all the browned bits from the bottom of the pot with a wooden spoon. This deglazing step captures all the concentrated flavors you just created. Let the wine simmer for 2 minutes until reduced by half.
Add the 2 tablespoons tomato paste, stirring to combine. Sprinkle in the 1.5 teaspoons salt and 1 teaspoon black peppercorns (freshly cracked). Pour in the 2 cups beef broth and stir to combine. The liquid should come about halfway up the sides of the roast.
Braise Until Fork-Tender
Return the roast to the Dutch oven, placing it on top of the vegetables. Add the 0.25 cup fresh thyme (leaves only) and 0.25 cup fresh rosemary (needles only), along with the 2 whole bay leaves. Cover tightly with a lid and transfer to a preheated 300°F oven.
Braise for 3 hours until the roast is fork-tender. You’ll know it’s ready when a knife slides in easily and the meat pulls apart cleanly. The vegetables should also be tender but still holding their shape. If the liquid reduces too much before this time, add a splash of water or broth to maintain moisture.
Rest and Serve with Confidence
Remove the roast from the Dutch oven and transfer it to a cutting board. Tent loosely with aluminum foil and let it rest for 15-20 minutes. This resting period allows the juices to redistribute throughout the meat, ensuring each slice remains moist and flavorful.
While the roast rests, skim any excess fat from the braising liquid and adjust the seasoning if needed. Serve the roast sliced against the grain into ¼-inch thick pieces, accompanied by the braised vegetables and reduced sauce. The result should be incredibly tender, juicy meat with deep, complex flavors from the slow braising process.
Pro Tips For Making 2 Lb Top Round Roast
- SEAR THE ROAST FIRST: Top round can dry out fast, so hit it with a screaming-hot pan for 3-4 minutes per side before adding liquid. The crust locks in flavor and keeps the meat from turning into shoe leather—trust me, I’ve made that mistake.
- CHOP VEGETABLES UNIFORM: Cut onions, carrots, and celery into ½-inch chunks so they cook evenly. I used to leave them random sizes, and some would turn mushy while others stayed crunchy—now they all finish together.
- USE COLD WATER FOR POT: Dumping boiling water into your pot with raw meat and veggies can shock the roast and make it tough. Start with cold water, bring it to a boil, then add everything—your meat will stay tender.
- SKIP THE CROWDED POT: If your Dutch oven or pot is packed too tight, the veggies steam instead of brown. Loosen things up so the onions and carrots can caramelize—it makes the whole dish taste richer. (Yes, even if it looks messy.)
Troubleshooting this dish
Dry Roast Problem
If your roast turns out dry, it’s usually from overcooking or insufficient liquid. First, verify your oven temperature with an oven thermometer—many run hotter than set. If the liquid evaporates too quickly, add ½ cup beef broth after 2 hours of braising.
For extra insurance, place the roast on a bed of chopped vegetables (like carrots and onions) before adding liquid—this helps retain moisture. 💧
Uneven Cooking
Uneven doneness often happens if the roast isn’t fully submerged in liquid. Ensure the liquid covers at least half the roast’s height—if it’s too low, add more broth or water. Also, rotate the Dutch oven halfway through cooking to promote even heat distribution.
A meat thermometer (like Thermoworks Smoke) is your best friend here—aim for 195-200°F internal temp for fork-tender results.
Tough Vegetables
If your carrots, onions, or celery stay crunchy, they likely need more time. The roast should be fork-tender first—usually 3 hours—but if vegetables are still firm, add 30 more minutes.
For extra tenderness, parboil them for 5 minutes before adding to the Dutch oven. Alternatively, swap in potatoes, which braise faster and hold up better.
Weak Flavor
Muted flavors usually mean underdeveloped seasoning or insufficient time. Always deglaze with wine to capture fond (browned bits)—this adds depth. For extra punch, add 1 tsp smoked paprika, 1 sprig fresh thyme, or a bay leaf.
Let the roast rest 15-20 minutes, then reduce the braising liquid on the stovetop to intensify flavors. A splash of red wine reduction, made separately, can elevate the dish further.
Lid Stuck Shut
If your Dutch oven lid gets stuck from condensation, don’t force it—cool the pot slightly first. To prevent this, place a silicon lid mat, a paper towel, or even a wire rack, under the lid before sealing.
If the lid still sticks, run cold water over the rim for 10 seconds. Pro tip: Use a Dutch oven with a tight-fitting lid, like Le Creuset, to avoid this issue entirely.
Meat Sticking to Pan
Sticking happens when the roast isn’t properly seared or lacks fat. Always sear the roast until deeply browned on all sides before braising. If it sticks later, add 1 tbsp olive oil, beef tallow, or even a splash of broth to the pot.
For stubborn cases, use a spatula to gently lift the roast, then slide it onto a plate before transferring to the oven. A well-seasoned Dutch oven, like Lodge, prevents sticking better than nonstick pans.
Nutrition facts
Frequently asked questions
Why does this recipe use braising instead of roasting?
The top round cut is naturally lean and can become tough when cooked with dry heat. Braising at 300°F for 3 hours breaks down the muscle fibers through moisture and gentle heat, transforming it into fork-tender perfection. This method preserves juices while developing deep, rich flavors that dry roasting simply can’t match.
Can I substitute wine with something else?
Yes! Replace the 0.5 cup dry red wine with 1 cup beef broth plus 1 tablespoon balsamic vinegar for similar depth. For extra richness, use ½ cup beef broth + ½ cup tomato juice. The key is balancing acidity and umami—never skip the deglazing step to capture those flavorful browned bits.
How do I know when the roast is done?
Use a meat thermometer for accuracy—it’s done at 195-200°F internal temp. The meat should pull apart easily with two forks, and the braising liquid will thicken slightly. If you don’t have a thermometer, check for fork tenderness after 3 hours—when it slides in cleanly, it’s ready. Never rely on time alone!
Can I make this ahead of time?
Braise the roast completely, then refrigerate it uncovered for 24 hours to concentrate flavors. Reheat in the oven at 325°F for 30 minutes with fresh broth. The roast reheats beautifully—just add ½ cup broth to the Dutch oven and simmer for 5-10 minutes until heated through. Leftovers keep for 5 days in the fridge.
What’s the best way to slice this roast?
Always slice against the grain—look for the long muscle fibers and cut perpendicular to them. Use a sharp chef’s knife and slice into ¼-inch thick pieces for the most tender texture. For even slices, first cut the roast in half lengthwise, then slice each half against the grain. This technique prevents tough, stringy bites.

- 6 Egg Cake Recipe with Oil: Light as Air With Buttery Moisture - October 4, 2026
- 4 Bean Casserole Recipe: One-Pan Heartiness With Smoky Paprika Depth - October 4, 2026
- 3-Ingredient Keto Mug Cake Recipe: Microwave Magic in 2 Minutes - October 4, 2026