
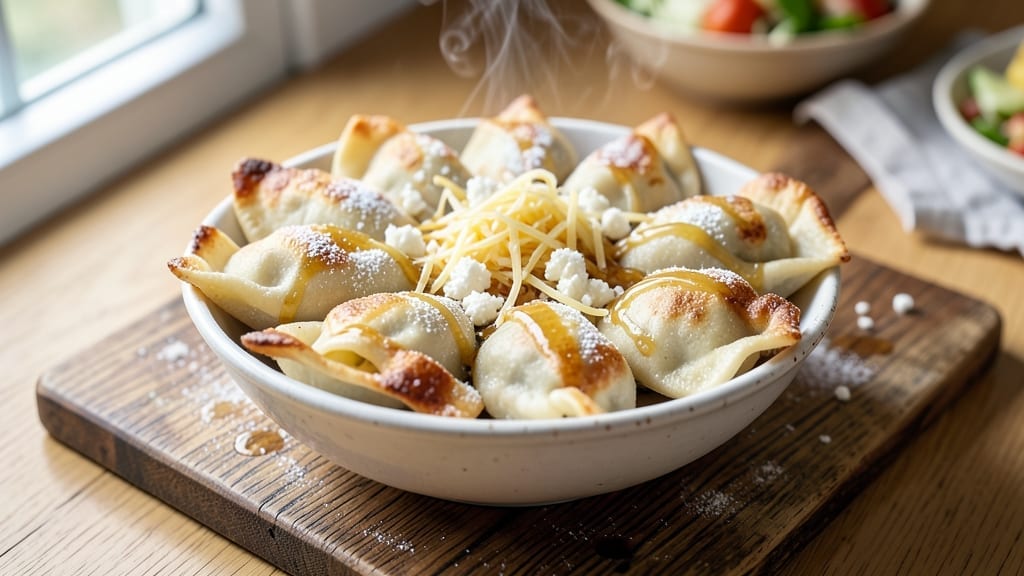
This 4 cheese pierogies recipe delivers the perfect balance of pillowy dough and melty cheese that makes every bite irresistible. 💛 The secret lies in using a blend of farmer’s cheese, ricotta, mozzarella, and sharp cheddar for a filling that’s rich yet not overly heavy—each type contributes its own texture and flavor.
I’ve been perfecting this recipe for years, and the difference between homemade and store-bought is night and day once you try it.
The dough itself is simple but requires patience—resting it properly ensures tender, not tough, pierogies that hold their shape during boiling. What sets these apart is the four-cheese filling, which stays gooey in the center while developing a golden crust when fried.
The combination of creamy ricotta, mild mozzarella, tangy cheddar, and crumbly farmer’s cheese creates layers of flavor that keep you reaching for more.
By the time you’re done, you’ll have golden-brown pierogies with crisp edges and soft centers, each one bursting with melty cheese goodness. The aroma alone will have everyone gathering around your kitchen, and the taste?
Pure comfort food perfection that rivals any Eastern European restaurant. These are the kind of pierogies that disappear faster than you can say “drugi” (Polish for “another one”).
Serve them fresh from the pan with a sprinkle of flour and a side of sour cream, or freeze extras for a quick meal later. The versatility of this recipe makes it perfect for family dinners, potlucks, or even a cozy night in.
Let’s get started on making these delicious pierogies!
Ingredients for 4 cheese pierogies
Pillowy dough and four cheeses make these pierogies irresistible. Grab what you need and get ready for comfort food perfection.
| Ingredient | Amount | Notes |
|---|---|---|
| All-Purpose Flour 🌾 | 3 cups | Sifted for light texture |
| Large Eggs 🥚 | 2 whole | Room temperature preferred |
| Unsalted Butter 🧈 | ½ cup | Cold, cubed for dough |
| Granulated Sugar 🍚 | 1 tbsp | For dough sweetness |
| Salt 🧂 | 1 tsp | Kosher or sea salt |
| Farmer's Cheese 🧀 | 1 cup | Creamy, crumbly texture |
| Ricotta Cheese 🧀 | ¾ cup | Whole milk preferred |
| Mozzarella Cheese 🧀 | ½ cup | Fresh, shredded fine |
| Sharp Cheddar Cheese 🧀 | ½ cup | Shredded, aged variety |
| Sour Cream 🥛 | ¼ cup | Full-fat for richness |
| Flour 🌾 | ½ cup | For dusting work surface |
| Vegetable Oil 🫒 | 2 cups | For deep frying |
| All-Purpose Flour 🌾 | ¼ cup | For serving, extra |
The cheeses are the heart of these pierogies—farmer’s cheese gives that classic crumbly texture, while ricotta keeps it creamy. Farmer’s cheese can be tricky to find, but most Polish or Eastern European markets carry it. If you’re stuck, substitute with extra ricotta or cottage cheese—just drain it well to avoid soggy pierogies. For cheddar, grab the sharpest you can find (the kind that’s aged at least 6 months). The mozzarella? Fresh is non-negotiable—the pre-shredded stuff has additives that ruin the texture. If you’re in a pinch, low-moisture mozzarella from a block shreds perfectly. Pro tip: buy all your cheeses the same day you plan to make pierogies—they’ll be at their peak freshness.
No farmer’s cheese? Cottage cheese works in a bind, but drain it thoroughly first—wrap it in a clean towel and let it sit for 20 minutes to squeeze out excess moisture. The ricotta can be swapped for mascarpone, though it’s pricier. For the dough, if you don’t have cold butter, chill your butter cubes in the freezer for 15 minutes—this is key for flaky layers. The sour cream adds richness, but if you’re avoiding dairy, Greek yogurt works too. Just don’t skip it—the pierogies need that tangy balance. And for frying? Vegetable or canola oil is your best bet, but peanut oil has a higher smoke point if you’re worried about burning. Whatever you do, don’t use olive oil—it’ll burn before the pierogies get golden.
Make the dough ahead and refrigerate it for up to 2 days—this actually improves the texture. The filled pierogies can be frozen on a tray before bagging, then stored for 3 months. For serving, keep them warm in a 200°F oven while you fry the rest. The fried pierogies reheat beautifully—just pop them in a 350°F oven for 5-10 minutes until crispy again. I always make a double batch because they disappear faster than you can say “drugi” (that’s Polish for ‘another one’). Store the dough scraps in a bag—they’re perfect for making extra pierogies later.
Why You’ll Love This Recipe
- No-Fuss Dough: I swear by this dough—just flour, eggs, butter, and a pinch of salt. No kneading, no fuss, and it comes together faster than I can microwave popcorn.
- Creamy Cheese Magic: That buttery, stretchy dough hugs the melted cheddar, gouda, mozzarella, and parmesan like a warm embrace. The sugar in the dough caramelizes just enough to balance the saltiness—trust me, it’s ridiculously good.
- Weeknight or Party Star: Freeze half the batch for lazy nights, and the other half gets pan-fried crispy for guests. Serve with sour cream or caramelized onions—suddenly, you’re the hero of any gathering.
- Budget-Friendly Feast: Four simple ingredients stretch to feed six, and leftovers reheat like a dream. Honestly, I make these when I’m broke or hosting—same result, zero guilt.
Step-by-step instructions for 4 cheese pierogies
Here’s how to make pillowy pierogies with a perfect cheese filling every time.
👨🍳 Step 1: Make the Dough with Cold Butter
In a large mixing bowl, combine the 3 cups all-purpose flour, 1 tablespoon granulated sugar, and 1 teaspoon salt. Whisk to distribute evenly. Cut in the ½ cup cold cubed unsalted butter using a pastry cutter or your fingers until the mixture resembles coarse crumbs with pea-sized butter pieces.
Make a well in the center and add the 2 room-temperature eggs and ¼ cup sour cream. Mix gently with a fork until the dough begins to come together. Once combined, turn it out onto a lightly floured surface and knead for 5-7 minutes until smooth and elastic. The dough should be soft but not sticky—if it sticks, add a little more of the ½ cup flour reserved for dusting.
👨🍳 Step 2: Prepare the Melty Cheese Filling
In a medium bowl, mix together the 1 cup farmer’s cheese, ¾ cup ricotta cheese, ½ cup shredded mozzarella cheese, and ½ cup shredded sharp cheddar cheese. The farmer’s cheese should be crumbly but not dry—if it’s too firm, grate it first. Add the ¼ cup sour cream and mix until completely combined. The filling should be thick but spreadable.
Here’s the thing—don’t overmix the filling. You want distinct cheese pieces that melt beautifully during cooking. If the mixture looks too wet, add 1-2 tablespoons of the reserved ½ cup flour to absorb excess moisture. Cover and refrigerate while you roll out the dough.
🥘 Step 3: Roll and Cut the Dough
Divide the dough into 4 equal pieces and roll each one into a ¼-inch thick rectangle on a floured surface. Keep the remaining dough covered to prevent drying. Use a 3-inch round cutter (or glass) to cut circles from the rolled dough. I like to stack the cutouts as I go to keep them from drying out.
Place 1 teaspoon of the cheese filling in the center of each dough circle. Fold the dough over the filling to create a half-moon shape, then seal the edges by pinching firmly with your fingers. Press down gently to create a tight seal—this prevents filling leaks during cooking. Place the sealed pierogies on a floured tray and cover with a damp towel to prevent drying.
🔥 Step 4: Boil the Pierogies to Perfection
Bring a large pot of water to a gentle boil (not a rolling boil—you want to prevent the pierogies from sticking together). Add the pierogies in batches, giving them room to float. They’re ready when they float to the surface and the dough turns opaque white—this usually takes 3-4 minutes. Use a slotted spoon to transfer them to a paper towel-lined plate.
Don’t overcook them—they’ll continue cooking when you fry them. If you notice any pierogies opening during boiling, gently press them closed with your fingers. The boiling water should be seasoned with ½ teaspoon salt to enhance the flavor of the dough.
🔥 Step 5: Fry Until Golden and Crispy
Heat 2 cups vegetable oil in a deep skillet to 350°F (use a thermometer for accuracy). Fry the pierogies in batches for 2-3 minutes per side until deep golden brown and crispy. The oil should sizzle gently but not smoke excessively. Drain on paper towels and sprinkle immediately with the ¼ cup all-purpose flour for that classic dusted look.
Real talk: This is where the magic happens. The crispy exterior contrasts perfectly with the tender, melty cheese inside. If you see the oil smoking too much, reduce the heat slightly—you want golden, not burnt. Serve hot with a dollop of sour cream or a sprinkle of flaky salt for extra flavor.
Pro Tips For Making 4 Cheese Pierogies
- Chill the Dough: After mixing your dough, pop it in the fridge for at least 30 minutes—no, don’t rush it. Cold dough handles better when rolling and filling, and those pierogies won’t stick to your hands like glue later. (Yes, even if you’re impatient like me.)
- Butter the Cheese: Mix your 4 cheeses with 1-2 tablespoons of melted butter before filling. The butter keeps the filling moist and rich—otherwise, you’ll end up with dry, crumbly pierogies that taste like sad cheese crackers.
- Seal the Edges: Press the dough edges together firmly with your fingers or a fork, then crimp with a fork’s tines. If you skip this, your pierogies will leak filling like a broken dam when boiling. (I learned this the hard way with a pot of runny cheese soup.)
- Boil in Batches: Drop pierogies into boiling water one layer deep—no crowding. Stir gently once, then let them float freely. Overcrowding steams them instead of boiling, and they’ll turn mushy. (Your future self will thank you for not making a gluey mess.)
Wine and beer pairings for this 4 cheese pierogies
Light White Wine
Pierogies pair beautifully with crisp white wines that complement their rich, cheesy filling. A dry Riesling from Germany—like Dr. Loosen Blue Slate—cuts through the richness with its bright acidity and subtle honeyed notes.
The slight sweetness balances the sharp cheddar while the citrus finish cleanses your palate between bites. 🍷
Crisp Sauvignon Blanc
If you prefer something more zesty, a New Zealand Sauvignon Blanc (try Oyster Bay) brings vibrant grapefruit and herbal notes that contrast perfectly with the creamy farmer’s cheese.
The wine’s high acidity prevents the pierogies from tasting too heavy. I always reach for this when serving pierogies as an appetizer.
Hoppy Beer Pairings
For beer lovers, a Belgian witbier like Hoegaarden or Blue MoonGerman Helles (like Weihenstephaner Original) offers a malty sweetness that complements the pierogies without overpowering them.
Creamy Stout Option
For a dessert-like experience, try pairing with a dark Belgian stout like Rodenbach or Chimay Blue. The caramel and chocolate notes in the beer mirror the cheddar’s sharpness while the slight tartness cuts through the richness.
This pairing works especially well when serving pierogies with a side of warm apple sauce.
Non-Alcoholic Options
Don’t overlook sparkling water with a splash of lemon juice or ginger ale for a refreshing contrast. For something more substantial, try a cucumber-mint infused water—the cool, crisp flavors balance the richness of the fried pierogies beautifully. I often serve this at family gatherings when alcohol isn’t an option.
Nutrition facts
Frequently asked questions
Why does my pierogi dough turn out tough instead of pillowy?
Overworking the dough or skipping the resting time are the most common culprits. Knead just until smooth (5-7 minutes) and let the dough rest for 30 minutes before rolling. Cold butter is key—it creates flaky layers when baked or fried. If your dough feels sticky, add just enough flour to make it pliable, not dry. Also, avoid using warm butter or eggs straight from the fridge.
Can I make pierogies ahead of time?
The dough can be refrigerated for up to 2 days or frozen for 3 months. For filled pierogies, boil them, then freeze on a tray before bagging. Reheat frozen pierogies by boiling for 2 minutes or frying from frozen at 325°F for 4-5 minutes. The texture stays perfect—just don’t skip the final crisp in hot oil!
What’s the best way to seal pierogies so they don’t leak?
Press the edges firmly with your fingers while pinching in a circular motion. For extra security, use a fork to crimp the edges after sealing. Keep the filling on the smaller side (1 teaspoon) and avoid overfilling—this prevents pressure buildup. If any pierogies open during boiling, gently press them closed with a slotted spoon. Pro tip: Chill the filled pierogies for 15 minutes before boiling to help them hold shape.
Which cheese can I omit if I can’t find farmer’s cheese?
Swap farmer’s cheese with drained cottage cheese (press out excess moisture) or extra ricotta. For a sharper flavor, add ¼ cup grated Parmesan to the mix. Avoid pre-shredded cheeses—they contain anti-caking agents that make the filling gummy. If you’re avoiding dairy, try a mix of nutritional yeast and cashew cream for a vegan version (though texture will differ).
How do I keep pierogies from sticking together while boiling?
Use a large pot with plenty of water (at least 4 quarts) and add ½ teaspoon salt to the boiling water. Stir gently once to separate them, then let them float freely. Never overcrowd the pot—boil in batches if needed. A splash of white vinegar (1 tablespoon) can also help prevent sticking. After boiling, transfer pierogies immediately to a floured tray to prevent them from touching.

- 6 Egg Cake Recipe with Oil: Light as Air With Buttery Moisture - October 4, 2026
- 4 Bean Casserole Recipe: One-Pan Heartiness With Smoky Paprika Depth - October 4, 2026
- 3-Ingredient Keto Mug Cake Recipe: Microwave Magic in 2 Minutes - October 4, 2026