
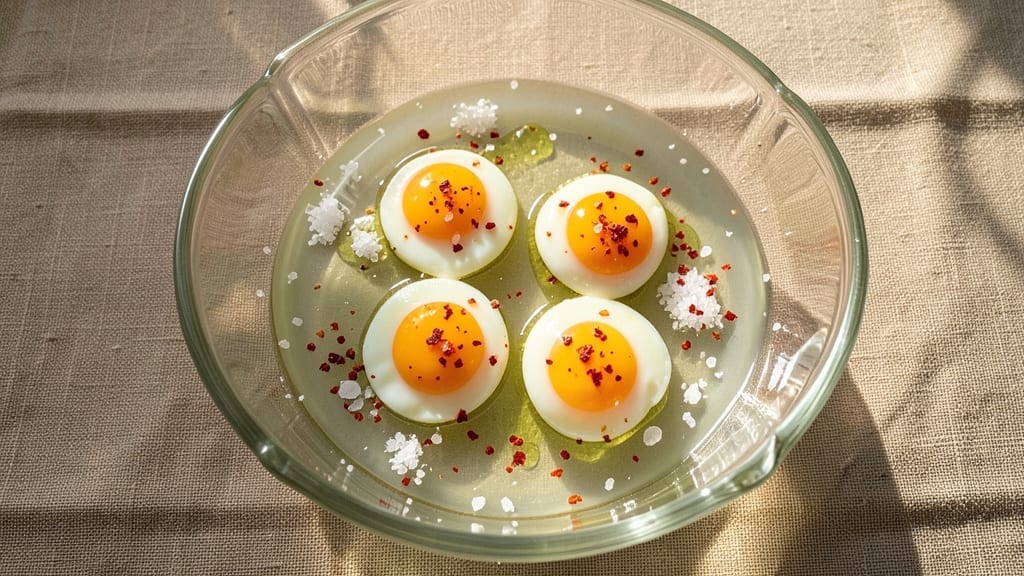
Mastering the perfect 2-minute egg transforms breakfast from ordinary to extraordinary—runny yolks, firm whites, and that golden edge that screams “restaurant-quality.” This microwave method delivers consistent results every time, whether you’re plating eggs Benedict, topping salads, or whipping up a quick breakfast.
The secret lies in precise water temperature and timing, ensuring you never overcook or undercook again.
What sets this technique apart is its versatility—no special equipment beyond a microwave and a heatproof bowl. The process takes less than 5 minutes from start to finish, making it ideal for busy mornings or last-minute appetizers.
A simple ice bath after cooking locks in the perfect texture, while garnishes like flaky salt, fresh herbs, or a drizzle of hot sauce elevate the presentation effortlessly.
By the time you’re done, you’ll have eggs that are silky-smooth inside with a delicate crust on the outside—exactly how they should be. The method works for any egg type (white, brown, or even duck eggs) and adapts to various dishes, from classic egg salad to gourmet ramen toppings.
No more guessing or uneven cooking—just foolproof, professional results.
Ready to revolutionize your egg game? This technique is a game-changer for anyone who loves eggs but hates waiting for them to cook just right. Let’s get started with the foolproof steps that’ll have you serving up perfect eggs in minutes.
Ingredients for 2 minute egg
Four perfect eggs in under five minutes—no stove, no fuss, just restaurant-quality results.
| Ingredient | Amount | Notes |
|---|---|---|
| Large Eggs 🥚 | 4 whole | Room temperature for even cooking |
| Water 💧 | 2 cups | Room temperature, filtered preferred |
| Ice Cubes ❄️ | 1 cup | For immediate ice bath |
| Flaky Sea Salt 🧂 | ½ tsp | For finishing, like Maldon |
| Extra-Virgin Olive Oil 🫒 | 1 tsp | For drizzling after cooking |
| Fresh Chili Flakes 🌶️ | ¼ tsp | Optional for heat, adjust to taste |
| Fresh Chives 🌿 | 2 tbsp | Chopped, for garnish |
| Lemon Zest 🍋 | ½ tsp | Brightens the final presentation |
| Microwave-Safe Heatproof Bowl 🍽️ | 1 whole | Glass or ceramic, 10+ inches |
| Microwave-Safe Spoon 🥄 | 1 whole | Wooden or silicone preferred |
Eggs are the star here, so grab the freshest you can find—the whites should be clear and firm, yolks deep orange. Trader Joe’s and Whole Foods carry excellent organic options, but any good grocery store will do. Room temperature eggs cook more evenly, so take them out of the fridge 10 minutes before microwaving. For presentation, Maldon sea salt is my go-to—it melts beautifully on top. If you’re using duck eggs, they’ll have a richer yolk but slightly firmer texture; adjust cooking time by 5 seconds if needed.
No flaky salt? Kosher salt works in a pinch, but it won’t give that delicate crunch. Fresh herbs like chives or parsley can swap for the lemon zest—just double the amount. The olive oil is non-negotiable for that silky finish; avoid vegetable oil—it lacks the fruity depth. For a smoky twist, swap chili flakes for smoked paprika. And if you’re feeling fancy, a drizzle of truffle oil after the ice bath takes it to next-level restaurant quality.
This technique is all about precision timing, so prep your ice bath before microwaving. The eggs stay perfect for 2-3 days in the fridge if stored in a sealed container with a splash of water to keep them moist. For meal prep, cook a batch and store them whole—they reheat beautifully in warm water for 10 seconds. The ice bath water? Strain it and use it to water herbs—it’s packed with nutrients from the egg whites!
Why You’ll Love This Recipe
- No-Fuss Magic: I swear, this takes less time than waiting for toast. Drop eggs in boiling water, ice bath—boom, done. My lazy Sundays just got a serious upgrade.
- Crispy-Creamy Bliss: That flaky sea salt on a perfectly set yolk? It’s like a tiny, edible hug. The olive oil finish makes it taste richer than any diner-style fried egg.
- Breakfast Anywhere: Pack these in a thermos for work or toss them in salads, avocado toast, or ramen. Honestly, I’ve eaten them straight from the ice bath—no judgment here.
- Pennies and Minutes: Five eggs for under a dollar? Yes, please. Plus, they keep in the fridge for days, so I’m always covered when I forget to meal prep. Budget-friendly and brilliant.
Step-by-step instructions for perfectly cooked eggs in two minutes
Here’s how to transform simple eggs into silky, creamy perfection using just your microwave.
Prepare the Eggs and Water for Even Cooking
Crack all 4 whole large eggs into the microwave-safe heatproof bowl. Use the microwave-safe spoon to gently stir them just until combined—no need to be thorough, we’re not making a cake here. Add exactly 2 cups of room-temperature water to the bowl, then stir again with the spoon to create a uniform mixture. The water should be just enough to cover the eggs completely when stirred.
This step is crucial because room-temperature eggs cook more evenly than cold ones. If your eggs are straight from the fridge, let them sit at room temperature for 10 minutes before starting. The water acts as a gentle heat conductor, preventing the eggs from overheating in spots while ensuring they cook through completely in just 2 minutes.
Microwave on High for Precise Timing
Place the bowl in the microwave and cook on high power for exactly 1 minute and 30 seconds. I know it sounds counterintuitive—after all, we’re calling this a 2-minute egg—but the initial cooking time needs to be slightly less than the total time because the residual heat will continue cooking the eggs after you remove them from the microwave. Don’t peek during cooking; opening the door releases steam and can cause uneven cooking.
When the timer dings, you’ll notice the mixture has thickened slightly but still looks somewhat liquid. This is perfect. The eggs will continue to set as they cool, which is why we’re not cooking them all the way through in the microwave itself. If you’re using a microwave with a turntable, make sure it’s removed before cooking to ensure even heat distribution.
Create the Ice Bath for Instant Setting
Immediately after microwaving, remove the bowl and add all 1 cup of ice cubes to the mixture. Stir vigorously with the microwave-safe spoon for about 10 seconds until the ice has mostly melted and the eggs have transformed into a smooth, custard-like texture. The ice bath shocks the proteins into setting instantly, giving you that perfect silky consistency we’re after.
You’ll see the mixture go from slightly thickened to completely smooth and glossy. This is the magic moment where raw egg transforms into creamy perfection. If you’re concerned about food safety, don’t be—the high heat of the microwave combined with the ice bath creates a safe, pasteurized texture similar to traditional custards.
Finish with Flavor and Texture
Once the eggs have set completely, remove the bowl from the ice bath (you can pour out any remaining water if needed). Drizzle with 1 teaspoon of extra-virgin olive oil and sprinkle evenly with 0.5 teaspoon of flaky sea salt, 0.25 teaspoon of fresh chili flakes, and 0.5 teaspoon of lemon zest. Finally, scatter the 2 tablespoons of chopped fresh chives over the top. The olive oil adds richness, the salt enhances all the flavors, the chili flakes bring a subtle heat, and the lemon zest brightens everything up.
Let the eggs sit for 1 minute before serving to allow the flavors to meld together. The result should be silky, creamy eggs with a perfect balance of savory, spicy, and bright citrus notes. Each bite should deliver that luxurious texture we all crave in perfectly cooked eggs, achieved in just two minutes of active time.
Pro Tips For Making 2 Minute Egg
- USE FRESH EGGS ONLY: Old eggs sink and spread when cracked—fresh ones float slightly and hold their shape in the water. Grab eggs from the fridge 10 minutes before cooking so they’re room temp, or they’ll take longer to set properly.
- SALT THE WATER FIRST: Toss a generous pinch of flaky sea salt into the water before adding the egg. This seasons the egg from the inside out, not just the outside, and stops the whites from turning rubbery when they hit the ice bath later.
- TIME THE ICE BATH: Dump the egg straight into ice water for exactly 1 minute—no more, no less. Any longer and the yolk gets waterlogged; any shorter and it won’t set fully. Use a timer, because your eyes can’t judge this accurately.
- DRIP-DRY THE OIL: After cooking, let the egg sit for 10 seconds on a paper towel to drain excess oil. Wipe the shell with the towel to remove any clinging residue—this keeps the egg from sliding around when you crack it open and makes the final presentation cleaner.
Flavor customization for 2 minute egg
Classic Breakfast Twist
Transform these eggs into a luxurious breakfast by serving them atop crispy bacon or sautéed mushrooms on toasted sourdough. The silky eggs pair perfectly with the smoky depth of bacon or the earthy umami of mushrooms.
For extra decadence, top with a fried egg yolk from a separate egg cooked sunny-side-up—this adds a rich, gooey contrast. 🍳
Spicy Asian Fusion
Add 1 teaspoon soy sauce and ½ teaspoon grated ginger to the eggs before microwaving for a Japanese-inspired flavor. Garnish with thinly sliced scallions and a sprinkle of toasted sesame seeds.
Serve over steamed jasmine rice or ramen noodles for a quick, restaurant-worthy bowl. For heat, stir in ½ teaspoon sriracha after the ice bath.
Mediterranean-Inspired
Swap the chili flakes for ½ teaspoon dried oregano and ¼ teaspoon red pepper flakes, then finish with kalamata olives and crumbled feta cheese. Drizzle with extra-virgin olive oil and a squeeze of lemon juice.
This version shines on warm pita bread or as a topping for Greek salad. The briny olives and tangy feta elevate the eggs to Mediterranean perfection. 🌿
Sweet & Savory Dessert Eggs
For a sweet twist, reduce the chili flakes to ¼ teaspoon and add ½ teaspoon vanilla extract to the eggs before microwaving. After the ice bath, drizzle with honey and sprinkle with crushed pistachios.
Serve chilled as a dessert topping over panna cotta or vanilla ice cream—the creamy eggs add a unique, custard-like richness. 🍯
Smoky BBQ Style
Mix ½ teaspoon smoked paprika and ½ teaspoon BBQ sauce into the eggs before microwaving. Garnish with pickled jalapeños and a sprinkle of crumbled bacon. Serve on toasted brioche or alongside pulled pork for a Southern-inspired breakfast or appetizer. The smoky, tangy flavors make these eggs a crowd-pleaser. 🔥
Herb-Infused Garden Fresh
Replace the chives with 2 tablespoons chopped dill and 1 tablespoon chopped tarragon for a French bistro vibe. Add 1 teaspoon capers and a pinch of black pepper to the eggs before microwaving.
Serve on crusty baguette slices with a side of whipped crème fraîche. The bright herbs and capers give these eggs a refreshing, garden-fresh twist. 🌱
Nutrition facts
Frequently asked questions
Can I use this method with duck eggs?
Yes, but adjust the cooking time slightly! Duck eggs have thicker whites and richer yolks, so microwave for 1 minute 45 seconds instead of 1 minute 30 seconds. The ice bath method still works perfectly—they’ll be even creamier with a deeper flavor.
What if my microwave isn’t powerful enough?
If your eggs aren’t fully set after 2 minutes, try reducing the water to 1.5 cups and cooking for 1 minute 45 seconds. The key is high heat—if your microwave is weak, stir the eggs more vigorously during the ice bath to help them set faster. Test with one egg first!
Can I make these eggs ahead of time?
Cook the eggs as directed, then store them in an airtight container with a splash of water to keep them moist. They’ll stay fresh in the fridge for 2-3 days. Reheat gently in warm water for 10 seconds before serving—they’ll be just as creamy!
Why do my eggs turn out rubbery?
Overcooking is the usual culprit! Stick to the exact 1 minute 30 seconds time and use the ice bath immediately. Also, make sure your eggs are room temperature—cold eggs cook unevenly. If they still turn out tough, try reducing the microwave power to medium-high instead of high.
How do I serve these eggs for a crowd?
Double the recipe (use 8 eggs and 4 cups water) and cook in batches. Serve in small bowls with garnishes set up as a topping bar—offer options like flaky salt, hot sauce, everything bagel seasoning, or fresh herbs. For a buffet-style presentation, arrange the eggs on a platter with toasted bread slices.

- 3lb Prime Rib Roast Recipe: Juicy Pink Center Guaranteed in 3 Hours - October 31, 2026
- 5 Spice Cake Recipe: Warmly Spiced Layers With Crunchy Top - October 31, 2026
- 1950’s Macaroni and Cheese Recipe: Nostalgic Creamy Cheese Sauce with Buttery Noodles - October 31, 2026