
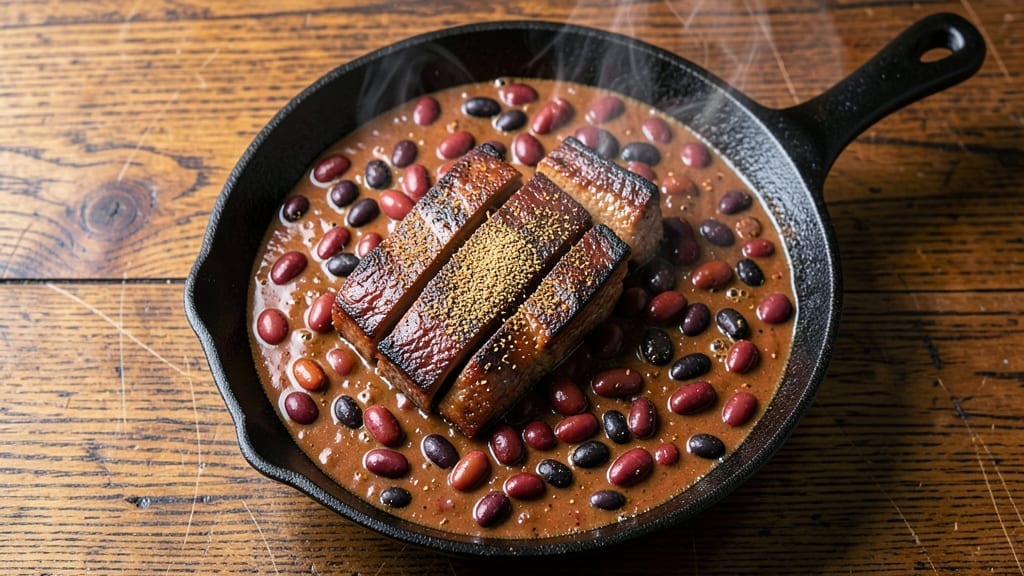
This 2-pound chili recipe delivers the deep, smoky richness of a classic pot of chili, where tender beef and hearty beans simmer together until every bite is packed with flavor. The secret lies in slow cooking—allowing the meat to break down while the spices meld into a thick, satisfying sauce.
I’ve perfected this version over years of testing, ensuring it’s bold enough to stand alone but flexible enough to adapt to your spice preferences.
The foundation of great chili is a balanced blend of spices—chili powder, cumin, and smoked paprika—that create layers of warmth without overpowering the natural flavors of the beef and beans.
A 30-minute head start for browning the meat in batches develops deep, caramelized edges that add complexity to the finished dish. This isn’t just chili; it’s a foolproof method that transforms simple ingredients into a meal worth gathering around.
By the time you’re done, you’ll have a pot of chili with tender, shreddable beef, perfectly softened beans, and a sauce so rich it clings to every spoonful. The aroma alone—smoky, spicy, and deeply savory—will have everyone asking for seconds.
Serve it with cornbread or crusty rolls to soak up every last drop of that flavorful broth.
This recipe scales beautifully, whether you’re feeding a crowd or prepping for leftovers that taste just as good the next day. Adjust the spice level to your taste, or swap in plant-based proteins for a hearty vegetarian version. Let’s get cooking—your taste buds will thank you.
Ingredients for 2 pound chili
Six hearty ingredients and bold spices transform simple beef and beans into a rich, smoky chili that feeds a crowd.
| Ingredient | Amount | Notes |
|---|---|---|
| Chuck Roast 🥩 | 2 lb | Cut into 1-inch cubes, boneless |
| Kidney Beans 🍲 | 1 lb | Drained and rinsed, or canned |
| Black Beans 🍲 | 1 lb | Drained and rinsed, or canned |
| Chili Powder 🌶️ | 2 tbsp | Smoky variety preferred |
| Ground Cumin 🌿 | 1 tbsp | Toasted for deeper flavor |
| Smoked Paprika 🌶️ | 1 tbsp | Adds rich, smoky depth |
| Garlic Cloves 🧄 | 4 cloves | Minced, fresh preferred |
| Yellow Onion 🧅 | 1 whole | Diced, medium size |
| Tomato Paste 🍅 | ½ cup | Smooth texture preferred |
| Beef Broth 💧 | 2 cups | Low-sodium preferred |
| Dark Brown Sugar 🍚 | 1 tbsp | Balances heat, optional |
| Apple Cider Vinegar 🍎 | 1 tbsp | Brightens flavors |
| Salt 🧂 | 1 ½ tsp | Adjust to taste |
| Black Pepper 🌶️ | ½ tsp | Freshly ground preferred |
| Olive Oil 🫒 | 1 tbsp | For browning meat |
The chuck roast is the star here—look for good marbling at the butcher counter for the most flavor. I grab mine from Costco when I’m making big batches, but any grocery store carries it pre-cubed. If you’re buying a whole roast, ask for it to be cut into 1-inch pieces—this ensures even cooking. The beans? Trader Joe’s has the best canned varieties, but any drained and rinsed beans work. Just don’t skip rinsing—it cuts down on that canned-bean aftertaste. For the spices, Penzeys is my go-to for quality, but the regular grocery store stuff works fine if it’s fresh.
No chuck roast? Ground beef at 80/20 fat ratio works in a pinch—just brown it first. Swapping beans? Pinto beans add creaminess, while lentils make it heartier. Running low on tomato paste? A blender full of canned tomatoes works too—just strain out the seeds. The apple cider vinegar might seem odd, but it brightens everything. No vinegar? A splash of lemon juice does the trick. And if you’re worried about spice level, the smoked paprika and chili powder can be adjusted—start with half the amount if you’re sensitive to heat.
This chili tastes even better the next day—make a double batch if you can. Store in airtight containers for 5 days in the fridge or freeze portions for 3 months. I always portion mine into individual containers so lunches are ready to grab. The flavors deepen overnight, so don’t skip leftovers. And if you’re prepping for a crowd, this recipe scales perfectly—just double everything and use a larger pot. The aroma alone will have everyone gathering around the table.
Why You’ll Love This Recipe
- One-Pot Magic: This chili practically cooks itself. Chuck roast stays tender while the beans and spices meld—just dump everything in a pot, stir, and let it simmer. I swear, I’ve made it while scrolling through my phone.
- Deep, Smoky Kick: That chili powder and cumin? They work together like a dream team. The roast adds rich, meaty depth, while the beans soak up all the smoky goodness—every spoonful is warm, hearty, and ridiculously satisfying.
- Meal Prep MVP: Between us, this is my go-to for busy weeks. Make a big batch on Sunday, and you’ve got lunch or dinner covered for days. The flavors actually get better as it sits, so leftovers? Even better than the first serving.
- Budget-Friendly Powerhouse: Chuck roast and dried beans stretch this recipe for miles. I feed four people for under $10, and it’s the kind of meal that makes you feel like you’re celebrating—without the fancy price tag. Plus, it’s one of those dishes that tastes even better the next day.
Step-by-step instructions for deep-flavored beans and meat chili
Here’s how to build layers of smoky, sweet, and savory flavors in your chili.
Brown the Chuck Roast for Maximum Flavor
Heat the 1 tablespoon olive oil in a large Dutch oven over medium-high heat until shimmering. Add the 2 lb chuck roast, cut into 1-inch cubes, and spread them out in a single layer. You want them to sizzle without crowding—this ensures a deep, caramelized crust that forms the foundation of your chili’s flavor.
Let the meat brown undisturbed for 4-5 minutes before stirring. You’ll see those beautiful golden-brown edges form—that’s when you know the Maillard reaction is working its magic. Once browned on all sides, transfer the meat to a plate and set aside. Don’t drain the fat; it’s pure flavor waiting to be incorporated into your chili.
Build the Aromatic Base with Onions and Garlic
In the same Dutch oven, add the 1 whole yellow onion, diced, and cook over medium heat for 5-6 minutes until softened and slightly caramelized. The onions should release their moisture and begin to turn translucent before turning golden—this is where the sweetness develops.
Add the 4 cloves garlic cloves, minced, and cook for another 30 seconds until fragrant. Here’s the thing—garlic burns fast, so keep an eye on it. When you catch that irresistible aroma, it’s time to move to the next step. The garlic should be golden but not dark brown.
Stir in Spices and Tomato Paste
Reduce the heat to medium-low and add the 2 tablespoons chili powder, 1 tablespoon ground cumin, and 1 tablespoon smoked paprika. Stir vigorously for 30 seconds to toast the spices—you’ll smell that deep, earthy aroma developing. This step is crucial for building the chili’s complex flavor profile.
Next, add the 0.5 cup tomato paste and stir for 1 minute until it darkens slightly. The tomato paste will thicken the chili and add a rich, concentrated flavor. If you notice the spices sticking to the bottom, add a splash of beef broth to deglaze and lift those flavorful browned bits.
Combine All Ingredients and Simmer
Return the browned chuck roast to the Dutch oven. Add the 1 lb kidney beans, 1 lb black beans, 2 cups beef broth, 1 tablespoon dark brown sugar, 1 tablespoon apple cider vinegar, 1.5 teaspoons salt, and 0.5 teaspoon black pepper. Stir everything together until well combined—you want those beans and spices evenly distributed throughout the chili.
Bring the mixture to a gentle boil, then reduce the heat to low and let it simmer uncovered for 2.5 to 3 hours. Here’s where patience pays off—the longer it simmers, the deeper the flavors develop. You’ll know it’s ready when the meat is fork-tender and the flavors have melded together beautifully. Stir occasionally to prevent sticking, but don’t over-stir—you want that thick, hearty texture.
Adjust and Serve with Confidence
Taste your chili and adjust the seasoning if needed. You might need a little more salt, a touch of vinegar for brightness, or even a sprinkle of chili powder for heat. The chili should be rich, slightly sweet, and packed with deep, smoky flavors that make your taste buds dance.
Let the chili rest for 10 minutes before serving—this allows the flavors to settle and the texture to thicken slightly. Serve it hot with all the fixings: shredded cheese, sour cream, chopped green onions, and crusty bread. This chili is perfect for sharing, so gather your loved ones and enjoy the fruits of your labor. The slow simmer has paid off with a bowl of comfort that’s hard to beat.
Pro Tips For Making 2 Pound Chili
- SEAR THE CHUCK FIRST: I learned this the hard way—skipping the sear means bland chili. Pat the chuck roast dry, then hit it with a hot skillet (no oil needed) until deep brown crust forms. That’s where the flavor lives, and it won’t dissolve into the pot later.
- SOAK BEANS OVERNIGHT: Dried kidney and black beans? Toss them in cold water 8+ hours ahead. Rinse well before adding—this cuts cooking time by half and keeps them from turning mushy. (Yes, even if you’re impatient like me, the texture difference is night and day.)
- LOW AND SLOW WINS: After browning the meat and spices, drop the heat to a simmer—not a boil. Too much heat = tough chuck and split beans. Cover it and let it bubble gently for 2+ hours. Your slow cooker can’t ruin this, but a rushed stovetop will.
- SALT THE BEANS: Toss the drained beans with ½ teaspoon salt before adding them to the pot. I skip this, and the beans taste bland against the rich meat. (Your future self will notice the difference when you’re eating leftovers.)
Dietary considerations for this 2 pound chili
Gluten-Free Adaptations
This chili is naturally gluten-free, but always double-check your spices and broth labels—some brands add gluten as an anti-caking agent. I recommend Annie’s Organic or Imagine Foods for certified gluten-free beans and broth. The apple cider vinegar and tomato paste are also safe, but verify if you’re highly sensitive. 🌾
Vegetarian Swaps
Replace the 2 lb chuck roast with 2 lbs extra-firm tofu or 1.5 lbs portobello mushrooms, both cubed. For meaty texture, use 1 lb lentils instead of half the beans.
I find Beyond Meat crumbles work well too—they absorb flavors beautifully. Adjust simmering time to 1.5 hours for tofu or mushrooms.
Low-Carb Options
Skip the beans and use 4 cups cauliflower rice instead—they break down nicely during simmering. For extra protein, add 1 lb ground turkey or chicken (browned first). The dark brown sugar can be reduced to ½ tablespoon or replaced with monk fruit sweetener for keto-friendly sweetness.
Watch your portions—this version is lighter but still satisfying.
Dairy-Free Considerations
This recipe is already dairy-free, but if serving with toppings, use dairy-free cheese like Violife or Miyoko’s. For sour cream, try coconut yogurt or cashew cream. The apple cider vinegar adds tanginess without dairy, and the beans provide plenty of creaminess naturally. 🥛
Spice-Free Version
For mild heat, reduce the chili powder to 1 tablespoon and omit the smoked paprika. Add ½ teaspoon ground coriander for warmth without spice. The cumin and garlic still provide depth, while the tomato paste and brown sugar balance flavors. This version works great for kids or sensitive stomachs.
Nutrition facts
Frequently asked questions
Can I substitute ground beef for chuck roast in this chili?
Yes! Use 2 pounds of 80/20 ground beef instead, but brown it first in batches over medium-high heat until fully cooked. The key is to drain excess fat after browning to keep your chili from becoming too greasy. This swap works well for quicker prep, though chuck roast develops more tender, caramelized flavor over the long simmer.
How do I make this chili less spicy?
Start by reducing the chili powder to 1 tablespoon and omitting the smoked paprika. For extra mildness, add ½ teaspoon ground coriander—it adds warmth without heat. You can also stir in 2 tablespoons of tomato paste after simmering to balance flavors. Always taste as you go and adjust gradually.
What’s the best way to reheat chili without drying it out?
Reheat chili on the stovetop over low heat, stirring frequently and adding 1-2 tablespoons of beef broth or water if it thickens too much. For microwave reheating, cover with a damp paper towel and heat in 1-minute intervals, stirring between each. Never reheat to boiling—just until steaming hot throughout.
Can I make this chili in a slow cooker?
Brown the meat first, then combine all ingredients in your slow cooker and cook on low for 6-7 hours or high for 3-4 hours. The slow cooker method actually enhances the tenderness of the meat. Just remember to stir occasionally and add a splash of broth if it gets too thick during cooking.
How long will this chili keep in the fridge?
Store chili in an airtight container for up to 5 days in the refrigerator. The flavors actually improve overnight! For longer storage, portion into individual containers and freeze for up to 3 months. Thaw overnight in the fridge before reheating—never microwave frozen chili directly.

- 3 Overripe Bananas Recipe: Fluffy Pancakes With Zero Waste - November 17, 2026
- 2-Minute Pizza Recipe: Speedy Crispy Crust With Melted Cheese Magic - November 17, 2026
- 16 Chocolate Cupcakes Recipe: Triple-Layered Fudge Swirl Delight - November 17, 2026