
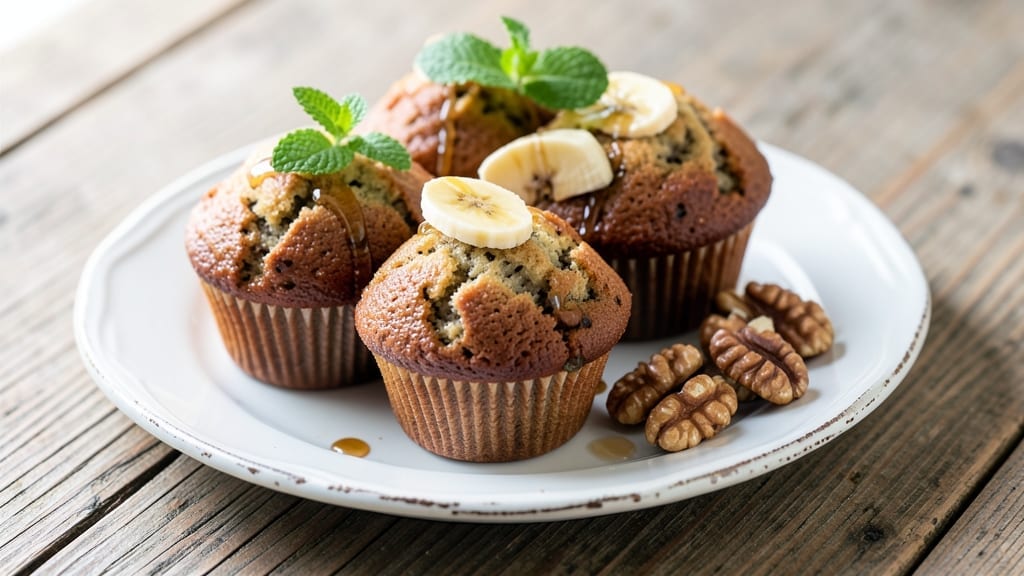
This 2 ripe banana muffin recipe transforms overripe fruit into fluffy, spiced breakfast bites that disappear faster than you can pull them from the oven. 🔥 The secret lies in blending bananas until smooth—no lumps, no waste—while a simple vegan batter creates muffins with a tender crumb and subtle caramel notes.
I perfected this recipe after burning through three batches of dense, dry muffins, and now it’s my go-to for quick breakfasts or snacking on the go.
What makes these muffins special is their 20-minute prep-to-bake time, using pantry staples like flour, baking powder, and a splash of vanilla to enhance the banana’s natural sweetness.
No eggs or dairy means they’re naturally moist and perfect for meal prep—store them at room temperature for up to 3 days or freeze for longer. The spices (cinnamon and nutmeg) add warmth without overpowering, while a pinch of salt balances the sweetness.
By the time they emerge from the oven, you’ll have golden, dome-shaped muffins with a crackly top and a soft interior that’s almost cake-like.
The aroma alone will wake up your household, and the texture—tender but sturdy enough to hold toppings—makes them ideal for breakfast or an afternoon pick-me-up. Top with a drizzle of maple syrup or a sprinkle of chopped nuts for extra indulgence.
These muffins are versatile enough for any occasion: pack them for school lunches, serve with coffee, or enjoy as a guilt-free dessert. The recipe scales easily, so double the batch for a crowd. Ready to put those ripe bananas to good use? Let’s get baking!
Ingredients for 2 ripe banana muffin
These 13 simple ingredients turn overripe bananas into fluffy, spiced muffins faster than you can say ‘breakfast’—no waste, no fuss.
| Ingredient | Amount | Notes |
|---|---|---|
| Ripe Bananas 🍌 | 2 whole | 2-3 days past perfect ripeness |
| All-Purpose Flour 🌾 | 1 ½ cups | Sifted for fluffy texture |
| Brown Sugar 🍚 | ½ cup | Packed lightly for sweetness |
| Pure Maple Syrup 🍯 | ¼ cup | For extra caramel flavor |
| Unsweetened Applesauce 🍎 | ½ cup | Replaces eggs for moisture |
| Pure Vanilla Extract 🌿 | 1 tbsp | High-quality for aroma |
| Ground Cinnamon 🌶️ | 1 ½ tsp | Freshly ground preferred |
| Ground Nutmeg 🌶️ | ½ tsp | Freshly grated for warmth |
| Salt 🧂 | ½ tsp | Fine sea salt preferred |
| Baking Powder 🍞 | 1 tsp | Check freshness with vinegar test |
| Plant-Based Milk 🥛 | ½ cup | Almond or oat works best |
| Extra-Virgin Olive Oil 🫒 | ¼ cup | For tender crumb texture |
| Chopped Walnuts 🥜 | ¼ cup | Optional topping (toasted) |
The bananas are your secret weapon—pick ones so ripe they’re almost black with squishy spots. Trader Joe’s or local Latin markets often have the best overripe ones at a discount. For the flour, King Arthur brand is my go-to—it’s finely milled and gives that perfect tender crumb. The brown sugar and maple syrup combo gives you that caramel depth without being cloying. Pro tip: measure your flour by scooping and leveling—don’t pack it down or you’ll end up with dense muffins. And if you’re like me, you’ll always grab extra walnuts for topping (toasted in a dry pan for 3 minutes).
No applesauce? Mashed sweet potato at the same amount works in a pinch—just add a splash more plant-based milk to balance the texture. Swapping the walnuts? Pecans or sunflower seeds add different crunch. The vanilla extract is non-negotiable here—Trader Joe’s or Nielsen-Massey are solid budget picks, but if you’ve got Fancy brand, go for it. The spices are where the magic happens: pre-ground cinnamon and nutmeg from the bulk section at Whole Foods stay fresher longer. And if you’re out of baking powder, baking soda plus an extra pinch of salt at half the amount is a decent swap, though the texture won’t be quite the same.
These muffins stay fresh for 3 days at room temperature, wrapped in a clean kitchen towel to keep them soft. Freeze them for up to 3 months—just thaw overnight on the counter. I like to bake a double batch and freeze half, so I always have breakfast ready. The walnut topping? Toast it fresh when you pull them from the oven—3 minutes in a dry pan makes all the difference. And if you’re worried about them drying out? Store them in an airtight container with a slice of apple or lemon to keep them moist longer.
Why You’ll Love This Recipe
- No Mash Needed: I swear by this trick—just toss those spotted bananas into the food processor with the dry ingredients, and let it do the work. No sticky hands, no overmixing, just smooth batter in seconds.
- Caramelized Banana Magic: That maple syrup and brown sugar combo? It turns the muffins into little pockets of warm, spiced banana flavor—like a mini bread pudding in every bite. (Yes, even my picky husband asks for seconds.)
- Breakfast or Snack Hero: Pack them for school lunches, toss one in your gym bag, or serve them warm with coffee. The applesauce keeps them moist for days, so they’re always ready when you are—no sad, dry muffins here.
- Zero-Waste Win: Use up those overripe bananas before they turn to mush, and you’ll save money and guilt. A single batch costs pennies, and the leftovers? They’ll disappear faster than you can say “breakfast forgotten.”
Step-by-step instructions for fluffy spiced banana muffins
Here’s how to make these tender, fragrant muffins in record time—no fancy equipment needed.
👨🍳 Step 1: Prep Ingredients and Preheat
Start by preheating your oven to 375°F. While it warms, peel the 2 whole ripe bananas and mash them in a large mixing bowl until completely smooth—no lumps! I like to use a fork for this, but a potato masher works too. The riper the bananas, the sweeter and more flavorful your muffins will be.
In a separate small bowl, whisk together the 1.5 cups all-purpose flour, 1.5 tsp ground cinnamon, 0.5 tsp ground nutmeg, 0.5 tsp salt, and 1 tsp baking powder. Sifting these dry ingredients removes any lumps and ensures your muffins will be light and fluffy. Keep this mixture nearby—you’ll add it in just a minute.
🍳 Step 2: Mix Wet Ingredients for Perfect Texture
To the mashed bananas, add the 0.5 cup brown sugar, 0.25 cup pure maple syrup, 0.5 cup unsweetened applesauce, 0.5 cup plant-based milk, 0.25 cup extra-virgin olive oil, and 1 tbsp pure vanilla extract. Stir everything together until completely combined—you want a smooth, thick batter that coats the back of your spoon.
This is where the magic happens—the applesauce replaces eggs for moisture, while the olive oil keeps the crumb tender. The maple syrup adds that caramel depth, and the plant-based milk ensures everything blends smoothly. If your batter looks too thick, add 1-2 tablespoons more plant-based milk to reach a pudding-like consistency.
🥘 Step 3: Combine and Fold Gently
Gradually add the dry ingredients to the wet mixture, folding just until combined. I use a spatula for this—overmixing develops gluten and makes muffins tough. Stop folding as soon as you see no more flour streaks remaining. The batter should be thick but pourable, like pancake batter.
Here’s the thing—don’t worry if the batter looks too much. These muffins rely on the chemical reaction between the baking powder and liquid to rise properly, so a slightly thick batter is actually ideal. If you’re using the 0.25 cup chopped walnuts, fold them in now. They’ll add a lovely crunch to each bite, but they’re optional if you prefer a smoother texture.
🔥 Step 4: Bake to Golden Perfection
Line a muffin tin with 12 paper liners (this recipe makes 12 muffins) and divide the batter evenly among them, filling each cup about ⅔ full. I use an ice cream scoop for this—it ensures each muffin gets the same amount and bakes evenly. Tap the tin gently on the counter to release any air bubbles.
Bake for 18-20 minutes until the tops are golden brown and a toothpick inserted in the center comes out clean. The muffins should spring back slightly when touched. Real talk: your oven might run hot, so start checking at the 18-minute mark. If they brown too quickly, tent them loosely with foil to prevent over-browning while they finish cooking.
⏰ Step 5: Cool and Enjoy Warm
Let the muffins cool in the pan for 5 minutes—this helps them set and makes them easier to remove. Then transfer them to a wire rack to cool completely. The first few minutes out of the oven are when they’re at their peak tenderness, so I recommend enjoying them warm with a cup of coffee or tea.
For extra flavor, brush the tops with a little more maple syrup while they’re still warm. These muffins keep well at room temperature for 2 days or in the fridge for 5 days, though they’re best enjoyed fresh. Store any leftovers in an airtight container to maintain their moisture and freshness.
Pro Tips For Making 2 Ripe Banana Muffin
- Mash Bananas First: Skip the chop-and-fold step—spend 30 seconds mashing those bananas with a fork until smooth. Lumpy banana bits sink to the bottom of muffins like lead weights, and you’ll end up with dense, uneven texture. I learned this the hard way after pulling apart a muffin that looked perfect but tasted like a banana smoothie had been stuffed into a brick.
- Use Room-Temp Applesauce: Cold applesauce makes muffins gummy. Scoop that jar out 10 minutes early and let it sit—even if you’re tempted to just grab it straight from the fridge. The batter will mix better, and your muffins won’t turn out like overproofed bread. (Yes, even if you’re impatient like me.)
- Check Doneness at 18 Minutes: These muffins peak at 18 minutes, not 20. Pull them when the top springs back when touched—overbaking turns them dry faster than a summer sidewalk. If you’re using a dark muffin tin, start checking at 16. Trust the toothpick test, but don’t wait for it to come out clean.
- Swap Sugar for Syrup: Replace half the brown sugar with pure maple syrup—it keeps muffins moist longer and cuts the cloying sweetness. Use ¼ cup syrup + ¼ cup sugar for the recipe. The syrup also adds a subtle caramel depth that makes these taste less like dessert and more like breakfast. (Your future self will notice the difference.)
Pro cooking tips for perfect results
Banana Blending Secrets
Blend those bananas until completely smooth—no lumps allowed! 🍌 I use an immersion blender for this step because it ensures a silky texture, but a fork works too. The smoother your base, the more tender your muffins will be.
If you spot any tiny banana bits, give it another quick pulse. Pro tip: Add 1 tablespoon of plant-based milk while blending if the mixture gets too thick—this helps create that perfect cake-like crumb.
Flour Folding Technique
When combining the dry ingredients, use a gentle folding motion with a spatula instead of stirring vigorously. Overmixing develops gluten, which makes muffins tough. Stop folding as soon as you see no more flour streaks—this keeps them light and airy.
I like to use a rubber spatula because it’s flexible enough to scrape the bowl clean without overworking the batter. 🥄
Batter Consistency Check
Your batter should be thick but pourable—like pancake batter. If it looks too thick, add 1-2 tablespoons more plant-based milk to reach that ideal consistency. Too thin? Add 1 tablespoon of flour.
The perfect batter should coat the back of your spoon but still hold its shape when spooned. This balance ensures muffins that are tender inside with a nice crackly top.
Oven Temperature Tips
Your oven might run hot, so start checking for doneness at 18 minutes instead of waiting the full 20 minutes. If the tops are browning too quickly, tent them loosely with foil to prevent over-browning while they finish cooking.
I use a toothpick test—insert it in the center, and if it comes out clean, they’re done. If not, give them another minute or two.
Walnut Toasting Hack
If using walnuts, toast them in a dry pan over medium heat for 3 minutes until fragrant and lightly golden. This adds incredible flavor and crunch. Let them cool slightly before folding into the batter.
I like to keep a small bowl of toasted walnuts on hand for quick topping—I always have a few bags of Trader Joe’s walnuts in my pantry for this exact purpose. 🥜
Post-Bake Moisture Trick
For muffins that stay fresh longer, brush the tops with a little maple syrup while they’re still warm. This adds extra moisture and a subtle caramel flavor. Store them in an airtight container with a slice of apple or lemon to keep them soft.
I also like to wrap them in a clean kitchen towel before storing—they stay moist for days this way. Perfect for meal prep! 🍂
Nutrition facts
Frequently asked questions
Can I use unripe bananas for this recipe?
No, this recipe specifically calls for 2 ripe bananas that are almost black with squishy spots. Unripe bananas won’t be sweet enough and will yield dense, bland muffins. The natural sugars in ripe bananas create that perfect caramel flavor and tender texture. If you only have firm bananas, let them ripen at room temperature for 2-3 days first.
How do I substitute applesauce if I don’t have any?
You can use ½ cup mashed sweet potato or ½ cup unsweetened applesauce substitute (like canned pumpkin puree). For best results, add 1-2 tablespoons extra plant-based milk to maintain the right batter consistency. The key is keeping the moisture level similar to the original recipe to prevent dry muffins.
Why are my muffins dense instead of fluffy?
Dense muffins usually mean overmixing the batter or using old baking powder. Mix just until combined (no more than 15 strokes) and make sure your baking powder is fresh (test with vinegar). Also check your oven temperature—if it’s too low, the muffins won’t rise properly. Try baking at 375°F and use a toothpick test to verify doneness.
Can I make these muffins gluten-free?
Yes! Replace the all-purpose flour with a 1:1 gluten-free baking flour blend (like Bob’s Red Mill). You may need to add ½ teaspoon xanthan gum if your blend doesn’t contain it. Also reduce the plant-based milk by 1 tablespoon since gluten-free flours absorb more liquid. The texture will be slightly different but still delicious.
How should I store these muffins for maximum freshness?
Store at room temperature in an airtight container for 2 days or in the fridge for 5 days. For longer storage, freeze them for up to 3 months. To reheat, wrap in a damp paper towel and microwave for 10-15 seconds. The moisture trick: place a slice of apple or lemon in the container to keep them soft longer.

- 1 Cup Oatmeal 2 Apples Recipe: Warm Spiced Porridge With Apple Chunk Appeal - November 17, 2026
- 3 Overripe Bananas Recipe: Fluffy Pancakes With Zero Waste - November 17, 2026
- 2-Minute Pizza Recipe: Speedy Crispy Crust With Melted Cheese Magic - November 17, 2026