
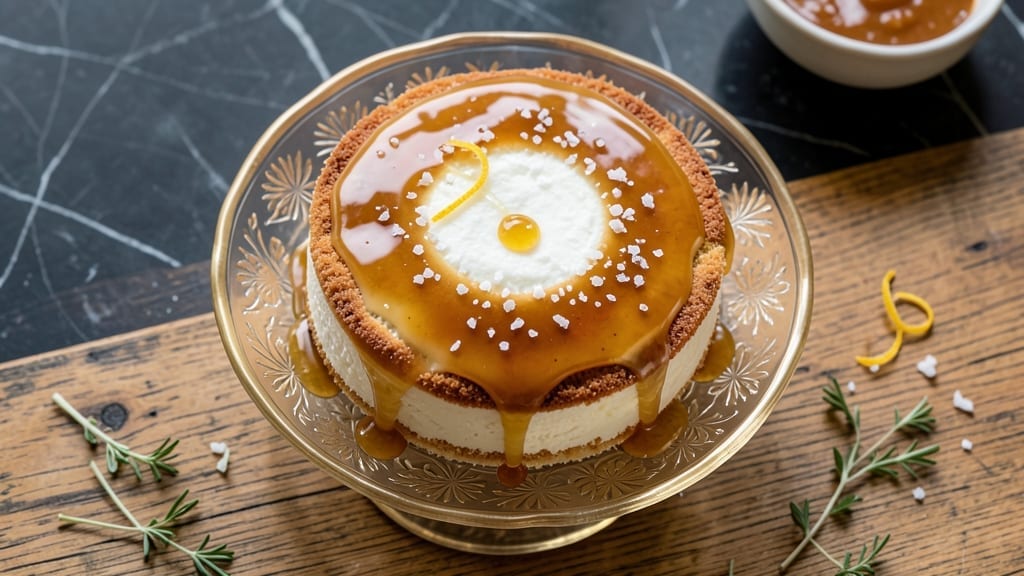
This 2-serving cake recipe solves the problem of baking a full cake only to end up with leftovers—or worse, a sad half-eaten dessert. The solution? A perfectly proportioned cake that delivers restaurant-quality texture and flavor without the waste.
I designed this recipe after years of baking for two, where every bite counts and every ingredient matters.
The secret to its success lies in the batter’s balance: a tender crumb achieved through precise ingredient ratios and a baking technique that ensures even cooking. No special equipment is needed—just a standard 6-inch cake pan and a few simple ingredients that come together in under 15 minutes of prep.
The result? A cake that’s moist, flavorful, and just the right size for two servings with no regrets.
What you’ll achieve is a cake with a golden, crackly top and a velvety interior that’s neither too dense nor too airy. The vanilla-infused batter delivers a comforting sweetness without being overpowering, while the optional dusting of powdered sugar adds a touch of elegance.
This isn’t just a cake—it’s a thoughtful dessert that feels special without the fuss.
Perfect for date nights, small gatherings, or when you simply want a treat without the leftovers, this recipe scales effortlessly if you decide to double it later.
The instructions are clear, the technique is foolproof, and the outcome is consistently delicious. Let’s get started on creating a cake that’s just right for two.
Ingredients for 2 serving cake
Nine simple ingredients for a perfectly portioned cake that delivers restaurant-quality texture.
| Ingredient | Amount | Notes |
|---|---|---|
| All-Purpose Flour 🌾 | 1 ¼ cups | Sifted for even texture |
| Granulated Sugar 🍚 | ¾ cup | White or light brown |
| Unsalted Butter 🧈 | ½ cup | Room temperature, cubed |
| Large Eggs 🥚 | 2 whole | Room temperature preferred |
| Pure Vanilla Extract 🌿 | 1 tbsp | High-quality, imitated free |
| Baking Powder 🧂 | ½ tsp | Check expiration date |
| Salt 🧂 | ¼ tsp | Fine sea salt preferred |
| Whole Milk 🥛 | ½ cup | Room temperature |
| Powdered Sugar 🍚 | 2 tbsp | For dusting, optional |
The butter and eggs are the foundation here—both should be at room temperature for a smooth batter. European-style butter like Plugrá or Land O’Lakes works best for richness, but any unsalted butter will do. For the vanilla, Madagascar bourbon vanilla adds depth, but pure extract is fine. The flour? King Arthur or Gold Medal brands are reliable for consistent results. If you’re in a pinch, any all-purpose will work, but sift it to avoid lumps. The baking powder must be fresh—if it’s older than six months, test it by mixing with water and vinegar to see if it bubbles.
No vanilla extract? Seeds from a vanilla bean steeped in warm water for 20 minutes work beautifully, or use vanilla sugar at half the amount. Running out of milk? Heavy cream or even water will suffice, though the texture may vary slightly. For a richer cake, substitute half the milk with whole milk yogurt. The powdered sugar for dusting is optional but adds that restaurant-worthy finish—Domino or C&H brands work well. If you prefer a different sweetness level, adjust the granulated sugar by 1-2 tablespoons up or down, but keep the powdered sugar as-is for the final touch.
Store any leftovers in an airtight container at room temperature for up to 2 days, though this cake is best enjoyed fresh. For longer storage, wrap tightly and refrigerate for up to 5 days. The cake reheats beautifully—pop a slice in the microwave for 10-15 seconds to restore its softness. If you’re doubling the recipe for a larger cake pan, increase all ingredients by 100% and bake at 325°F for 30-35 minutes. The secret to its perfect texture? Don’t overmix the batter—just combine until the flour is just incorporated.
Why You’ll Love This Recipe
- No Mixer Needed: I’ll be real—this cake comes together with just a bowl and a fork. Cream butter and sugar until light, crack in eggs one at a time, then fold in flour and vanilla. No electric mess, no overmixing, just pure simplicity.
- Vanilla Butter Bliss: That first bite of tender crumb with vanilla-infused butter? It’s like dessert hugs you. The eggs add richness without heaviness, and the sugar caramelizes just enough to make every slice feel special—no fancy add-ins required.
- Half-Batch Magic: Two servings means no food waste, no stress. Make it for a coffee date, a quick lunch, or a midnight craving—it’s the perfect portion for one or two. (Yes, even on a Tuesday night.)
- Budget-Friendly Indulgence: Flour, sugar, butter, eggs—these are pantry staples that won’t break the bank. The leftovers? They keep for days in the fridge, so you’re always covered without extra cost. Plus, it’s cheaper than buying a single slice from a bakery.
Step-by-step instructions for perfect two-serving cake
This method delivers a flawlessly moist, perfectly portioned cake every time—no guesswork, no waste.
Cream Butter and Sugars to Light and Fluffy
In a medium mixing bowl, combine the 0.5 cup unsalted butter and 0.75 cup granulated sugar. Using a hand mixer or stand mixer on medium speed, beat for 3-4 minutes until the mixture becomes pale and fluffy, nearly doubling in volume. This step is critical—it incorporates air that creates the cake’s signature light texture.
Stop occasionally to scrape down the sides of the bowl with a rubber spatula. You’re looking for a ribbon consistency when you lift the beaters—the mixture should leave a trail that holds its shape for a few seconds. If the butter wasn’t quite room temperature, you may need to add 1-2 extra minutes to fully emulsify the mixture.
Add Eggs and Vanilla for Rich Flavor
Add the 2 whole large eggs, one at a time, mixing on low speed after each addition until fully incorporated. Then add the 1 tablespoon pure vanilla extract and mix for 10-15 seconds until completely combined. The eggs should blend smoothly into the butter mixture without any streaks.
Here’s the thing—don’t overmix at this stage. You want the eggs to gently combine rather than create a dense batter. If you see the mixture starting to thicken too much, reduce the mixer speed to low and continue mixing just until smooth. The goal is a thick, ribbony consistency similar to what you achieved with the butter and sugar.
Alternate Dry and Wet Ingredients
In a separate bowl, whisk together the 1.25 cups all-purpose flour, 0.5 teaspoon baking powder, and 0.25 teaspoon salt. Sift the flour mixture directly into the butter mixture with the mixer running on low speed. After the flour is incorporated, add the 0.5 cup whole milk in a slow, steady stream while mixing on low speed.
This alternating method prevents gluten development and ensures an even distribution of ingredients. Mix just until the batter is smooth and no flour streaks remain—about 30-45 seconds total. Overmixing at this stage can lead to a dense, tough cake. The perfect batter should be thick but pourable, with a smooth, velvety texture.
Bake Until Golden and Springy
Preheat your oven to 350°F and prepare a 6-inch round cake pan by greasing it thoroughly with butter and dusting with flour (or using a silicone baking mat). Pour the batter into the prepared pan and smooth the top with a spatula. Bake for 25-30 minutes, or until a toothpick inserted into the center comes out clean and the top is golden brown.
Real talk: Your oven might run hot, so start checking at the 20-minute mark. The cake is done when it springs back slightly when gently pressed in the center and the edges pull away from the pan. If the top browns too quickly, tent the cake with aluminum foil after 15 minutes to prevent over-browning while still allowing it to cook through.
Cool and Dust for Perfect Presentation
Remove the cake from the oven and let it cool in the pan for 10 minutes. Then transfer it to a wire rack to cool completely. While it’s still warm, dust the top with the 2 tablespoons powdered sugar using a fine-mesh sieve for an elegant finish. This step is optional but adds a professional touch that makes the cake look even more impressive.
The cake will be moist and tender when fully cooled, with a fine, even crumb. If you’re serving it immediately, you can dust with powdered sugar right before serving. For best results, store any leftovers in an airtight container at room temperature for up to 3 days or refrigerate for up to 5 days. This perfectly portioned cake makes for an ideal treat for two without any leftovers.
Pro Tips For Making 2 Serving Cake
- MEASURE FLOUR RIGHT: Spoon it into the cup and level with a knife—don’t scoop directly from the bag. I learned this the hard way when my cake turned out dense; flour compacts when scooped, and you end up with way more than the recipe needs. For a two-serving cake, that tiny extra cup makes all the difference in texture.
- SOFTEN BUTTER FIRST: Take the butter out of the fridge 30 minutes before mixing—just until it’s soft enough to press with a finger, not melt. I used to use cold butter straight from the fridge, and my cakes always came out dry. Room temperature butter blends better with sugar and eggs, giving you that light, tender crumb you actually want.
- DON’T OVERMIX THE BATTER: Stop folding the flour in when you see streaks of white—no need to fully incorporate it. Overmixing develops gluten, and your cake will turn out tough instead of light. I’ve ruined more cakes than I’d admit by beating the batter like I was making pancakes. Two-serving cakes are forgiving, but this is the one step where less is more.
- CHECK OVEN TEMP AFTER 10 MINUTES: Your oven runs hotter than it says—always check the temp with an oven thermometer. I’ve had cakes bake too fast and turn out gummy, or dry out because the heat was too low. For a two-serving cake, aim for 350°F (175°C), but confirm it’s accurate. A few degrees can turn a perfect cake into a disaster.
Make-ahead tips for 2 serving cake
Prep Ahead Timeline
I recommend prepping the batter up to 24 hours in advance and storing it in an airtight container in the refrigerator. The flavors meld beautifully overnight, and the butter stays firm enough to handle easily.
When ready to bake, let the batter sit at room temperature for 30 minutes before mixing—this ensures the butter softens properly for that perfect fluffy texture. 💫
Batter Storage Tips
For maximum freshness, transfer the mixed batter to a quart-sized zip-top bag and seal tightly. Place it in the fridge for up to 2 days before baking. When you’re ready, simply remove the bag, let it sit for 30 minutes, then proceed with the baking instructions.
Pro tip: Label your bag with the date to track freshness.
Cake Assembly Options
If you’re planning ahead for a special occasion, you can bake the cake 1 day in advance and store it wrapped tightly in plastic wrap at room temperature. Reheat slices for 10-15 seconds in the microwave before serving to restore moisture.
For longer storage, freeze the cake (wrapped in plastic and foil) for up to 1 month—thaw at room temperature before serving.
Make-Ahead Garnishes
Prepare your powdered sugar garnish ahead of time by sifting 2 tablespoons into a small bowl. Store it in a sealed container with a damp paper towel to prevent clumping.
When ready to serve, simply dust the cooled cake with the pre-sifted sugar using a fine-mesh sieve for that perfect restaurant finish. This saves time and ensures a professional presentation every time. ✨
Double-Batch Strategy
If you’re doubling the recipe for a larger cake pan, mix all ingredients 2 days ahead and store the batter in two separate airtight containers. Bake the cakes on the same day for consistent results.
Use a 9-inch round pan and increase baking time to 30-35 minutes at 325°F. This approach works perfectly for meal prep or when you know you’ll have more guests.
Portion Control Tips
For perfect two-serving portions, use a 6-inch cake pan and serve the entire cake at once. If you’re making a larger batch, slice the cake into 6 equal wedges (about 1.5 inches wide) and store them individually in resealable plastic bags.
This makes it easy to grab just what you need without leftovers. Label each portion with the date for freshness tracking. 💡
Nutrition facts
Frequently asked questions
Can I use a different pan size for this recipe?
Yes, but you’ll need to adjust the baking time. A 6-inch pan works perfectly for two servings, but if using a 7-inch pan, reduce baking time by 5 minutes (about 20-25 minutes at 350°F). For an 8-inch pan, bake for 18-22 minutes. Always check doneness with a toothpick—it should come out clean. The key is thinner layers bake faster, so adjust accordingly.
Why did my cake turn out dense instead of light?
Overmixing is the most common culprit! Mix the batter just until the flour disappears—about 30-45 seconds after adding it. Also ensure your butter and eggs are at room temperature and don’t overbake. A toothpick should come out clean with a few moist crumbs, not dry. For extra lightness, sift your flour and avoid opening the oven door during baking.
Can I substitute any of the ingredients?
Swap whole milk for Greek yogurt (½ cup) for extra moisture, or use vegetable oil instead of butter (¼ cup) for a lighter texture. For dairy-free, use unsweetened almond milk and dairy-free butter. Need less sugar? Reduce granulated sugar by 2 tablespoons and add 1 teaspoon honey to compensate. Always adjust liquids if substituting with oils or yogurts.
How do I make this cake gluten-free?
Replace the 1.25 cups all-purpose flour with 1 cup gluten-free 1:1 baking flour (like Bob’s Red Mill) plus 0.25 cup cornstarch. Add 1 teaspoon xanthan gum if your blend doesn’t include it. Also reduce baking powder to 0.25 teaspoon and increase milk to 0.6 cup—gluten-free batters need extra moisture. Bake at 325°F for 28-32 minutes to prevent over-browning.
Can I add mix-ins like chocolate chips?
Yes, but keep portions small to maintain texture. Fold in 2 tablespoons mini chocolate chips or ¼ cup chopped nuts after adding the milk. For fruit, use ½ cup finely diced berries (fold gently to avoid sinking). Avoid heavy mix-ins like whole chocolate bars—they can make the cake dense. Toss mix-ins in 1 tablespoon flour first to prevent separation.

- 1 Cup Oatmeal 2 Apples Recipe: Warm Spiced Porridge With Apple Chunk Appeal - November 17, 2026
- 3 Overripe Bananas Recipe: Fluffy Pancakes With Zero Waste - November 17, 2026
- 2-Minute Pizza Recipe: Speedy Crispy Crust With Melted Cheese Magic - November 17, 2026