
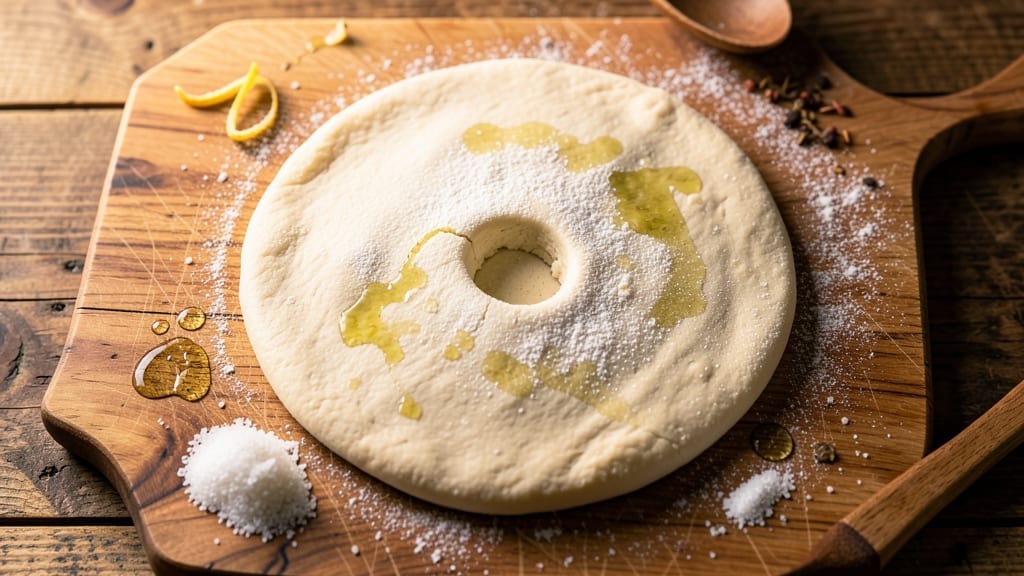
When you crave homemade pizza but don’t have hours to spare, this 20-minute pizza dough recipe delivers a light, airy crust that’s ready in a fraction of the time. The secret lies in a quick-mix method that skips long kneading—perfect for weeknights or spontaneous dinner plans.
I’ve tested this dough countless times, and it consistently yields a crisp yet tender base that holds toppings beautifully without collapsing.
This recipe relies on simple ingredients—just flour, yeast, water, and a pinch of salt—to create a dough that’s both foolproof and adaptable. The key is activating the yeast properly and letting it rest just long enough to develop flavor without overproofing.
No stand mixer? No problem. A sturdy mixing bowl and your hands are all you need to achieve a smooth, elastic dough in minutes.
What sets this dough apart is its versatility. Use it for classic Neapolitan-style pies, thick New York slices, or even flatbreads. The crust stays crisp around the edges while remaining tender in the center, making it ideal for everything from gourmet toppings to casual family meals.
Once you try this method, you’ll never go back to store-bought again.
For those with dietary preferences, swapping in whole wheat flour or a gluten-free blend keeps the process just as simple. The dough’s quick rise means you can have a homemade pizza on the table faster than you’d think—no waiting, no fuss, just delicious results. Let’s get started!
Ingredients for 20 minute pizza dough
Four simple ingredients transform into pizza dough faster than you’d imagine.
| Ingredient | Amount | Notes |
|---|---|---|
| All-Purpose Flour 🌾 | 3 cups | Plus 1 tbsp for dusting |
| Active Dry Yeast 🍞 | 1 tsp | Or 1 packet (0.25 oz) |
| Warm Water 💧 | 1 cup | 110-115°F for yeast activation |
| Granulated Sugar 🍚 | 1 tsp | Activates yeast quickly |
| Olive Oil 🫒 | 1 tbsp | Extra-virgin for best flavor |
| Salt 🧂 | 1 tsp | Kosher or sea salt |
| Semolina Flour or Cornmeal 🌾 | 2 tbsp | For dusting pizza peel |
| Cornstarch 🌾 | 1 tbsp | Optional for extra crispiness |
The yeast is your time-saver here. King Arthur or Bob’s Red Mill active dry yeast works best—it activates fast in warm water (110-115°F). Too hot and it kills the yeast; too cold and it won’t wake up. I always test the water with my pinky finger—should feel like bathwater, not scalding. The flour matters too: King Arthur or Gold Medal all-purpose gives the best texture. If you’re gluten-sensitive, swap for a 1:1 gluten-free blend (like Bob’s Red Mill), but add 1 extra tbsp of water to compensate for dryness.
No yeast on hand? Instant yeast works 1:1, but you’ll need to mix it directly into the flour. Short on sugar? A pinch of honey works too (but don’t skip it—the yeast needs food to activate). Olive oil can be swapped for melted butter (trust me on the full-fat version), or even vegetable oil in a pinch. The cornstarch is optional but worth it if you love that extra-crispy crust edge. For the semolina, Trader Joe’s sells it in bulk—cheaper than the tiny jars at regular stores.
This dough keeps for 2 days wrapped in plastic in the fridge. For longer storage, freeze shaped dough balls for up to 3 months. Thaw overnight in the fridge before using. Pro tip: Shape the dough into a ball, flatten slightly, and wrap tightly in plastic—it’ll hold its shape perfectly until ready to roll. The dough doubles in size during the 10-minute rise, so don’t panic if it looks huge after resting.
Why You’ll Love This Recipe
- Ready in 20: I swear, this dough is the only one I make anymore—no waiting hours for it to rise, just mix, knead for two minutes, and let it rest while I prep toppings. That sugar in the yeast mix? It wakes it up faster than coffee on a Monday.
- Crispy-Chewy Magic: The olive oil keeps it tender inside while the edges get that perfect golden crunch in the oven—no special tricks, just a hot pan and a little patience. Honestly, it’s the kind of texture that makes you close your eyes and take an extra bite.
- Topping Freedom: This dough handles everything—thin and crisp for Neapolitan-style, thick and chewy for deep-dish, even stuffed with ricotta if I’m feeling fancy. Leftovers? I freeze half the batch and pull it out for lazy nights (yes, even on a Tuesday).
- Pocketbook Hero: Five ingredients, none of them fancy—this is cooking on a budget without sacrificing flavor. I stretch one dough into two pizzas, and the rest? Stale crusts become garlic bread or croutons. Zero waste, all win.
Step-by-step instructions for quick pizza dough
Here’s how to make a light, airy crust in just 20 minutes—no waiting around!
Activate the Yeast for Maximum Rise
In a small bowl, combine the 1 cup warm water (110-115°F), 1 tsp granulated sugar, and 1 tsp active dry yeast. Stir gently and let sit for 5 minutes until foamy. You’ll see bubbles forming—this means your yeast is alive and ready to work. If nothing happens after 5 minutes, your yeast might be dead. Start fresh with a new packet.
While waiting, I like to check the temperature of the water with a thermometer. Too hot and you’ll kill the yeast; too cool and it won’t activate properly. The sugar helps speed up this process, giving us that quick rise without long waits. Don’t skip this step—proper yeast activation is what makes this dough work in just 20 minutes.
Mix the Dough Until Smooth
In a large mixing bowl, whisk together the 3 cups all-purpose flour and 1 tsp salt. Make a well in the center and pour in the yeast mixture along with the 1 tbsp olive oil. Using a wooden spoon or your hands, mix until a shaggy dough forms. The dough will be sticky at first—that’s normal with this quick method.
Once combined, turn the dough out onto a lightly floured surface and knead for 3-4 minutes until smooth and elastic. You don’t need to develop gluten like traditional dough—just enough to bring everything together. If the dough feels too sticky, wet your hands slightly to prevent sticking. The olive oil helps keep the dough tender and prevents cracking during stretching.
Let the Dough Rest (The Short Wait)
Lightly oil a large bowl with a bit more olive oil, then place the dough inside. Cover with a damp towel or plastic wrap and let rest for 10 minutes at room temperature. This short rest helps the gluten relax slightly, making it much easier to stretch later. I know it seems counterintuitive to wait when you’re in a hurry, but trust me—this makes all the difference.
During this time, I like to preheat my oven to 475°F for baking. This ensures my oven is ready when the dough is stretched. The high heat helps create that perfect crispy crust without overcooking the toppings. While waiting, you can prepare your sauce and toppings so everything’s ready when the dough is stretched.
Shape and Stretch the Dough
After the rest, turn the dough onto a surface lightly dusted with 2 tbsp semolina flour or cornmeal. This helps prevent sticking and gives that beautiful textured crust. Using your fingertips, gently press the dough outward from the center, rotating occasionally, until it reaches about 12 inches in diameter. Don’t press too hard—just enough to thin it out slightly for that classic pizza texture.
For extra crispiness, I sometimes sprinkle 1 tbsp cornstarch over the stretched dough before adding toppings. This creates a beautiful, lacy crust edge when baked. If the dough resists stretching, let it rest for another 2-3 minutes—it should become more pliable. Remember, this dough is quick but still needs a little handling to get that perfect shape.
Bake to Golden Perfection
Transfer the stretched dough to a parchment-lined baking sheet or pizza stone. Add your sauce and toppings, then bake in the 475°F oven for 12-15 minutes until the crust is golden brown and the cheese is bubbly. The edges should be crispy while the center remains tender. If your oven runs hot, start checking at the 10-minute mark—every oven is different.
For that restaurant-style finish, I like to broil for 1-2 minutes at the end to get extra browning on the cheese. Keep an eye on it—broiling can happen fast! The dough should hold its shape without being too thick or too thin. Serve immediately while the crust is still warm and crispy for the best experience.
Pro Tips For Making 20 Minute Pizza Dough
- Measure Yeast Like a Pro: Use a kitchen scale for the yeast—1 teaspoon isn’t always 3 grams, and that tiny difference matters. I learned this after my dough took forever to rise one time (turns out, my “teaspoon” was actually 4 grams).
- Warm Water, Not Hot: Test your water with your finger—it should feel like bathwater, not scalding. Too hot kills the yeast instantly, and you’ll end up with flat, sad dough. I’ve done it twice; trust me, it’s a mood killer.
- Knead Just Enough: Stop when the dough springs back slowly after pressing it—overworking it makes gluten tough and chewy. I used to go full-on bakery mode, but the dough just gets tired. Two minutes of gentle stretching is all you need.
- Oil the Bowl Right: Coat the bowl with olive oil and flip the dough to fully encase it—this prevents sticking and keeps the surface smooth. I skipped this once, and my dough got a weird, gummy texture. Now I oil like my life depends on it.
Troubleshooting this dish
Yeast Not Activating
If your yeast mixture doesn’t bubble after 5 minutes, it’s likely dead or expired. First, check the water temperature—it should feel like bathwater (110-115°F). If too hot, the yeast dies instantly.
Try again with fresh yeast from a trusted brand like King Arthur or Bob’s Red Mill, and use warm water. If your kitchen is cold, place the bowl in a slightly warm spot (like near the oven with the light on) to help activation. 💡
Dough Too Sticky
This quick dough is naturally sticky, but if it’s impossible to handle, you’re likely overworking it or using too much flour. Wet your hands slightly before shaping to prevent sticking. For extra grip, dust your surface with semolina flour instead of all-purpose flour—it’s coarser and absorbs moisture better.
Avoid adding extra flour during kneading; the dough should be soft but manageable. If it’s still too wet, let it rest uncovered for 2-3 extra minutes to absorb excess moisture.
Dough Tears When Stretching
Tears happen when the dough isn’t rested enough or the gluten isn’t developed properly. After mixing, let the dough rest for the full 10 minutes—this relaxes the gluten and makes it more pliable. If it still resists, gently knead it for another 1-2 minutes on a lightly floured surface.
For stubborn dough, cover it and let it rest for 5 more minutes before stretching again. Use your fingertips to press outward, not your palms, to avoid tearing.
Uneven Baking
If your pizza bakes unevenly (edges done, center raw), your oven isn’t hot enough or the dough is too thick. Preheat your oven to 475°F for at least 30 minutes before baking. For a pizza stone or steel, place it in the oven while preheating.
If the center stays doughy, stretch the dough slightly thinner before baking. For stubborn spots, broil for 1-2 minutes at the end—just watch closely to avoid burning.
Dough Flattens Too Much
If your dough spreads too thin or loses shape during baking, it’s likely overproofed or too wet. The 10-minute rest is crucial—don’t skip it. For extra stability, chill the dough for 15 minutes in the fridge before stretching.
This firms it up and prevents excessive spreading. Also, avoid overloading toppings; heavy sauces and cheese can weigh down the dough. Use a pizza peel dusted with cornmeal for better support while transferring to the oven.
Crust Too Dense
A dense crust usually means the dough wasn’t rested enough or the yeast didn’t activate properly. Double-check your yeast—it should foam within 5 minutes. If the dough feels tough after mixing, let it rest longer (up to 15 minutes).
For a lighter texture, avoid over-kneading; just mix until combined. If you’re using whole wheat or gluten-free flour, add 1 extra tablespoon of water to compensate for dryness. The olive oil in the recipe keeps the crust tender, so don’t skip it!
Nutrition facts
Frequently asked questions
Can I make this dough without yeast?
This recipe relies on yeast for its quick rise, but you can make a no-yeast version using baking powder or baking soda for a flatbread-style crust. Replace the yeast with 1 tbsp baking powder and 1 tsp baking soda, and reduce the flour to 2.5 cups. The texture will be denser and less airy, but it works well for quick flatbreads or focaccia-style pizzas.
How do I adjust this dough for whole wheat or gluten-free flour?
For whole wheat, replace 1 cup of all-purpose flour with whole wheat flour and add 1 extra tbsp water to compensate for dryness. For gluten-free, use a 1:1 gluten-free blend like Bob’s Red Mill and add 2 tbsp extra water. Let the dough rest for 15 minutes instead of 10 to help develop structure. The texture will be slightly denser but still delicious!
Why does my dough need to rest after mixing?
The 10-minute rest relaxes the gluten strands, making the dough easier to stretch without tearing. Without resting, the dough will be too tight and resistant. Think of it like stretching a rubber band—it needs to loosen up first! This short wait also helps the flavor develop slightly for better taste.
Can I make this dough ahead of time?
Yes! Shape the dough into balls, flatten slightly, and wrap tightly in plastic. Store in the fridge for up to 2 days or freeze for 3 months. Thaw in the fridge overnight before using. The dough will need a 5-minute rest at room temperature before stretching if taken straight from the fridge. Perfect for meal prep!
What’s the best way to stretch the dough without tearing?
Use your fingertips to gently press outward from the center, rotating the dough as you go. Keep the outer edge slightly thicker than the center for support. If the dough resists, let it rest for 2-3 extra minutes covered. Avoid using your palms—they can overwork the dough. For stubborn spots, use a rolling pin lightly to smooth out thick areas.

- 3lb Prime Rib Roast Recipe: Juicy Pink Center Guaranteed in 3 Hours - October 31, 2026
- 5 Spice Cake Recipe: Warmly Spiced Layers With Crunchy Top - October 31, 2026
- 1950’s Macaroni and Cheese Recipe: Nostalgic Creamy Cheese Sauce with Buttery Noodles - October 31, 2026