
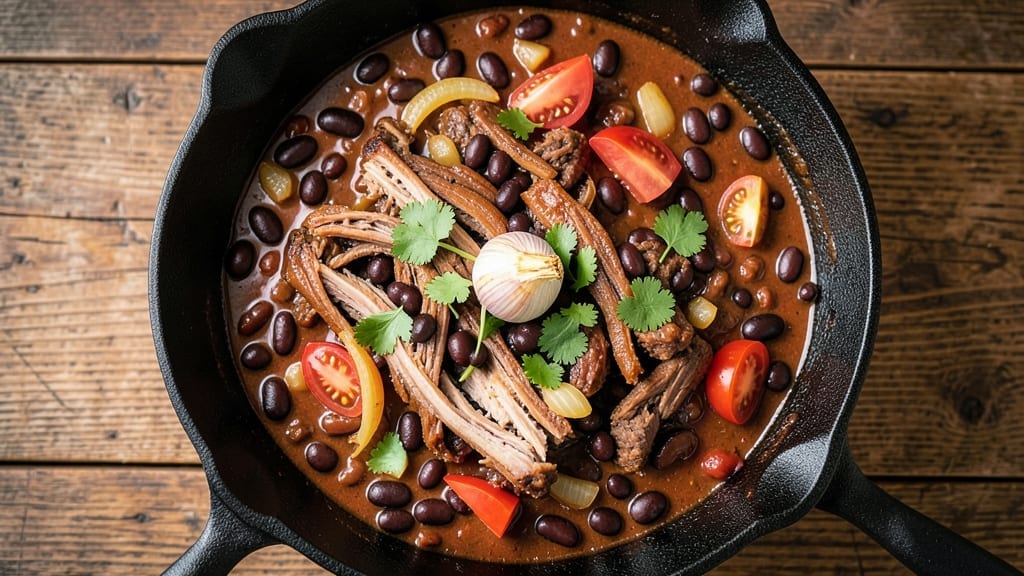
A 24-hour chili recipe transforms tough cuts of meat and simple ingredients into a rich, complex stew that deepens in flavor with every hour. The secret lies in slow cooking—where spices meld, proteins tenderize, and the broth reduces into a velvety, umami-packed sauce.
I’ve perfected this method over years of trial and error, ensuring no burnt edges or bland results, just layers of smoky, savory depth that make every spoonful unforgettable.
This isn’t your average chili. The 24-hour process breaks down collagen-rich meats (like chuck roast or pork shoulder) into melt-in-your-mouth tenderness while developing a broth so flavorful it rivals restaurant-quality. No fancy techniques—just a Dutch oven, Instant Pot, or slow cooker, and the patience to let flavors unfold.
The spices toast gently, the beans soften just enough, and the fat renders into the stew, creating a finish that’s rich without being greasy.
By the time you’re ready to serve, you’ll have a pot of chili that’s deeply aromatic, with a crust on top that’s crispy enough to scoop up with a spoon. The slow cook transforms tough ingredients into something luxurious, and the best part?
It tastes even better the next day. This is the kind of chili that turns casual weeknights into a cozy, flavor-packed experience—without the risk of burning or over-salting.
Whether you’re feeding a crowd or meal prepping for the week, this recipe scales effortlessly. Top it with shredded cheese, sour cream, or fresh jalapeños, and pair it with cornbread or crusty bread to soak up every last drop.
The instructions are clear, the timing is flexible, and the results? Restaurant-quality, every time. Let’s get cooking.
Ingredients for 24 hour chili
Sixteen ingredients. One pot. Twenty-four hours of restaurant-quality depth.
| Ingredient | Amount | Notes |
|---|---|---|
| Chuck Roast 🥩 | 3 lb | Tough cut for maximum tenderness |
| Dried Black Beans 🌿 | 1 ½ cups | Soaked overnight for best texture |
| Diced Tomatoes (San Marzano) 🍅 | 2 cups | High-quality canned for sweetness |
| Tomato Paste 🍅 | ½ cup | Concentrated depth of flavor |
| Yellow Onion 🧅 | 2 whole | Chopped, for aromatic base |
| Garlic Cloves 🧄 | 6 cloves | Freshly minced for aromatic punch |
| Ground Cumin 🌿 | 2 tbsp | Toasted for deeper flavor |
| Chili Powder 🌶️ | 2 tbsp | Medium heat preferred |
| Smoked Paprika 🌶️ | 1 tbsp | For smoky depth |
| Ground Coriander 🌿 | 1 tbsp | Bright, citrusy note |
| Bay Leaves 🍃 | 2 whole | Fresh for subtle herbal touch |
| Beef Broth 💧 | 4 cups | Low-sodium preferred |
| Dark Brown Sugar 🍚 | 1 tbsp | Balances acidity |
| Apple Cider Vinegar 🍎 | 1 tbsp | Brightens flavors |
| Kosher Salt 🧂 | 1 ½ tbsp | Adjust to taste |
| Black Peppercorns 🌶️ | 1 tsp | Freshly cracked |
| Olive Oil 🫒 | 2 tbsp | For searing meat |
The chuck roast is non-negotiable here—it’s the collagen-rich muscle that breaks down into melt-in-your-mouth perfection over time. Costco or Whole Foods carry good cuts, but any grocery store with a butcher section will have it. Look for good marbling—those little white flecks of fat are what render into flavor. If you’re using pre-cubed chuck, you’ll save time, but I always buy the whole roast and cut it myself for better control. The beans? Dried is best—soak them overnight or use the quick-soak method with boiling water. Canned beans work in a pinch, but they lack that deep, earthy flavor that develops over time.
No cumin? Ground coriander at double the amount gets you close, but the earthy depth is different. Smoked paprika hard to find? Regular paprika plus a pinch of liquid smoke mimics it. The San Marzano tomatoes are worth hunting down—they’re sweeter and less acidic than regular canned tomatoes, which is crucial for this long cook. If you can’t find them, Crushed tomatoes with no salt added work fine. The apple cider vinegar might seem odd, but it cuts through the richness and brightens the whole dish. Don’t skip it. For the spices, Penzeys or bulk bins at natural food stores have the freshest, most flavorful options, but the regular grocery store spices work fine if they’re not ancient.
This chili tastes even better the next day—plan ahead. The roast can be browned and refrigerated for up to 2 days before starting the slow cook. Once assembled, it keeps in the fridge for 5-6 days, and freezes beautifully for 3 months. I always make a double batch—one pot for dinner, one for lunches. The crust that forms on top is crispy and delicious—just scoop it up with a spoon. If you’re serving a crowd, double the recipe and use a large Dutch oven or Instant Pot for even cooking.
Why You’ll Love This Recipe
- Set-and-Forget Magic: I swear by this recipe because once the pot’s simmering, I can walk away. The chuck roast practically melts into tender shreds overnight, while the San Marzano tomatoes and tomato paste build that deep, sweet base without a single stir from me. Honestly, the only work I do is dump everything in and let time do the heavy lifting.
- Deep, Slow-Rolled Richness: That 24-hour soak transforms dried black beans into creamy, hearty bites, and the onion? It caramelizes just enough to add a subtle sweetness that ties everything together. Between us, the chili’s got a complexity that tastes like you spent hours on it—even though it’s basically hands-off.
- Weeknight Workhorse: This is my go-to for game days, lazy Sundays, or when I need to feed a crowd without stress. I’ll make a double batch, portion it out, and freeze half—because nothing beats reheating a pot of this when you’re exhausted. (Yes, even on a Tuesday night.)
- Budget-Friendly Powerhouse: Chuck roast and dried beans stretch for miles, and a single can of San Marzano tomatoes makes the whole pot sing. I’ll be real: it’s the kind of recipe where I can feed my family four meals for the price of one restaurant dinner. Plus, the leftovers? They’re my secret weapon for lunches that don’t taste like leftovers.
Step-by-step instructions for 24 hour chili recipe
Here’s how to build layers of flavor that develop beautifully over time.
🍳 Step 1: Sear the Chuck Roast for Deep Flavor
Heat a heavy pot over medium-high heat and add the 2 tablespoons olive oil. Once shimmering, place the 3 lb chuck roast in the pot and sear on all sides until deeply browned, about 8-10 minutes. This step is crucial—it develops the Maillard reaction that creates rich, caramelized flavors that will infuse the chili throughout the slow cook.
Real talk: don’t rush this. You want that meat to develop a good crust before we move to the next step. Once browned, remove the roast and set it aside on a plate. Here’s where it gets fun—the rendered fat in that pot is pure flavor gold, and we’re about to use it to build our aromatic base.
👨🍳 Step 2: Build the Aromatic Base with Onions and Garlic
In the same pot with all that beautiful browned meat fat, add the 2 whole yellow onion, chopped, and cook for 5-6 minutes until softened and just beginning to caramelize. This is where the onions should start to turn golden—you’ll see it happening at the edges first. Add the 6 cloves garlic cloves, minced, and cook for another 30 seconds until fragrant.
Here’s the thing—don’t let that garlic burn. It happens fast, and once it does, you lose all that sweet, aromatic punch. The moment you smell that garlic aroma, it’s ready. Remove the pot from heat briefly if needed to prevent burning, then return it to the stove. This aromatic base is the foundation of your chili’s flavor profile.
🥘 Step 3: Toast the Spices for Maximum Depth
With the onions and garlic still in the pot, reduce heat to medium and add the 2 tablespoons ground cumin, 2 tablespoons chili powder, 1 tablespoon smoked paprika, and 1 tablespoon ground coriander. Stir constantly for 1-2 minutes until the spices are fragrant and toasted—you’ll smell that earthy, toasty aroma developing. This step is what transforms ordinary spices into flavor bombs.
Don’t skip this toasting step. It’s where the spices release their essential oils and develop their full potential. You want to see the spices almost dancing in the pot, releasing their aroma. Once toasted, add the 2 whole bay leaves and stir for another 30 seconds to incorporate them into the mixture.
🍳 Step 4: Simmer the Chili Base
Return the seared chuck roast to the pot. Add the 2 cups diced tomatoes (San Marzano), 0.5 cup tomato paste, 4 cups beef broth, 1 tablespoon dark brown sugar, 1 tablespoon apple cider vinegar, 1.5 tablespoons kosher salt, and 1 teaspoon black peppercorns. Stir everything together until well combined, making sure the roast is fully submerged in the liquid.
Bring the mixture to a boil, then reduce heat to low and let it simmer gently for 15 minutes. This initial simmer helps break down the meat and start extracting all those rich flavors. You’ll see the liquid begin to thicken slightly as it reduces. Here’s where the magic starts—those flavors are beginning to meld together.
⏰ Step 5: Slow Cook for 24 Hours
After the initial 15-minute simmer, add the 1.5 cups dried black beans (previously soaked overnight) and stir to combine. Cover the pot and transfer it to a 200°F oven or place it on a burner set to the lowest possible heat. Let it cook for 24 hours, checking occasionally to ensure the liquid level remains adequate—add a splash of water or broth if needed.
This long, slow cook is what transforms tough chuck roast into fork-tender meat and allows all those flavors to develop and meld together. The beans will soften completely, absorbing all that rich chili liquid. The chili should reduce slightly but still have a good sauce consistency. When you’re ready to serve, remove the bay leaves and discard them—they’ve done their job.
Pro Tips For Making 24 Hour Chili
- Brown the Chuck First: I learned this the hard way—skipping the sear means your chili will taste like stewed beef instead of deep, caramelized flavor. Get that roast screaming hot in a Dutch oven, then let it brown for 8-10 minutes until it’s dark in spots. The crust locks in moisture and builds flavor that slow cooking can’t replicate.
- Soak Beans Overnight: Dried black beans aren’t just convenient—they’re better when soaked. Toss them in cold water for 12+ hours, then drain before adding to the pot. This cuts cooking time by half and prevents that sad, mealy texture. (Yes, even if you’re impatient like me.)
- Stir the Paste Early: Don’t wait until the end to add the tomato paste—mix it in with the onions and diced tomatoes right at the start. The low-and-slow simmer will break it down smoothly, giving you that rich, velvety base without clumps. Stir it into the oil first if you’re worried about lumping.
- Skim the Foam: The first 20 minutes of cooking? That’s when the chili throws up a layer of fat and foam like it’s auditioning for a horror movie. Lift it off with a spoon—it’s gross, but it keeps your chili from tasting greasy later. (Your future self will thank you.)
Make-ahead tips for this 24 hour chili
Prep Ahead Strategy
Start by prepping your ingredients the night before—this makes the 24-hour process effortless. Soak the 1.5 cups dried black beans overnight in a bowl with plenty of water (at least 8 cups). This ensures they soften perfectly during the long cook.
I like to use a large glass bowl for easy draining later. For the meat, sear the 3 lb chuck roast and refrigerate it in its rendered fat overnight—the flavors intensify when chilled. 🥩
Slow Cooker Adaptation
For hands-off cooking, use a 6-8 quart slow cooker on low for the full 24 hours. Brown the meat and build the base as directed, then transfer everything to the slow cooker. The key here is to stir occasionally (every 4-6 hours) to prevent sticking.
I’ve found that adding ½ cup extra broth helps maintain moisture. The slow cooker’s gentle heat creates the same tender meat and rich sauce as oven cooking. ⏰
Freezing for Later
This chili freezes beautifully for up to 3 months—perfect for meal prep. After the 24-hour cook, let it cool completely, then portion it into airtight containers or heavy-duty freezer bags. Leave 1 inch headspace to prevent expansion cracks.
When ready to eat, thaw overnight in the fridge, then reheat on the stovetop with ¼ cup water or broth to restore moisture. The flavors actually deepen after freezing! ❄️
Oven vs. Stovetop
Both methods work, but the oven gives slightly better results. If using a stovetop, maintain a gentle simmer at 180-190°F—too high heat can make the chili too thin. I recommend using a heavy Dutch oven to retain heat.
For the oven, set it to 200°F and prop the lid open slightly with a wooden spoon to allow steam to escape. This prevents a soggy crust while keeping the chili moist. 🔥
Batch Cooking Tips
Double the recipe for a crowd—just use a large Dutch oven or Instant Pot. Divide the chili into two 6-quart slow cookers or two Dutch ovens. Label containers clearly with dates to track freshness.
I like to freeze half immediately for future meals. The chili’s texture and flavor remain consistent even after freezing, making it ideal for bulk prep. 💡
Day-of Serving
Let the chili rest for 10-15 minutes before serving to let flavors settle. Skim off any excess fat if desired (though I love that crispy crust!). Serve with toppings like shredded cheese, sour cream, or fresh jalapeños.
For extra flair, drizzle with hot honey or chopped cilantro. The chili tastes even better the next day—plan accordingly! 🌶️
Nutrition facts
Frequently asked questions
Why does this chili need 24 hours to cook?
The long cook time transforms tough cuts like chuck roast into melt-in-your-mouth tenderness while developing deep, complex flavors. The collagen breaks down slowly, creating a rich sauce, and spices infuse more completely than in quick recipes. This is how you get that restaurant-quality depth without burning or over-salting.
Can I use canned beans instead of dried?
Yes! Use 2 (15 oz) cans of black beans, drained and rinsed, to replace the dried beans. Canned beans save time but won’t develop the same earthy flavor as dried. For best results, add them during the last 30 minutes of cooking to prevent mushiness.
What if I don’t have a Dutch oven?
Use a 6-8 quart slow cooker on low for 24 hours or a heavy pot on the stovetop at 180-190°F (gentle simmer). For stovetop, stir occasionally and add ½ cup broth if it gets too thick. The Instant Pot works too—use the “Slow Cook” function for 24 hours on low.
How do I fix chili that’s too thick or too thin?
For thick chili, add ¼ cup broth or water and simmer 10 minutes. For thin chili, simmer uncovered on low heat for 30-60 minutes to reduce. If it’s too salty, stir in 1 cup corn or diced tomatoes to dilute the flavor. For bland chili, add 1 tsp apple cider vinegar or a pinch of smoked paprika.
Can I make this vegetarian?
Replace the chuck roast with 2 cups mushrooms (sautéed with spices) and 1 lb extra-firm tofu (pressed and cubed). Add 1 tbsp soy sauce and 1 tsp liquid smoke to mimic meaty depth. Use vegetable broth instead of beef broth, and consider adding 1 cup lentils for extra protein.

- 6 Egg Cake Recipe with Oil: Light as Air With Buttery Moisture - October 4, 2026
- 4 Bean Casserole Recipe: One-Pan Heartiness With Smoky Paprika Depth - October 4, 2026
- 3-Ingredient Keto Mug Cake Recipe: Microwave Magic in 2 Minutes - October 4, 2026