
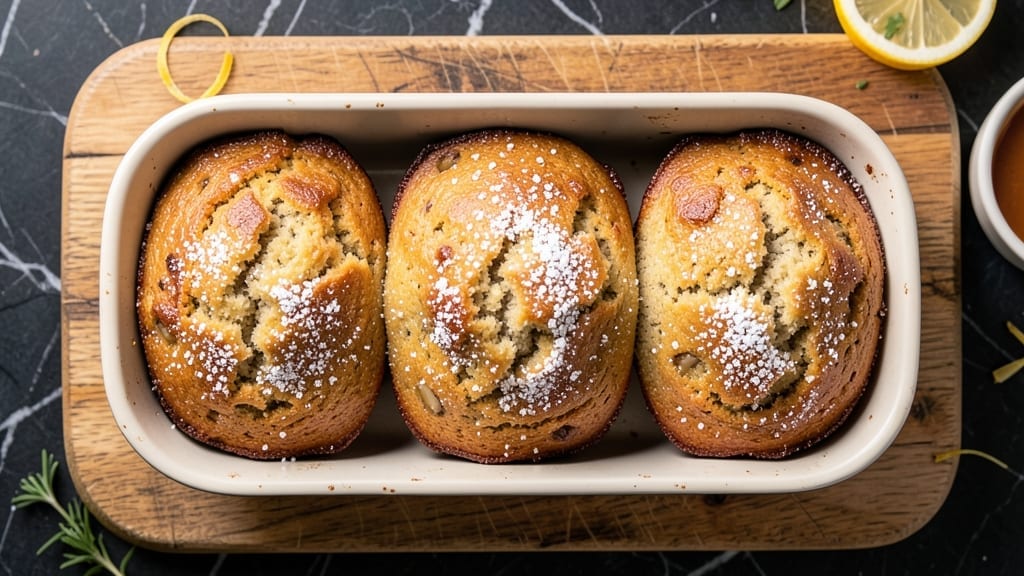
Baking three small banana bread loaves instead of one large loaf solves the age-old problem of over-baking and wasted ingredients—plus, perfect portions for sharing. The secret lies in using standard 6×2-inch loaf pans and adjusting the batter proportionally, ensuring each mini loaf stays moist and tender without drying out.
This method also cuts baking time in half, making it ideal for busy schedules or small households.
The base recipe relies on ripe bananas (the spottier, the better) and a balanced mix of flour, sugar, and baking soda for that classic banana bread texture.
Unlike traditional recipes, this version accounts for the increased surface area of smaller pans, so you won’t end up with dense or underbaked centers. A quick oven test—inserting a toothpick into the center—guarantees doneness every time.
What you’ll get are three perfectly proportioned loaves with a golden crust and a moist, slightly sweet crumb that stays fresh for days when stored properly. The smaller size also makes them ideal for gifting, meal prep, or satisfying a single craving without leftovers.
Whether you’re feeding a family of three or prepping for the week, this approach ensures no banana goes to waste.
For those with dietary preferences, swapping out butter for coconut oil or using a gluten-free flour blend keeps the method adaptable. The key is maintaining the banana-to-flour ratio—this ensures the signature flavor and texture remain intact. Let’s get baking!
Ingredients for 3 small banana bread
Standard baking essentials with a focus on ripe bananas and precise measurements for three perfect mini loaves.
| Ingredient | Amount | Notes |
|---|---|---|
| Ripe Bananas 🍌 | 3 medium | Spotty skin preferred |
| All-Purpose Flour 🌾 | 2 ½ cups | Sifted for even texture |
| Granulated Sugar 🍚 | 1 ½ cups | White or light brown |
| Unsalted Butter 🧈 | ¾ cup | Melted, full-fat preferred |
| Eggs 🥚 | 2 large | Room temperature |
| Baking Soda 🧂 | 1 tsp | Freshly measured |
| Salt 🧂 | ½ tsp | Fine sea salt |
| Vanilla Extract 🌿 | 1 tsp | Pure extract preferred |
| Walnuts 🌰 | ½ cup | Chopped, optional topping |
| Buttermilk 🥛 | ½ cup | Homemade or store-bought |
| Cinnamon 🌶️ | 1 tsp | Ground, for flavor depth |
| Vegetable Oil 🫒 | ¼ cup | For greasing pans |
The bananas are non-negotiable—ripe with brown spots ensures maximum sweetness and moisture. Grab the spottiest ones from the grocery store’s produce section or the back of your fruit bowl. For flour, King Arthur or Gold Medal brands are ideal—they sift evenly and prevent dense centers. The butter should be unsalted and full-fat for that classic richness; European-style butter like Plugrá works beautifully if you’re willing to splurge. Walnuts add texture, but pecans or almonds are equally delicious if you prefer a different flavor profile.
No vanilla extract? Vanilla bean paste works in a pinch, or a pinch of ground vanilla bean. Short on buttermilk? Mix 1 tablespoon lemon juice or vinegar with 1 cup milk and let it sit for 5 minutes. The cinnamon can be swapped for pumpkin pie spice if you’re feeling adventurous, but stick with ground cinnamon for that authentic taste. If you’re using gluten-free flour, Bob’s Red Mill 1:1 blend is a reliable choice—just add an extra 1/4 teaspoon of baking soda to compensate for the lack of gluten structure. For the oil, any neutral oil like canola or vegetable works, but avoid flavored oils like olive.
Store the baked loaves in an airtight container at room temperature for up to 2 days, or refrigerate for 5-7 days to extend freshness. For longer storage, wrap each loaf individually in plastic wrap and freeze for up to 3 months. To reheat, wrap the desired slices in a damp paper towel and microwave for 10-15 seconds. The mini loaves also make excellent gifts—just wrap them in parchment paper and tie with a ribbon for a thoughtful presentation. Prefer them warm? Bake fresh and serve immediately for the best texture.
Why You’ll Love This Recipe
- No Muffin Tin Needed: I just toss the batter into three greased ramekins—no fancy molds, no extra cleanup. The butter gets whipped into the bananas until it’s almost fluffy, and those ramekins? They give you perfectly portioned loaves for sharing (or not).
- Sweet Spot Balance: That sugar-butter combo with ripe bananas? It’s not too cloying, not too dry—just a tender crumb with a whisper of caramelized sweetness. Honestly, I’ll take this over dense cake any day.
- Breakfast or Snack: Morning toast? Check. After-school treat? Double check. The recipe makes three small loaves, so I can freeze two and pull one out whenever I want—warm or cold, it’s always a hit.
- Pantry Staple Magic: Five ingredients, zero weird substitutions. If you’ve got flour, sugar, and butter, you’ve got banana bread. And since it keeps for days, I’m always stocked for when my kid “forgets” lunch again.
Step-by-step instructions for 3 small banana bread loaves
Miniature loaves deliver perfect portion control and eliminate waste—here’s how to bake them flawlessly.
Prepare the Banana Mixture
Mash the 3 medium ripe bananas in a mixing bowl until completely smooth, with no visible lumps. I prefer using a fork for this step—it gives you better control than a blender and prevents overmixing. The mixture should be thick but pourable, with a consistency similar to heavy cream.
In a separate small bowl, whisk together the 0.5 cup buttermilk, 1 tsp vanilla extract, and 1 tsp cinnamon until fully combined. This creates a fragrant base that will infuse the entire loaf. Let this mixture sit for 5 minutes while you prepare the other ingredients—this allows the cinnamon to bloom and enhances the flavor profile.
Combine Wet and Dry Ingredients
In a stand mixer fitted with the paddle attachment, combine the 0.75 cup melted unsalted butter and 1.5 cups granulated sugar. Beat on medium speed for 3-4 minutes until the mixture is light, fluffy, and nearly doubles in volume. This creaming process incorporates air, which creates a tender crumb in the final loaf.
Add the mashed bananas and buttermilk mixture, mixing on low speed until just combined. In a separate bowl, sift together the 2.5 cups all-purpose flour, 1 tsp baking soda, and 0.5 tsp salt. With the mixer running on low, gradually add the dry ingredients to the wet mixture, mixing just until the flour is incorporated and no dry streaks remain. Overmixing develops gluten, which can make the bread dense instead of tender.
Fold in Walnuts and Prepare Pans
Using a silicone spatula, gently fold in the 0.5 cup chopped walnuts, being careful not to overmix. The walnuts should be evenly distributed throughout the batter but not crushed. Grease three 5×3-inch loaf pans thoroughly with 0.25 cup vegetable oil, then lightly dust each pan with flour, tapping out any excess. This ensures easy release and prevents sticking.
Divide the batter evenly among the prepared loaf pans, filling each about two-thirds full. Smooth the tops with a spatula, then let the batter rest at room temperature for 15-20 minutes. This allows any air bubbles to rise to the surface, resulting in a smoother crumb and more even rise during baking.
Bake to Golden Perfection
Preheat your oven to 350°F. Place the filled loaf pans on the middle rack and bake for 25-30 minutes, or until a toothpick inserted into the center comes out clean. The loaves should be golden brown on top and feel firm to the touch. If the tops brown too quickly, tent loosely with aluminum foil after 15 minutes to prevent over-browning while ensuring the centers cook through.
Real talk: Your oven might run hot, so start checking for doneness at the 25-minute mark. If the tops look underdone but the toothpick test passes, simply return them to the oven for another 2-3 minutes. Once baked, remove the loaves from the pans and let them cool in the pans for 10 minutes before transferring to a wire rack to cool completely. This gradual cooling prevents cracking and preserves moisture.
Pro Tips For Making 3 Small Banana Bread
- Mash Bananas First: Don’t just chop them—use a fork or potato masher to break up the bananas completely. This releases more moisture and sugar, which actually makes your small loaves denser and sweeter without extra sugar. (Yes, even if the recipe says “chopped,” trust me on this.)
- Cream Butter Cold: Take the butter straight from the fridge and beat it with the sugar until it’s light but still holds peaks. Warm butter mixes faster but can make your small batches greasy, leading to a cakey texture instead of that classic moist crumb. I learned this the hard way after making three batches that tasted like shortbread.
- Skip Overmixing Dry Ingredients: Once you add the wet bananas to the flour, mix just until combined—no need to stir like you’re folding laundry. Overmixing develops gluten, which turns your small loaves tough instead of tender. Two minutes max with a spatula is all you need.
- Test Doneness with a Toothpick: Insert a toothpick into the center of the smallest loaf—it should come out with a few moist crumbs, not wet batter or dry flour. The middle loaf often bakes slower, so check it last. (Pro move: Tap the top gently; if it sounds hollow, it’s done.)
Common mistakes when making your 3 small banana bread
Overmixing the Batter
This is the #1 mistake I see with mini banana bread—overmixing the batter turns tender crumb into dense, rubbery loaves. Once you’ve incorporated all the dry ingredients, stop mixing immediately.
The moment you see no more flour streaks, call it done. I’ve ruined perfectly good banana bread by mixing for an extra 30 seconds—don’t make my mistake! 🌾
Underripe Bananas
Using underripe bananas means your bread will be bland and dry. Look for bananas with dark brown spots all over the peel—the spottier, the better. I once used bananas with just a few brown spots and ended up with a crumbly, unsatisfying loaf.
For extra insurance, let your bananas sit at room temperature for 1-2 hours before mashing to enhance their sweetness.
Skipping the Resting Time
Letting the batter rest for 15-20 minutes before baking might seem like an extra step, but it’s crucial. This short rest allows air bubbles to rise and the flour to hydrate properly, resulting in a smoother texture.
I’ve seen home bakers rush this step and end up with dense, uneven loaves. Trust me—those extra minutes pay off in texture!
Incorrect Pan Preparation
Greasing your pans with just butter or oil isn’t enough—you need that light flour dusting to prevent sticking. I learned this the hard way when my first mini loaves stuck so badly I had to pry them out with a butter knife.
Use vegetable oil for greasing and flour for dusting, tapping out any excess. This ensures clean release every time.
Overfilling the Pans
Filling your loaf pans more than two-thirds full leads to overflow and uneven baking. I’ve seen home bakers pack the batter tightly, resulting in messy tops and potentially underbaked centers. Use a spatula to smooth the batter gently—this creates an even surface that bakes more consistently.
The batter should mound slightly above the pan edges but not overflow when you tap the pan.
Ignoring the Toothpick Test
Checking for doneness by appearance alone is risky—your mini loaves might look golden but still be underdone inside. Always perform the toothpick test: insert a toothpick into the center of each loaf. If it comes out clean or with just a few moist crumbs, your bread is ready.
I’ve pulled loaves out too early only to have them continue cooking and develop a dry texture. Patience here ensures perfect results every time! 🔥
Nutrition facts
Frequently asked questions
Why should I bake 3 small loaves instead of one large one?
Mini loaves solve three big problems: portion control, waste reduction, and faster baking. Each 6×2-inch loaf serves 4-6 people perfectly, so you won’t have leftovers from a single large pan. The smaller size also cuts baking time by half (just 25-30 minutes total) and prevents the dry edges that often happen with large loaves. Plus, they’re ideal for gifting or meal prep!
Can I use this recipe with underripe bananas?
Not ideal! Underripe bananas lack sweetness and moisture, resulting in dry, crumbly bread. Look for bananas with dark brown spots all over—the spottier, the better. For extra flavor, let them sit at room temperature for 1-2 hours before mashing. If you must use slightly less ripe bananas, add 1-2 tablespoons extra sugar to compensate.
How do I adjust this recipe for gluten-free baking?
Replace the 2.5 cups all-purpose flour with a 1:1 gluten-free flour blend (like Bob’s Red Mill) and add 1/4 teaspoon extra baking soda to improve rise. Keep all other ingredients the same, but expect slightly denser texture. For best results, use a gluten-free loaf pan and grease it extra well to prevent sticking.
Why does my mini banana bread come out dense?
Density usually means one of three things: overmixing (mix just until combined), underripe bananas, or skipping the 15-20 minute rest before baking. Also check your oven temp—350°F is critical. If your loaves still turn out dense, try sifting the flour or adding 1/4 cup extra buttermilk to improve moisture.
Can I make these loaves ahead of time?
Bake them 1 day ahead and store wrapped at room temperature. For longer storage, freeze wrapped loaves for up to 3 months. To reheat, wrap slices in a damp paper towel and microwave for 10-15 seconds. The mini size actually preserves freshness better than large loaves since they cool faster.

- 6 Egg Cake Recipe with Oil: Light as Air With Buttery Moisture - October 4, 2026
- 4 Bean Casserole Recipe: One-Pan Heartiness With Smoky Paprika Depth - October 4, 2026
- 3-Ingredient Keto Mug Cake Recipe: Microwave Magic in 2 Minutes - October 4, 2026