
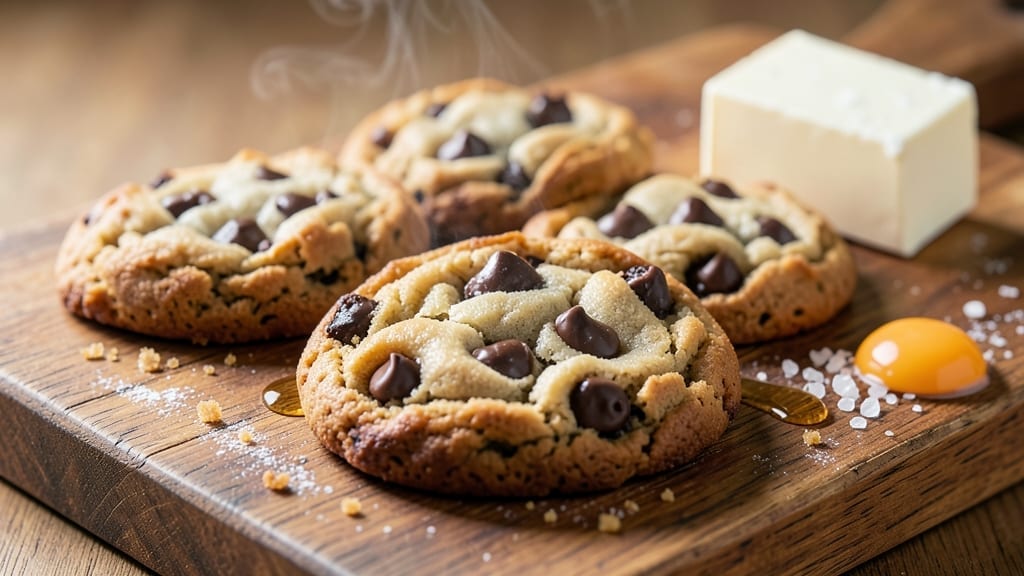
A 24-hour chocolate chip cookie recipe transforms ordinary cookies into something extraordinary—deeply browned edges, crackly tops, and centers so gooey they’ll make you close your eyes in bliss. This isn’t your average batch; it’s a foolproof method that relies on slow fermentation for maximum flavor and texture.
The secret? Letting the dough rest overnight, which develops complex caramel notes and creates that signature chewy-yet-crispy balance. What sets these apart is the two-stage baking process: first at a lower temperature to set the edges, then a higher heat to achieve that perfect golden-brown finish.
You’ll need just 10 ingredients and 30 minutes of active time, but the waiting makes all the difference. The result? Cookies that stay soft for days, with a rich, buttery depth you won’t find in store-bought versions.
By the time you pull them from the oven, you’ll have restaurant-quality cookies—crispy at the edges, tender in the middle, and packed with melty chocolate chips. The aroma alone will have everyone gathering in the kitchen, and the first bite will silence any skepticism.
This is the kind of recipe that becomes a holiday tradition—or a weekly obsession. Perfect for gifting, bake sales, or satisfying that late-night craving. The dough can be prepped the night before, so you’re not stuck in the kitchen when the mood strikes. Let’s make cookies that taste like home.
Ingredients for 24 hour chocolate chip cookie
Just ten ingredients, but the magic happens overnight—rich, buttery, and packed with melty chocolate.
| Ingredient | Amount | Notes |
|---|---|---|
| Unsalted Butter 🧈 | 1 cup | Cold, cubed for even baking |
| Granulated Sugar 🍚 | ¾ cup | White or brown for depth |
| Packed Brown Sugar 🍚 | ¾ cup | Light or dark, packed tightly |
| Large Eggs 🥚 | 2 whole | Room temperature for mixing |
| Vanilla Extract 🌿 | 2 tsp | Pure vanilla for authentic flavor |
| All-Purpose Flour 🌾 | 2 ½ cups | Sifted, no substitutions |
| Baking Soda 🧂 | 1 tsp | Freshly opened for lift |
| Salt 🧂 | 1 tsp | Fine sea or kosher salt |
| Chocolate Chips 🍫 | 2 cups | Semi-sweet or milk, high quality |
| Flaky Sea Salt 🧂 | 1 tbsp | For finishing, like Maldon |
The butter is non-negotiable here—use European-style butter if you can find it, like Plugrá, for that extra richness. Most grocery stores carry it now, and it makes a noticeable difference. The chocolate chips? Ghirardelli or Guittard are my go-to brands—they melt better than the store brands. Brown sugar should be packed tightly, not scooped loosely. If you’re in a pinch, Trader Joe’s or Costco have great bulk bins for sugar and chocolate chips. The vanilla extract matters too—imitation vanilla will taste artificial in these cookies.
No vanilla extract? Vanilla bean paste works in a pinch, or even a scraped vanilla bean. Short on chocolate chips? Chopped chocolate bars (like Lindt or Ghirardelli) give you more chocolate flavor. The baking soda needs to be fresh—if it’s more than six months old, toss it and buy a new box. For the sea salt, Maldon or Diamond Crystal are perfect, but any flaky salt will do. The dough will be thick—don’t stress, that’s exactly how it should be. If you’re worried about overmixing, use a stand mixer with the paddle attachment to keep it smooth without developing gluten.
The dough keeps beautifully in the fridge for up to 3 days, so make a double batch if you’re planning ahead. For baking, preheat your oven to 350°F and use parchment paper—no greasing needed. The cookies will stay soft for 5-7 days if stored in an airtight container. Freeze dough balls for up to 3 months—just bake straight from frozen, adding a minute or two to the time. The aroma alone will have your whole house smelling like a bakery, so save some for gifts.
Why You’ll Love This Recipe
- No-Fuss Dough: I swear, the butter and sugars mix themselves. Cream until light? Ten minutes tops, and the dough comes together faster than I can wipe my hands on my apron.
- Chewy Magic: That 24-hour chill transforms the texture—crisp edges, gooey centers, and a vanilla kiss that lingers. Honestly, the brown sugar’s caramel depth is what makes these dangerously good.
- Party or Pantry: Bake a batch for a crowd, freeze half for later, or pull them straight from the fridge for a snack. Between us, these are my go-to for teacher gifts or lazy Sunday afternoons.
- Budget Buster: Five ingredients, zero fuss, and they cost less than half what store-bought cookies do. The eggs and butter make them rich, but the sugar keeps them affordable—win-win for my wallet.
Step-by-step instructions for 24-Hour chocolate chip cookies
Here’s how to make cookies that develop deep flavor and perfect texture over time.
Cream the Butter and Sugars Together
In a stand mixer fitted with the paddle attachment, beat the 1 cup unsalted butter (cold and cubed) with the 0.75 cup granulated sugar and 0.75 cup packed brown sugar on medium speed for 3-4 minutes. You’re looking for a light, fluffy mixture that nearly doubles in volume and becomes pale in color. This creaming process incorporates air, which creates those beautiful crackly tops and helps the cookies spread just enough.
I like to scrape down the sides of the bowl every minute or so to ensure everything gets evenly incorporated. The butter should be fully softened but not melted—this ensures proper texture in the final cookies. If you’re using your hands, work quickly but thoroughly to avoid melting the butter prematurely.
Add Eggs and Vanilla Extract
Add the 2 whole large eggs (room temperature) one at a time, mixing on low speed for 30 seconds after each addition. Then stir in the 2 teaspoons vanilla extract until fully combined. The mixture will look slightly curdled at first, but don’t worry—it will smooth out once the dry ingredients are added.
This is where the magic of the 24-hour wait begins. The eggs help bind the dough while the vanilla adds that classic chocolate chip cookie aroma. I always use pure vanilla extract here—it makes a noticeable difference in the final flavor. If you’re short on time, you can let the dough rest in the fridge for just 30 minutes, but 24 hours is ideal for maximum flavor development.
Mix in Dry Ingredients and Chocolate Chips
In a separate bowl, whisk together the 2.5 cups all-purpose flour, 1 teaspoon baking soda, and 1 teaspoon salt. Gradually add this mixture to the wet ingredients, mixing on low speed for 30-45 seconds until just combined. You should still see a few flour streaks—overmixing develops gluten, which can make the cookies tough.
Remove the bowl from the mixer and fold in the 2 cups chocolate chips by hand using a silicone spatula. Make sure they’re evenly distributed throughout the dough. I like to use a mix of semi-sweet and milk chocolate chips for depth of flavor. Once everything is incorporated, cover the bowl with plastic wrap and refrigerate for 24 hours. This long chill time allows the flour to fully hydrate and the flavors to meld beautifully.
Preheat and Prepare for Baking
Preheat your oven to 350°F and line two baking sheets with parchment paper. After the 24-hour chill, scoop the dough into 2-tablespoon portions (I use a cookie scoop for uniform size) and place them 3 inches apart on the prepared sheets. The dough will be cold and firm, making it easier to handle without spreading too much.
Bake for 11-13 minutes until the edges are golden brown but the centers still look slightly underdone. They’ll continue cooking on the hot pan after you remove them from the oven. Let them cool on the baking sheet for 5 minutes before transferring to a wire rack. The 24-hour wait ensures they hold their shape better and develop that deep, rich flavor.
Finish with Flaky Sea Salt
While the cookies are still warm, sprinkle each one with a pinch of flaky sea salt. This adds a perfect contrast to the sweetness of the chocolate chips and enhances the overall flavor. The salt should melt slightly from the residual heat, creating those beautiful little crystals on top.
Serve the cookies warm for the ultimate experience—each bite will deliver a perfect balance of crispy edges, gooey centers, and rich chocolate flavor. Store any leftovers in an airtight container at room temperature for up to 5 days, though I doubt they’ll last that long! The 24-hour process makes these cookies irresistible.
Pro Tips For Making 24 Hour Chocolate Chip Cookie
- Chill the Dough Hard: After mixing, spread dough on a tray and refrigerate for at least 12 hours—ideally 24. I used to skip this, and my cookies spread like pancakes. Cold dough holds its shape, giving you thick, chewy centers and crisp edges. (Yes, even if you’re impatient like me.)
- Soften Butter Properly: Beat the unsalted butter until it’s just smooth, with no streaks of white fat—about 3-5 minutes. Over-softened butter makes cookies greasy; under-softened butter won’t blend right. Room temp butter (65-68°F) is your goal. (I learned this the hard way when my first batch tasted like a science experiment.)
- Measure Brown Sugar Right: Pack that brown sugar firmly into your measuring cup—no tapping, no shaking. Loose brown sugar = less moisture = dry cookies. Press it down with a spoon until it resists when you lift the cup. (Your future self will notice the difference.)
- Use Room-Temp Eggs: Cold eggs mix unevenly and can cause cookies to spread unevenly. Let them sit in warm water for 5 minutes before cracking. Room-temp eggs also emulsify better with the butter, giving you a smoother dough. (I was skeptical until I tried it—now I never go back.)
Troubleshooting this dish
Dough Too Sticky?
If your dough feels too sticky after mixing, it’s likely because the flour wasn’t fully incorporated or the butter softened too much. Chill the dough for an extra 30 minutes before scooping—this firms it up.
For stubborn stickiness, wet your hands slightly or use a cookie scoop to portion without flattening the dough balls. I’ve found that Plugrá butter (European-style) stays firmer longer than regular butter, making handling easier.
Cookies Spread Too Much
Over-spreading happens when the butter melts too quickly or the dough isn’t chilled enough. Scoop dough balls with a 2-tablespoon scoop and place them 3 inches apart on the baking sheet.
Use parchment paper to prevent sticking, and bake at 350°F—no higher! If your oven runs hot, reduce the temp to 325°F and add 1-2 minutes to the bake time.
Chocolate Chips Not Melting
For perfectly melty chocolate, use high-quality chocolate chips (like Ghirardelli) and avoid overbaking. Bake until edges are golden but centers still look soft (11-13 minutes). If chips stay hard, try adding 1 teaspoon corn syrup to the dough—it lowers the melting point.
Let cookies cool on the baking sheet for 5 minutes before transferring to a rack; residual heat finishes melting the chocolate.
Cookies Too Dense
Dense cookies usually mean overmixing or old baking soda. Mix dry ingredients just until combined (no flour streaks left), and use fresh baking soda (older than 6 months loses potency).
For extra tenderness, replace ½ cup of the flour with ½ cup cake flour. Also, ensure your butter is cold but softened—not melted—before creaming.
Dough Didn’t Hold Shape
If dough balls flatten during baking, the dough was too warm or didn’t rest long enough. Let the dough chill for the full 24 hours—this hydrates the flour and strengthens the gluten structure.
Scoop dough balls with a cookie scoop and gently roll them between your palms to smooth any cracks. For extra stability, add 1 tablespoon cornstarch to the flour mixture.
Burnt Edges, Raw Centers
This is a classic oven-temperature issue. Preheat your oven for at least 30 minutes before baking, and use an oven thermometer to confirm it’s 350°F (many ovens run hot).
Rotate baking sheets halfway through baking for even heat distribution. If edges brown too fast, reduce the temp to 325°F and bake for 14-15 minutes.
Nutrition facts
Frequently asked questions
Why does the dough need to rest for 24 hours?
The overnight chill transforms these cookies! The long rest time allows the flour to fully hydrate, develops deeper caramelized flavors, and creates that perfect balance between crispy edges and gooey centers. Without it, you’ll miss the rich, buttery depth that makes these stand out from regular chocolate chip cookies.
Can I make these cookies without a stand mixer?
Use a sturdy mixing bowl and a wooden spoon or rubber spatula. Cream the butter and sugars by hand for about 5-7 minutes until light and fluffy, then mix in the wet and dry ingredients as directed. The key is patience—work the dough until it’s just combined without overmixing.
What if I don’t have flaky sea salt for finishing?
Don’t worry! Use regular fine sea salt or even table salt in a pinch. While flaky salt gives those pretty crystals, any salt will enhance the flavor contrast. Just sprinkle it while the cookies are still warm for best results. The salt should melt slightly from the residual heat for that perfect balance.
How do I store these cookies to keep them soft?
Store in an airtight container at room temperature for up to 5 days. For longer storage, freeze the baked cookies (not dough) for up to 3 months. To reheat, warm in a 300°F oven for 3-5 minutes or microwave for 10-15 seconds. The 24-hour process helps them stay soft longer than regular cookies!
Can I add mix-ins like nuts or white chocolate?
Yes! Fold in ½ cup chopped nuts or ½ cup white chocolate chips with the regular chocolate chips. For best results, use high-quality white chocolate that melts smoothly. Keep the total mix-ins to 2.5 cups to maintain the perfect texture.

- 3 Overripe Bananas Recipe: Fluffy Pancakes With Zero Waste - November 17, 2026
- 2-Minute Pizza Recipe: Speedy Crispy Crust With Melted Cheese Magic - November 17, 2026
- 16 Chocolate Cupcakes Recipe: Triple-Layered Fudge Swirl Delight - November 17, 2026