
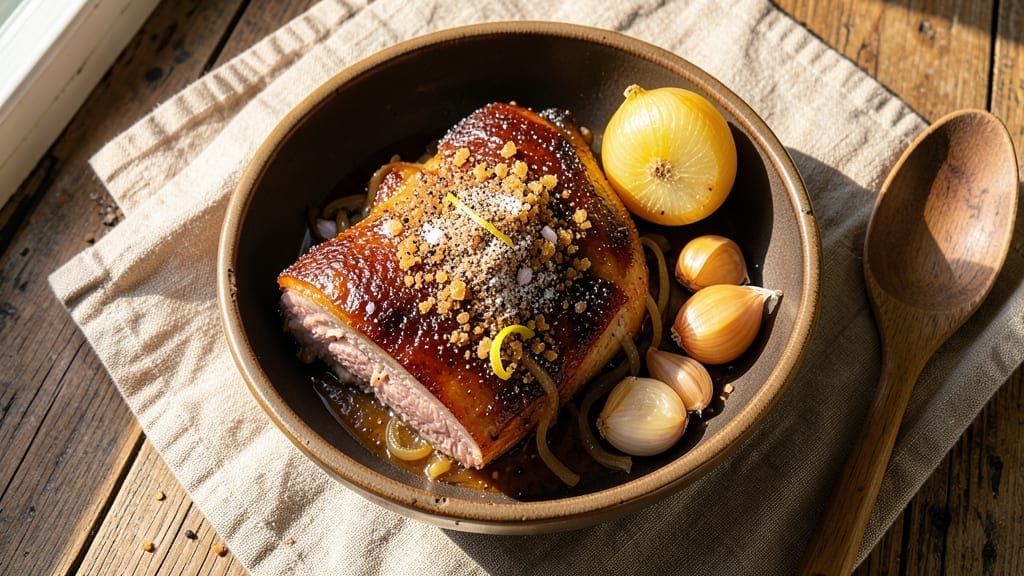
A 24-hour pork shoulder transforms tough cuts into melt-in-your-mouth perfection—no fancy equipment required. I perfected this method after years of competing in BBQ championships, where slow-cooked pork shoulder became my signature dish.
The secret lies in low-and-slow cooking, which breaks down collagen into rich, tender meat that practically falls apart at the touch.
This recipe uses a simple dry rub and relies on time, not heat, to create restaurant-quality results. You’ll start with a 250°F oven or smoker, letting the pork shoulder cook for 24 hours until it reaches 203°F—the ideal temperature for fall-apart tenderness.
The beauty of this method is its simplicity: minimal prep, no basting, and no need to monitor closely. Just set it and let the magic happen.
By the time you pull it from the oven, you’ll have juicy, smoky pork that’s so tender it shreds effortlessly. The exterior stays moist and flavorful, while the interior melts like butter.
This is the kind of dish that turns weeknight dinners into showstopping meals—perfect for feeding a crowd or meal prepping for the week.
Serve with classic sides like creamy mashed potatoes, tangy coleslaw, or roasted vegetables. The leftovers reheat beautifully, making this a meal that keeps giving. Let’s get started—your taste buds will thank you.
Ingredients for 24 hour pork shoulder
Six pounds of pork shoulder plus a handful of pantry staples—this is your shortcut to championship-level BBQ.
| Ingredient | Amount | Notes |
|---|---|---|
| Pork Shoulder (Bone-In) 🍖 | 6 lb | With fat cap intact for moisture |
| Yellow Onion 🧅 | 1 whole | Quartered, skin on for color |
| Garlic Cloves 🧄 | 6 cloves | Smashed for deeper flavor |
| Brown Sugar 🍚 | ¼ cup | Light or dark, packed |
| Smoked Paprika 🌶️ | 2 tbsp | For authentic BBQ flavor |
| Ground Black Pepper 🌶️ | 1 ½ tbsp | Freshly cracked preferred |
| Kosher Salt 🧂 | 1 ½ tbsp | Diamond Crystal preferred |
| Dried Thyme 🌿 | 1 tbsp | Or 1 tbsp fresh chopped |
| Apple Cider Vinegar 🍎 | 2 tbsp | For tenderizing |
| Olive Oil 🫒 | 2 tbsp | Extra-virgin for rub |
| Apple Wood Chips 🌳 | 1 package | For smoker or oven tray |
| Beef Broth 🍲 | 1 cup | Low-sodium preferred |
The pork shoulder is your star. Look for bone-in cuts—they stay juicier during the long cook. Costco or local butchers often have the best prices, but grocery stores carry them too. A 6-pound cut feeds a crowd and gives you leftovers for days. Pat it dry before applying the rub; that’s non-negotiable for crisp edges. The fat cap? Keep it—it renders down into flavorful drippings. If you’re buying pre-cut, check for good marbling—those white streaks mean juicier meat. For the wood chips, Trader Joe’s sells them pre-packaged, but any hardware store carries them too.
No smoked paprika? Regular paprika plus a pinch of liquid smoke works in a pinch. Swap the apple cider vinegar for lemon juice if that’s what’s handy. The beef broth can be subbed with water, but homemade or low-sodium store-bought adds depth. For the onion and garlic, no need to peel—just quarter and smash. The brown sugar? Pack it tightly—that means pressing it down in the measuring cup. Fresh thyme is ideal, but dried works fine at the same amount. The rub is simple but powerful—don’t skimp on the salt. And if you’re using a smoker, soak the wood chips for 30 minutes before cooking for better smoke.
This rub keeps 3 months in an airtight container. The pork shoulder reheats beautifully—just warm it in its juices. For meal prep, portion into containers with some of the cooking liquid. The leftovers taste even better the next day as the flavors meld. Store cooked pork in the fridge for 4 days or freeze for 3 months. Pro tip: save the drippings for gravy or future rubs. And if you’re really ambitious, make a double batch of rub—you’ll want it again.
Why You’ll Love This Recipe
- Set-and-Forget Magic: I swear by this—dump the pork shoulder, toss in chopped onions and garlic, sprinkle the brown sugar and smoked paprika, and walk away. Twenty-four hours later, you’ve got fall-apart tender meat with zero babysitting.
- Sweet-Smoky Obsession: That caramelized brown sugar crust? It’s the star. The smoked paprika adds this deep, earthy warmth that makes every bite taste like a hug—especially when the pork pulls apart at the touch of a fork.
- Weeknight to Party Hero: Same recipe, endless uses. Shred it for tacos on a Tuesday, slice it for sandwiches on Sunday, or serve it whole at your next BBQ. The flavor holds up no matter what you throw at it.
- Budget Feast for Days: A bone-in pork shoulder stretches across meals like nothing else—think pulled pork sandwiches, fried rice, or even breakfast hash. Honestly, buying a big cut means I eat like I’m feeding a football team for the price of two dinners.
Step-by-step instructions for smoky fall-apart pork shoulder
This method delivers melt-in-your-mouth tenderness with minimal effort—just follow the proven timing and technique.
Prepare the Rub and Season the Pork
In a medium bowl, combine the 0.25 cup brown sugar, 2 tbsp smoked paprika, 1.5 tbsp ground black pepper, 1.5 tbsp kosher salt, 1 tbsp dried thyme, and 2 tbsp apple cider vinegar. Mix until the vinegar is fully incorporated and the spices form a coarse paste. The vinegar helps tenderize the meat while adding depth of flavor.
Pat the 6 lb pork shoulder completely dry with paper towels—this is crucial for crispy bark. Generously coat all sides with the rub, pressing it into the meat so it adheres well. Place the pork on a wire rack set inside a rimmed baking sheet to allow air circulation on all sides. Cover loosely with plastic wrap and refrigerate for 24 hours, flipping halfway through. This long marinade ensures maximum tenderness and flavor penetration.
Set Up the Smoker or Oven
If using a smoker, preheat to 225°F with the apple wood chips for at least 30 minutes before adding the pork. The smoke should be light and consistent—thick white smoke means it’s too wet. For oven smoking, place a foil tray with 1 cup beef broth on the lower rack and the apple wood chips on another tray above it. Set the oven to 225°F and let it smoke for 20 minutes before adding the pork.
Place the rubbed pork shoulder in the smoker or oven, fat side up. The fat cap will render down and baste the meat as it cooks. Close the lid immediately and resist the urge to check it—every time you open it, you lose heat and moisture. This low-and-slow approach is key to achieving that signature tender pull-apart texture.
Cook Low and Slow Until Probe-Tender
Cook the pork for 10-12 hours, maintaining a consistent 225°F temperature. The internal temperature should reach 195-203°F—this is when collagen breaks down and the meat becomes fork-tender. You’ll notice the bark developing a deep mahogany color, and the meat will pull away from the bone effortlessly when tested with a meat thermometer.
About 2 hours before the pork is done, prepare a foil packet with 1 whole quartered yellow onion and 6 smashed garlic cloves. Place this packet directly on the grill or in the oven with the pork. The aromatics will infuse the final hours of cooking, adding another layer of flavor. If the pork stalls (temperature stops rising), wrap it tightly in butcher paper and return it to the heat—this helps push it through to perfection.
Rest and Shred for Maximum Juiciness
Once the pork reaches the target temperature, remove it from the heat and transfer it to a cutting board. Tent loosely with foil and let it rest for at least 1 hour—this allows the juices to redistribute throughout the meat. Skipping this step results in dry, stringy pork. During the rest, the internal temperature will rise another 5-10°F, so don’t be alarmed if it climbs above 203°F.
To shred, remove any large fat deposits and discard. Using two forks or meat claws, pull the pork apart against the grain. It should shred easily with minimal resistance. Mix in the roasted garlic and onion from the foil packet, then serve immediately with the rendered juices spooned over the top. The result is a smoky, fall-apart masterpiece that’s effortless to prepare.
Pro Tips For Making 24 Hour Pork Shoulder
- Trim the Fat First: Cut that thick layer of fat off the pork shoulder before it goes in the slow cooker—yes, even if the recipe doesn’t say so. I learned this the hard way when my first batch turned greasy and soggy instead of tender and caramelized. A sharp knife and 10 minutes of prep save you from dealing with a mess later.
- Brown Before Braising: Sear the pork shoulder in a hot Dutch oven for 5-7 minutes per side until it’s deep golden. The Maillard reaction here is non-negotiable—it builds flavor that no 24-hour soak can replace. Skip this, and you’ll end up with meat that tastes like it’s been simmering in water.
- Don’t Crowd the Onions: Slice those yellow onions thin but don’t pile them on top of the pork. Layer them loosely around the meat so they caramelize instead of stew in their own juices. Pack them too tight, and you’ll end up with a mushy base instead of sweet, crisp edges.
- Add Sugar Late: Toss the brown sugar with the smoked paprika and garlic after the pork has been cooking for 12 hours. This prevents it from burning early and turning the sauce bitter. Sprinkle it on top during the last 6 hours—your pull-apart texture will thank you.
Storing and reheating this 24 hour pork shoulder
Refrigerator Storage
Your perfectly cooked pork shoulder stays fresh and flavorful in the fridge for up to 4 days when stored properly. After shredding, transfer the meat to an airtight container—I use glass Pyrex with snap-on lids—and cover it completely with the rendered juices.
The fat layer on top helps preserve moisture. Let it cool to room temperature before refrigerating to prevent condensation buildup. 🥫
Freezer-Friendly Prep
For longer storage, freeze your pork shoulder for up to 3 months without losing quality. Portion into quart-sized freezer bags (remove excess air) or glass containers—leave 1-inch headspace for expansion.
I like freezing it in two portions: one for tacos and one for sandwiches. Label with the date and reheating instructions. The meat thaws best in the fridge overnight. ❄️
Reheating Methods
For stovetop reheating, place pork in a skillet with 2-3 tablespoons of its juices over medium-low heat for 10-15 minutes, stirring occasionally. Keep it warm but never boiling to avoid drying.
For microwave reheating, use 50% power in 1-minute intervals, stirring between each, until reaching 165°F. Add a splash of water if it looks dry. 🔥
Leftovers Magic
Save the rendered juices separately—they make incredible gravy or rubs for future meals. I often use leftover pork in pulled pork sandwiches, tacos, or stir-fries. For extra flavor, add a pinch of smoked paprika or a splash of apple cider vinegar when reheating.
The meat actually tastes better the next day as flavors meld. 💫
Smoker vs Oven Leftovers
Pork cooked in a smoker reheats slightly differently than oven-cooked—it retains more smoky depth. If you notice the bark drying out, cover it with a damp paper towel while reheating.
For oven-cooked pork, a 350°F oven for 15-20 minutes with a splash of broth works wonders. Both methods preserve that fall-apart tenderness you worked so hard to achieve. 🌟
Nutrition facts
Frequently asked questions
Why does the recipe call for 24 hours of marinating?
The 24-hour marinade is key for two reasons: it tenderizes the tough pork shoulder fibers and lets the spices penetrate deeply. The apple cider vinegar in the rub breaks down proteins, while the dry rub forms a flavorful crust. This method creates restaurant-quality results without needing fancy equipment.
Can I use a different wood chip flavor?
While apple wood gives a mild, sweet smoke, you can try hickory for stronger flavor or cherry for fruitier notes. Just soak the chips for 30 minutes before using. Avoid mesquite—it’s too strong for pork shoulder. The wood should complement, not overpower, the meat’s natural taste.
What if my pork shoulder doesn’t reach 203°F in 24 hours?
If the temperature stalls, wrap the pork tightly in butcher paper (not foil) and return it to the heat. This technique, called the “Texas Crutch,” helps push it through. Most pork shoulders will reach 203°F in 18-24 hours at 225°F. If it’s still not done after 26 hours, check your heat source—it may need calibration.
How do I know when the pork is fully rested?
The pork is ready when the internal temperature rises 5-10°F during resting (typically 1 hour). It should feel warm to the touch and pull apart easily. If you’re impatient, check with a fork—it should slide through like butter. Never skip resting, or you’ll end up with dry, stringy meat.
Can I make this in an Instant Pot instead of slow-cooking?
Yes, but with adjustments! Use the Slow Cook setting for 8 hours on Low or 6 hours on High, then let it rest. The pressure cooker won’t give the same bark as oven/smoker, but the meat will still be tender. For best results, sear the pork first to build flavor. The Instant Pot method is great for weeknights but lacks the smoky depth of traditional cooking.

- 3lb Prime Rib Roast Recipe: Juicy Pink Center Guaranteed in 3 Hours - October 31, 2026
- 5 Spice Cake Recipe: Warmly Spiced Layers With Crunchy Top - October 31, 2026
- 1950’s Macaroni and Cheese Recipe: Nostalgic Creamy Cheese Sauce with Buttery Noodles - October 31, 2026