
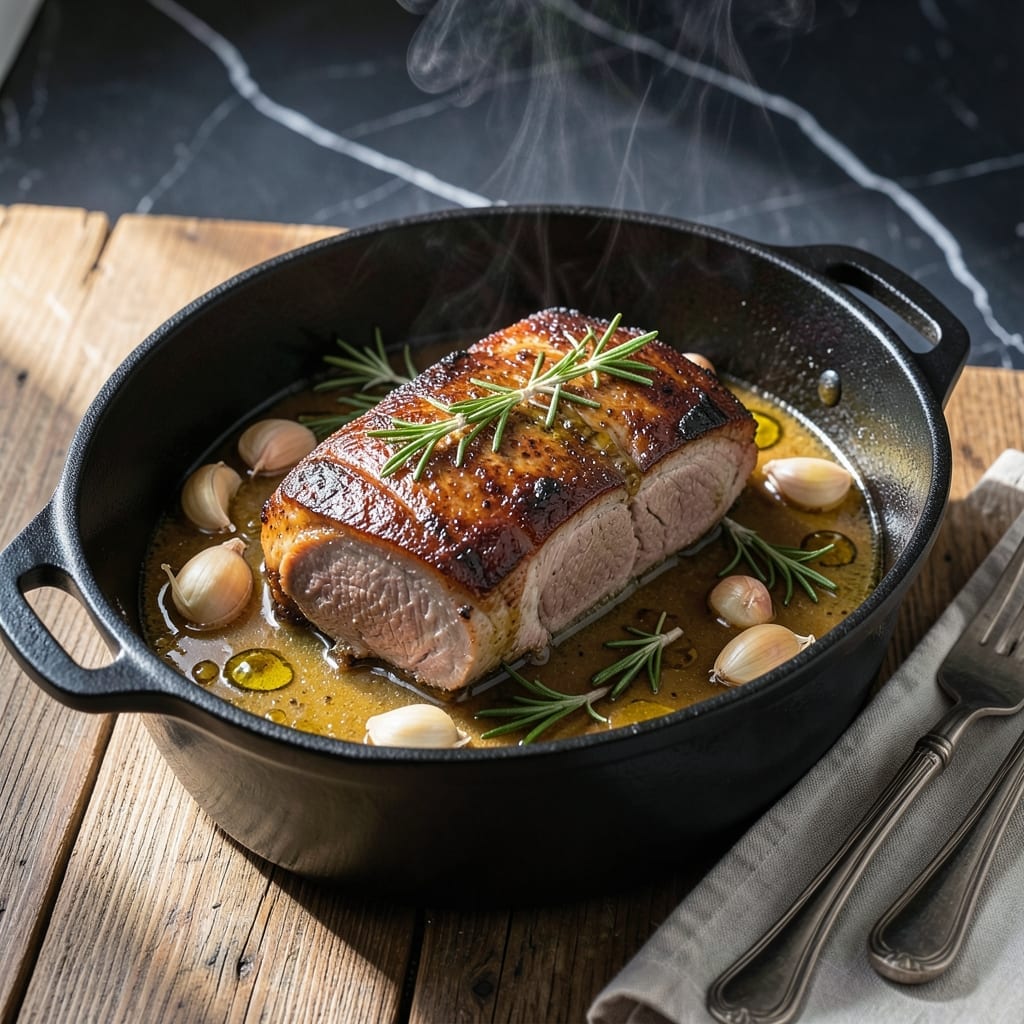
This Dutch oven method transforms pork tenderloin into a tender, moist centerpiece with minimal effort. The enclosed environment traps steam, ensuring the meat stays juicy while developing a rich garlic and herb crust.
I’ve perfected this approach by searing the pork first to lock in flavor, then slow-cooking it with aromatic herbs and garlic. The result is a dish that’s both elegant and foolproof, ideal for weeknight dinners or special occasions.
The Dutch oven’s even heat distribution guarantees consistent results every time. You’ll be rewarded with meat so succulent it practically melts in your mouth, infused with the deep, savory notes of garlic and herbs.
Ready in under an hour, this recipe delivers restaurant-quality flavor with a fraction of the work.
Ingredients for Pork Tenderloin Dutch Oven
Pantry staples plus fresh herbs create this elegant Dutch oven masterpiece in under an hour.
| Ingredient | Amount | Notes |
|---|---|---|
| Pork Tenderloin 🥩 | 1 ½ lb | Trimmed of excess fat |
| Olive Oil 🫒 | 2 tbsp | Divided for searing and roasting |
| Kosher Salt 🧂 | 1 ½ tsp | Diamond Crystal preferred |
| Black Pepper 🌶️ | 1 tsp | Freshly ground coarse |
| Garlic Cloves 🧄 | 6 cloves | Minced for crust |
| Fresh Rosemary 🌿 | 2 tbsp | Finely chopped stems |
| Fresh Thyme 🍃 | 2 tbsp | Leaves stripped from stems |
| Dijon Mustard 🟡 | 1 tbsp | For herb crust binding |
| Low-Sodium Chicken Broth 🥫 | ½ cup | For braising liquid |
| Unsalted Butter 🧈 | 2 tbsp | Melted for finishing |
| White Wine 🍷 | ¼ cup | Dry variety like Sauvignon Blanc |
| Shallot 🧅 | 1 whole | Finely minced for depth |
The pork tenderloin needs to be fresh and plump—avoid anything with grayish discoloration. Whole Foods or Costco have the best selection, but most supermarkets carry it pre-packaged. For the herbs, organic bunches from the produce section have more fragrance than those sad little plastic clamshells. The garlic should be firm with tight skin (no green sprouts).
No white wine? Substitute with more chicken broth plus a splash of apple cider vinegar for acidity. Fresh herbs can be swapped for dried at one-third the amount. Trader Joe’s has great pre-minced garlic if you’re short on time, but fresh tastes brighter. For the mustard, any whole-grain variety works—just avoid the sweet stuff.
Store the pork in its original packaging on a plate (it leaks) for 1-2 days max. Fresh herbs last 1 week wrapped in damp paper towels. The finished dish keeps 3-4 days refrigerated—reheat gently to avoid drying out.
Why You’ll Love This Recipe
- One Pan Wonder: I love that I can sear the pork, then roast it all in the same Dutch oven—no extra dishes to wash.
- Garlic Infused: The garlic cloves roast right alongside the tenderloin, giving it a deep, savory flavor that’s anything but bland.
- Meal Prep Hero: This reheats beautifully, so I make extra for lunches or a quick dinner the next day.
- Budget Friendly: Pork tenderloin is lean, affordable, and feeds my family without breaking the bank.
Step-by-Step Instructions for Pork Tenderloin in a Dutch Oven
Here’s the method that guarantees juicy meat with a fragrant herb crust every time.
Step 1: Sear the Pork Tenderloin for a Golden Crust
Heat 1 tbsp Olive Oil in a Dutch oven over medium-high heat until it shimmers but doesn’t smoke. Pat the 1.5 lb Pork Tenderloin dry with paper towels, then season evenly with 1.5 tsp Kosher Salt and 1 tsp Black Pepper.
Sear the pork tenderloin on all sides for 2-3 minutes per side until deeply browned. You’re building a flavor foundation here—don’t rush. The meat should release easily when it’s ready to turn. Transfer it to a plate and set aside.
Step 2: Build the Aromatic Base in the Dutch Oven
Reduce the heat to medium and add the remaining 1 tbsp Olive Oil. Add the 1 whole Shallot (finely minced) and cook for 1-2 minutes until translucent and just starting to caramelize at the edges.
Stir in the 6 cloves Garlic Cloves (minced), 2 tbsp Fresh Rosemary, and 2 tbsp Fresh Thyme. Cook for 30 seconds until fragrant—the herbs should smell bright and fresh, not burnt. This creates the aromatic base that will infuse the entire dish.
Step 3: Create the Herb Crust and Deglaze
In a small bowl, mix the 1 tbsp Dijon Mustard with a pinch of the reserved pan juices to thin it slightly. Brush this mixture all over the seared pork tenderloin, then roll it in the minced garlic and herbs from the Dutch oven to create a thick crust.
Return the pork to the Dutch oven and pour in 0.25 cup White Wine. Use a wooden spoon to scrape up all the browned bits from the bottom—this is where the deep flavor lives. Let the wine reduce by half, about 2-3 minutes.
Step 4: Braise to Tender Perfection
Pour in the 0.5 cup Low-Sodium Chicken Broth, then cover the Dutch oven with a tight-fitting lid. Reduce the heat to low and let it braise for 20-25 minutes, turning the pork halfway through.
The pork is done when an instant-read thermometer inserted into the thickest part reads 145°F. The meat should feel slightly springy but not firm to the touch. This gentle cooking method ensures it stays moist and tender.
Step 5: Finish with Butter and Rest
Transfer the pork tenderloin to a cutting board and tent loosely with foil. Place the Dutch oven over medium heat and stir in the 2 tbsp Unsalted Butter until melted and the sauce has thickened slightly, about 2 minutes.
Let the pork rest for 10 minutes before slicing. This allows the juices to redistribute throughout the meat. Slice against the grain into 1-inch thick pieces and spoon the herb-infused sauce over the top before serving.
Pro Tips For Making Pork Tenderloin Dutch Oven
- Sear It Hard: Get your Dutch oven screaming hot before adding the pork—about 2 minutes on medium-high with olive oil until it shimmers. This gives the tenderloin that deep brown crust that locks in flavor.
- Salt the Night Before: I learned this the hard way—dry-brine the pork with kosher salt at least 12 hours ahead. It seasons all the way through and keeps the meat juicy, even in a lean cut like tenderloin.
- Don’t Overcrowd the Pot: Resist the urge to add all the garlic cloves at once during searing—they’ll burn. Toss them in during the last minute of browning, then move everything to the sides before adding liquid.
- Use a Thermometer: Pork tenderloin goes from perfect to dry in minutes. Pull it at 140°F internal temp, then let it rest 5-10 minutes under foil—it’ll coast up to a safe 145°F without overcooking.
Storing and Reheating This pork tenderloin dutch oven
Refrigerator Storage
Let your pork tenderloin cool completely, then transfer to an airtight container with its juices. It will keep in the fridge at 40°F or below for 3-4 days. The flavors deepen overnight as the herbs continue to infuse the meat. ❄️
Freezer Storage
For longer storage, wrap individual slices tightly in plastic wrap, then place in a freezer-safe bag with the sauce. It freezes beautifully for up to 3 months without texture loss. Thaw overnight in the fridge before reheating.
Stovetop Reheating
Place slices in a skillet with a splash of chicken broth over medium-low heat. Cover and warm for 5-7 minutes, turning occasionally. This method preserves moisture better than a microwave. 🔥
Oven Reheating
Preheat your oven to 300°F. Place the pork in a baking dish with a little sauce, cover with foil, and warm for 10-15 minutes. This gentle heat prevents drying while reviving the herb crust.
Microwave Option
For quick meals, place slices on a microwave-safe plate with a damp paper towel. Heat on 50% power for 1-2 minutes, checking frequently. Add a spoonful of sauce to maintain moisture.
Nutrition Facts
Frequently Asked Questions
Can I use a different cut of pork?
Pork loin works but needs 10-15 minutes more cooking. Avoid tougher cuts like shoulder—they won’t cook evenly in this method. Tenderloin’s uniform shape makes it ideal for Dutch oven cooking.
Why rest the pork before slicing?
Resting for 10 minutes lets juices redistribute. Slicing too soon causes dry meat as moisture escapes. The internal temperature also rises 5-10°F during this time.
What if my Dutch oven doesn’t have a tight lid?
Use heavy foil to seal it tightly. The trapped steam is key for moisture. Check halfway through to ensure liquid hasn’t evaporated too much.
Can I skip the wine?
Yes! Substitute with extra broth plus 1 tbsp vinegar for acidity. The flavor will be milder but still delicious. Avoid skipping entirely—liquid is needed for deglazing.

- 6 Egg Cake Recipe with Oil: Light as Air With Buttery Moisture - October 4, 2026
- 4 Bean Casserole Recipe: One-Pan Heartiness With Smoky Paprika Depth - October 4, 2026
- 3-Ingredient Keto Mug Cake Recipe: Microwave Magic in 2 Minutes - October 4, 2026