
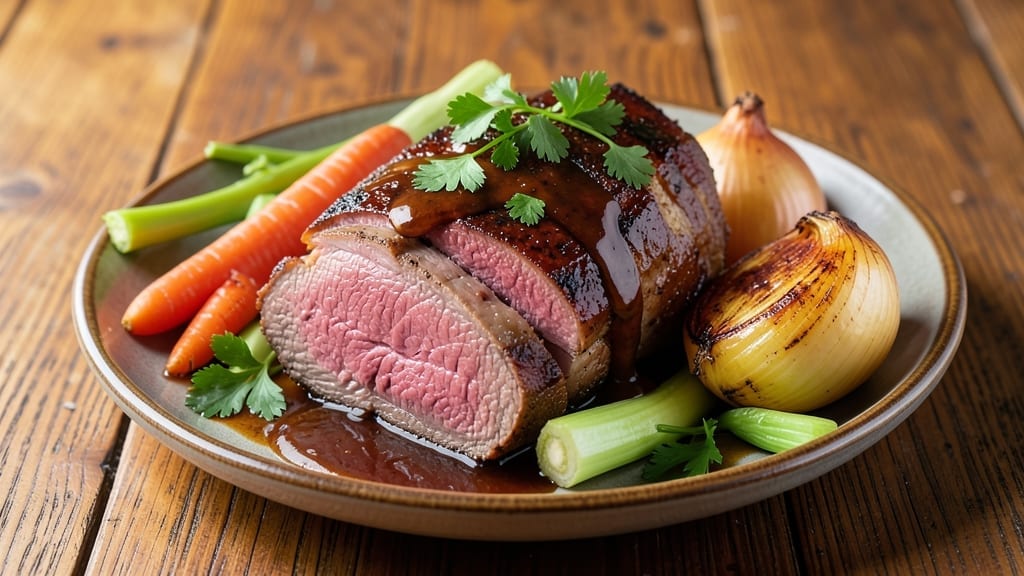
A 2lb eye round roast transformed into fork-tender perfection is what separates a good roast from an unforgettable centerpiece. This slow-braised method unlocks deep flavor and melt-in-your-mouth texture—no fancy cuts or long marinating required.
The secret lies in patience: low heat, moisture control, and precise timing turn tough beef into something restaurant-worthy at home.
What makes this recipe work is the balance of time and technique. We’ll start with a simple seasoning blend, then slow-cook the roast until it reaches 195°F internal temperature—where collagen dissolves into juicy, velvety perfection.
The key? A 3-hour cook time at 275°F, with occasional basting to keep the surface golden and the interior transforming. No guesswork, no dry meat—just consistent, professional results every time.
By the end, you’ll have a roast that slices effortlessly, with rich, caramelized edges and a center so tender it nearly falls apart. The aroma alone will have everyone gathering at the table, and the first bite delivers that satisfying, juicy payoff.
This isn’t just dinner—it’s a showstopper that turns weeknight cooking into something special.
Serve with classic sides like roasted root vegetables, creamy mashed potatoes, or a bold red wine reduction for dipping. The versatility of this method means it works for holidays, family dinners, or even a cozy Sunday supper. Let’s get started on that perfectly tender roast.
Ingredients for 2lb eye round roast
Transform tough eye round into melt-in-your-mouth perfection with these 14 carefully chosen ingredients.
| Ingredient | Amount | Notes |
|---|---|---|
| Eye Round Roast Beef 🥩 | 2 lb | Center-cut for even tenderness |
| Yellow Onion 🧅 | 1 whole | Peeled and quartered |
| Carrots 🥕 | 4 medium | Whole, peeled and halved lengthwise |
| Celery Stalks 🥬 | 3 whole | Trimmed and cut into 2-inch pieces |
| Garlic Cloves 🧄 | 6 cloves | Smashed but not minced |
| Beef Broth 💧 | 2 cups | Low-sodium preferred |
| Red Wine 🍷 | ½ cup | Bold dry variety like Cabernet |
| Tomato Paste 🍅 | 2 tbsp | Smooth, not chunky |
| Olive Oil 🫒 | 2 tbsp | Extra-virgin for richness |
| Fresh Thyme 🌿 | 2 sprigs | Or 1 tsp dried thyme |
| Fresh Rosemary 🌿 | 1 sprig | Wooden spoon helps remove |
| Kosher Salt 🧂 | 1 ½ tsp | Diamond Crystal preferred |
| Black Peppercorns 🌶️ | 1 tsp | Freshly cracked preferred |
| Balsamic Vinegar 🍶 | 1 tbsp | For finishing touch |
The eye round is the star here—center-cut is non-negotiable for even tenderness. Most butchers will trim it for you, but if you’re buying whole, look for good marbling and uniform thickness. Costco or Whole Foods carry excellent quality for roasts, but your local butcher shop will often have fresher cuts. The vegetables—onion, carrots, and celery—form the flavor base, so don’t skimp on freshness. Wilted or rubbery veggies will make the braising liquid bland. For the broth, low-sodium options prevent over-salting, though you can adjust later.
No red wine? Substitute with extra beef broth and a splash of balsamic vinegar—it mimics the acidity perfectly. Fresh thyme and rosemary are ideal, but dried works at one-third the amount. The tomato paste can be swapped for crushed tomatoes if preferred, though paste gives deeper flavor. For the beef, chuck roast can replace eye round in a pinch, though it may need slightly longer cooking. The carrots can be baby carrots if that’s what’s available, but whole carrots hold their shape better. If you’re short on time, pre-chopped mirepoix mixes from the grocery store work fine too.
This roast develops flavor over time—3 hours at 275°F is ideal, but it reheats beautifully if you need to adjust. Store leftovers in an airtight container for up to 5 days, though it’s best within 3 days. For freezing, portion into individual servings and freeze for up to 3 months. The braising liquid can be reduced into a sauce by simmering uncovered for 15 minutes, then finished with a splash of balsamic vinegar for brightness. Always let the roast rest 15-20 minutes before slicing to retain juices.
Why You’ll Love This Recipe
- One-Pan Magic: I swear by this for nights when I’d rather not wash a million dishes. Toss the beef, onions, carrots, and celery into one roasting pan with garlic cloves—no fuss, no stress. The aromatics caramelize right alongside the meat, and honestly? That’s my kind of shortcut.
- Deep, Savory Payoff: The eye round roast delivers that perfect balance—tender enough to melt in your mouth but with just enough chew to keep things interesting. The onions and carrots soften into sweet, jammy pockets, while the garlic adds this warm, earthy punch. It’s the kind of flavor that sticks with you long after the last bite.
- Leftovers That Don’t Suck: Between us, roast beef leftovers usually end up in the trash. Not this one. The meat stays juicy for days, and the veggies hold up beautifully. I’ll slice it thin for sandwiches, cube it for tacos, or just reheat it straight up—no one complains. (Yes, even my picky teenager.)
- Budget-Friendly Crowd-Pleaser: A 2lb roast feeds four easily, and the veggies stretch it even further. You’re not breaking the bank for fancy cuts or specialty ingredients—just good, honest beef and pantry staples. Plus, it’s one of those dishes that makes you look like a hero without trying too hard. Win.
Step-by-step instructions for slow-braised eye round roast
Transform tough eye round into melt-in-your-mouth perfection through precise braising technique.
Sear the Roast for Deep Flavor Foundation
Heat a heavy Dutch oven over medium-high heat until very hot. Add the 2 lb Eye Round Roast Beef and sear on all sides until deeply browned, about 8-10 minutes total. This caramelization creates the flavor base for your braise – don’t rush this step or the meat will steam instead of develop color.
While the roast sears, prepare your vegetables by combining the 1 whole Yellow Onion (quartered), 4 medium Carrots (halved lengthwise), 3 whole Celery Stalks (cut into 2-inch pieces), and 6 cloves Garlic Cloves (smashed). Add these to the Dutch oven with the roast. The vegetables will soften during searing, releasing their natural sweetness into the pan.
Build the Braising Liquid
Remove the roast and vegetables from the Dutch oven and set aside. In the same pot, add 2 tbsp Olive Oil and increase heat to medium. Pour in the 0.5 cup Red Wine and scrape up all the browned bits from the bottom – this is where all the flavor lives. Let the wine reduce by half, about 3-4 minutes, until it develops a rich, concentrated aroma.
Add 2 tbsp Tomato Paste, 2 cups Beef Broth, 2 sprigs Fresh Thyme, 1 sprig Fresh Rosemary, 1.5 tsp Kosher Salt, and 1 tsp Black Peppercorns. Stir well to combine, then return the roast and vegetables to the pot. The liquid should come about halfway up the sides of the roast – if it doesn’t, add a splash of water.
Braise Until Fork-Tender
Bring the liquid to a gentle simmer, then cover the Dutch oven tightly with a lid. Reduce heat to low and transfer to the oven preheated to 300°F. Braise for 3 hours, then carefully flip the roast and add 1 tbsp Balsamic Vinegar to the braising liquid. Return to the oven for another 1-2 hours until the meat is fork-tender and falls apart easily.
The key to perfect braising is patience – the meat should be so tender that a fork slides through with no resistance. Check the internal temperature with a meat thermometer; it should read 195-205°F in the thickest part. The vegetables should be completely tender but still holding their shape, absorbing all the rich braising flavors.
Rest and Serve
Remove the roast from the Dutch oven and transfer to a cutting board. Tent loosely with foil and let rest for 15-20 minutes before slicing. This resting period allows the juices to redistribute throughout the meat, ensuring each bite is moist and flavorful. Meanwhile, skim any excess fat from the braising liquid and adjust seasoning if needed.
Slice the roast against the grain into ¼-inch thick slices and serve with the braised vegetables and reduced sauce. The result should be fork-tender beef with a rich, caramelized surface and vegetables that have absorbed all the deep, savory flavors of the braise. Each bite should deliver perfect tenderness with every forkful.
Pro Tips For Making 2lb Eye Round Roast
- USE A MEAT THERMOMETER: Eye round roasts are lean and dry out fast—guessing won’t cut it. Stick the probe in the thickest part (not touching bone) and pull it at 130°F for medium-rare (yes, it’ll rise to 135°F while resting). I learned this the hard way after serving a slightly overdone roast that had all the joy of shoe leather.
- TRIM THE FAT, NOT THE FLAVOR: You’ll find a thin fat cap on eye round—leave it. That’s where the juices hide. Instead, trim any silverskin or excess connective tissue, but don’t go hunting for fat to cut off. The beef’s natural fat renders slowly and keeps it moist, unlike, say, a ribeye where you’d aggressively trim.
- SWEAT THE VEGETABLES FIRST: Chop onions, carrots, and celery into ½-inch chunks (no need for perfection) and cook them in the same pot with a splash of water or broth for 8–10 minutes before adding the roast. This builds flavor into the pan juices instead of just boiling them later. I used to skip this, and the gravy always tasted bland.
- REST IT UNDER FOIL: After roasting, tent the meat with foil and let it sit for 10–15 minutes—this isn’t optional. Eye round is tough when cold, and resting lets the fibers relax. If you’re impatient (like me), resist the urge to slice early. Even 5 minutes makes a difference in tenderness.
Flavor customization for these flavors
Classic Red Wine Braise
The original recipe delivers bold, savory depth thanks to the 0.5 cup dry red wine and 2 tbsp tomato paste base. The wine reduces into a concentrated flavor bomb, while the tomato paste adds umami richness.
I recommend using a Cabernet Sauvignon or Merlot for their robust tannins that pair beautifully with beef. For extra complexity, add 1 bay leaf during braising and remove before serving. 🍷
Herb-Infused Variations
Swap out the thyme and rosemary for other aromatic herbs to change the flavor profile completely. Try 1 tbsp fresh oregano and 1 tsp fennel seeds for an Italian-inspired twist, or 2 sprigs fresh sage and 1 tsp juniper berries for a gamey, forest-like depth.
Both combinations work beautifully with the red wine base and add visual appeal when garnished on top.
Spicy Cajun Kick
For heat lovers, add 1 tbsp Cajun seasoning (like Tony Chachere’s) directly to the roast before searing, then stir 1 tsp smoked paprika and ½ tsp cayenne pepper into the braising liquid.
Finish with a splash of hot sauce when serving. This version pairs perfectly with cool sides like creamy coleslaw or buttery cornbread. 🌶️
Umami Bomb Boost
Elevate the depth of flavor by adding 2 tbsp soy sauce or 1 tbsp fish sauce to the braising liquid. For vegetarian-friendly umami, use 1 tbsp mushroom powder or 2 tbsp Worcestershire sauce.
These additions create a richer, more complex sauce that clings beautifully to the tender meat. I especially love this version when serving with a side of jasmine rice.
Sweet & Tangy Glaze
Create a caramelized finish by adding 2 tbsp brown sugar and 1 tbsp balsamic vinegar to the braising liquid during the final 30 minutes of cooking. The sugars will caramelize, creating a glossy, slightly sweet glaze that contrasts perfectly with the savory beef.
This works especially well with apple or pear slices as a side dish.
Garlic & Ginger Fusion
For an Asian-inspired twist, add 2 tbsp minced fresh ginger and 4 extra garlic cloves when building the braising liquid. Replace the red wine with 0.5 cup dry sherry and add 1 tsp five-spice powder for warmth.
Serve with steamed jasmine rice and quick-pickled vegetables to balance the richness. This version transforms the dish into a cross-cultural delight. 🌏
Nutrition facts
Frequently asked questions
Why does the recipe call for such a long cook time?
The 3-hour braise at 300°F transforms tough eye round into melt-in-your-mouth perfection by breaking down collagen into gelatin. This slow process creates that signature fork-tender texture while allowing flavors to meld beautifully. Patience here is key—rushing will leave the meat dry and chewy.
Can I use a different cut of beef instead of eye round?
Yes! Chuck roast or bottom round work well, though they may need 30-60 extra minutes of cooking. Avoid lean cuts like sirloin—they won’t become tender. The eye round’s leaner profile makes it ideal for this method, but a slightly fattier cut (like chuck) adds extra richness. Always check for 195°F internal temp.
What if my Dutch oven isn’t big enough?
Use a heavy oven-safe pot with a lid instead—any deep pot that fits the roast and vegetables will work. If needed, braise in batches: cook the vegetables first, then add the roast. For extra insurance, cover tightly with foil if your pot lacks a lid. The key is keeping the liquid level halfway up the roast to prevent drying.
How do I know when the roast is done?
The meat is ready when it reaches 195-205°F internal temp and a fork slides through with no resistance. The edges should be caramelized, and the juices should run clear when pierced. If using a meat thermometer, insert it into the thickest part—don’t rely on visual cues alone. The 15-20 minute rest after cooking is crucial for juices to redistribute.
Can I make this roast ahead of time?
This roast reheats beautifully. Cook it fully, then refrigerate in an airtight container for up to 5 days or freeze for 3 months. To reheat, warm in the oven at 300°F for 20-30 minutes with a splash of beef broth to refresh the sauce. The flavors actually deepen overnight, making it perfect for meal prep.

- 6 Egg Cake Recipe with Oil: Light as Air With Buttery Moisture - October 4, 2026
- 4 Bean Casserole Recipe: One-Pan Heartiness With Smoky Paprika Depth - October 4, 2026
- 3-Ingredient Keto Mug Cake Recipe: Microwave Magic in 2 Minutes - October 4, 2026