
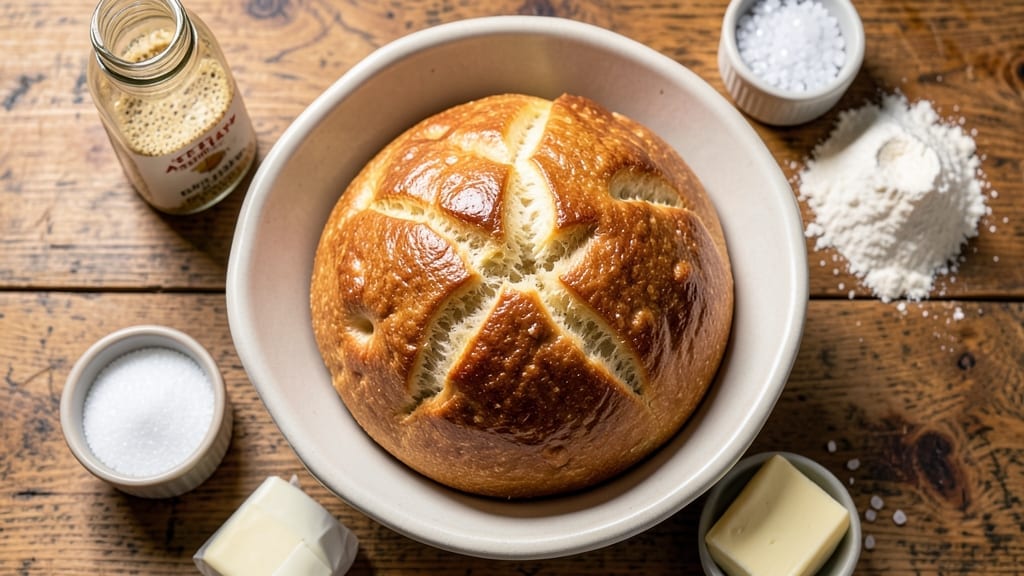
A 2lb white bread recipe that delivers crusty crunch and soft crumb without the fuss of professional equipment is exactly what home bakers need. This hands-off method uses simple ingredients—flour, yeast, water, and a touch of sugar—to create a loaf with restaurant-quality texture, all in a standard 9×5-inch pan.
The secret lies in precise timing and gentle handling, ensuring a foolproof result every time, even for beginners.
What sets this recipe apart is its balance of simplicity and professional technique. You’ll mix, knead, and proof the dough with minimal effort, then bake it to a golden brown with a crisp exterior and airy interior.
The dough’s resting time (critical for flavor and texture) is built into the process, so you won’t need to babysit it. Whether you’re making sandwich bread or an artisan-style loaf, the same principles apply—just adjust the shape.
By the end, you’ll have a 2lb loaf that slices cleanly, toasts perfectly, and stays fresh for days. The crust develops a satisfying crunch while the crumb remains tender, making it ideal for everyday meals or gifting.
No steam basket or Dutch oven required—just a home oven and patience. Let’s get started on mastering this classic.
This recipe scales easily for larger batches or smaller pans, and optional tips for storage or variations (like adding seeds or herbs) ensure you can customize it to your taste.
The key is attention to detail during proofing and baking, where small adjustments make all the difference. Ready to bake bread like a pro?
Ingredients for 2lb white bread
Simple ingredients, professional results—this 2lb white bread recipe delivers restaurant-quality texture with hands-off ease.
| Ingredient | Amount | Notes |
|---|---|---|
| All-Purpose Flour 🌾 | 5 cups | Unbleached, for best texture |
| Active Dry Yeast 🍞 | 2 ¼ tsp | Fresh yeast preferred if available |
| Granulated Sugar 🍚 | ½ tsp | Feeds yeast for activation |
| Salt 🧂 | 1 ½ tsp | Kosher or sea salt preferred |
| Unsalted Butter 🧈 | ½ cup | Cold, cubed for texture |
| Warm Water 💧 | 1 ½ cups | 110°F for yeast activation |
| Large Egg 🥚 | 1 whole | Room temperature for mixing |
| Extra-Virgin Olive Oil 🫒 | 2 tbsp | For dough handling |
| Cornmeal 🌽 | ½ cup | For dusting baking pan |
| Ice Water ❄️ | ¼ cup | For final dough adjustment |
The flour is non-negotiable here—King Arthur or Bob’s Red Mill all-purpose flour gives the best balance of structure and tenderness. If you’ve only got store-brand flour, sift it first for a lighter crumb. The yeast is the heart of this recipe, so check the expiration date—old yeast won’t activate properly. For the butter, Land O’Lakes or Plugrá work perfectly, but any unsalted butter will do. Keep it cold until mixing to prevent melting. Warm water is critical: too hot kills yeast, too cold slows activation—aim for 110°F (like a warm bath).
No active dry yeast? Instant yeast works at half the amount—just skip the sugar since it’s already included. Store-brand flour with additives? Sift it before mixing to avoid dense bread. Running short on butter? Vegetable shortening or coconut oil can substitute, though texture will differ slightly. The olive oil matters more for dough handling than flavor—any brand works here. Cornmeal is just for dusting, so grab the cheapest bag at Costco or Walmart—no need to splurge. Ice water is your secret weapon for controlling dough temperature during the final knead.
This dough is best used within 24 hours of mixing, but you can refrigerate it for up to 3 days if wrapped tightly in plastic. For longer storage, freeze the shaped loaf for up to 3 months—thaw overnight in the fridge before baking. The crust stays crisp for 2 days at room temperature, but slice and toast for maximum freshness. Leftovers? Freeze slices wrapped in foil for quick toast later.
Why You’ll Love This Recipe
- No-Knead Magic: I swear by this dough—just mix, let it rise, and forget it. The yeast does all the work while you handle dinner, and that butter-rich crumb? Soft enough to melt in your mouth.
- Buttery Soft Payoff: That small pat of cold butter in the dough isn’t just decoration—it creates pockets of air so light, you’ll forget you’re eating bread, not cloud fluff. Honestly, the first slice is always the hardest to stop at.
- Weeknight Wonder: Make a loaf on Sunday, slice it for sandwiches all week. Freeze half for lazy mornings when toast is the only thing standing between you and sanity. (Yes, even on a Tuesday night.)
- Pantry Staple Gold: Five ingredients, zero specialty items. You’re already stocked—flour, yeast, sugar, salt, butter. No last-minute grocery runs, no fancy tools, just reliable, crave-worthy bread that costs less than takeout.
Step-by-step instructions for homemade white bread
Here’s the method for a foolproof white bread that delivers perfect crusty crunch and tender crumb every time.
Activate the Yeast for Maximum Rise
In a small bowl, combine the 1.5 cups warm water (about 110°F—too hot will kill the yeast) with the 0.5 tsp granulated sugar and 2.25 tsp active dry yeast. Let this sit for 5-10 minutes until it becomes frothy and bubbly. This activation step ensures your bread rises properly—if it doesn’t bubble, your yeast is dead and you’ll need to start over.
While waiting, measure out the 5 cups all-purpose flour and 1.5 tsp salt in a large mixing bowl. The flour should be sifted to remove any lumps, which helps create a lighter texture. Keep the bowl nearby so you can combine everything quickly once the yeast is active.
Mix the Dough and Develop Gluten
Add the activated yeast mixture to the dry ingredients and stir with a wooden spoon until a shaggy dough forms. Then add the 1 whole large egg and 0.5 cup cold cubed unsalted butter. Mix until the butter is incorporated, then add the 2 tbsp extra-virgin olive oil.
Turn the dough onto a lightly floured surface and knead for 8-10 minutes until smooth and elastic. You’ll know it’s ready when it springs back slowly when poked. This kneading step develops gluten, which gives the bread its structure. If the dough feels too sticky, add flour 1 tablespoon at a time—but don’t overdo it, or your bread will be dense.
First Rise and Shape the Loaf
Lightly grease a large bowl with olive oil and place the dough inside. Cover with a damp towel and let rise in a warm place for 1-1.5 hours, or until doubled in size. The dough should feel light and airy when pressed gently with a finger. If it doesn’t rise properly, your kitchen might be too cold—try placing the bowl near a warm oven with the light on.
Once risen, punch down the dough to release air, then shape it into a rectangular loaf. Place it on a parchment-lined baking sheet and cover again with the damp towel. Let it rise for another 30-45 minutes until slightly puffy. This second rise ensures a good oven spring when baking.
Prepare and Bake for Crusty Crunch
Preheat your oven to 375°F with a baking stone or inverted baking sheet on the middle rack. This creates steam for that perfect crust. While the oven heats, brush the risen dough with a little water and sprinkle generously with 0.5 cup cornmeal—this creates the signature crusty exterior.
Bake for 30-35 minutes until the bread is deep golden brown and sounds hollow when tapped on the bottom. The internal temperature should reach 190-200°F. For the best texture, immediately transfer the bread to a wire rack to cool completely—this prevents sogginess and helps develop the crumb structure.
Adjust Dough Consistency if Needed
If your dough feels too sticky after shaping, brush the top with 0.25 cup ice water and let it sit for 5 minutes before baking. This helps tighten the gluten structure and creates a better oven spring. The ice water also contributes to that classic artisanal look and chewy crust.
For extra flavor, you can brush the cooled bread with melted butter. This simple step adds richness and enhances the bread’s natural sweetness. Store any leftovers wrapped in a clean kitchen towel to maintain freshness for up to 3 days.
Pro Tips For Making 2lb White Bread
- Use Room-Temp Butter: Cold butter creates pockets of steam that make your bread dense—no one wants a brick. Let that unsalted butter sit out for 30 minutes before mixing, or even better, microwave it for 10 seconds to soften just enough. (Yes, I’ve made this mistake twice—don’t be me.)
- Bloom Yeast in Warm Water: Dumping dry yeast straight into flour is lazy and unreliable. Mix it with the sugar and warm water first—wait 5 minutes until it foams like a tiny beer before adding flour. That’s how you guarantee it’s active, not just sitting there waiting to fail you.
- Knead Until Windowpane: Stop guessing when the dough is done. Stretch a small piece—if it’s smooth and translucent (like a windowpane), it’s ready. Over-kneading is easy, but under-kneading means gummy, sad bread. (Your hands will thank you for not going full CrossFit on the dough.)
- Let Dough Rise Twice: First rise is for flavor, second rise is for structure. After the initial rise, punch down the dough and let it rest 10 minutes before shaping. Then, give it a second rise—this step makes the difference between dense bread and airy, pillowy perfection. (Skipping it is like skipping the appetizer—you’ll still eat, but you’ll regret it.)
Perfect pairings for 2lb white bread
Classic Spreads
This white bread pairs beautifully with butter—I recommend Land O’Lakes or Plugrá for that rich, creamy texture. For a touch of sweetness, try strawberry jam or honey (about 1 tbsp per slice). The crust’s crunch contrasts perfectly with soft spreads, making every bite satisfying. 🥪
Savory Toppings
For sandwiches, sharp cheddar cheese and turkey slices create a crowd-pleasing combo. I love adding sliced avocado or hummus for extra creaminess. The bread’s mild flavor lets toppings shine without overpowering. Try a grilled cheese with American cheese and a sprinkle of garlic powder—it melts beautifully. 🧀
Sweet Pairings
Warm the bread slightly and top with cinnamon sugar (mix 1 tbsp sugar with ½ tsp cinnamon) for a French toast twist. Pair with maple syrup or whipped cream for dessert. For a breakfast sandwich, add scrambled eggs and crispy bacon—the soft crumb soaks up flavors perfectly. 🍯
Drink Pairings
A hot cup of coffee or black tea complements the bread’s simplicity. For a cozy vibe, try hot chocolate with a sprinkle of sea salt. Cold drinks like iced tea or lemonade work too—just let the bread cool slightly to avoid sogginess. 🍵
Meal Prep Uses
Slice the bread and store in an airtight container for up to 3 days. Toast before serving to revive crispiness. Use for open-faced sandwiches (top with peanut butter and banana slices) or garlic bread (brush with melted butter and garlic powder).
Perfect for quick lunches or snacks. 🥖
Nutrition facts
Frequently asked questions
Can I use this recipe for a sandwich loaf vs. artisan-style bread?
For a sandwich loaf, shape the dough into a standard 9×5-inch pan and bake at 350°F for 35-40 minutes. For an artisan-style loaf, roll the dough into a round boule or batard shape and bake on a parchment-lined tray at 425°F for 25-30 minutes with steam. The key is adjusting the shape and oven temperature for different textures.
Why did my bread turn out dense instead of light and airy?
Dense bread usually means the gluten didn’t develop enough or the yeast didn’t activate properly. Check your yeast—it should bubble within 5-10 minutes in warm water. Also, knead for the full 8-10 minutes to build structure. If your kitchen is cold, place the dough near a warm oven with the light on during rising. Over-handling or under-kneading are common culprits!
How do I know when the bread is fully baked?
Your bread is done when it reaches an internal temperature of 190-200°F and has a deep golden brown crust. Tap the bottom—it should sound hollow. If unsure, slice a small piece: the center should be fully cooked with no raw dough. Overbaking dries out the crumb, so pull it out just before it seems “done” for perfect texture.
Can I make this recipe without a stand mixer?
Yes! This dough is designed for hand-kneading. Use a lightly floured surface and knead for 8-10 minutes until smooth and elastic. The butter adds richness, so work quickly to keep it cold. If your arms get tired, take breaks—patience is key! The dough should spring back slowly when poked, signaling proper gluten development.
How long can I refrigerate or freeze the dough?
You can refrigerate the shaped dough for up to 3 days if wrapped tightly in plastic. For longer storage, freeze the shaped loaf (unbaked) for up to 3 months. Thaw overnight in the fridge before baking. Pro tip: Let it sit at room temperature for 30 minutes after thawing to ensure even baking and proper rise.

- 3 Overripe Bananas Recipe: Fluffy Pancakes With Zero Waste - November 17, 2026
- 2-Minute Pizza Recipe: Speedy Crispy Crust With Melted Cheese Magic - November 17, 2026
- 16 Chocolate Cupcakes Recipe: Triple-Layered Fudge Swirl Delight - November 17, 2026