
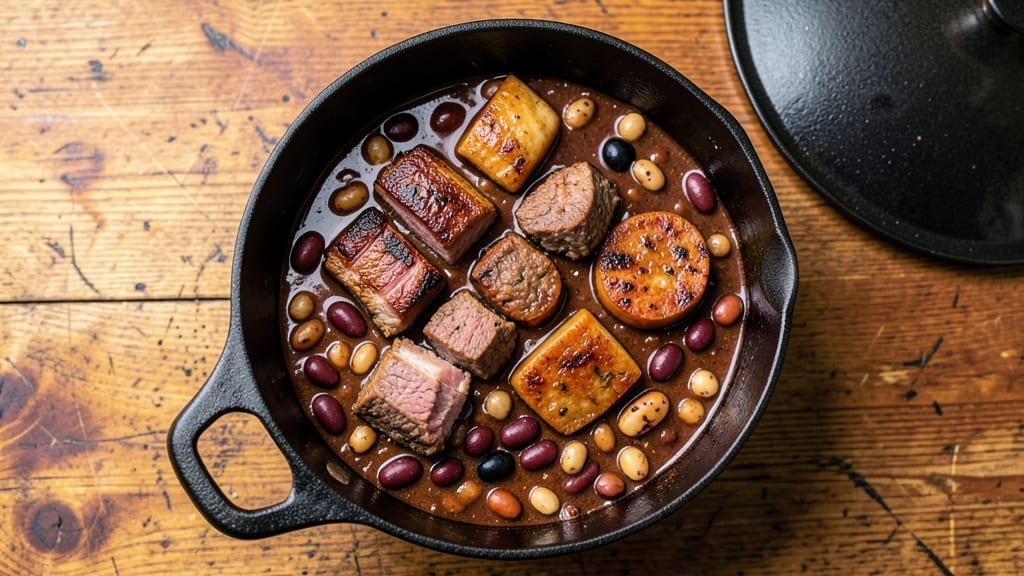
A 3 bean 3 meat chili recipe transforms a simple pot into a hearty Tex-Mex masterpiece that feeds a crowd with deep, smoky flavors and layers of texture.
This isn’t your basic chili—it’s a protein-packed powerhouse where tender beef, savory pork, and spiced sausage blend with kidney, black, and pinto beans for a meal that’s equal parts comforting and satisfying.
The slow simmer allows spices like cumin and chili powder to develop into rich complexity, while the meat breaks down into fork-tender perfection.
The beauty of this recipe lies in its balance: bold enough to stand alone but flexible enough to customize with toppings like melted cheese, cool sour cream, or fresh green onions.
I’ve perfected the browning step to build deep, caramelized flavors in the meat, and the secret to avoiding a mushy texture is letting the chili simmer low and slow—no rushing, just patience that pays off in every spoonful.
This is the kind of chili that disappears faster than you can say “second bowl,” leaving your kitchen smelling like a Texas roadside diner.
What you’ll end up with is a restaurant-quality chili that’s hearty enough for game day gatherings but simple enough for a weeknight dinner. The combination of three meats adds depth to the flavor profile, while the three beans create a satisfying texture that holds up through reheating.
The spices—cumin, chili powder, and garlic—work together to create a warm, earthy backbone that ties everything together.
Serve it with crusty bread or cornbread to soak up every last drop of that rich, savory broth. This isn’t just chili; it’s a one-pot meal that delivers comfort, protein, and flavor in one satisfying package. Let’s get cooking—your taste buds (and leftovers) will thank you.
Ingredients for 3 bean 3 meat chili
Three meats, three beans, and a handful of pantry staples—this chili is a Tex-Mex powerhouse.
| Ingredient | Amount | Notes |
|---|---|---|
| Chuck Roast 🥩 | 2 lb | Cut into 1-inch cubes |
| Pork Shoulder 🐖 | 1 ½ lb | Cut into 1-inch cubes |
| Kielbasa Sausage 🌭 | 1 lb | Sliced into 1/2-inch rounds |
| Kidney Beans 🌱 | 1 can | 15 oz, drained and rinsed |
| Black Beans 🌱 | 1 can | 15 oz, drained and rinsed |
| Pinto Beans 🌱 | 1 can | 15 oz, drained and rinsed |
| Chili Powder 🌶️ | 3 tbsp | Smoked variety preferred |
| Ground Cumin 🌿 | 2 tbsp | Toasted for depth |
| Garlic Cloves 🧄 | 6 cloves | Minced, fresh preferred |
| Onion 🧅 | 1 whole | Medium, diced |
| Tomato Paste 🍅 | 2 tbsp | Squeeze tube works |
| Beef Broth 💧 | 4 cups | Low-sodium preferred |
| Black Coffee ☕ | 1 cup | Cold brew or regular |
| Bay Leaves 🍃 | 2 whole | Remove before serving |
| Salt 🧂 | 1 ½ tsp | Kosher or sea salt |
| Black Pepper 🌶️ | 1 tsp | Freshly ground |
| Olive Oil 🫒 | 2 tbsp | For browning meat |
The meats are where the magic happens. Chuck roast for deep flavor, pork shoulder for richness, and kielbasa for that smoky kick—don’t skip the browning step. I grab mine from Costco when I’m feeding a crowd, but the regular supermarket cuts work fine too. Look for good marbling in the beef and pork—it’s what makes the chili rich. The beans? Canned is fine, but if you’ve got time, soaking them overnight cuts down on gas. I usually buy the no-salt-added versions to control the seasoning myself.
No smoked chili powder? Regular chili powder plus a pinch of smoked paprika works in a pinch. Fresh garlic is ideal, but jarred minced garlic at half the amount gets you close. The coffee is non-negotiable—it deepens the chili flavor without adding bitterness. No coffee? Instant espresso powder works too. The tomato paste can be from a squeeze tube if that’s what you’ve got—just measure it out carefully. For the onions, any variety works, but yellow or red have the best flavor. And if you’re watching sodium, use low-sodium beef broth and add the salt at the end.
This chili tastes even better the next day—honestly, it’s peak flavor after 24 hours. Keeps in the fridge for 5-6 days and freezes beautifully for up to 3 months. I like to portion it into containers right after it cools so I can grab a meal anytime. The meat and beans hold up perfectly through reheating, so leftovers are just as good as the first batch. Pro tip: Freeze in portions with a bit of broth on top to prevent a dry texture.
Why You’ll Love This Recipe
- One-Pot Magic: Honestly, I dump everything into one pot—meats, beans, spices—and walk away. No chopping, no fussing, just simmer. The chuck roast and pork shoulder break down into tender shreds while you’re watching TV, and the kielbasa adds smoky layers without extra effort.
- Deep Umami Bomb: Between us, the combo of beef, pork, and kielbasa creates a flavor explosion. The kidney beans soak up all the juices, while the black beans add that creamy texture—like a hug in a bowl. (Yes, even on a Tuesday night.)
- Leftovers That Save Me: This chili tastes better the next day. I make a double batch on Sundays, freeze half, and pull it out for lazy nights or game days. The flavors meld into something richer, and it’s still hearty enough to feed my teenagers.
- Budget-Friendly Powerhouse: I’m not kidding—this feeds six for under $15. Chuck roast and pork shoulder stretch across meals, and canned beans cut costs without sacrificing taste. Plus, the kielbasa adds a premium touch without breaking the bank.
Step-by-step instructions for hearty 3 bean 3 meat chili
Here’s how to build a chili so rich and flavorful it’ll have everyone asking for seconds.
Brown the Meats for Maximum Flavor
Heat a large Dutch oven over medium-high heat and add the 2 tablespoons olive oil. Working in batches to avoid crowding, add the 2 lb chuck roast cut into 1-inch cubes and brown on all sides for 3-4 minutes until deeply golden. Remove and set aside.
In the same pot, add the 1.5 lb pork shoulder cut into 1-inch cubes and brown for 4-5 minutes until caramelized. Transfer to a plate. Finally, add the 1 lb kielbasa sausage sliced into ½-inch rounds and cook for 2-3 minutes per side until lightly browned. Remove all meats and set aside temporarily.
Here’s the thing—browning the meats first develops deep, meaty flavors that simmer into the chili. Don’t skip this step; it’s what makes homemade chili taste restaurant-quality. If your pot gets too crowded, work in batches and wipe out any browned bits that stick to the bottom with a paper towel.
Sauté Aromatics and Build the Chili Base
In the same Dutch oven, reduce heat to medium and add the 1 whole onion diced and the 6 cloves garlic minced. Cook for 5-6 minutes until the onions are soft and translucent, stirring occasionally. You’ll smell that sweet, caramelized aroma—this is where the chili’s depth starts.
Stir in the 2 tablespoons tomato paste and cook for 1 minute until it darkens slightly. This paste will thicken the chili and add that rich, umami depth. Be careful not to burn it—just let it bloom for that minute.
Now add the 3 tablespoons chili powder and 2 tablespoons ground cumin, stirring constantly for 30 seconds to toast the spices and release their aromas. This step is crucial for developing the chili’s signature warmth. Don’t walk away—spices burn quickly.
Combine Everything and Simmer
Return all the browned meats to the pot. Add the 4 cups beef broth, 1 cup black coffee, 2 whole bay leaves, 1.5 teaspoons salt, and 1 teaspoon black pepper. Stir well to combine, then bring the mixture to a gentle boil over high heat.
Once boiling, reduce heat to low and add the 1 can kidney beans, 1 can black beans, and 1 can pinto beans (all drained and rinsed). The beans should be just submerged—they’ll absorb some liquid as they cook. Here’s where it gets fun: stir in the beans and give everything a good mix.
Cover the pot and let it simmer for 3-4 hours on the stove or transfer to a 325°F oven for 4-5 hours. The chili needs time to develop its complex flavors. I like to check it periodically, stirring gently and tasting as it goes. The coffee adds depth, while the bay leaves lend subtle earthiness—don’t remove them until the very end.
Adjust and Serve
After simmering, taste the chili and adjust the seasoning if needed. You might need a little more salt, chili powder, or even a splash of vinegar to brighten the flavors. Real talk: the first taste might seem a bit bland—this is normal. The chili will deepen in flavor as it rests.
Remove the 2 bay leaves before serving. Ladle the chili into bowls and top with your favorite garnishes—sour cream, shredded cheese, chopped cilantro, or sliced jalapeños. The combination of tender meats, three types of beans, and that perfect smoky-spicy balance makes this chili a showstopper.
This chili tastes even better the next day as the flavors meld together. Leftovers keep well in the refrigerator for up to 5 days or can be frozen for 3 months. Double the batch if you can—this chili disappears fast!
Pro Tips For Making 3 Bean 3 Meat Chili
- SEAR MEAT IN BATCHES: Chuck roast and pork shoulder won’t release their juices if you crowd the pan—trust me, I’ve turned a perfectly good chili into a sad, greasy mess by ignoring this. Brown the kielbasa first (it cooks fastest), then work in the other meats in 2-3 batches. High heat, two minutes per side max, or you’ll end up with steamed meat instead of crispy edges.
- SOAK BEANS OVERNIGHT: I used to toss dried beans in cold water and hope for the best—until my chili turned into a mushy, grainy disaster. Soak kidney and black beans in plenty of water (4 cups per pound) for 8+ hours, then drain and rinse. This cuts cooking time by half and keeps them from breaking down into paste. (Yes, even if you’re impatient like me.)
- SKIP THE PRE-CUT KIELBASA: Pre-sliced kielbasa loses flavor and texture faster than whole links. Buy it whole, slice it yourself into ½-inch rounds, and sear the edges before adding to the pot. The extra step makes a real difference—your chili will taste like it was made by someone who actually cares.
- LOW AND SLOW AFTER 45 MINUTES: The first hour of cooking should be hot enough to blister the meat, but after that, drop the heat to a simmer (200°F or lower). I learned this the hard way when my chili boiled down into a thick, rubbery sludge. Cover it and let it work—this is where the flavors meld, not where you rush.
Wine and beer pairings for this dish
Red Wine Pairings
For this hearty chili, I reach for a bold Zinfandel from California—its jammy berry notes and peppery finish stand up to the smoky, spicy depth of the chili.
A Cabernet Sauvignon with its dark fruit and earthy undertones also works beautifully, especially if your chili has a touch of sweetness from the tomato paste. Avoid light whites—they’ll get overwhelmed by the rich, meaty flavors. 🍷
Beer Complements
A crisp Mexican lager like Modelo Especial or Pacifico cuts through the richness without competing. The light body and subtle citrus notes refresh your palate between bites of chili.
For craft beer lovers, a wheat beer with a touch of spice—like Allagash White—adds a nice contrast to the smoky kielbasa and chili powder. Avoid heavy stouts or IPAs, which can overpower the dish.
Coffee Contrast
Since the recipe already includes coffee, why not serve it alongside? A dark roast with medium body—like Peet’s Big Bench—complements the chili’s depth without overpowering it. The natural acidity in the coffee balances the richness of the meat and beans.
For a non-alcoholic option, a hibiscus tea (like Mexican agua de jamaica) adds a tangy brightness that pairs surprisingly well.
Spicy Chili Tip
If your chili has extra heat from the smoked chili powder, opt for a slightly sweeter wine or beer to balance it. A Riesling with its honeyed notes or a Mexican amber lager like Negra Modelo will help tame the spice.
The key is finding a beverage that enhances the chili’s complexity rather than clashing with it.
Nutrition facts
Frequently asked questions
Can I substitute any of the meats in this recipe?
For the beef, try ground chuck or stew meat instead of chuck roast. Swap pork shoulder for pork ribs or Italian sausage—just adjust the cooking time. The kielbasa can be replaced with chorizo or andouille sausage for a different flavor profile. Keep the total meat weight around 4.5 lbs for best results.
Why does the recipe call for coffee?
The coffee enhances the chili’s depth without adding bitterness—it deepens the flavor by intensifying the spices and meat. Use cold brew or instant espresso powder if you don’t have regular coffee. Never use decaf, as it lacks the necessary compounds for flavor development. This is a classic Tex-Mex trick!
How can I make this chili less spicy?
Start by reducing the chili powder to 2 tablespoons instead of 3. For extra mildness, add 1 cup tomato sauce or 1 diced tomato to balance the heat. After cooking, stir in a spoonful of sugar or honey to mellow the spices. Always taste as you go!
Can I make this chili in a slow cooker?
Yes! Brown the meats first, then combine everything in the slow cooker. Cook on low for 8-10 hours or high for 5-6 hours. The slow cooker’s gentle heat works perfectly for developing flavors. Just skip the bay leaves if you’re making it ahead—they can get mushy.
What’s the best way to reheat leftover chili?
Reheat gently on the stovetop over low heat with a splash of beef broth or water to prevent drying. For microwave reheating, cover with a damp paper towel and heat in 30-second intervals, stirring between each. The chili tastes even better the next day as flavors meld!

- 3lb Prime Rib Roast Recipe: Juicy Pink Center Guaranteed in 3 Hours - October 31, 2026
- 5 Spice Cake Recipe: Warmly Spiced Layers With Crunchy Top - October 31, 2026
- 1950’s Macaroni and Cheese Recipe: Nostalgic Creamy Cheese Sauce with Buttery Noodles - October 31, 2026