
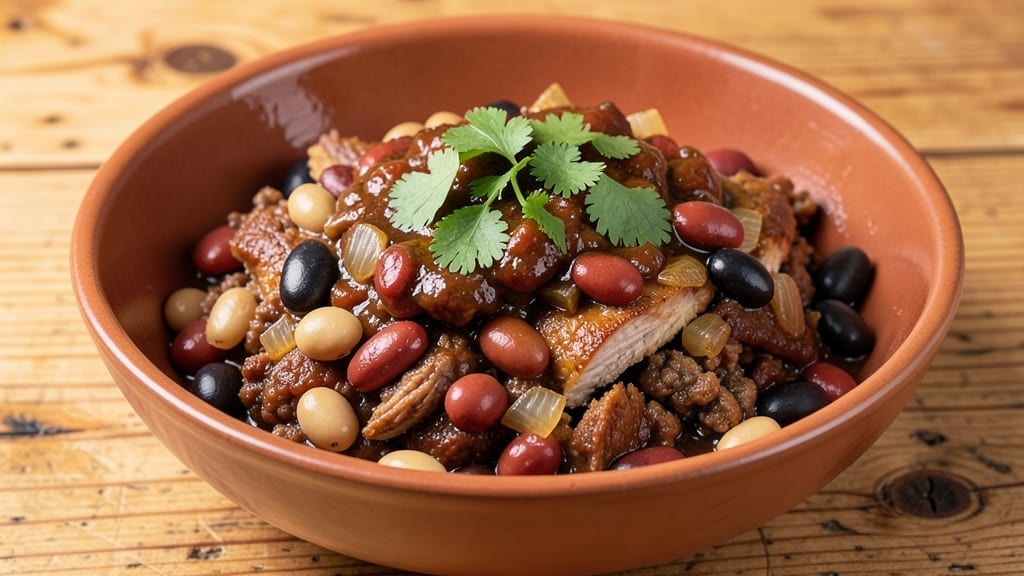
This 3 bean turkey chili recipe delivers the kind of smoky-spiced heartiness that turns weeknight dinners into comforting traditions. The secret lies in slow-simmered flavors—ground turkey browned to perfection, three types of beans for texture, and a blend of spices that dance between earthy and bright.
I’ve perfected this over years of testing, balancing traditional techniques with modern shortcuts like slow cooker or Instant Pot adaptations for busy evenings.
The beauty of this chili is its versatility—it’s rich enough to stand alone but pairs beautifully with cornbread or a sprinkle of avocado.
The key steps are simple: sauté the turkey until deeply browned, build layers of flavor with onions and garlic, then let everything meld in a long, slow simmer.
This isn’t just a recipe; it’s a one-pot meal that feeds a crowd or warms a solo night, with every spoonful packed with smoky depth and tender textures.
What you’ll end up with is a deeply satisfying bowl of chili—thick with beans, tender from the turkey, and infused with warm spices that linger on the palate. The slow cook transforms tough cuts into melt-in-your-mouth bites, while the beans add heartiness without overpowering the smoky base.
Serve it with crusty bread or a dollop of sour cream to balance the heat, and you’ve got a dish that’s as restaurant-worthy as it is homey.
Ready to make it? The instructions walk you through every step—from browning the turkey to adjusting the spice level—so you can trust the process. Whether you’re feeding a family or meal prepping for the week, this chili delivers foolproof results that taste like a hug in a bowl.
Ingredients for 3 bean turkey chilli
Six servings of smoky-spiced heartiness start with these simple yet powerful ingredients.
| Ingredient | Amount | Notes |
|---|---|---|
| Ground Turkey 🦃 | 1 ½ lb | 93% lean, browned thoroughly |
| Kidney Beans 🌱 | 1 cup | Canned, drained and rinsed |
| Black Beans 🌱 | 1 cup | Canned, drained and rinsed |
| Pinto Beans 🌱 | 1 cup | Canned, drained and rinsed |
| Yellow Onion 🧅 | 1 whole | Diced, medium size |
| Garlic Cloves 🧄 | 4 cloves | Minced, fresh preferred |
| Diced Tomatoes 🍅 | 2 cups | Canned, fire-roasted |
| Tomato Paste 🍅 | 2 tbsp | Smooth, unsweetened |
| Chicken Broth 💧 | 2 cups | Low-sodium preferred |
| Chili Powder 🌶️ | 2 tbsp | Smoked paprika blend |
| Ground Cumin 🌿 | 1 tbsp | Freshly toasted preferred |
| Dried Oregano 🍃 | 1 tsp | Mexican oregano ideal |
| Bay Leaves 🌿 | 2 whole | Removed before serving |
| Salt 🧂 | 1 tsp | Kosher or sea salt |
| Black Pepper 🌶️ | ½ tsp | Freshly ground preferred |
| Olive Oil 🫒 | 2 tbsp | Extra-virgin for richness |
The ground turkey is where the magic begins. Look for 93% lean—it browns beautifully and stays tender. I usually grab mine from Costco or the butcher counter at Whole Foods for the best quality. The beans? Canned is fine, but if you’re feeling ambitious, soak and cook your own for extra depth. For the beans, I like mixing kidney, black, and pinto—they give you that perfect trio of textures. The onions and garlic should be fresh, with the onions having a nice crisp bite when diced. If you’re short on time, pre-minced garlic from the jar works in a pinch, but fresh is always better.
No fire-roasted tomatoes? Regular canned tomatoes with a pinch of smoked paprika will do. The tomato paste can be substituted with tomato sauce at double the amount, though it’ll be less concentrated. For the broth, low-sodium is key—you’ll be adding salt later, and you don’t want to overdo it. The chili powder is non-negotiable here—Penzeys or McCormick have great blends. If you’re feeling adventurous, toast the cumin seeds whole in a dry pan for 30 seconds before grinding them—game changer. The bay leaves add that subtle earthiness that makes this chili sing, so don’t skip them.
This chili tastes even better the next day, so make a double batch if you can. Store in airtight containers in the fridge for up to 5 days, or freeze for 3 months. I like to portion it into individual containers for easy lunches—just reheat with a splash of broth or water. The flavors deepen as it sits, so if you’re meal prepping, wait 24 hours before serving the first portion. And if you’ve got leftovers, a sprinkle of avocado or a dollop of sour cream takes it to the next level.
Why You’ll Love This Recipe
- One-Pot Magic: I swear by this—no extra dishes, just dump, stir, simmer. The turkey browns while the onions caramelize, and by the time the beans are tender, the whole kitchen smells like a cozy Sunday.
- Deep, Smoky Richness: That combo of kidney, black, and pinto beans? It’s where the magic happens—earthy, creamy, with just enough kick from the spices. The turkey keeps it hearty but never heavy, and honestly? It’s the kind of dish that makes you slow down.
- Meal Prep Hero: Make a double batch on Sunday, and you’ve got lunch covered all week. The flavors actually get better after a day in the fridge—my kids beg for it at school, and I still have leftovers by Thursday. (Yes, even on a Tuesday night.)
- Budget-Friendly Feast: Ground turkey stretches so far, and those three beans? They’re my wallet’s best friend. A big pot feeds six for under $15, and the leftovers? Freezer-friendly for months. No guilt, just good eating.
Step-by-step instructions for 3 bean turkey chilli
Here’s how to craft a deeply flavorful chilli that balances smoky spices with tender turkey and three types of beans.
Brown the Ground Turkey Thoroughly
Heat the 2 tablespoons olive oil in a large Dutch oven over medium-high heat. Add the 1.5 pounds ground turkey, breaking it apart with a wooden spoon as it cooks. Let it brown undisturbed for 3-4 minutes—this creates that rich, meaty foundation. Once the turkey loses its raw color, break it up further and cook for another 3-4 minutes until fully browned and cooked through.
Here’s the thing—don’t drain the fat after browning. That rendered turkey fat carries incredible flavor and helps build the chilli’s depth. If the pan gets too dry before the turkey is fully cooked, add 1-2 tablespoons chicken broth to deglaze. Transfer the browned turkey to a plate and set aside temporarily.
Build Flavor with Aromatics and Spices
In the same Dutch oven, reduce the heat to medium and add the diced yellow onion. Cook for 5-6 minutes until softened and translucent. Add the 4 minced garlic cloves and cook for 30 seconds until fragrant—don’t let it brown or it’ll turn bitter.
Now stir in the 2 tablespoons chili powder, 1 tablespoon ground cumin, 1 teaspoon dried oregano, 1 teaspoon salt, and 0.5 teaspoon black pepper. Cook the spices for 1 minute, stirring constantly, until they release their aromatic oils. This step develops the chilli’s signature smoky depth.
Create the Chilli Base with Tomatoes and Broth
Add the 2 tablespoons tomato paste and cook for 1 minute, stirring constantly to prevent burning. Pour in the 2 cups diced tomatoes and 2 cups chicken broth, scraping up any browned bits from the bottom of the pot. Bring everything to a gentle simmer, then reduce heat to low and let it cook uncovered for 10 minutes to allow the flavors to meld.
This simmering step is where the magic happens. The acids in the tomatoes and the sweetness of the broth begin to marry with the spices. You’ll notice the mixture darkening slightly—that’s the sign of flavor development. Return the browned turkey to the pot and stir to combine.
Add Beans and Simmer to Perfection
Add the 1 cup kidney beans, 1 cup black beans, and 1 cup pinto beans along with the 2 whole bay leaves. Stir gently to combine, then increase heat to medium-low and let the chilli simmer uncovered for 25-30 minutes. The beans should be heated through and the chilli should thicken slightly as it reduces.
I like to check the seasoning after about 20 minutes of simmering. Taste and adjust with additional salt if needed. The chilli should have a rich, complex flavor with layers of smokiness from the spices, sweetness from the tomatoes, and depth from the turkey fat. Remove the bay leaves before serving.
Rest and Serve with Confidence
Let the chilli rest for 10 minutes off the heat before serving. This resting period allows the flavors to fully develop and the beans to absorb any remaining liquid. The chilli will thicken slightly as it rests, creating that perfect spoonable consistency.
Serve the chilli hot with your favorite toppings—crumbled cheese, chopped avocado, fresh cilantro, or a dollop of sour cream. Each spoonful should deliver that perfect balance of smoky heat, tender turkey, and hearty beans. This chilli tastes even better the next day as the flavors continue to meld.
Pro Tips For Making 3 Bean Turkey Chilli
- Brown the Turkey Hard: Don’t just warm it—crank the heat to medium-high and break the turkey into small, even crumbles while it cooks. I learned this the hard way: undercooked turkey stays bland, and you’ll end up with a gray, mushy mess. Let those pieces sear for 5-6 minutes until they’re no longer pink, or your chili will taste like it’s missing something.
- Rinse Those Beans: Drain and rinse the canned beans before adding them—yes, even if they’re labeled “no salt added.” The starch coating makes the chili gummy, and nobody wants a thick, gluey texture. A quick cold-water rinse keeps things light and lets the flavors shine.
- Sweat the Onion Slow: Skip the sizzle—cook the onion over low heat until it’s translucent and just starting to soften, about 8-10 minutes. High heat burns it fast, and you’ll end up with a bitter, charred taste that overpowers the rest of the dish. Patience here means better flavor later.
- Simmer, Don’t Boil: Once everything’s in the pot, keep the heat at a gentle simmer (small bubbles, occasional stir) for at least 30 minutes. Boiling toughens the beans and makes the turkey dry out. If it looks too thick, add a splash of broth—not water—so the seasoning stays balanced.
Common mistakes when making this dish
Skipping the Brown Step
Never underestimate the power of browning your ground turkey—this step creates the deep, meaty flavor that makes chili sing. I’ve seen beginners rush this and end up with pale, bland turkey that doesn’t hold up in the long simmer.
Let it brown undisturbed for 3-4 minutes until it releases those rich, caramelized juices. If you skip this, your chili will taste more like a stew than a smoky, spiced masterpiece. 🔥
Overcrowding the Pot
Adding all your ingredients at once can lead to a watery, thin chili. Instead, build layers of flavor: brown the turkey first, then sauté the onions and garlic, and finally add the beans. If you dump everything in at once, you’ll end up with a soup-like consistency.
I like to keep the Dutch oven no more than 2/3 full during cooking to allow for proper simmering and reduction.
Ignoring the Simmer Time
Rushing the simmer is a fast track to bland chili. The spices and flavors need at least 25-30 minutes to meld together properly. If you’re short on time, use a slow cooker on low for 6-8 hours—it’ll give you that same deep flavor without constant attention.
Trust the process; the longer it simmers, the better it tastes the next day. ⏳
Not Adjusting Seasoning
Taste as you go! Many cooks forget to check the seasoning midway through cooking, only to realize at the end that it’s either bland or too salty. After 20 minutes of simmering, take a spoonful and adjust with salt, pepper, or even a pinch of chili powder.
The flavors evolve, so don’t be afraid to tweak—this is where your chili goes from good to amazing.
Using Pre-Cooked Beans Directly
While canned beans are convenient, draining and rinsing them is a must. The excess sodium and starches can make your chili taste flat or overly salty. Rinse them under cold water until the rinse water runs clear.
For extra depth, I sometimes add 1/2 cup of the bean liquid back to the pot after rinsing—it adds a subtle richness. 💫
Skipping the Resting Time
Letting your chili rest for 10 minutes off the heat might feel like a waste of time, but it’s crucial. This step allows the juices to redistribute, making every bite more flavorful.
If you serve it immediately, you’ll end up with a thinner, less cohesive dish. Think of it like resting a steak—patience pays off in the end. 💪
Nutrition facts
Frequently asked questions
Can I substitute ground beef for the turkey in this recipe?
Ground beef works wonderfully—just use the same amount (1.5 pounds) and consider trimming excess fat if you prefer a leaner texture. For extra depth, brown the beef in batches to avoid overcrowding. The flavor profile will be richer, but the turkey keeps it lighter and more versatile for meal prep.
How do I make this chili in a slow cooker?
Brown the turkey first in a skillet, then transfer it to your slow cooker. Add all remaining ingredients (including the browned turkey) and cook on low for 6-8 hours or high for 3-4 hours. The slow cooker method actually enhances the flavors by keeping everything warm and simmering gently. Stir once halfway through and adjust seasoning before serving.
What can I do if my chili is too thin?
Simmer uncovered for an additional 10-15 minutes to let the liquid reduce naturally. If it’s still too thin, mix 1 tablespoon cornstarch with 2 tablespoons cold water, stir it into the chili, and simmer for another 5 minutes until thickened. Avoid adding flour directly—it can make the chili taste grainy.
Can I freeze this chili for later?
Yes! Let the chili cool completely, then store it in airtight containers for up to 3 months. Thaw overnight in the refrigerator before reheating. For best results, reheat on the stove over medium-low heat, stirring occasionally, until warmed through. The flavors actually improve after freezing and thawing.
How can I adjust the spice level?
Start with the base recipe, then taste and adjust. For more heat, add 1/2 teaspoon cayenne pepper or a pinch of red pepper flakes. For a milder version, reduce the chili powder to 1.5 tablespoons and add 1/2 teaspoon sugar to balance. Always taste as you go—seasoning evolves during cooking!

- 3lb Prime Rib Roast Recipe: Juicy Pink Center Guaranteed in 3 Hours - October 31, 2026
- 5 Spice Cake Recipe: Warmly Spiced Layers With Crunchy Top - October 31, 2026
- 1950’s Macaroni and Cheese Recipe: Nostalgic Creamy Cheese Sauce with Buttery Noodles - October 31, 2026