
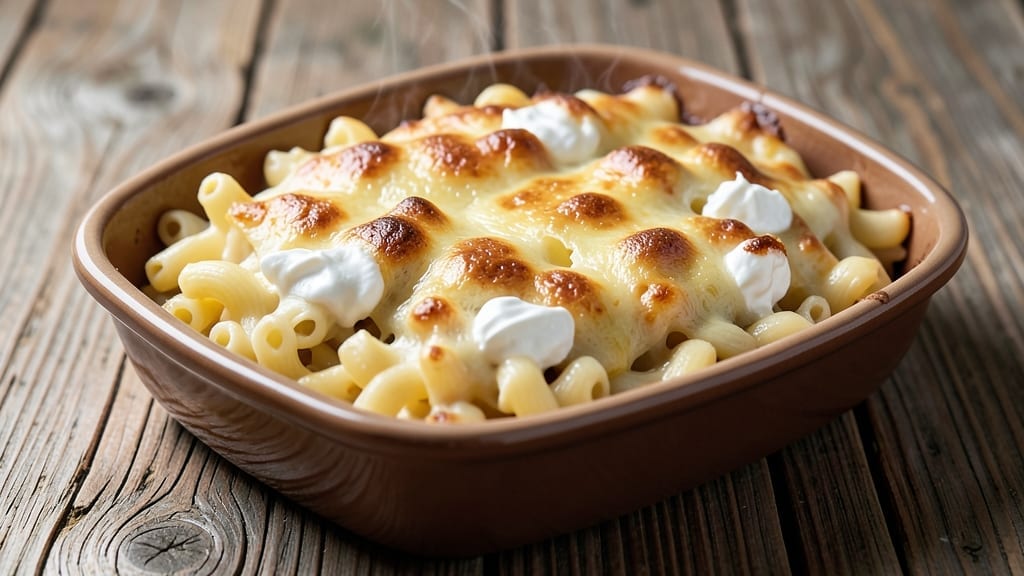
A 3 cheese mac and cheese recipe baked until golden and bubbling is the ultimate comfort food—creamy, gooey layers topped with crispy breadcrumbs that make every bite irresistible.
I developed this version after years of testing, balancing rich cheeses and perfecting the oven technique to ensure that crispy texture without sacrificing that melt-in-your-mouth center. The secret lies in the cheese blend and baking time, which transforms simple pasta into a restaurant-worthy dish.
This recipe uses sharp cheddar for tang, Gruyère for nutty depth, and cream cheese for extra creaminess—three cheeses that create a sauce so rich it clings to every noodle.
The breadcrumb topping adds texture and flavor, while baking at the right temperature ensures crispy edges without drying out the pasta underneath. It’s the kind of dish that feels indulgent but comes together in under an hour.
What you’ll end up with is a crispy, golden-topped mac and cheese with layers of cheesy goodness that pull apart perfectly. The sauce is velvety, the breadcrumbs add a satisfying crunch, and the cheeses meld into a flavor so rich it satisfies even the pickiest eaters.
This is comfort food at its finest—creamy, cheesy, and impossible to resist.
Serve it as a main dish for a family dinner or as a side for holiday gatherings. The leftovers reheat beautifully, making it perfect for meal prep. Here’s how to make it—simple steps for a dish that always impresses.
Ingredients for 3 cheese mac n cheese recipe baked
Six servings of cheesy perfection—where crispy meets gooey in every bite.
| Ingredient | Amount | Notes |
|---|---|---|
| Elbow Macaroni 🍝 | 1 ½ lbs | Dry pasta, medium or elbow shape |
| Sharp White Cheddar Cheese 🧀 | 1 ½ cups | Shredded, block preferred |
| Gruyère Cheese 🧀 | 1 cup | Shredded, aged 12+ months |
| Cream Cheese 🧀 | 8 oz | Full-fat, room temperature |
| Unsalted Butter 🧈 | ¾ cup | Cold, cubed for melting |
| Heavy Whipping Cream 🥛 | ½ cup | Full-fat for creaminess |
| Whole Milk 🥛 | ½ cup | Warm for smooth sauce |
| Yellow Onion 🧅 | 1 whole | Medium size, finely diced |
| Garlic Cloves 🧄 | 4 cloves | Fresh, minced for flavor |
| Diamond Crystal Kosher Salt 🧂 | 1 ½ tsp | For pasta water and seasoning |
| Ground Black Pepper 🌶️ | ½ tsp | Freshly cracked for heat |
| Plain Breadcrumbs 🍞 | ½ cup | Panko for extra crunch |
| Extra-Virgin Olive Oil 🫒 | 2 tbsp | For breadcrumb topping |
| Freshly Grated Parmesan Cheese 🧀 | ¼ cup | For topping, optional |
The cheeses are non-negotiable here. Sharp cheddar brings the tang, Gruyère adds nutty depth, and cream cheese ensures that velvety texture. Grab block cheeses from the deli counter—pre-shredded gets clumpy and lacks flavor. For Gruyère, Whole Foods or specialty cheese shops carry the good stuff, but Kroger’s has a solid imported option too. The cream cheese? Philadelphia brand melts the smoothest—don’t skimp on the full-fat version. The pasta? Barilla or De Cecco are my go-tos for that perfect al dente bite, but any dry elbow macaroni works.
No Gruyère? Parmesan or Comté in a pinch, but it’ll change the flavor profile slightly. Short on cheddar? Extra sharp cheddar at half the amount works, but the sauce won’t be as rich. The breadcrumbs can be regular or panko—panko gives extra crunch, but regular works fine. For the onion, yellow or white both work, but yellow has a slightly sweeter base. Fresh garlic is ideal, but one teaspoon of garlic powder in a pinch won’t ruin it. The key is balancing those cheeses—don’t substitute more than one type or the sauce gets unbalanced.
Pasta water is liquid gold here—save 2 cups before draining. The sauce reheats beautifully, but add a splash of milk if it gets too thick. For extra crispy topping, broil for 2-3 minutes at the end. Leftovers keep 4-5 days in the fridge, and freeze perfectly for 3 months. I always double the breadcrumb topping—it’s the first to disappear. Store extra sauce in a sealed container with a layer of oil on top to prevent skinning.
Why You’ll Love This Recipe
- One-Pot Magic: I swear by this—just boil the pasta, melt the butter, and fold in the cheeses. No straining, no extra bowls, no stress. That Gruyère melts into something so silky, you’ll forget how little work went into it.
- Creamy Crispy Perfection: Between us, the sharp cheddar adds that tangy bite, the Gruyère brings nutty depth, and the cream cheese? It’s the secret weapon for that dangerously creamy texture with a golden crust that cracks like a hug. Honestly, my kids fight over the last bite.
- Potluck Star: This is my go-to for gatherings—it’s hearty enough for a crowd but still feels special. Bake it in a cast-iron skillet, and it’s instantly the dish everyone asks for seconds on, no matter if it’s a holiday dinner or a last-minute potluck.
- Budget Comfort: I make this twice a month, and it’s always a win. The cheeses stretch far, the pasta’s cheap, and leftovers reheat like a dream. Plus, it’s the kind of dish that makes you feel like you’re serving something fancy—without breaking the bank. (Yes, even on a Tuesday night.)
Step-by-step instructions for 3 cheese mac and cheese
This method delivers triple-layered perfection with a creamy center, melty cheese layers, and crispy breadcrumb topping.
Cook the Elbow Macaroni Al Dente
Bring a large pot of water to a rolling boil and add the 1.5 lbs elbow macaroni. Season generously with 1.5 tsp diamond crystal kosher salt—it should taste like the sea. Cook until 1 minute before the package instructions for al dente texture, then drain immediately, reserving 1 cup of pasta water. The starchy water is essential for creating a silky sauce later.
Don’t rinse the pasta—those surface starches help the cheese cling beautifully. Transfer the drained pasta to a large mixing bowl and set aside. The residual heat will keep it warm while you prepare the cheese sauce.
Build the Triple Cheese Sauce
In a separate saucepan, melt the 0.75 cup unsalted butter over medium-low heat. Add the finely diced yellow onion and cook for 5 minutes until translucent. Stir in the 4 cloves minced garlic and cook for 30 seconds until fragrant—don’t let it brown or it’ll become bitter.
Reduce heat to low and gradually whisk in the 1.5 cups sharp white cheddar cheese, 1 cup gruyère cheese, and 8 oz cream cheese in small batches. Stir constantly until completely melted and smooth. Remove from heat and stir in the 0.5 cup heavy whipping cream and 0.5 cup warm whole milk. The sauce should be luxuriously thick but still pourable.
Combine Pasta and Cheese
Return the cooked pasta to the saucepan with the melted cheese mixture. Add the 0.5 tsp ground black pepper and toss vigorously with tongs until every strand is fully coated and glistening. If the sauce appears too thick, add pasta water 1 tablespoon at a time until it reaches a creamy, coatable consistency.
This is where the magic happens—the combination of sharp cheddar, nutty gruyère, and creamy cream cheese creates a complex flavor profile. The pasta should be completely submerged in the sauce, with no dry spots remaining.
Assemble and Bake for Crispy Topping
Transfer the macaroni mixture to a 9×13-inch baking dish, spreading it evenly into a single layer. For the crispy topping, combine the 0.5 cup plain breadcrumbs with 2 tbsp extra-virgin olive oil and 0.25 cup freshly grated parmesan cheese in a bowl. Sprinkle this mixture evenly over the macaroni, pressing down gently to ensure even coverage.
Bake at 375°F for 25-30 minutes until the top is golden brown and the edges are bubbling. The breadcrumb topping should be crispy while maintaining a soft, gooey interior. If it browns too quickly, tent loosely with foil for the last 5 minutes of baking.
Rest and Serve Immediately
Remove from the oven and let the macaroni rest for 5-10 minutes before serving. This resting period allows the cheese to set slightly, making it easier to slice and preventing a runny mess. The internal temperature should reach 165°F at the center for food safety.
Cut into squares and serve immediately—the combination of creamy, melty cheese layers and crispy breadcrumb topping makes this macaroni cheese unforgettable. Each bite delivers perfect texture contrast and rich, layered flavors that keep everyone coming back for more.
Pro Tips For Making 3 Cheese Mac N Cheese Recipe Baked
- Boil Mac Until Firm: Undercooked pasta ruins everything—no exceptions. Test a piece at 8 minutes: it should hold shape but still have a slight bite. Gruyère’s fat content needs that texture to cling properly, not turn mushy later. (Yes, even if you’re impatient like me.)
- Shred Cheese Coarse: Skip the food processor—it turns Gruyère into paste. Use a box grater and break chunks into rice-sized pieces. Sharp White Cheddar melts smoother this way, and the Gruyère adds those glorious, stretchy strands when baked. (Your future self will notice the difference.)
- Melt Cheese Slow: Low heat wins. Start the cheese-butter mix on medium, then drop to low once it’s bubbly. Rushing it seizes the cream cheese, and you’ll end up with lumps instead of a silky sauce. Stir like you’re stirring oatmeal—gentle but constant.
- Bake Covered First: Foil on for 20 minutes locks in moisture before the crust forms. After that, uncover and broil 2–3 minutes for color—just watch it like a hawk. No peeking! (I learned this the hard way with a burnt top and sad, dry mac.)
Essential equipment for 3 cheese mac n cheese recipe baked
Baking Dish Essentials
Start with a 9×13-inch baking dish—this size gives you perfect portion control while allowing even baking. I swear by CorningWare for its even heat distribution and nonstick properties, but any oven-safe dish works.
If you don’t have one, a ceramic or glass dish from your regular grocery store will do just fine. Just make sure it’s lightly greased with olive oil or butter to prevent sticking—trust me, this makes cleanup a breeze. 🍽️
Cheese Melting Tools
A double boiler or heatproof mixing bowl set over a saucepan is key for melting the cheese mixture smoothly. I use a stainless steel mixing bowl because it conducts heat evenly, preventing scorching.
If you don’t have one, a large, deep skillet works in a pinch—just keep the heat low and steady. The goal is to melt the cheeses without breaking the sauce, so patience here pays off big time.
Crispy Topping Kit
For that golden, crispy breadcrumb topping, you’ll need a small mixing bowl and a pastry brush (or your fingers!) to distribute the olive oil evenly. I love panko breadcrumbs for extra crunch, but regular breadcrumbs work too.
A microplane or box grater comes in handy for freshly grating the Parmesan cheese—this adds a salty, nutty finish that elevates the dish. Don’t skip this step; it’s what turns good mac and cheese into showstopper mac and cheese. 🧀
Measuring and Mixing
Precision matters, so grab a set of measuring cups and a spoon rest to keep your workspace tidy. I use stainless steel measuring cups for accuracy, especially with the cheeses and liquids. A wooden spoon or heatproof silicone spatula helps stir the sauce without scratching your pot.
For the breadcrumb topping, a small offset spatula makes spreading it evenly a cinch—press gently to ensure full coverage. Every tool has its purpose, and these make the process smoother. ✨
Oven Thermometer
Your oven’s temperature gauge can be off by 25°F or more, so an oven thermometer is a game-changer. I keep a Thermoworks sous vide thermometer in my kitchen—it’s affordable and accurate. Place it in the oven while preheating to confirm the temperature is 375°F before baking.
This ensures your mac and cheese bakes evenly and doesn’t end up undercooked or over-browned. A little extra step for foolproof results. 🌡️
Optional Extras
Want to take it to the next level? A kitchen torch adds a smoky char to the breadcrumb topping, while a fine-mesh sieve helps dust extra Parmesan over the top. For serving, a sharp chef’s knife and cutting board make clean slices effortless.
And if you’re feeling fancy, a small bowl for holding extra breadcrumbs lets guests add their own crunch. These aren’t must-haves, but they make the process even more enjoyable. 💡
Nutrition facts
Frequently asked questions
Can I use different cheeses in this recipe?
While the original recipe uses sharp cheddar, Gruyère, and cream cheese for that perfect balance, you can swap in other melty cheeses like Monterey Jack (for extra creaminess) or Pepper Jack (for a kick). Just keep the total amount at 3 cups of cheese to maintain the right texture. Avoid pre-shredded cheese—it gets clumpy and lacks flavor!
Why is my mac and cheese watery after baking?
Watery mac and cheese usually means the sauce was too thin to begin with. Always cook the pasta 1 minute less than the package says (al dente), and save 2 cups of pasta water to thin the sauce gradually if needed. If it’s still too runny after baking, let it rest for 10-15 minutes uncovered—the cheese will firm up as it cools.
How do I make this recipe vegetarian or vegan?
For a vegetarian version, swap the butter for vegetable oil and use vegan cheese like Miyoko’s or Violife (they melt surprisingly well!). For a fully vegan dish, replace the cream cheese with cashew cream (blend soaked cashews with plant-based milk) and use nutritional yeast for a cheesy flavor. The breadcrumb topping can stay the same—just omit the Parmesan.
Can I prep this ahead of time?
Yes! Assemble the mac and cheese in the baking dish, cover tightly with foil, and refrigerate for up to 24 hours. When ready to bake, add 5-10 minutes to the baking time (cover with foil for the first 15 minutes to prevent over-browning). For freezing, bake it fully, cool completely, then freeze in portions. Reheat covered at 350°F for 20-25 minutes until warmed through.
What’s the best way to reheat leftovers?
Leftovers reheat best in the oven for even heating. Cover with foil and bake at 350°F for 15-20 minutes until bubbly and heated through. Avoid the microwave—it makes the breadcrumb topping soggy. If you must use the microwave, cover with a damp paper towel and heat in 30-second bursts, stirring between each.

- 3lb Prime Rib Roast Recipe: Juicy Pink Center Guaranteed in 3 Hours - October 31, 2026
- 5 Spice Cake Recipe: Warmly Spiced Layers With Crunchy Top - October 31, 2026
- 1950’s Macaroni and Cheese Recipe: Nostalgic Creamy Cheese Sauce with Buttery Noodles - October 31, 2026