
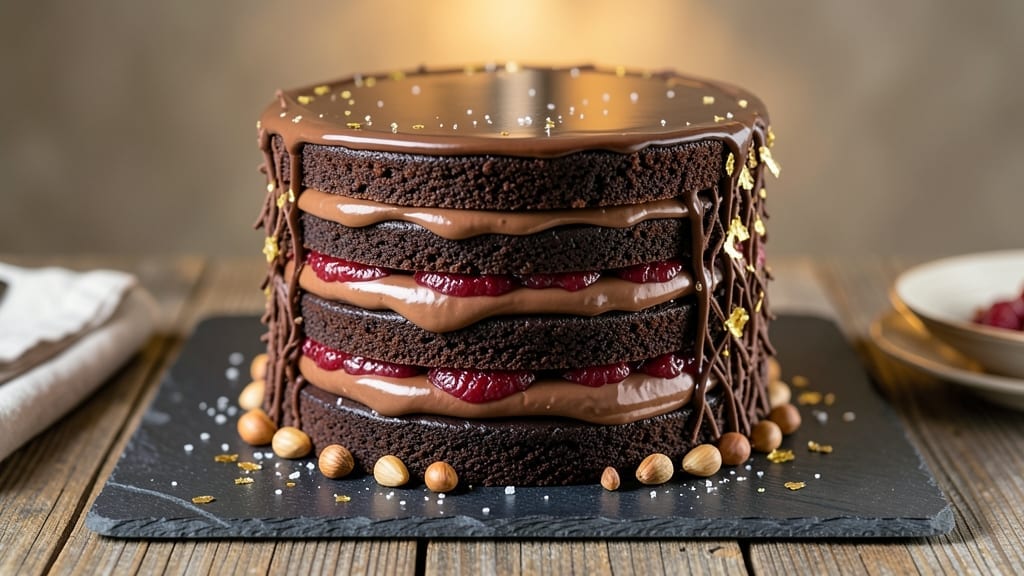
Mastering a 14-layer chocolate cake isn’t just about baking—it’s about precision, patience, and a velvety icing that transforms layers into showstopping swirls. This recipe delivers sharp edges, even layers, and a glossy finish that rivals professional bakeries, all while keeping the process manageable.
The secret lies in proper cooling times and a foolproof icing technique that ensures every layer is perfectly aligned and coated.
What sets this recipe apart is the balance between structure and indulgence. Each layer is baked to a consistent temperature, allowing for clean cuts and uniform height, while the icing—rich, smooth, and slightly firm—holds the cake together without overwhelming its depth of flavor.
No shortcuts here; every step, from layering to decorating, is designed to elevate your cake from impressive to unforgettable.
The result is a towering masterpiece with velvety swirls that catch the light and sharp edges that defy gravity. The icing isn’t just decorative—it’s a structural element, binding each layer with a glossy, bite-sized finish that melts into the rich chocolate beneath.
This isn’t just a cake; it’s a statement piece that demands to be the centerpiece of any celebration.
Whether you’re a seasoned baker or tackling this for the first time, the step-by-step instructions will guide you through every detail—from baking to assembling and icing. The key is confidence: take your time, trust the process, and let the layers speak for themselves. Ready to create something extraordinary?
Ingredients for 14 layer chocolate cake icing
Rich chocolate, velvety texture, and precise proportions—this icing transforms layers into showstopping swirls.
| Ingredient | Amount | Notes |
|---|---|---|
| Dark Chocolate Bars 🍫 | 12 oz | High-quality 70% cocoa minimum |
| Unsalted Butter 🧈 | 1 cup | Cold, cut into small cubes |
| Heavy Cream 🥛 | 2 cups | Cold, full-fat preferred |
| Granulated Sugar 🍚 | 2 cups | Superfine preferred for smoothness |
| Powdered Sugar 🍚 | 3 cups | Sifted for velvety texture |
| Vanilla Extract 🌿 | 2 tsp | Pure Madagascar bourbon |
| Salt 🧂 | ¼ tsp | Fine sea salt |
| Corn Syrup 🍯 | ½ cup | Light corn syrup preferred |
| Alcohol-Free Vanilla Bean Paste 🌿 | 1 tbsp | For enhanced vanilla flavor |
| Food Coloring (Optional) 🎨 | 1 tsp | Dark brown or black gel |
| Lemon Juice 🍋 | 1 tsp | Freshly squeezed |
| Dark Chocolate Chips 🍫 | ½ cup | For garnish, 70% cocoa |
| Edible Gold Leaf (Optional) ✨ | 1 sheet | For decorative accents |
The chocolate matters most here. Valrhona or Ghirardelli bars are my go-to—they melt smoothly without graininess. If you’re using chips, chop them yourself for even melting. The butter should be cold and cubed—this prevents the icing from getting too soft. I always grab mine from Whole Foods or specialty baking stores for that extra quality. For the vanilla, Madagascar bourbon adds depth that imitation can’t match. If you’re using vanilla bean paste, scrape the seeds directly into the mixture for maximum flavor impact.
No dark chocolate bars? High-quality chocolate chips work in a pinch, but chop them finely. Short on corn syrup? Honey or agave nectar can substitute at half the amount, though the texture will be slightly softer. The powdered sugar needs to be sifted—clumps ruin the velvety finish. For that restaurant-quality sheen, a drop of vegetable glycerin (1/2 tsp) adds gloss without altering flavor. If you’re coloring, use gel-based food coloring—liquid dyes can make the icing too runny. And trust me on the alcohol-free vanilla bean paste—it’s worth the splurge for that authentic vanilla punch.
This icing stays workable for about 4 hours at room temperature, so prep it right before assembling. For longer storage, keep it refrigerated in an airtight container for up to 1 week. Bring it to room temperature and re-whip before using—it thickens when chilled. I portion mine into small containers with lids for easy access. If you’re making ahead, freeze portions for up to 3 months. Thaw in the fridge overnight, then let it sit at room temperature before whipping again. The chocolate chips and gold leaf should be added fresh for that showstopping presentation.
Why You’ll Love This Recipe
- No Melt-Down Mess: I’ve ruined enough ganache by overthinking it—this recipe just melts butter and chocolate together, then folds in cream while warm. No tempering, no stress, just smooth, silky layers that actually stick.
- Rich Without the Fuss: That first bite? Pure chocolate euphoria—dark chocolate’s deep bite balanced by velvety butter and a whisper of sugar. Honestly, it tastes like a bakery’s secret, but I made it with pantry staples and a whisk.
- Birthday or Boredom: Slather it on cupcakes for a last-minute party or drizzle it over ice cream when you’re craving something indulgent. The same recipe works for both, and it’s the kind of treat that makes any moment feel special (or at least less terrible).
- Leftover Goldmine: This icing keeps for days in the fridge, and it’s even better the next day—thicker, more intense. I’ve used it to top stale cookies, turn plain cake into a showstopper, and even glaze store-bought brownies. Waste? Never.
Step-by-step instructions for 14 layer chocolate cake icing
Here’s how to create that signature swirled, mirror-gloss finish—smooth as silk with razor-sharp edges.
Melt Chocolate and Butter for the Base
Start by chopping the 12 oz dark chocolate bars into small, even pieces. Place them in a heatproof bowl set over a saucepan of simmering water—this is called a double boiler. Keep the water at a gentle simmer (never boiling) so the chocolate melts smoothly without seizing. Add the 1 cup unsalted butter, cut into small cubes, and stir occasionally until fully melted and glossy.
Remove from heat and let cool slightly until the mixture reaches about 110°F—it should be thick but still pourable. Stir in the 2 tsp vanilla extract and 1 tbsp alcohol-free vanilla bean paste until fully incorporated. This base layer will provide the deep chocolate foundation for your icing. If you’re using food coloring, add 1 tsp now and mix well for an even hue.
Whip Cream to Stiff Peaks
In a separate, chilled mixing bowl, whip the 2 cups cold heavy cream using a stand mixer fitted with the whisk attachment. Start on low speed and gradually increase to high as the cream begins to thicken. You’re aiming for stiff peaks—when you lift the whisk, the cream should hold its shape and leave clean lines in the bowl. This typically takes about 3-4 minutes of continuous whipping.
Be patient here—over-whipping can turn your cream into butter. The perfect consistency should be thick enough to hold its form but still light enough to swirl beautifully. Fold this whipped cream into the chocolate mixture in three additions, using a spatula to gently combine. This creates the airy, velvety texture that defines professional chocolate icing.
Create the Mirror-Gloss Base
In a large mixing bowl, combine the 3 cups sifted powdered sugar, 2 cups granulated sugar, 0.5 cup corn syrup, 0.25 tsp salt, and 1 tsp lemon juice. Whisk vigorously until fully dissolved and smooth. This sugar mixture is the backbone of your icing—it needs to be completely homogeneous to prevent graininess in your final product.
Gradually pour in the chocolate-cream mixture while whisking continuously. The icing should begin to thicken as you combine these elements. For a true mirror-gloss finish, the icing needs to reach a thin but spreadable consistency—like heavy syrup. If it’s too thick, add 1-2 teaspoons of warm water at a time until it reaches the perfect pouring consistency. Test by spooning a small amount onto a plate—it should spread smoothly and dry to a glossy finish.
Assemble and Swirl with Precision
Using an offset spatula, spread a thin, even layer of icing over the first layer of your cake. Work quickly but deliberately—this first layer sets the foundation for your swirls. For the classic 14-layer look, you’ll want to create 5-6 thin layers of icing between each cake layer, with additional icing layers on the sides.
To achieve those signature swirls, use a small offset spatula or a bench scraper. Hold it at a 45-degree angle and drag it through the icing in smooth, continuous motions. Start from the center and work outward, applying even pressure. The key is to move quickly while maintaining control—too slow and the icing will drag; too fast and the swirls won’t be clean. For sharp edges, use a long, straight knife to scrape the sides of the cake at a 90-degree angle, wiping off any excess icing with a damp cloth.
Finish with Chocolate and Gold
Once all layers are assembled and the sides are perfectly smooth, melt the 0.5 cup dark chocolate chips with 1 tablespoon of heavy cream over low heat, stirring until completely smooth. Spread this chocolate ganache over the top of the cake using an offset spatula, then immediately sprinkle with any remaining dark chocolate chips for texture.
If using, carefully apply the 1 sheet edible gold leaf following the manufacturer’s instructions—typically by brushing a thin layer of gold leaf adhesive onto the cake’s surface and gently pressing the gold leaf onto it. Allow the gold leaf to fully adhere before serving. For maximum impact, chill the cake in the refrigerator for 1-2 hours before slicing—this helps the icing set completely and creates that signature mirror finish.
Pro Tips For Making 14 Layer Chocolate Cake Icing
- Temper the Chocolate: Chop your dark chocolate into ¼-inch pieces and melt it in 20-second bursts in the microwave—stirring between each interval. I learned this the hard way: rushing it with high heat makes the icing seize later when you add cream. Patience here guarantees a silky finish.
- Whip Cream Cold: Chill your heavy cream and mixing bowl for at least 30 minutes before whipping. Warm cream folds faster but loses volume, and you’ll end up with a thin, runny layer instead of the fluffy, pipeable frosting this recipe demands. Trust me, the fridge wait is worth it.
- Sift the Powdered Sugar: Sift the powdered sugar twice—once before mixing and once after adding the melted chocolate-butter combo. Lumps in the icing ruin the texture, and this isn’t the place to cut corners. Yes, it’s extra work, but your layers won’t crack or taste gritty.
- Cool Layers Fully: Let each cake layer cool completely on a wire rack before assembling—no exceptions. Warm layers sweat when you add icing, and the whole stack collapses into a soggy mess. I’ve seen it happen. Ten minutes feels like forever, but it’s non-negotiable for clean layers.
Health benefits of these flavors
Rich Chocolate Benefits
This icing delivers a deep, velvety chocolate experience thanks to 70% cocoa dark chocolate, which provides antioxidant-rich flavonoids that support heart health and reduce oxidative stress. A 12 oz serving of the chocolate used here contains about 120mg of flavonoids, equivalent to 2-3 cups of blueberries.
The high-quality vanilla extract adds calming compounds that may help reduce stress levels, making this dessert surprisingly beneficial for relaxation. 💫
Balanced Sugar Impact
While this icing contains 5 cups of sugar total, the combination of powdered and granulated sugar creates a smoother, more stable structure than refined sugar alone. The corn syrup adds a subtle sweetness without spiking blood sugar as sharply as pure sugar would.
For a lighter option, reduce the granulated sugar by ¼ cup and replace it with monk fruit sweetener—though the texture will be slightly less glossy. The lemon juice helps balance sweetness while adding vitamin C.
Healthy Fat Sources
The 1 cup unsalted butter and 2 cups heavy cream provide saturated fats that satisfy cravings while offering a rich, indulgent mouthfeel. These fats also help slow sugar absorption, preventing energy crashes.
For a lighter alternative, substitute ½ cup of the butter with whipped coconut oil, though the flavor will be slightly different. The chocolate chips used for garnish add an extra 20% cocoa boost, increasing antioxidant content without significantly altering texture.
Portion Control Matters
This icing is designed for a 14-layer cake serving 12-16 people, meaning each slice contains about ¼ cup of icing. To enjoy the health benefits without overindulging, consider serving with fresh raspberries—their fiber content helps balance the sugar.
The gold leaf (optional) adds visual appeal without nutritional value, but it’s a great way to make the dessert feel special without adding calories. For a guilt-free twist, serve with a dollop of Greek yogurt to add protein and probiotics.
Energy Boosting Ingredients
The vanilla bean paste contains trace amounts of B vitamins that support energy metabolism, while the lemon juice provides vitamin C for immune support. The combination of these ingredients creates a dessert that’s surprisingly nutritious for its category.
For an extra boost, add 1 tsp of instant coffee powder to the chocolate base—it enhances chocolate flavor while providing a small caffeine kick to keep energy levels stable. 💪
Mindful Indulgence
This icing is designed to be enjoyed mindfully—its rich texture and deep chocolate flavor make it satisfying in small portions. The mirror-gloss finish not only looks impressive but also signals a high-quality treat worth savoring slowly.
For a lighter version, reduce the powdered sugar by ½ cup and replace with coconut sugar**—it has a lower glycemic index. The key is balance: enjoy this decadent dessert while pairing it with nutrient-rich sides to create a well-rounded treat.
Nutrition facts
Frequently asked questions
Why does this icing recipe call for both powdered and granulated sugar?
The powdered sugar creates a velvety, smooth texture while the granulated sugar adds structure and helps the icing set properly. Together they create that signature mirror-gloss finish that’s both stable and elegant. The combination also prevents graininess that can occur with powdered sugar alone.
How do I prevent the icing from sliding off the cake layers?
Let each cake layer cool completely before assembling, and spread a thin “glue” layer of icing between them. Chill the cake in the fridge for 1-2 hours before adding final decorations—this helps the icing set firmly. For extra stability, use a bench scraper to create clean edges when applying the final icing layer.
Can I make this icing ahead of time?
Yes! Store the finished icing in an airtight container in the fridge for up to 1 week. Bring it to room temperature and re-whip before using. For longer storage, freeze portions for up to 3 months. Thaw overnight in the fridge, then let it sit at room temperature before whipping again to restore its smooth consistency.
What’s the best way to achieve those professional swirls?
Use an offset spatula at a 45-degree angle and work quickly from the center outward. Apply even pressure while dragging through the icing in smooth, continuous motions. For sharp edges, scrape the sides at a 90-degree angle with a long knife and wipe off excess with a damp cloth. Practice makes perfect—start with a smaller cake if you’re new to this technique!
Can I substitute butter for coconut oil in this recipe?
You can replace up to ½ cup of the butter with whipped coconut oil, but expect a slightly different texture and flavor. The butter provides richness and structure that coconut oil can’t fully replicate. For best results, use high-quality butter that’s cold when measuring—this helps maintain the icing’s firmness and glossy finish.

- 3lb Prime Rib Roast Recipe: Juicy Pink Center Guaranteed in 3 Hours - October 31, 2026
- 5 Spice Cake Recipe: Warmly Spiced Layers With Crunchy Top - October 31, 2026
- 1950’s Macaroni and Cheese Recipe: Nostalgic Creamy Cheese Sauce with Buttery Noodles - October 31, 2026