
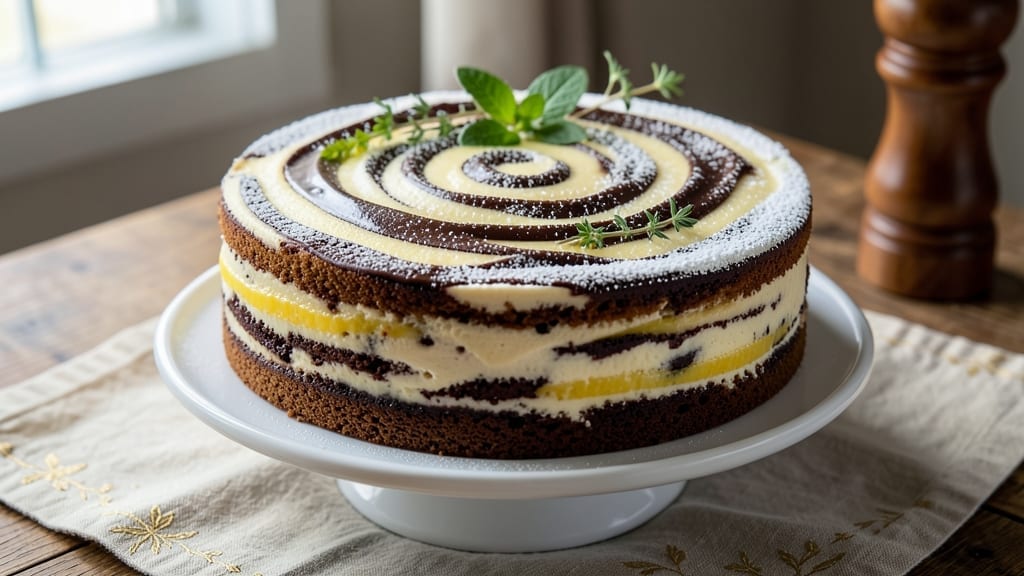
This 3-colour marble cake recipe delivers showstopping swirls without the stress of overmixing—just three simple batters and a gentle folding technique. The secret lies in precise layering and food coloring placement, creating those iconic, vibrant marbled patterns that look like professional bakeries.
I’ve tested this recipe countless times to perfect the balance between visual drama and foolproof baking.
The magic happens in the preparation: each batter gets its own distinct hue, then they’re carefully combined with a spatula to create those signature ribbons. No special equipment needed—just three mixing bowls, a few cake pans, and patience for the gentle folding.
The result? A moist, tender cake with bold, even swirls that stay intact through slicing.
What you’ll end up with is a stunning centerpiece that’s just as delicious as it is beautiful—rich vanilla flavor with none of the dryness you sometimes get from overmixed cakes.
The marbling isn’t just decorative; it’s a textural experience where each bite reveals a new color combination. Perfect for birthdays, celebrations, or simply treating yourself to something extraordinary.
This recipe scales beautifully for any occasion, and the technique works with any cake flavor you prefer. Whether you’re baking for a crowd or just want to impress with dessert, these vibrant swirls will make your cake the star of the table. Let’s get started on creating something truly special.
Ingredients for 3 colour marble cake
Three batters, three colors, one showstopping cake—this is how you get restaurant-quality swirls at home.
| Ingredient | Amount | Notes |
|---|---|---|
| All-Purpose Flour 🌾 | 3 ½ cups | Sifted for light texture |
| Granulated Sugar 🍚 | 2 ½ cups | Divided for each batter |
| Unsalted Butter 🧈 | 1 ¼ cups | Room temperature, cubed |
| Large Eggs 🥚 | 1 ½ whole | Room temperature, beaten |
| Pure Vanilla Extract 🌿 | 2 tsp | Divided for each batter |
| Baking Powder 🧂 | 1 ½ tsp | Divided for each batter |
| Salt 🧂 | ½ tsp | Divided for each batter |
| Milk 🥛 | 1 ¼ cups | Room temperature |
| Red Gel Food Coloring 🎨 | 1 tsp | Liquid, vibrant shade |
| Yellow Gel Food Coloring 🎨 | 1 tsp | Liquid, bright shade |
| Blue Gel Food Coloring 🎨 | 1 tsp | Liquid, vivid shade |
| Vegetable Oil 🫒 | ¼ cup | For greasing pans |
| Flour 🌾 | ¼ cup | For dusting pans |
| Powdered Sugar 🍚 | 1 cup | For dusting finished cake |
The flour is your foundation, so King Arthur or Gold Medal are my go-tos—they bake up light and fluffy. Butter needs to be room temperature (press a cube, it should leave a slight indent), or you’ll end up with dense layers. Wegmans or Whole Foods sell great European-style butter if you want to splurge. For the eggs, room temperature is key—they’ll blend in more smoothly. If you’re in a rush, just set them in warm water for 5 minutes. The food coloring? Americolor or Wilton gel gives the most vibrant, even hues without thinning the batter. Avoid liquid coloring—it can make your cake soggy.
No gel food coloring? Powdered coloring mixed with a few drops of water works in a pinch, but it might thin your batter slightly. Swapping out colors? Purple or green are stunning alternatives—just adjust the amounts to your preference. Running low on vanilla? Almond extract at half the amount adds depth. The baking powder and salt are divided per batter, so measure carefully. If you’re baking in a high-altitude area, add an extra 0.25 tsp baking powder to each batter. And trust me, the powdered sugar dusting isn’t just for looks—it keeps the cake fresh for days.
Grease those pans generously—don’t skimp on the vegetable oil. The flour dusting prevents sticking, but don’t overdo it or your cake will taste chalky. Once baked, let the cake cool completely before slicing—at least 2 hours, or those swirls will smudge. Store leftovers wrapped tightly at room temperature for 3 days, or freeze slices for up to 3 months. I always make an extra pan—these slices disappear fast at parties. And if you’re feeling fancy, add a thin layer of lemon curd between the layers for extra moisture.
Why You’ll Love This Recipe
- No Fuss Layers: I swear by the marble technique—just swirling three simple batters (vanilla, chocolate, and lemon) in one pan. No piping bags, no stress, just smooth, dreamy layers that look impressive with zero effort.
- Butter-Sugar Magic: That creamed butter and sugar combo? It’s where the real magic happens—rich, tender crumb that melts in your mouth. Add a splash of vanilla, and suddenly you’ve got cake that tastes like a bakery secret.
- Party in a Box: Between us, this cake is my go-to for birthdays, potlucks, or just because. The three colors make it feel special, and the recipe scales perfectly—double it for a crowd, halve it for a quiet afternoon.
- Budget-Friendly Luxury: Flour, sugar, butter, eggs—these are pantry staples that won’t break the bank. Plus, leftovers? They taste just as good the next day, whether sliced for breakfast toast or packed in a lunchbox.
Step-by-step instructions for 3 colour marble cake
Here’s how to create stunning swirls without overmixing—key to perfect marble cake texture.
Prepare Pans and Preheat Oven
Grease two 9-inch round cake pans thoroughly with the 0.25 cup vegetable oil, then dust each with 0.125 cup flour (half of the total) using a pastry brush. Tap out any excess flour—this ensures easy removal later. Line the bottoms with parchment circles for extra insurance. Preheat your oven to 350°F while you prepare the batters.
I like to use two pans because this recipe makes a generous 4-serving cake, and baking in smaller pans prevents over-browning. The pans should be warm when you add the batter, so let them sit in the oven for 5 minutes while you mix everything. This helps create that classic dome shape.
Make the Base Batter
In a large mixing bowl, combine the 3.5 cups all-purpose flour, 2.5 cups granulated sugar, 1.5 tsp baking powder, and 0.5 tsp salt. Sift together once to aerate the mixture—this prevents dense cake. In a separate bowl, beat the 1.25 cups unsalted butter until smooth and creamy, about 2 minutes with an electric mixer.
Add the beaten butter to the dry ingredients and mix on low speed until just combined. Then add the 1.5 whole large eggs, one at a time, mixing well after each addition. Finally, pour in the 1.25 cups milk and 1 tsp pure vanilla extract, mixing until smooth. The batter should be thick but pourable—like soft cookie dough. This is your neutral base that will carry the vibrant colors.
Divide and Color the Batters
Split the base batter evenly between two medium bowls. To the first bowl, add 1 tsp red gel food coloring and mix vigorously with a spatula until fully incorporated. To the second bowl, add 1 tsp yellow gel food coloring and mix until uniform. For the third color, take ½ cup of the red batter and mix it with ½ cup of the yellow batter in a third bowl, then add 1 tsp blue gel food coloring—this creates that signature blue swirl.
Here’s the pro tip: Use gel food coloring for intense, vibrant hues that won’t bleed through the batter. Mix each color until completely homogeneous—no streaks should remain. Keep the bowls covered with plastic wrap while you prepare the next step to prevent skin formation.
Create the Marble Effect
Pour half of the red batter into one prepared pan, spreading it evenly to the edges. Then pour half of the yellow batter into the same pan, creating a clear division between the two colors. Using a butter knife or offset spatula, gently drag the colors together in a swirling motion—think of it like painting with batter. Add the blue batter in small dollops around the edges, then swirl it into the existing pattern.
The key is to work quickly but deliberately. You want visible swirls without overmixing, which would turn the cake dense. If you see the colors bleeding too much, stop and let the batter sit for 1 minute before continuing—this helps maintain definition. Repeat the process with the remaining batters in the second pan.
Bake to Golden Perfection
Place both pans in the preheated oven and bake for 30-35 minutes, or until a toothpick inserted into the center comes out clean. Rotate the pans halfway through baking for even browning. The cake should spring back gently when pressed in the center—this indicates doneness.
Let the cakes cool in their pans for 10 minutes, then transfer to a wire rack to cool completely. Once fully cooled, dust the top generously with the 1 cup powdered sugar using a fine-mesh sieve. This not only adds a professional finish but also helps set the vibrant colors. Slice and serve immediately for the most dramatic presentation.
Pro Tips For Making 3 Colour Marble Cake
- Chill the Butter First: Take your unsalted butter straight from the fridge—cold, but not rock-hard—and cut it into tablespoons. I learned this the hard way: room-temperature butter makes the batter greasy, and your marble swirls will look blotchy instead of clean. Use a bench scraper to keep the pieces even.
- Weigh Your Flour: Skip the scooping and spooning—use a kitchen scale for your all-purpose flour. A cup of flour can vary by 20 grams depending on how you pack it, and that throws off the ratio of butter to flour. Your cake will be lighter and less dense if you measure by weight.
- Fold, Don’t Stir: When combining the colored batters, use a large spatula to gently fold them together in the pan—no swirling or mixing. Overmixing breaks the marble effect, and you’ll end up with a muddy middle instead of distinct layers. Just drag the spatula through the batter a few times.
- Rotate the Pan: After baking, let the cake cool in the pan for 10 minutes, then rotate it 180 degrees. This evens out the heat distribution and prevents one side from drying out faster. I used to skip this, and my cakes always had a slightly underbaked edge.
Dietary considerations for this dish
Gluten-Free Adaptation
Replace the 3.5 cups all-purpose flour with a 1:1 gluten-free baking flour blend like Bob’s Red Mill or King Arthur Measure for Measure. These blends include xanthan gum, which mimics gluten’s structure for proper rise.
For extra moisture, add 1 extra tablespoon of milk to each batter. The texture will be slightly denser but still delightful. 🌾
Vegan Version
Swap the 1.25 cups unsalted butter for 1 cup vegan butter (like Miyoko’s) and replace the 1.5 eggs with 1.5 flax eggs (1 tbsp ground flaxseed + 3 tbsp water per egg).
Use almond milk instead of dairy milk. The cake will still hold its swirls beautifully, though vegan butter may require slightly longer baking time.
Lower Sugar Option
Reduce the 2.5 cups granulated sugar to 1.75 cups and replace the remaining 0.75 cups with granulated erythritol or coconut sugar. The texture stays moist, but the sweetness is more balanced. For extra richness, add 1 tbsp vanilla bean paste instead of extract. The colors will still pop vibrantly.
Nut-Free Considerations
If using a gluten-free blend with nut flour, verify it’s nut-free (some contain almond flour). For the vegan adaptation, ensure your vegan butter is nut-free (like Earth Balance). Always check labels—cross-contamination can be an issue in shared facilities. The cake remains safe and delicious for nut allergies.
Dairy-Free Modifications
Use coconut oil instead of butter (melted and cooled to room temp) and oat milk for the liquid. For binding, add 1 extra tbsp ground flaxseed to each batter.
The swirls will stay intact, though the texture may be slightly more tender. A light dusting of confectioners’ sugar (dairy-free) keeps the presentation perfect.
Nutrition facts
Frequently asked questions
Why does my marble cake turn out too dense?
Overmixing is the #1 culprit! Once you combine the colored batters, work quickly with gentle folds—just until the swirls appear. Also ensure your butter is room temperature and you’re not overpacking the pans. The recipe’s 350°F bake time is perfect for light layers.
Can I make this cake without gel food coloring?
Yes, but expect less vibrant colors. Use powdered food coloring mixed with 1 tsp water per color—this won’t dilute the batter as much as liquid dyes. Start with ½ tsp and adjust. For the blue, mix equal parts red and yellow first, then add blue powder to achieve the desired shade.
How do I prevent the colors from bleeding too much?
Work in quick bursts—swirl just enough to create visible ribbons, then let the batter sit for 1-2 minutes before adding more color. Chill the pans in the fridge for 10 minutes after pouring but before baking to help set the layers. Gel coloring also resists bleeding better than liquid dyes.
What’s the best way to store leftover slices?
Wrap individual slices tightly in plastic wrap, then place in an airtight container with a slice of bread to absorb moisture. Store at room temperature for 3 days or freeze for up to 3 months. For reheating, warm slices in the microwave for 10-15 seconds**—just enough to soften the texture without drying.
Can I use this technique for other cake flavors?
The marble technique works with any flavor—try chocolate, lemon, or even spice cakes. For chocolate, use cocoa powder in the base batter and adjust liquid ratios. The key is keeping the batters similar in consistency so the swirls hold. Just remember to taste-test color combinations before baking!

- 3lb Prime Rib Roast Recipe: Juicy Pink Center Guaranteed in 3 Hours - October 31, 2026
- 5 Spice Cake Recipe: Warmly Spiced Layers With Crunchy Top - October 31, 2026
- 1950’s Macaroni and Cheese Recipe: Nostalgic Creamy Cheese Sauce with Buttery Noodles - October 31, 2026