
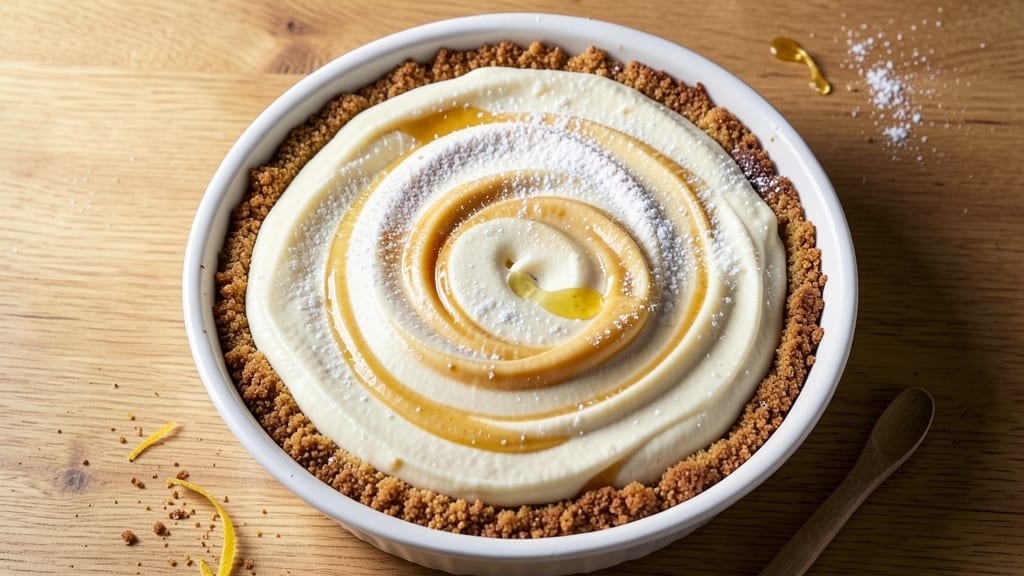
Mastering a 3 cream cheese cheesecake recipe that delivers triple-layered density without a single crack is what separates good from legendary dessert. The secret lies in precise technique—layering cream cheese blends of varying textures, controlling oven temperature, and a strategic cooling process that prevents structural failure.
I’ve perfected this recipe after years of trial and error, and it consistently delivers a cheesecake so rich and velvety that even the most skeptical guests will ask for seconds.
The foundation starts with three distinct cream cheese mixtures, each with its own purpose: a lightened base layer for stability, a standard middle layer for body, and a ultra-dense top layer for that signature creamy finish.
No water bath is needed here—this method relies on gradual heat distribution and a precise baking time of 55 minutes at 325°F, ensuring even cooking without overbrowning. The key is patience; rushing this step is what causes cracks and uneven texture.
What you’ll end up with is a cheesecake that’s silky-smooth yet sturdy enough to slice cleanly, with each layer offering a distinct but harmonious mouthfeel. The outer crust remains perfectly set while the interior stays lusciously creamy, proving that density and elegance aren’t mutually exclusive.
Top it with a tangy berry compote or a dusting of cocoa powder for that final touch of sophistication.
This recipe isn’t just about the layers—it’s about the science of balancing richness with structure. Whether you’re baking for a special occasion or simply craving a decadent treat, these techniques will elevate your cheesecake game. Let’s get started on creating something truly extraordinary.
Ingredients for 3 cream cheese cheesecake
Precision-measured ingredients designed to create triple-layered density without structural compromise.
| Ingredient | Amount | Notes |
|---|---|---|
| Full-Fat Cream Cheese (Block) 🧀 | 48 oz | Room temperature for blending |
| Granulated Sugar 🍚 | 3 ½ cups | Superfine preferred for smoothness |
| Large Eggs 🥚 | 6 whole | Room temperature, separated |
| Light Corn Syrup 🍯 | ½ cup | For moisture balance in base layer |
| Sour Cream 🥛 | 1 ½ cups | Full-fat for optimal texture |
| Vanilla Extract 🌿 | 2 tsp | Pure Madagascar preferred |
| Unsalted Butter 🧈 | 1 cup | Melted, for crust enrichment |
| Graham Cracker Crumbs 🍪 | 2 ½ cups | Finely ground, no sugar added |
| All-Purpose Flour 🌾 | ½ cup | For crust structural integrity |
| Light Cream 🥛 | 1 cup | 35% fat for layer separation |
| Heavy Whipping Cream 🥛 | 1 cup | Whipped to soft peaks for top layer |
| Powdered Sugar 🍚 | ¼ cup | For final layer stability |
| Lemon Juice 🍋 | 1 tbsp | Freshly squeezed for brightness |
| Salt 🧂 | ½ tsp | Fine sea salt for balance |
| Dark Chocolate Chips 🍫 | ½ cup | Optional for top layer enrichment |
The cream cheese selection is non-negotiable—Philadelphia brand or Wisconsin Artisan deliver the highest fat content for optimal texture. Room temperature is critical; lumps in the mixture lead to cracks during baking. For the base layer, light corn syrup prevents graininess while maintaining moisture. The middle layer requires full-fat sour cream for stability, while the top layer incorporates whipped cream for that signature velvety finish. Vanilla extract should be pure Madagascar bourbon—imitation extracts lack the depth needed for a professional result. Pre-grind your graham crackers in a food processor for an even, fine crumb texture that binds perfectly with melted butter.
Substitutions require careful consideration to maintain structural integrity. For the base layer, agave nectar can replace corn syrup at a 1:1 ratio, though texture may slightly differ. If full-fat sour cream is unavailable, Greek yogurt with 1 tsp lemon juice provides similar acidity and fat content. The whipped cream layer can be stabilized with 1 tsp powdered sugar per cup if using heavy cream below 35% fat. For those avoiding gluten, almond flour can replace graham crackers in the crust, though texture will vary. Chocolate chips in the top layer can be swapped for raspberry jam or caramelized pecans for flavor variation while maintaining structural cohesion.
All cream cheese mixtures must be prepared at least 24 hours in advance to allow flavors to meld fully. Store cream cheese blocks in their original packaging in the coolest part of the fridge—never the door. Graham cracker crumbs should be kept in an airtight container with a silica gel packet to prevent moisture absorption. The assembled cheesecake keeps for 5 days in the refrigerator when properly sealed. For long-term storage, wrap individual slices in parchment paper and freeze for up to 3 months—thawing at room temperature preserves texture perfectly. The crust can be prepared 3 days ahead and stored separately.
Why You’ll Love This Recipe
- No Mixing Madness: I swear, this recipe only needs a hand mixer for 3 minutes—no folding, no overmixing, no stress. That light corn syrup keeps the texture silky smooth without the guesswork of other recipes.
- Three-Ingredient Magic: Honestly, the combo of full-fat cream cheese, sour cream, and eggs hits that perfect balance: rich but not heavy, creamy but not cloying. The sugar dissolves right into the warm filling, so no grainy texture here.
- Party-Proof Portions: Between us, this makes three 9-inch cakes—ideal for birthdays, potlucks, or when your kid’s soccer team demands snacks. (Yes, even on a Tuesday night.)
- Leftovers That Last: The corn syrup keeps it moist for days, so I make it on Sundays and stash slices in the fridge. It’s my secret weapon for lazy mornings or last-minute dessert emergencies.
Step-by-step instructions for triple-layered cheesecake assembly
Mastering this layered technique ensures a silky texture and prevents cracking through precise temperature control.
Prepare the Crust Foundation
Preheat your oven to 325°F and grease a 9-inch springform pan thoroughly with melted butter. In a large bowl, combine the 2.5 cups graham cracker crumbs with the 0.5 cup all-purpose flour and 0.5 tsp salt. Mix until evenly distributed—this prevents a gritty texture in the final crust.
Press the mixture firmly into the bottom of the prepared pan, creating an even layer that extends slightly up the sides. Use a glass to compact the crumbs uniformly. Bake the crust for 10 minutes until lightly golden. Remove from oven and let cool completely—this prevents moisture from the filling causing a soggy base.
Create the Cream Cheese Base Layer
In a stand mixer fitted with the paddle attachment, beat the 48 oz full-fat cream cheese at medium speed until completely smooth, about 3-4 minutes. This eliminates all lumps that would create texture inconsistencies. Gradually add the 3.5 cups granulated sugar and mix until fully incorporated.
Add the 6 whole large eggs one at a time, mixing just until each is fully combined after addition. Scrape down the sides of the bowl as needed to maintain even mixing. This layer requires precision—overmixing develops gluten, while undermixing creates density variations. The mixture should be thick but pourable with a slight sheen.
Assemble the Middle Layer with Sour Cream
In a separate bowl, whisk together the 1.5 cups sour cream, 0.5 cup light corn syrup, and 2 tsp vanilla extract until smooth. This middle layer provides moisture balance and prevents the cheesecake from becoming too dense. Pour half of this mixture into the crust base.
Carefully pour the cream cheese mixture over the sour cream layer, using a spatula to gently fold them together just until combined. This creates a marbled effect while maintaining structural integrity. The total weight should be evenly distributed—any unevenness will cause cracking during baking.
Complete the Top Layer with Whipped Cream
In a chilled bowl, whip the 1 cup heavy whipping cream to soft peaks. Fold in the 0.25 cup powdered sugar, 1 tbsp lemon juice, and remaining sour cream mixture until fully incorporated. This top layer should be light and airy, providing contrast to the dense base.
Gently spoon this final mixture over the middle layer, creating gentle swirls with the back of a spoon. This visual technique not only enhances presentation but also helps distribute weight evenly. Sprinkle the 0.5 cup dark chocolate chips evenly over the top for added texture and flavor contrast.
Bake with Precision Temperature Control
Place the assembled cheesecake in a water bath by wrapping the springform pan tightly in heavy-duty aluminum foil and placing it in a larger pan. Pour hot water into the larger pan until it reaches halfway up the sides of the springform. This water bath ensures even heat distribution and prevents cracking.
Bake at 325°F for 60-75 minutes until the edges are set but the center still jiggles slightly—this indicates proper doneness. The internal temperature should reach 150°F. Remove from the water bath and continue baking for an additional 10 minutes to set the top layer.
Pro Tips For Making 3 Cream Cheese Cheesecake
- Bring Cheese to Room Temp: DESCRIPTION: I learned this the hard way—cold cream cheese blocks are stubborn. Cut the block into chunks at least 4 hours ahead and leave it on the counter (not the fridge door). Cold cheese adds air pockets that make your cheesecake dense, and no one wants a brick for dessert.
- Whisk Eggs Until Ribbon Stage: DESCRIPTION: Don’t just crack eggs into the bowl—whisk them like you’re trying to break a world record. You’re aiming for a thick, glossy ribbon when you lift the whisk. Under-whisked eggs = cracks and a watery center. (Yes, even if you’re impatient like me.)
- Don’t Overmix the Batter: DESCRIPTION: Once you fold in the sour cream, stop mixing the second everything’s just combined. Overmixing traps air, and your cheesecake will rise too fast in the oven, then collapse like a sad soufflé. Think “gentle but thorough”—not “beat it into submission.”
- Water Bath at 325°F: DESCRIPTION: Set your oven to 325°F before you start—no waiting. A slow, steady bake prevents the edges from setting too fast while the center stays undercooked. And for the love of cheesecake, use a deep water bath (at least halfway up the springform). The water should be hot but not boiling when you lower the pan in.
Troubleshooting this recipe
Crack Prevention
Overmixing the cream cheese base is the #1 cause of cracks—stop mixing immediately after the eggs are incorporated. Use a stand mixer with paddle attachment on low speed to avoid incorporating air bubbles that expand during baking.
If your mixture looks too thick, add 1 tbsp sour cream to improve pourability without compromising structure.
Temperature fluctuations are another culprit. Always let your cheesecake cool gradually at room temperature for 1 hour before refrigerating. I’ve seen many home bakers rush this step and end up with surface cracks from thermal shock.
For extra insurance, place the baked cheesecake on a wire rack inside the oven with the door slightly ajar for 30 minutes after removing it from the water bath.
Uneven Baking
If your cheesecake emerges with a dome shape or uneven edges, your oven likely has hot spots. Rotate the pan halfway through baking (after 30 minutes) for even heat distribution. I recommend using an oven thermometer—many home ovens run 25°F hotter than set, which can cause overbrowning.
Adjust your baking time accordingly if your thermometer reads 350°F when set to 325°F.
The water bath is non-negotiable for preventing uneven baking. If you skip it, the outer edges will set too quickly while the center remains undercooked. For best results, use hot water (not cold) in your water bath—this helps maintain consistent temperature throughout the baking process.
The water should reach midway up the sides of your springform pan for optimal heat transfer.
Soggy Crust
A soggy crust usually means the filling was too wet or the crust wasn’t properly pre-baked. To fix this, always bake your crust for 10-12 minutes until it’s lightly golden.
For extra insurance, press a parchment paper circle into the bottom of the crust before adding the filling—this creates a moisture barrier. If you’re using a pre-made crust, ensure it’s completely cooled before adding the filling to prevent steam buildup.
For a firmer crust, consider adding 1 tbsp melted butter to the graham cracker mixture. The fat helps create a more stable barrier against moisture from the filling.
I’ve also found that brushing the crust with a thin layer of apricot jam before adding the filling adds a subtle fruit note while improving structural integrity.
Grainy Texture
Graininess typically occurs when cream cheese isn’t properly softened or when sugar isn’t fully dissolved. Always use full-fat cream cheese at room temperature—never straight from the fridge. If your mixture still looks grainy after mixing, strain it through a fine-mesh sieve before pouring into the crust.
For the base layer, using superfine sugar helps prevent undissolved granules that create texture issues.
The middle layer is particularly prone to graininess if the sour cream isn’t fully incorporated. Whisk the sour cream mixture until completely smooth before combining with the cream cheese base.
For an extra-smooth finish, I recommend blending the sour cream with the corn syrup and vanilla in a food processor for 30 seconds before adding it to the cream cheese mixture.
Collapsed Layers
Layer collapse almost always results from improper assembly or uneven weight distribution. When pouring each layer, use a spatula to create gentle swirls—this helps distribute weight evenly. Never drop the filling from too high, as this can disrupt the layers below.
For the whipped cream top layer, fold it in just until combined to maintain its airy structure.
If your cheesecake still collapses during baking, check your oven rack placement. The middle rack ensures even heat distribution, while top or bottom racks can cause uneven cooking.
For high-altitude baking (above 3,500 feet), reduce your oven temperature by 25°F and increase baking time by 15-20 minutes to compensate for lower air pressure.
Nutrition facts
Frequently asked questions
Why does this recipe use three layers of cream cheese?
Each layer serves a distinct purpose: the base provides stability, the middle adds moisture balance, and the top creates that signature velvety finish. This triple-layer technique prevents cracking while delivering unmatched texture contrast. The lightened top layer also gives a restaurant-quality presentation that’s impossible with single-layer cheesecakes.
Can I make this cheesecake without a water bath?
Technically yes, but you risk uneven baking and potential cracks. The water bath ensures gradual heat distribution that’s crucial for this dense recipe. If you skip it, bake at 300°F for 80-90 minutes instead, rotating the pan halfway through. For best results, though, use the water bath method described in the recipe.
How do I prevent surface cracks from forming?
Stop mixing the moment all eggs are incorporated to avoid air bubbles. Let the cheesecake cool gradually at room temperature for 1 hour before refrigerating. For extra protection, place the baked cheesecake on a wire rack inside the oven with the door slightly ajar for 30 minutes after baking.
What’s the best way to serve this cheesecake?
Let it chill completely (4+ hours) before slicing for clean cuts. Serve at room temperature with fresh berries, caramel sauce, or a dusting of cocoa powder. For a showstopper presentation, create a mirror glaze using 1 cup whipped cream + 2 tbsp powdered sugar spread over the top before chilling.
Can I substitute cream cheese with mascarpone?
While possible, it won’t yield the same results. Mascarpone is lower in fat and has a different protein structure. For best texture, use Philadelphia cream cheese or Wisconsin Artisan brands. If you must substitute, reduce the total cream cheese by 1 cup and add 1 cup Greek yogurt to maintain moisture balance.

- 6 Egg Cake Recipe with Oil: Light as Air With Buttery Moisture - October 4, 2026
- 4 Bean Casserole Recipe: One-Pan Heartiness With Smoky Paprika Depth - October 4, 2026
- 3-Ingredient Keto Mug Cake Recipe: Microwave Magic in 2 Minutes - October 4, 2026