
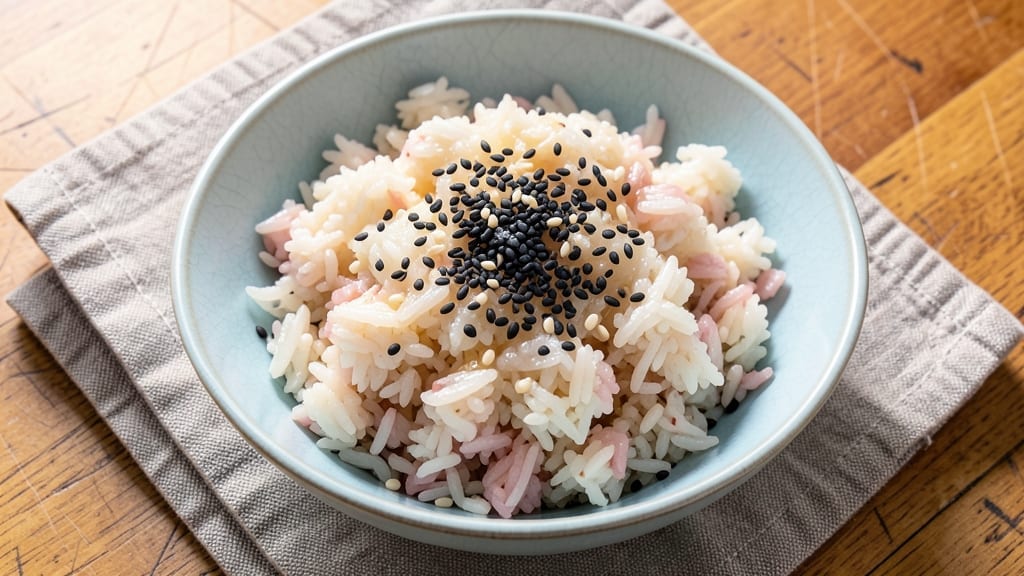
Mastering 3 cups sushi rice transforms your kitchen into a Japanese izakaya—fluffy grains with that signature vinegar shine and just the right stickiness. The secret lies in precise rice-to-water ratios (1:1.1) and a well-balanced seasoning blend of rice vinegar, sugar, and salt, all steamed to perfection.
This isn’t just rice; it’s the foundation for rolls, bowls, or even sushi-inspired fusion dishes that’ll impress anyone who takes a bite.
What sets this recipe apart is the technique: rinsing the rice until the water runs clear removes excess starch, preventing gummy texture. After cooking, the vinegar mixture—warmed gently—infuses the grains with bright acidity and subtle sweetness.
The result? Sticky yet distinct grains that hold their shape when rolled or shaped, with that glossy finish that screams “authentic.” No special equipment needed beyond a rice cooker or pot with a tight lid.
Once seasoned, the rice becomes a canvas for creativity—traditional fillings like spicy tuna or modern twists with avocado and cream cheese. The key to presentation? Use a bento box or wooden board to showcase the rice’s texture, and garnish with sesame seeds or nori strips for that restaurant-worthy touch.
This recipe delivers restaurant-quality sushi rice every time, whether you’re making classic rolls or experimenting with fusion flavors.
Perfect for meal prep or spontaneous sushi nights, this method scales easily for larger batches. The rice stays fresh in the fridge for up to 3 days, making it ideal for busy weeks.
Ready to elevate your homemade sushi game? Let’s get started with the step-by-step process that’ll have you shaping rolls like a pro.
Ingredients for 3 cups sushi rice
Nine simple ingredients create restaurant-quality sushi rice with perfect sticky texture.
| Ingredient | Amount | Notes |
|---|---|---|
| Short-Grain Sushi Rice (e.g., Koshihikari or Calrose) 🍚 | 3 cups | Uncooked, rinsed until water runs clear |
| Water 💧 | 3.3 cups | Room temperature preferred |
| Rice Vinegar 🍶 | ½ cup | Seasoned or unseasoned (Miyoko's brand recommended) |
| Granulated Sugar 🍚 | 2 tbsp | White or raw cane sugar |
| Salt 🧂 | 1 tsp | Diamond Crystal preferred |
| Sesame Seeds 🌰 | 1 tbsp | Toasted for garnish (optional) |
| Nori Strips 🍣 | 4 pieces | For presentation (optional) |
| Extra-Virgin Olive Oil 🫒 | 1 tsp | For seasoning (optional) |
The rice is everything here. Koshihikari or Calrose are the gold standards—Japanese markets like Mitsuwa or H Mart carry them, or check the Asian aisle at Whole Foods. Avoid long-grain rice like basmati, which lacks the necessary starch. Rinsing is non-negotiable: use a fine-mesh strainer and swirl the rice in water until it’s completely clear. This removes excess starch that would make your rice gummy. Pro tip: soak the rice for 20-30 minutes before cooking if you’re using a stovetop method—this ensures even cooking.
No rice vinegar? Apple cider vinegar in a pinch, but the flavor won’t be as refined. The sugar-to-salt ratio matters—too much salt makes the rice taste harsh, while too little sugar leaves it flat. For the vinegar mixture, warm it gently (just until sugar dissolves) to infuse the rice evenly. The sesame seeds and nori are optional but elevate presentation—toast the sesame seeds in a dry pan for 2 minutes until golden for maximum flavor. If you’re short on time, skip the optional olive oil, but it adds a subtle richness that pairs beautifully with sushi fillings like spicy tuna or avocado.
Freshly cooked rice is best used within 2-3 hours for optimal texture, but it reheats beautifully. Store leftovers in an airtight container in the fridge for up to 3 days, though the texture softens slightly after day 2. For meal prep, portion into bento boxes with your favorite fillings—the rice stays distinct and flavorful. If you’re making sushi rolls, work with the rice immediately after seasoning while it’s still warm and pliable. The vinegar mixture keeps for 1 month in the fridge, so make extra for future batches.
Why You’ll Love This Recipe
- I swear by this 3: 1 rice-to-water ratio—it’s the magic number for fluffy, sticky grains every single time. No guesswork, no mushy results, just foolproof texture that works whether I’m making sushi or bowls.
- No Fuss Ratio: I swear by this 3:1 rice-to-water ratio—it’s the magic number for fluffy, sticky grains every single time. No guesswork, no mushy results, just foolproof texture that works whether I’m making sushi or bowls.
- Sweet-Tangy Magic: That simple vinegar-sugar mix? It’s the secret weapon. The rice gets this bright, clean finish—just enough acidity to cut through richness, and the sugar keeps it from tasting flat. Honestly, it’s the kind of flavor that makes me reach for more.
- Weeknight Workhorse: I keep a batch in the fridge all week—perfect for quick sushi rolls, fried rice, or even as a bed for teriyaki chicken. (Yes, even on a Tuesday night.) The rice stays fresh for days, so I’m never scrambling for dinner ideas.
Step-by-step instructions for perfect sushi rice
Here’s how to achieve restaurant-quality sushi rice with ideal texture and vinegar shine.
Rinse the Rice Until Water Runs Clear
Place the 3 cups short-grain sushi rice in a large bowl and cover with cold water by about 2 inches. Using your hands, gently swirl the rice in circular motions for 30 seconds, then drain immediately through a fine-mesh strainer. Repeat this rinsing process 3-4 times total, always draining completely between rinses. You’re looking for water that runs clear when drained – this removes excess starch that would make your rice gummy.
The goal is to create rice that’s perfectly balanced – not too sticky when raw, but with just enough surface starch to create that signature sushi rice texture. I press down gently on the rice in the strainer during the final rinse to ensure all the starch is removed from between the grains. This step is absolutely critical for achieving the right texture in your final dish.
Cook the Rice to Perfect Al Dente Texture
Transfer the rinsed rice to a medium saucepan with the 3.3 cups water. I use a 3:1 rice-to-water ratio for short-grain varieties, which gives us that ideal sticky yet separate grain texture. Bring to a boil over medium-high heat, then immediately reduce to the lowest possible simmer. Cover with a tight-fitting lid and cook for exactly 12 minutes without peeking.
After 12 minutes, turn off the heat completely and let the rice steam undisturbed for another 10 minutes. This resting period allows the steam to finish cooking the rice evenly and redistribute moisture throughout each grain. The rice should be tender but still have a slight bite – what we call “al dente” in Italian, though it’s equally important in Japanese rice preparation. If you peek too early, you’ll release steam and potentially create uneven cooking.
Prepare the Seasoning Mixture
While the rice finishes cooking, combine the 0.5 cup rice vinegar, 2 tablespoons granulated sugar, and 1 teaspoon salt in a small saucepan. Heat gently over low heat until the sugar dissolves completely, stirring constantly. This creates a smooth, flavorful seasoning that will coat each grain perfectly. Remove from heat and let cool slightly – it should be warm but not hot when you mix it with the rice.
I like to use seasoned rice vinegar for this recipe as it adds subtle umami notes that complement the rice beautifully. If using unseasoned vinegar, you might want to add an extra pinch of salt to compensate. The sugar helps balance the acidity of the vinegar while adding just enough sweetness to enhance the overall flavor profile. This mixture is what gives authentic sushi rice its signature glossy finish and delicate tang.
Mix the Seasoning with Warm Rice
Using a rice paddle or wooden spoon, gently fold the seasoning mixture into the warm rice. Start by cutting through the rice at the edges to loosen it, then work your way to the center. The rice should be slightly sticky but still separate at this stage – you’re looking for that signature “shari” texture where grains cling together lightly but don’t form a solid mass.
Work quickly but carefully to distribute the seasoning evenly throughout all the rice. I press down gently on the rice with the paddle to help the seasoning penetrate each grain. The rice should develop a beautiful glossy sheen as the vinegar coats the surface. At this point, the rice should be warm but not hot – perfect for immediate use in sushi rolls or as a side dish. If you notice any dry spots, add a few drops of water and gently fold them in.
Garnish and Serve Immediately
Transfer the seasoned rice to a serving dish and spread it evenly. Sprinkle the 1 tablespoon toasted sesame seeds over the top for added texture and visual appeal. Arrange the 4 pieces nori strips decoratively around the edges if using for presentation. The sesame seeds add a subtle nutty flavor that complements the rice beautifully while providing a nice contrast in both texture and appearance.
For best results, serve the rice immediately while still warm. The texture will begin to firm up as it cools, so use it within 30 minutes of preparation. If you need to reheat, cover the rice with a damp paper towel and warm gently in the microwave for 15-20 seconds. This method helps restore the moisture balance without making the rice mushy. The rice should be sticky enough to hold its shape when rolled but still have individual grains visible – that’s the perfect texture for sushi.
Pro Tips For Making 3 Cups Sushi Rice
- Rinse Until Clear: Rinse the rice in a fine-mesh strainer for 30 seconds at a time—don’t rush it. I learned this the hard way after making a batch where the water stayed cloudy, and the rice turned out sticky and gluey instead of fluffy.
- Use a Heavy Pot: A heavy-bottomed pot or a dedicated rice cooker prevents hot spots that burn the rice. I tried this recipe in a thin pot once, and the rice stuck to the bottom like cement—now I only use my stainless steel rice pot.
- Mix Vinegar Last: Wait until the rice is off the heat before folding in the vinegar mixture. Adding it too early can turn the rice mushy, and I’ve ruined more batches by skipping this step than I care to admit.
- Prep Ingredients First: Measure and mix the vinegar, sugar, and salt in a small bowl before cooking. This saves time later, and I’ve burned rice waiting to fold in the seasoning while it cooled—now I have everything ready to go.
Perfect pairings for 3 cups sushi rice
Classic Sushi Rolls
This rice is the perfect base for traditional California rolls or spicy tuna rolls. For a California roll, mix the rice with ½ cup cream cheese, then spread on nori sheets with ½ cup cucumber matchsticks and ½ cup imitation crab.
Roll tightly using a bamboo mat, slice into 1-inch pieces, and serve with soy sauce and wasabi. For spicy tuna, mix 8 oz sushi-grade tuna with 1 tbsp spicy mayo and 1 tsp sriracha, then roll with avocado slices. 🍣
Sushi Bowls
Transform your rice into a sushi bowl by serving it in a bento box with ½ cup grilled salmon, ¼ cup edamame, and 2 tbsp pickled ginger. Drizzle with 1 tbsp ebi mayo (mayo + shrimp) and sprinkle with 1 tsp furikake.
For a vegetarian option, use marinated tofu, avocado, and sautéed mushrooms. The rice’s sticky texture holds up perfectly to all these toppings. 🍱
Sashimi Pairings
Serve your sushi rice alongside fresh sashimi for a complete meal. I recommend pairing with yellowtail (hamachi) or sea bass slices, arranged on a chilled wooden board. Add pickled daikon and shiso leaves for color contrast.
The rice’s vinegar shine complements the delicate fish flavors beautifully. For extra flair, drizzle with yuzu kosho or ponzu sauce. 🐟
Fusion Dishes
Get creative with sushi rice tacos—fill corn tortillas with rice, shredded rotisserie chicken, mango salsa, and cilantro. Or make sushi rice burgers by pressing the rice into a patty shape, topping with avocado, crispy onions, and spicy mayo.
The rice’s stickiness helps hold these fusion elements together while keeping the dish light and fresh. 🌮
Dessert Twist
Yes, sushi rice can be dessert! Mix ½ cup mashed banana and 1 tbsp honey into warm rice, then chill. Serve in small cups with whipped cream and toasted coconut flakes.
The vinegar-sweet contrast creates a unique, refreshing treat. For a more traditional option, try mochi ice cream with a side of seasoned rice for dipping. 🍡
Nutrition facts
Frequently asked questions
Can I use regular long-grain rice instead of sushi rice?
Not recommended! Short-grain sushi rice has the perfect starch content to create that signature sticky yet distinct texture. Long-grain rice like basmati or jasmine lacks the necessary stickiness and will fall apart when rolled. If you must substitute, try Calrose rice (a common U.S. sushi rice) or Japanese Koshihikari—both are widely available at Asian markets.
Why does my sushi rice turn out too sticky or gummy?
Over-rinsing removes too much starch, while under-rinsing leaves excess starch that creates gummy rice. Aim for water that runs completely clear after 3-4 rinses. Also, avoid peeking at the rice while cooking—releasing steam can create uneven texture. For extra insurance, use the 1:1.1 rice-to-water ratio and let it steam uncovered for 10 minutes after cooking.
How do I make sushi rice without a rice cooker?
Use a heavy-bottomed pot with a tight lid. Bring the rinsed rice and water to a boil, then reduce to the lowest simmer, cover, and cook for 12 minutes without lifting the lid. After cooking, turn off the heat and let it steam for another 10 minutes. A rice paddle helps distribute the seasoning evenly without mashing the grains. Pro tip: Soak the rice for 20-30 minutes before cooking for even results.
Can I make this recipe gluten-free?
Yes! Skip the nori strips (they contain gluten) and use a gluten-free soy sauce alternative. The rice itself is naturally gluten-free, and the seasoning (vinegar, sugar, salt) is safe. For rolls, use gluten-free tamari or coconut aminos instead of regular soy sauce. Always check labels on fillings like imitation crab or sauces to ensure they’re certified gluten-free.
How long can I store leftover sushi rice?
Store in an airtight container in the fridge for up to 3 days, though texture softens after day 2. For longer storage, freeze portioned amounts for up to 1 month. To reheat, cover with a damp paper towel and microwave for 15-20 seconds. Avoid reheating multiple times, as it can make the rice dry. For best results, use within 24 hours of cooking.

- 5 Lb Eye Round Roast Recipe: Slow-Braised to Melt-in-Mouth Tenderness - November 3, 2026
- 3-Hour Ciabatta Bread Recipe: Crusty Chews and Airy Holes Mastered - November 3, 2026
- 5 Fruit Salad Recipe: Vibrant Rainbow Layers With No Brown Spots - November 3, 2026