
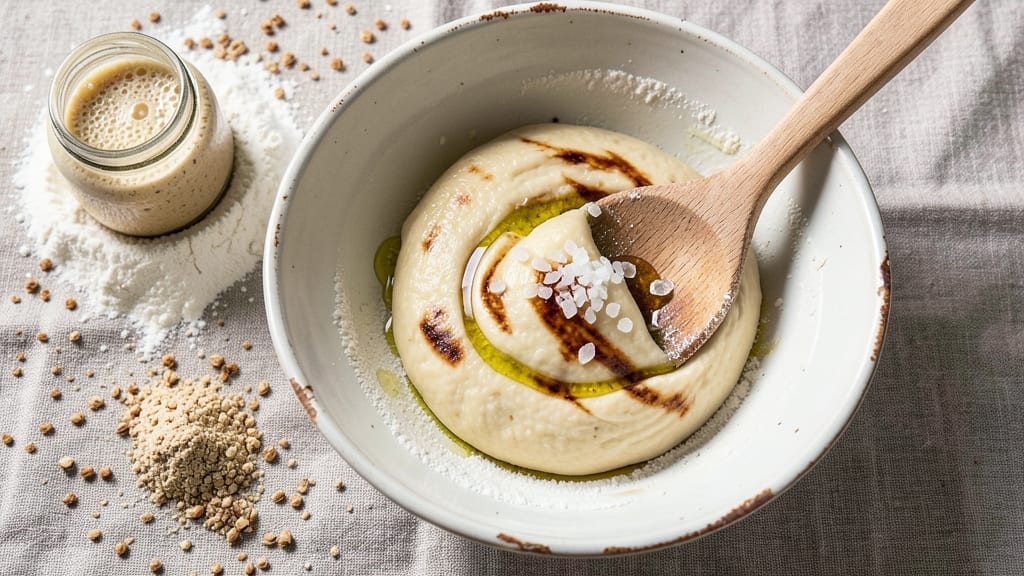
Mastering 3-day sourdough bread transforms your kitchen into a bakery, where the tangy aroma of fermentation becomes the heart of your home. This recipe builds a robust starter from scratch—no shortcuts, just time and patience—resulting in a loaf with a crisp crust and an open crumb that speaks to tradition.
The 72-hour process may seem daunting, but each step unlocks deeper flavor and texture that store-bought bread simply can’t match.
What sets this method apart is the focus on fermentation control, where bulk fermentation at room temperature (12–16 hours) develops complexity, followed by a cold proof in the fridge (8–12 hours) for refined structure.
The dough’s elasticity and open crumb are direct results of these precise timings, while the high hydration (70%) ensures a light, airy texture. Troubleshooting weak starter or dense bread becomes intuitive once you understand the science behind each stage.
By the time you pull that golden-brown loaf from the oven, you’ll have a loaf with a crust that crackles and a crumb so open it seems almost impossible—yet entirely achievable. The tangy depth comes from the starter’s natural acidity, while the oven spring delivers that signature height.
This isn’t just bread; it’s a skill you’ll refine with every batch, turning a simple flour mixture into a masterpiece.
Perfect for breakfast, sandwiches, or gifting, this recipe scales beautifully and adapts to whole wheat or rye flour for variations. The key to success lies in the details—temperature, hydration, and timing—all of which we’ll break down step by step. Let’s begin with the starter, the foundation of everything that follows.
Ingredients for 3 day sourdough bread
Four ingredients transform your kitchen into a bakery—just time and patience required.
| Ingredient | Amount | Notes |
|---|---|---|
| Unbleached All-Purpose Flour 🌾 | 5 cups | High-protein preferred for structure |
| Whole Wheat Flour 🌾 | 1 cup | For added flavor and texture |
| Active Sourdough Starter 🍞 | 1 ½ cups | 100% hydration, bubbly and active |
| Filtered Water 💧 | 3 ½ cups | Room temperature (70°F) |
| Sea Salt 🧂 | 1 ½ tsp | Diamond Crystal preferred |
| Extra-Virgin Olive Oil 🫒 | ½ tbsp | For dough handling |
| Cornmeal 🌽 | ¼ cup | For dusting and scoring |
| Ice Water ❄️ | ½ cup | For shaping and cold proof |
The flour is non-negotiable here. King Arthur or Caputo Tipo 00 are gold standards, but Bob’s Red Mill unbleached works in a pinch. The whole wheat adds depth—King Arthur or White Lily are ideal for consistent texture. Your starter needs to be 100% hydration and actively bubbling; if it’s sluggish, feed it 1:1:1 (flour:water:starter) twice daily until lively. For the water, room temperature is critical—too cold slows fermentation, too warm kills yeast. I use a thermometer to confirm 70°F (21°C).
No Diamond Crystal salt? Maldon flaky or kosher salt works, but adjust to taste—salt controls fermentation speed. Olive oil matters for dough handling; California avocado oil is a great alternative if you’re sensitive to olive flavor. Cornmeal is just for scoring—semolina works too. The ice water is your secret weapon for shaping; it firms up the dough instantly. If your starter’s not ready, buy a mature one from a trusted bakery—no shame in shortcuts when you’re learning. For hydration, filtered water prevents off-flavors from chlorine.
Flour keeps 6 months in airtight containers; salt lasts forever. Store your starter in the fridge—feed it weekly to keep it alive. The dough can be shaped 12 hours ahead and proofed in the fridge for 8-12 hours for better flavor. Bake within 4 hours of shaping for best results. Leftovers? Toast within 2 days—fresh bread doesn’t reheat well. For extra batches, double the recipe and bake in a Dutch oven.
Why You’ll Love This Recipe
- No-Stir Fancy: The dough comes together with just a handful of ingredients—no kneading, no fuss—thanks to that whole wheat flour giving it structure while the sourdough starter does the heavy lifting. Honestly, I’ve made this while scrolling through my phone; the magic happens in the slow rise.
- Tangy Crust, Soft Core: That crispy, caramelized crust with a pillowy interior? It’s all thanks to the sea salt and the 3-day fermentation letting the flavors meld. Between us, it’s the kind of bread that makes you pause mid-bite—like a sourdough hug for your sandwich.
- Weeknight Workhorse: Toss a loaf in the freezer for toast on lazy mornings or pack it in lunches—it stays fresh for days. I’ll be real: my kids now ask for it before their PB&J, and that’s saying something after years of store-bought bread.
- Budget-Friendly Staple: Whole wheat flour and a starter are cheaper than buying loaves, and one batch feeds my family for days. Not the prettiest, but the taste makes up for it—and my wallet thanks me every time.
Step-by-step instructions for 3-Day sourdough bread
Here’s the method that builds flavor through fermentation—patience pays off with a crust that crackles and crumb that sings.
Mix and Autolyse for Optimal Gluten Development
In a large mixing bowl, combine the 5 cups unbleached all-purpose flour and 1 cup whole wheat flour. Add the 1.5 cups active sourdough starter and gently mix with a wooden spoon until no dry spots remain. This is called an autolyse, and it kickstarts gluten formation without salt or water.
Next, add the 3.5 cups room-temperature filtered water and mix again until fully incorporated. The dough should be shaggy but cohesive. Cover the bowl with a damp kitchen towel and let it rest for 30 minutes. During this time, the flour will absorb the water, and the gluten strands will begin to relax and develop. You’ll notice the dough becomes smoother and more elastic—this is your signal to proceed to the next step.
Incorporate Salt and Oil for Structure and Handling
After the autolyse, sprinkle the 1.5 teaspoons sea salt evenly over the dough. Using your hands, gently fold the salt into the dough, working from the bottom up to incorporate it fully. Then, add the 0.5 tablespoon extra-virgin olive oil and mix it in by hand, ensuring it coats the dough evenly. The oil improves the dough’s handling and adds a subtle richness.
Now, perform a series of stretch-and-folds every 30 minutes for 2 hours. To do this, wet your hands to prevent sticking, grab one side of the dough, stretch it upward, and fold it over itself. Rotate the bowl and repeat this process on all four sides. This builds strength in the gluten network, which is crucial for the bread’s structure. After the final stretch-and-fold, let the dough rest for 20 minutes before shaping.
Shape and Cold Proof for Flavor Development
Lightly dust a clean surface with 0.25 cup cornmeal and turn the dough onto it. Shape the dough into a tight boule (round loaf) by pulling the edges toward the center and tucking them under. Seal the dough seam-side down and let it rest for 20 minutes to relax the gluten before the final proof.
Place the shaped dough, seam-side up, into a lightly oiled proofing basket or a bowl lined with a floured kitchen towel. Cover it loosely with plastic wrap or a damp towel and refrigerate for 12 to 16 hours. This cold proof slows fermentation, allowing flavors to deepen and the dough to develop its signature tang. The dough should nearly double in size and feel springy when pressed gently with a finger.
Score and Bake for a Crispy Crust
Preheat your oven to 450°F with a Dutch oven inside for 45 minutes. This ensures the oven reaches the correct temperature and the Dutch oven gets hot. Remove the Dutch oven from the oven and carefully transfer the dough onto a piece of parchment paper. Use a sharp razor or lame to score the dough in a crosshatch or diagonal pattern—this allows the bread to expand and prevents it from bursting open unpredictably.
Carefully place the scored dough into the hot Dutch oven, cover it, and bake for 30 minutes. After 30 minutes, remove the lid and bake for an additional 15 to 20 minutes until the bread is deep golden brown and the internal temperature reaches 205°F. The crust should be crackly and the bread should sound hollow when tapped on the bottom. Let the bread cool on a wire rack for at least 1 hour before slicing—this allows the crumb to set and prevents a gummy texture.
Rest and Serve for Maximum Flavor
Once the bread has cooled, slice it with a serrated knife to reveal the open, airy crumb. The bread should have a crispy crust with a chewy interior and a tangy depth from the long fermentation. Serve it fresh, or store it in an airtight container at room temperature for up to 3 days. The flavor actually improves as it stales, making it perfect for toast or sandwiches.
Real talk: The first slice is always the best. The crust will be perfectly crisp, and the crumb will be light yet dense with flavor. This method delivers a sourdough that rivals artisanal bakery bread, and the best part? You made it yourself.
Pro Tips For Making 3 Day Sourdough Bread
- Weigh Your Flours: Skip the cups—this recipe needs precision. Whole wheat absorbs differently than all-purpose, and even a tablespoon off throws off hydration. I learned this after two dense, gummy loaves where I eyeballed it. Use a scale for both flours, and write down the exact grams.
- Stretch and Fold Smart: Timing matters more than force. Do your stretch-and-folds every 30 minutes for 2 hours—not all at once. I used to rush and end up with a tangled mess; now I set a timer and let the gluten develop naturally. Less elbow grease, better structure.
- Proof at Room Temp: Skip the warm oven or proofing box unless you’re in a chilly kitchen. A consistent 70–75°F room works fine—just move the dough to a less drafty spot (like a closed cabinet). I wasted a batch trying to “speed it up” with heat, only to get overproofed, gummy bread.
- Score Deep and Fast: Use a razor blade or very sharp lame, and cut through the tension—don’t just nick the surface. A slow, shallow score won’t open properly. I now make one decisive motion per loaf, and the oven spring does the rest. No second-guessing mid-bake.
Wine and beer pairings for 3 day sourdough bread
Crisp Whites
Sourdough’s tangy complexity pairs beautifully with crisp, mineral-driven white wines like Alsace Pinot Gris or Sauvignon Blanc from New Zealand. The wine’s citrus and stone fruit notes complement the bread’s tang without overpowering it.
I love a chilled Domaine Weinbach Gewürztraminer—its lychee and spice echo the sourdough’s depth while refreshing your palate. For a budget-friendly option, Kim Crawford Sauvignon Blanc delivers the same bright acidity. 🍷
Light Reds
If you prefer red wine, opt for light-bodied varieties with bright acidity like Pinot Noir or Beaujolais. A Willamette Valley Pinot Noir with its red berry and earthy notes harmonizes perfectly with the bread’s crusty exterior and chewy interior.
For something more approachable, try a Crozes-Hermitage Syrah—its peppery finish cuts through the bread’s richness. Serve slightly chilled to enhance the wine’s freshness. 🍇
Beer Pairings
For beer lovers, a Belgian Witbier like Hoegaarden or Stella Artois is a classic choice. The coriander and citrus notes in these beers mirror the sourdough’s tangy profile, while the effervescence cleanses your palate between bites.
If you prefer something darker, a German Pilsner or Heineken offers a crisp, malty contrast that balances the bread’s complexity. For a bold twist, try a sour ale like Allagash White—its funky acidity mirrors the sourdough’s fermentation. 🍺
Non-Alcoholic Options
Skip the alcohol? A sparkling ginger beer or sparkling water with lemon enhances the bread’s crusty texture and tangy flavor. For something richer, try a chilled hibiscus tea—its floral notes complement the sourdough’s depth.
A cold brew coffee with a splash of cream also works surprisingly well, especially for breakfast. The bitterness of the coffee balances the bread’s sweetness and acidity. ☕
Regional Adaptations
In Northern Italy, sourdough is often paired with Vermentino, a crisp white wine from Sardinia. Its herbal notes and citrus brightness mirror the bread’s rustic charm. Meanwhile, in France, a Burgundy Pinot Noir with its earthy undertones enhances the sourdough’s depth.
For a Southern US twist, try a Texas Hill Country white wine—local varieties like Viognier or Roussanne add a fruity contrast. 🗺️
Nutrition facts
Frequently asked questions
Why does this recipe take 3 days instead of 1?
The extended fermentation creates deeper flavor and better texture. The first 24 hours develop the starter, while the 12-16 hour cold proof enhances gluten structure and tanginess. This slow process breaks down starches into sugars, giving that signature sourdough taste and open crumb.
Can I use whole wheat flour instead of all-purpose?
Yes, but adjust hydration slightly. Replace 1 cup all-purpose with whole wheat and add 1-2 tablespoons extra water since whole wheat absorbs more. The bread will be denser but nuttier. For best results, use a 50/50 blend of both flours to balance texture.
What if my starter isn’t bubbly after 24 hours?
Feed it! Mix 1 part starter with 1 part flour and 1 part water, then let sit 4-6 hours at room temperature. Repeat until bubbly. If it smells bad (rotten eggs), discard and start fresh. A weak starter causes dense bread—patience is key!
How do I know when the dough is fully proofed?
Press gently with a finger—if it springs back slowly (not instantly) and leaves a slight indentation, it’s ready. The dough should also rise 50-75% of its original volume. For visual confirmation, check for bubbles on the surface. Overproofing leads to a collapsed loaf.
Can I bake this without a Dutch oven?
Yes, but expect a less crisp crust. Use a baking stone with a metal bowl inverted over the dough to trap steam. Score generously and bake at 475°F for 25 minutes uncovered. For extra steam, spray water on oven walls during the first 10 minutes. The crumb will still be great!

- 3lb Prime Rib Roast Recipe: Juicy Pink Center Guaranteed in 3 Hours - October 31, 2026
- 5 Spice Cake Recipe: Warmly Spiced Layers With Crunchy Top - October 31, 2026
- 1950’s Macaroni and Cheese Recipe: Nostalgic Creamy Cheese Sauce with Buttery Noodles - October 31, 2026