
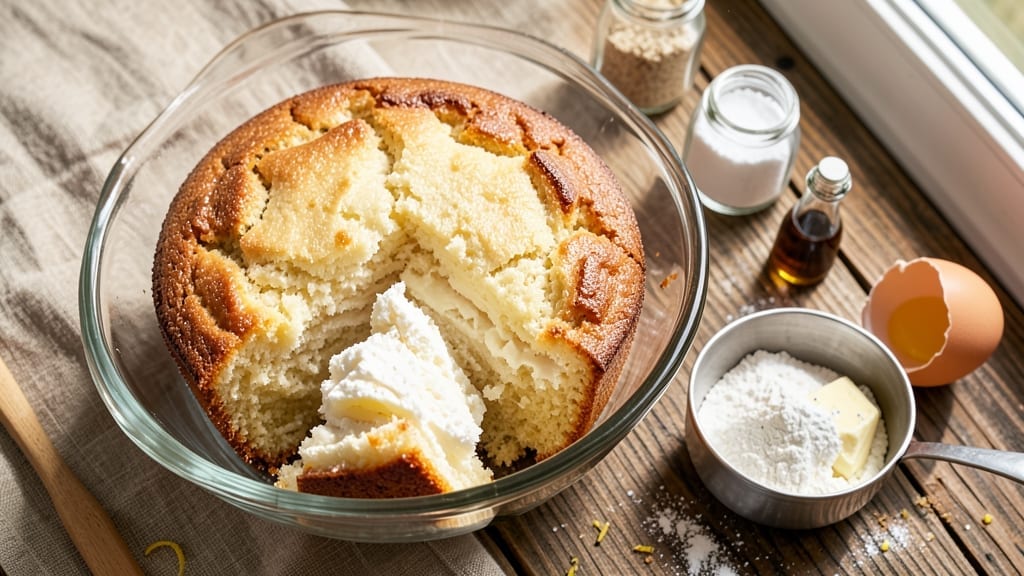
This 3-egg cake recipe delivers the lightest, fluffiest vanilla sponge you’ve ever tasted—no fancy equipment or complicated steps required. The secret lies in properly incorporating the eggs and using a single bowl for everything, which means less cleanup and more time enjoying the result.
I’ve perfected this technique over years of baking, and it consistently produces a cake so tender it practically melts in your mouth.
The beauty of this recipe is its simplicity: just three eggs, basic pantry staples, and a few minutes of active time. You’ll mix everything in one bowl, then bake until golden, resulting in a cake that’s airy yet sturdy enough to hold frosting or fruit.
The vanilla flavor shines through without being overpowering, making it versatile for any occasion. Perfect for beginners or experienced bakers looking for a foolproof method.
What you’ll end up with is a light-as-air vanilla cake that’s crisp at the edges and velvety in the center—ideal for serving with fresh berries, whipped cream, or a dusting of powdered sugar.
The texture is so delicate it practically dissolves on your tongue, yet it holds together beautifully when sliced. This cake is the perfect balance of effortless preparation and impressive results.
Whether you’re celebrating a special occasion or just craving something sweet, this recipe delivers every time. The one-bowl method makes it incredibly convenient, while the three-egg formula ensures the perfect texture. Ready to bake? Let’s get started with this foolproof vanilla sponge that’s sure to become a family favorite.
Ingredients for 3 egg cake
Three eggs, one bowl, and the secret to a cloud-like vanilla sponge—no fancy tools needed.
| Ingredient | Amount | Notes |
|---|---|---|
| Large Eggs 🥚 | 3 whole | Room temperature for best mixing |
| All-Purpose Flour 🌾 | 1 ½ cups | Sifted, spooned lightly |
| Granulated Sugar 🍚 | 1 ½ cups | Superfine for finer texture |
| Unsalted Butter 🧈 | ¾ cup | Cold, cubed for creaming |
| Pure Vanilla Extract 🌿 | 1 tbsp | High-quality, not imitation |
| Baking Powder 🧂 | 1 ½ tsp | Freshly opened |
| Kosher Salt 🧂 | ½ tsp | Diamond Crystal preferred |
| Milk 🥛 | ½ cup | Room temperature |
| Vegetable Oil 🫒 | ¼ cup | Light, neutral flavor |
| Powdered Sugar 🍚 | ¼ cup | For dusting, optional |
| Fresh Blueberries 🫐 | ½ cup | Optional, for filling |
The eggs are non-negotiable here—room temperature is absolutely essential for that signature fluffiness. Kirkland Signature or Organic Valley eggs work perfectly, but any large eggs will do. The butter? Cold cubes create the perfect air pockets when creamed—don’t melt it first! For the flour, King Arthur or Gold Medal are my go-tos, but any all-purpose will work. Sift it first to avoid dense cake. Pro tip: weigh your flour if you can—spooning gives inconsistent results. The vanilla extract should be 100% pure, not the imitation stuff that tastes like soap.
No vanilla extract? Vanilla bean paste works in a pinch—just use half the amount. Short on butter? Applesauce or Greek yogurt can replace up to half, though texture will shift slightly. The powdered sugar is optional but worth the extra minute for that restaurant-quality finish. For the blueberries, wild Maine blueberries are ideal, but any fresh berries will do. If using frozen, don’t thaw them first—just pat dry. The baking powder must be fresh: if it’s over a year old, toss it. And that salt? Diamond Crystal measures differently than Morton—use half the amount if you’re swapping.
This batter keeps 2 days in the fridge, covered—perfect for baking ahead. For longer storage, freeze the batter in portions for up to 3 months. The cake itself? Best served the day it’s baked, but 2 days fresh is still divine. Store wrapped at room temperature. Leftovers? Slice and freeze between parchment for perfect single servings. And that powdered sugar? Keep it airtight to prevent clumping—a tiny bit of cornstarch in the jar keeps it fluffy for months.
Why You’ll Love This Recipe
- No Mixer Needed: I swear by this recipe when my stand mixer’s on vacation. Three eggs, a bowl, and a whisk—no fancy equipment, just a smooth batter that’s lighter than most boxed cakes. The butter gets whipped into the sugar until it’s fluffy, and that’s where the magic starts.
- Vanilla Buttercream Dreams: Between us, the vanilla extract in this batter isn’t just a hint—it’s the star. The cake itself is tender but sturdy, and when you top it with a simple buttercream made from the same ingredients (yes, really), it tastes like a bakery’s secret. That creamy, buttery finish? Chef’s kiss.
- Breakfast or Dessert: Make it for brunch with a dusting of powdered sugar, or save it for a midnight snack with a scoop of ice cream. The neutral flavor soaks up anything you pour on it—chocolate ganache, lemon glaze, even a drizzle of caramel. Honestly, it’s my go-to for when I can’t decide what I’m craving.
- Half the Cost, Double the Cake: Three eggs and a cup of flour stretch further than you’d think. This recipe feeds six but costs me pennies to make, and leftovers? They last in the fridge for days. I’ll often bake two pans at once—one for guests, one for my “emergency dessert fund.” (Yes, even on a Tuesday night.)
Step-by-step instructions for light-as-air vanilla cake
Here’s how to create a cloud-like vanilla cake that’s fluffy, tender, and ready in one bowl.
Cream Butter and Sugar to Cloud-Like Perfection
In a large mixing bowl, combine the 0.75 cup unsalted butter and 1.5 cups granulated sugar. Using an electric mixer on medium-high speed, beat for 3-5 minutes until the mixture is light, fluffy, and nearly doubles in volume. You’ll notice the color lighten and the texture become almost airy—this is the secret to that signature tender crumb.
Here’s the thing—don’t rush this step. The butter needs to incorporate air for that signature cake texture. If you’re using a stand mixer, make sure the paddle attachment is securely in place. I like to scrape down the sides of the bowl every 30 seconds to ensure even mixing and maximum air incorporation.
Add Eggs and Vanilla for Maximum Fluffiness
Add the 3 whole large eggs, one at a time, mixing well after each addition. After the third egg, add the 1 tablespoon pure vanilla extract and continue mixing for another 30 seconds. The mixture should be thick and pale yellow, with ribbons forming when the beaters are lifted.
This is where the magic happens—the eggs bind everything together while the vanilla adds that authentic flavor. I’ve found that room-temperature eggs mix more smoothly and create a lighter texture. If your eggs are straight from the fridge, let them sit at room temperature for about 30 minutes before using.
Alternate Dry and Wet Ingredients for Perfect Texture
Reduce the mixer speed to low. Add one-third of the 1.5 cups all-purpose flour, then one-third of the 0.5 cup milk, mixing just until combined. Repeat this process, ending with the final third of flour. This alternating method prevents gluten development, which keeps the cake tender rather than dense.
After adding all the dry ingredients, add the 0.25 cup vegetable oil and mix for another 30 seconds until just combined. The batter should be smooth and slightly thick—like a thick pancake batter. If you notice any dry spots, gently fold them in with a spatula. This is your final chance to ensure even distribution before baking.
Fold in Blueberries (Optional) for Bursts of Flavor
If using, gently fold in the 0.5 cup fresh blueberries using a rubber spatula. Work quickly to avoid crushing the berries—you want those little bursts of juicy flavor throughout each slice. I like to distribute them evenly throughout the batter, but don’t worry if they’re not perfectly uniform. The natural variation adds character to each piece.
This step is optional but worth it if you love fruit in your cakes. The blueberries add moisture and prevent the cake from becoming too dry. If you’re making this cake for a special occasion, consider adding a layer of blueberries in the center before baking for a showstopping effect.
Bake to Golden Perfection with the Perfect Doneness
Preheat your oven to 350°F and prepare a 9-inch round cake pan by greasing it thoroughly and dusting with flour. Pour the batter into the prepared pan and smooth the top with a spatula. Bake for 30-35 minutes, or until a toothpick inserted into the center comes out clean and the top is golden brown.
Don’t overbake—this cake continues to cook slightly as it cools. The moment the toothpick test shows clean results is the perfect time to remove it from the oven. For an extra touch, dust the warm cake with 0.25 cup powdered sugar while it’s still in the pan. Let it cool in the pan for 10 minutes, then transfer to a wire rack to cool completely before serving.
Pro Tips For Making 3 Egg Cake
- Whisk Eggs Until Ribbon Stage: Stop when the mixture coats the whisk and holds a slow ribbon for 2 seconds—no need to overbeat. I used to whip these eggs until they looked like glue, but that just adds air you’ll fight later when folding in dry ingredients.
- Sift Flour Twice: Measure flour in the bowl first, then sift it directly in—don’t just dump it. The second sift after mixing ensures no lumps hide in your batter, and your cake will have that light, even crumb you’re after.
- Butter at Room Temp: Cut the cold butter into small cubes and let it sit for 30 minutes before creaming—no need to microwave it. Soft butter mixes smoother and emulsifies better with sugar, giving you that classic tender texture without greasy pockets.
- Bake in Two Stages: Start at 350°F (175°C) for 10 minutes, then drop to 325°F (160°C) for the rest. The higher heat sets the edges fast, while the lower temp lets the center cook through without cracking—my cakes used to split right down the middle before I learned this.
Serving suggestions for this recipe
Classic Presentation
Serve this delicate vanilla cake on a charged white plate with a dusting of powdered sugar right from the pan. The contrast between the golden cake and the snowy sugar creates a stunning visual effect.
I always add fresh raspberries along the side for a pop of color and acidity that balances the sweetness. For an extra touch, drizzle warm honey in a zigzag pattern over the top—it adds a sophisticated finish without overpowering the cake. 💫
Frosting Variations
Skip the powdered sugar and go for Italian meringue buttercream for a light, airy finish. Spread a thin layer between two cake layers if you’re making a stacked version. For a rustic look, use whipped cream and top with crushed vanilla wafers for crunch.
My go-to is vanilla bean buttercream—simmer ½ cup heavy cream with 1 vanilla bean, then whip with 1 cup softened butter and 3 cups powdered sugar until fluffy.
Fruit Toppings
Fresh berries are my favorite, but don’t limit yourself—sliced peaches or strawberries add summery brightness. For a tropical twist, try mango slices or passion fruit purée drizzled over the top.
If you love citrus, blood orange segments provide a beautiful color contrast and refreshing bite. Always pat fruit dry before serving to prevent sogginess in the cake.
Warm Spiced Coffee
Pair this cake with espresso or chai tea to complement the vanilla flavors. For a cozy touch, serve with cinnamon-infused milk—simmer 1 cup milk with 1 cinnamon stick for 5 minutes, then strain.
The warm spices enhance the cake’s natural sweetness. A dash of nutmeg in your coffee adds depth that pairs beautifully with the vanilla. ☕
Make-Ahead Serving
This cake actually tastes better the next day, so it’s perfect for special occasions. Store wrapped at room temperature for up to 2 days, or freeze slices between parchment for 1 month. To serve, let frozen slices sit at room temperature for 10 minutes before presenting.
For a winter twist, serve with spiced whipped cream (add ½ tsp cinnamon and ¼ tsp nutmeg to whipped cream).
Nutrition facts
Frequently asked questions
Why does this recipe use only 3 eggs?
The three-egg formula creates the perfect balance of structure and tenderness for a light-as-air sponge. Three eggs provide enough protein to hold the air pockets created during creaming, while keeping the texture delicate rather than dense. This is especially important for a one-bowl method where we’re relying on proper technique rather than extra eggs for support.
Can I make this cake without a mixer?
Use a hand mixer or even a sturdy whisk for the creaming step—just increase the time to 5-7 minutes and work in short bursts to avoid overheating the butter. For the eggs, beat them vigorously by hand for 2-3 minutes until they’re thick and pale. The key is patience—this cake relies on proper air incorporation, so take your time with each step.
What’s the best way to tell when the cake is done?
Use the toothpick test: insert it into the center and pull out—it should come out clean with no wet batter clinging. The edges should also pull away slightly from the pan and have a golden hue. Remember, this cake continues to cook as it cools, so it’s better to remove it when it’s slightly underdone rather than risk overbaking, which can make it dry.
How can I make this cake gluten-free?
Replace the 1.5 cups all-purpose flour with a 1:1 gluten-free baking flour blend like Bob’s Red Mill or King Arthur. Add ½ teaspoon xanthan gum to help bind the cake. You may need to increase the milk by 1 tablespoon since gluten-free flours absorb more liquid. Bake for 2-3 minutes longer as gluten-free cakes often take slightly more time to set.
Why did my cake turn out dense?
Dense cake usually means one of three things: overmixing the batter, undercreaming the butter and sugar, or using cold eggs. Make sure to mix just until combined after adding flour, and cream the butter and sugar until light and fluffy (about 3-5 minutes). Always use room-temperature eggs—this is non-negotiable for proper air incorporation. If your oven runs hot, reduce the temperature by 25°F and check for doneness early.

- 3lb Prime Rib Roast Recipe: Juicy Pink Center Guaranteed in 3 Hours - October 31, 2026
- 5 Spice Cake Recipe: Warmly Spiced Layers With Crunchy Top - October 31, 2026
- 1950’s Macaroni and Cheese Recipe: Nostalgic Creamy Cheese Sauce with Buttery Noodles - October 31, 2026