
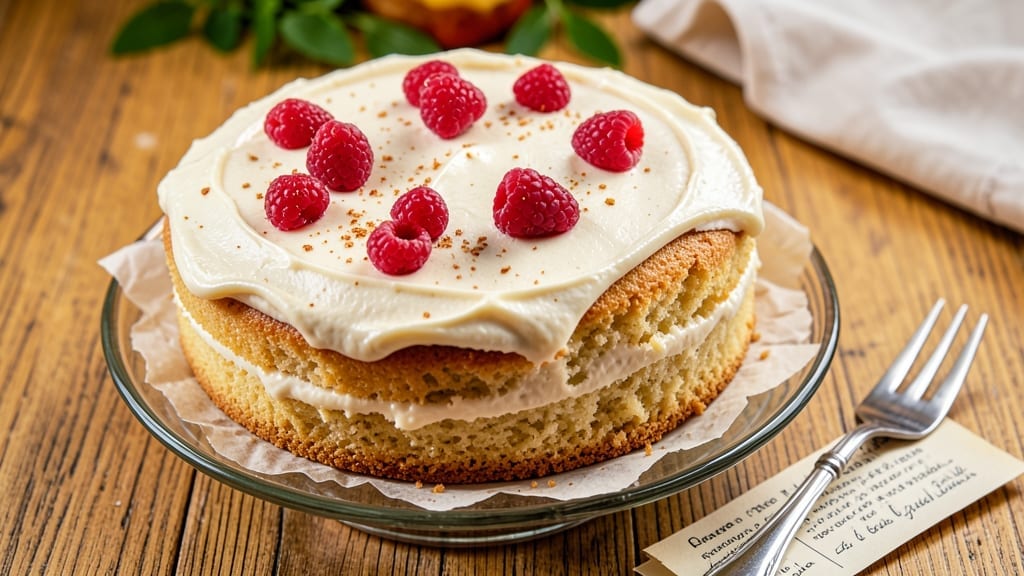
This 3-egg vanilla cake recipe delivers perfectly light layers with a tender crumb—no dense, overmixed texture in sight. The secret lies in creaming butter and sugar properly, then gently folding in eggs to maintain airiness.
I’ve baked countless cakes, and this method consistently produces a moist, fluffy result that slices beautifully. The key is patience: overmixing is the enemy of a light cake, and this recipe avoids it entirely.
The technique starts with room-temperature ingredients, which blend smoothly for even distribution. You’ll use a standard 3-egg base, but the real magic happens in the folding step—whisking eggs separately before gently incorporating them keeps the batter light.
Baking at 350°F ensures even rise without overbrowning, while a simple syrup glaze adds moisture and shine. This cake is foolproof for beginners but refined enough for special occasions.
What you’ll end up with is a cake that’s light-as-air, with tender layers and a delicate crumb. The vanilla flavor shines through without being overpowering, and the texture stays moist for days.
It’s the kind of cake that disappears quickly—perfect for birthdays, celebrations, or a simple dessert craving. The recipe scales easily, too, so you can adjust for a crowd without sacrificing quality.
Once baked, let the cake cool completely before slicing to maintain its structure. Serve plain, with fresh berries, or drizzled with a light glaze for extra elegance. The simplicity of this recipe makes it a staple—no fancy techniques, just reliable results every time. Let’s get baking!
Ingredients for 3 egg vanilla cake
Room-temperature butter, precise measurements, and gentle folding create this flawless vanilla cake.
| Ingredient | Amount | Notes |
|---|---|---|
| Unsalted Butter 🧈 | 1 cup | Room temperature for creaming |
| Granulated Sugar 🍚 | 1 ½ cups | Superfine preferred for smooth texture |
| Pure Vanilla Extract 🌿 | 2 tbsp | Bourbon or Madagascar preferred |
| Large Eggs 🥚 | 3 whole | Room temperature for even blending |
| All-Purpose Flour 🌾 | 2 cups | Sifted for lightness (spooned & leveled) |
| Baking Powder 🍞 | 2 tsp | Aluminum-free for tender crumb |
| Diamond Crystal Kosher Salt 🧂 | ½ tsp | Fine grain preferred |
| Whole Milk 🥛 | ½ cup | Room temperature for smooth batter |
| Vanilla Bean Seeds 🌿 | 1 tsp | Scraped from 1 pod for depth |
| Simple Syrup 🍯 | ¼ cup | 1:1 sugar-to-water ratio (cooled) |
| Powdered Sugar 🍚 | ½ cup | For glaze (sifted) |
| Lemon Juice 🍋 | 1 tbsp | Freshly squeezed for glaze |
The butter makes or breaks this cake—unsalted, room-temperature is non-negotiable. Plugrá or Land O’Lakes brands work best for consistent quality, but any unsalted will do if properly softened. Sugar choice matters too: superfine dissolves more smoothly, but regular granulated works if pulsed briefly in a food processor. Vanilla extract should be pure, not imitation—Madagascar bourbon adds depth without overpowering. For the vanilla bean seeds, split one pod lengthwise and scrape with a knife. Store vanilla extract in a cool, dark place to preserve its potency for up to 2 years.
No vanilla bean? Double the extract—just ensure it’s high-quality. Running short on baking powder? Baking soda plus cream of tartar at a 2:1 ratio works, but test your leavening first. The milk can be swapped for heavy cream or buttermilk, though texture may vary slightly. For the glaze, powdered sugar from a sealed container prevents clumping. If your kitchen runs hot, chill the cake pans for 10 minutes before baking to prevent over-browning. The simple syrup should be cooled completely before using to maintain cake structure.
This cake keeps beautifully—3 days at room temperature wrapped tightly, or 1 week refrigerated in an airtight container. For longer storage, slice and freeze portions between parchment paper for up to 3 months. The glaze sets best when applied to completely cooled cake, so plan ahead. Store extra batter in the fridge for 24 hours or freeze for 1 month—just let it come to room temperature before baking. The cake reheats wonderfully in a 250°F oven for 10 minutes to restore moisture.
Why You’ll Love This Recipe
- No Mixer Needed: I swear by this recipe when I forget to take my stand mixer out of the box. Cream the butter and sugar by hand—it’s just a few minutes of elbow grease, and the result is that perfect, fluffy crumb. (Yes, even on a Tuesday night.)
- Vanilla That Stays: That pure vanilla extract? It doesn’t fade into the background like some store-bought junk. The aroma lingers in every slice, and the flavor? Rich, warm, and exactly like the vanilla cake you remember from childhood—no artificial shortcuts here.
- Weeknight or Celebration: Make it for breakfast with a drizzle of honey, or save it for a birthday with a quick dusting of powdered sugar. The same simple batter works for both, and honestly? That’s the kind of recipe I reach for when I don’t want to overthink it.
- Leftovers That Last: This cake holds up beautifully for days—moist enough to slice fresh but sturdy enough to pack for lunches. I’ve even frozen slices for last-minute treats, and they reheat like a dream. (Budget win: fewer grocery runs.)
Step-by-step instructions for light vanilla cake layers
Here’s the precise method to achieve tender, airy layers with perfect rise and moisture.
Cream Butter and Sugar to Light Ribbons
In a stand mixer fitted with the paddle attachment, beat the 1 cup unsalted butter on medium speed until smooth and creamy. Gradually add the 1.5 cups granulated sugar while mixing continuously. Increase speed to high and beat for 3-4 minutes until the mixture is pale and fluffy, with ribbons forming when the paddle is lifted.
This creaming process incorporates air, which creates the cake’s signature light texture. I like to check the butter temperature first—it should be soft enough to leave a slight indent when pressed, but not melted. If it’s too cold, the mixture will struggle to emulsify properly, resulting in dense layers.
Incorporate Eggs and Vanilla for Maximum Flavor
Add the 3 whole large eggs, one at a time, mixing on low speed after each addition until fully incorporated. This gradual approach prevents the eggs from cooking or curdling in the warm butter mixture. Add the 2 tbsp pure vanilla extract and 1 tsp vanilla bean seeds, mixing just until combined.
The vanilla bean seeds add depth of flavor that extract alone can’t match. I scrape the seeds directly from a split pod using the back of a knife—this ensures you capture every bit of flavor. The mixture should now be smooth with no visible streaks of egg white.
Combine Dry Ingredients with Minimal Mixing
In a separate bowl, whisk together the 2 cups all-purpose flour, 2 tsp baking powder, and 0.5 tsp diamond crystal kosher salt. Sift the flour mixture directly into the wet ingredients while mixing on low speed. Add the 0.5 cup whole milk and mix just until combined—this is critical to avoid developing gluten.
Overmixing is the enemy of tender cake. I stop mixing as soon as the flour disappears, typically after about 20-30 seconds. The batter should be smooth with a few small lumps remaining. This technique ensures a fine crumb rather than a dense, chewy texture.
Divide and Bake for Even Layers
Preheat your oven to 350°F and grease two 8-inch round cake pans with butter, then dust with flour. Divide the batter evenly between the pans. Bake for 25-30 minutes, or until a toothpick inserted in the center comes out clean and the tops spring back when touched.
I always rotate the pans halfway through baking to ensure even heat distribution. The cake should have a golden top but remain tender—it’s better to pull it out slightly underdone than risk overbaking. Let the cakes cool in the pans for 10 minutes before transferring to a wire rack to cool completely.
Assemble with Simple Syrup and Glaze
Place the first cake layer on a serving plate. Brush the top with 0.25 cup simple syrup and spread a thin layer of 1 cup unsalted butter, softened. Repeat with the second layer. For the glaze, whisk together the 0.5 cup powdered sugar and 1 tbsp lemon juice until smooth, then drizzle over the assembled cake.
The simple syrup adds moisture while the butter layer creates a rich, tender interface between layers. The lemon glaze adds brightness that complements the vanilla perfectly. Serve immediately or refrigerate for up to 4 hours before serving for enhanced flavor development.
Pro Tips For Making 3 Egg Vanilla Cake
- Cream Butter and Sugar Slowly: I used to dump everything in the mixer and wonder why my cake turned out dense—don’t. Beat the butter and sugar on medium speed for 3-4 minutes until it’s light and fluffy, not just pale. The air you’re incorporating here is what makes the cake rise properly with just three eggs.
- Room-Temp Eggs Matter: Cold eggs from the fridge won’t blend smoothly and can cause streaks. Crack them into a bowl, cover it with warm water, and let them sit for 10 minutes before adding to the batter. Trust me, your cake’s texture will thank you—no weird lumps or graininess.
- Don’t Overmix the Flour: Once you fold in the flour, stop mixing the second it disappears. Overworking it develops gluten, and your cake will turn out tough instead of tender. Use a spatula to gently fold—just until combined, no more. I’ve ruined cakes this way, and you don’t want that regret.
- Preheat Pan and Oven Together: Place your cake pan in the oven while it’s preheating—no waiting. This ensures even baking from the start. If you skip this, the edges will cook faster than the center, leaving you with a cake that’s dry on the outside and underdone inside. (Yes, I’ve done it.)
Common mistakes when making this dish
Overmixing the Batter
The biggest mistake I see is overmixing after adding the flour. Once you incorporate the dry ingredients, mix just until combined—about 20-30 seconds—then stop immediately.
Overmixing develops gluten, which creates a tough, chewy texture instead of the delicate crumb you want. I always set a timer to avoid going overboard. 🌾
Skipping Room-Temperature Ingredients
Cold butter and eggs can cause uneven mixing and poor rise. Let your butter, eggs, and milk sit at room temperature for at least 1 hour before starting. Cold ingredients create pockets of air that don’t distribute properly, leading to dense spots in your cake.
I test butter by pressing my finger into it—it should leave a slight indent but not be sticky.
Incorrect Oven Temperature
Baking at the wrong temperature is a common downfall. This recipe requires a precise 350°F oven. Too low, and your cake won’t rise properly; too high, and it’ll brown before cooking through.
I recommend using an oven thermometer to verify your oven’s accuracy. Preheat for at least 20 minutes to ensure consistent heat distribution.
Using Old or Improper Leavening Agents
Baking powder and baking soda lose effectiveness over time. Check your leavening agents’ expiration dates—if they’re more than 6 months old, replace them. Also, avoid substituting baking soda for baking powder without adjusting the recipe.
I keep my baking powder in an airtight container in a cool, dark place to preserve its potency.
Not Cooling Properly
Many people rush to slice their cake immediately after baking. Let the cakes cool in the pans for 10 minutes, then transfer to a wire rack to cool completely before assembling.
This prevents crumbling and allows the layers to set properly. I’ve seen cakes fall apart when sliced too soon—patience is key here!
Ignoring the Toothpick Test
Some bakers rely on visual cues alone, but the toothpick test is foolproof. Insert a toothpick into the center of the cake—it should come out clean or with a few moist crumbs.
If it’s wet with batter, bake for another 5 minutes. Overbaking dries out the cake, so trust this test to avoid disappointment. 🔥
Nutrition facts
Frequently asked questions
Why does this recipe use only 3 eggs?
The 3-egg base creates a perfectly light, tender crumb without making the cake too rich or heavy. Fewer eggs also help maintain moisture, which is key for this vanilla cake’s delicate texture. The gentle folding technique ensures even distribution of air throughout the batter.
Can I make this cake without a mixer?
Use a sturdy wooden spoon or whisk to cream the butter and sugar by hand for 5-7 minutes until light and fluffy. For the eggs, beat them separately before adding to the butter mixture. Mix the dry ingredients with a spatula, then fold everything together gently. The key is patience—hand-mixing just takes more elbow grease!
How do I store leftovers?
Wrap individual slices tightly in plastic wrap and store at room temperature for 2 days or refrigerate for up to 5 days. For longer storage, freeze slices between parchment paper for 3 months. Reheat frozen slices at 250°F for 10 minutes to restore moisture. The simple syrup glaze keeps the cake fresh longer!
What if my cake sinks in the middle?
This usually happens from overmixing or opening the oven too soon. Let the cake cool completely before slicing, then check your technique: mix just until combined, don’t overfill pans, and bake at 350°F until a toothpick comes out clean. A slight dome is normal—it’ll settle as it cools. For next time, try adding 1/4 tsp extra baking powder to help with rise.
Can I substitute vanilla extract with vanilla sugar?
Not directly—vanilla sugar lacks the alcohol base that helps distribute flavor. Instead, use 2 tbsp vanilla extract plus 1 tsp vanilla bean seeds for depth. If you must use vanilla sugar, dissolve 2 tbsp in the milk first, then proceed with the recipe. The extract provides better flavor distribution throughout the batter.

- 6 Egg Cake Recipe with Oil: Light as Air With Buttery Moisture - October 4, 2026
- 4 Bean Casserole Recipe: One-Pan Heartiness With Smoky Paprika Depth - October 4, 2026
- 3-Ingredient Keto Mug Cake Recipe: Microwave Magic in 2 Minutes - October 4, 2026