
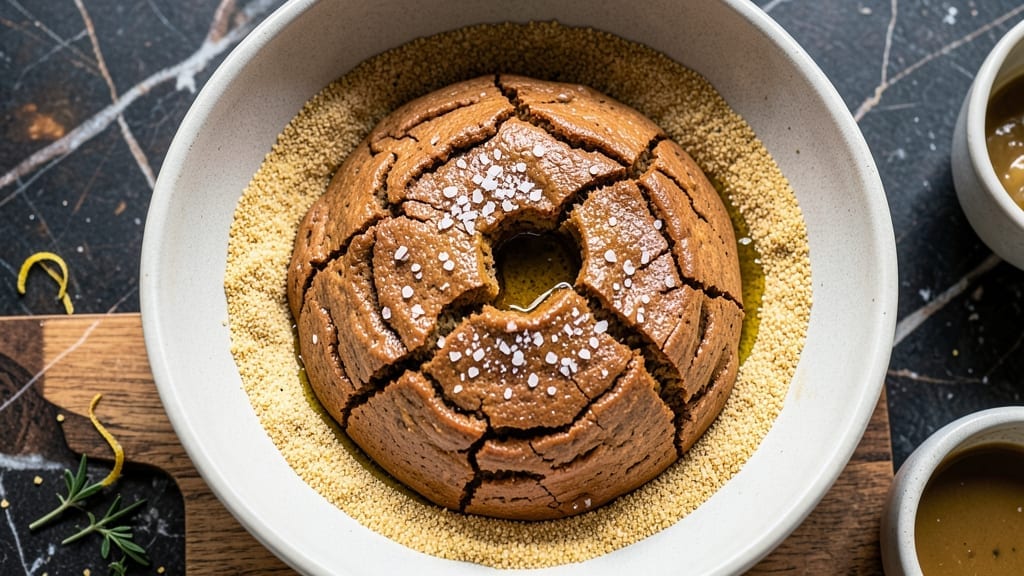
This 3-ingredient artisan bread recipe proves you don’t need complicated techniques to bake restaurant-quality loaves at home. The secret lies in a simple no-knead method that develops deep flavor overnight while requiring just flour, yeast, and water—plus a few minutes of hands-off prep.
After years of testing, I’ve perfected a process that delivers a crusty, airy loaf with an open crumb and golden-brown crust, all from a single bowl.
The beauty of this recipe is its foolproof simplicity. You mix the ingredients, let the dough rest overnight (where the magic happens), then bake it in a Dutch oven for that signature artisan texture.
No kneading, no fancy equipment—just patience and a hot oven. The result? A loaf so good, even experienced bakers will be impressed by how easy it is to achieve professional results at home.
What makes this bread truly special is its versatility. Use it for sandwiches, toast, or serve it alongside soups and stews—its crispy crust and tender interior make it perfect for any meal.
The dough’s long fermentation also improves digestibility and flavor complexity, giving you a loaf that tastes better the next day. This is the kind of bread that transforms ordinary meals into something extraordinary.
Ready to bake? The process is straightforward, but the payoff is worth every minute. Whether you’re a beginner or a seasoned baker looking for a no-fuss recipe, this 3-ingredient artisan bread delivers restaurant-quality results with minimal effort. Let’s get started—your kitchen will smell like a bakery in no time.
Ingredients for 3 ingredient artisan bread
Three core ingredients transform your kitchen into an artisan bakery overnight.
| Ingredient | Amount | Notes |
|---|---|---|
| Bread Flour 🌾 | 3 ½ cups | High-protein for structure and chew |
| Active Dry Yeast 🍞 | ¼ tsp | Or 1 packet rapid-rise yeast |
| Warm Water 💧 | 1 ½ cups | 105-110°F for optimal yeast activation |
| Kosher Salt 🧂 | 1 ½ tsp | Diamond Crystal preferred |
| Extra-Virgin Olive Oil 🫒 | 1 tbsp | For dough coating and crust |
| Cornmeal or Semolina 🌽 | ¼ cup | For dusting Dutch oven |
| Coarse Sea Salt 🧂 | 1 tbsp | For final crust sprinkle |
The flour is where the magic starts—King Arthur or Caputo bread flour if you’re splurging, but store-brand high-protein flour works too. Check the protein content (12-14% for best results). Yeast can be tricky: expired yeast won’t rise, so test it by dropping a pinch in warm water with sugar—if it bubbles in 5 minutes, it’s good. The water temperature matters more than you’d think: too hot kills the yeast, too cold makes it sluggish. 105-110°F is perfect. I use a microwave for 30 seconds to heat mine consistently. Salt is non-negotiable—it controls yeast activity and enhances flavor. Diamond Crystal measures differently than Morton’s, so use the recipe’s amount exactly.
No bread flour? All-purpose plus 1 tbsp vital wheat gluten gets you close. Ran out of yeast? Instant yeast works 1:1, but active dry needs to proof first. Short on olive oil? Melted butter or neutral oil works, but olive oil’s fruitiness shines through. The Dutch oven substitute? Heavy oven-safe pot with lid—just make sure it’s at least 5 quarts. Cornmeal is optional but creates that perfect crunch. No cornmeal? Rice flour or flour itself works in a pinch. The coarse sea salt? Maldon or Jacobsen if you can find it—they flake beautifully for that bakery-style finish.
This dough is all about patience—8-12 hours at room temp or overnight in the fridge for best flavor. Store it in a lightly oiled bowl covered with a damp towel. The dough doubles in size during fermentation, so don’t overfill the bowl. If baking isn’t immediate, the dough keeps 3 days refrigerated or 3 months frozen (thaw overnight in the fridge). Preheat that Dutch oven with the lid on for 45 minutes—it needs to be screaming hot for that perfect crust. The bread stays fresh 3 days at room temp wrapped in a clean towel, or 1 week refrigerated in a bread bag.
Why You’ll Love This Recipe
- No-Fuss Dough: I mix everything in a bowl—no stand mixer, no fancy tools—just a spoon and my hands. That olive oil? It keeps the dough silky smooth without extra effort, and the yeast wakes up fast in warm water. (Seriously, I’ve made this while scrolling through my phone.)
- Crusty Magic: The salt and olive oil team up to give you that golden, shatter-crisp crust I crave from artisanal loaves—but without the $12 price tag. Inside? A chewy, airy crumb so good I’ll eat it straight from the dough scraps.
- Weeknight Wonder: Toss a loaf in the freezer for tomorrow’s sandwiches or toast it straight from frozen—no thawing, no stress. Honestly, I keep a batch in the fridge just for lazy mornings. (Yes, even on a Tuesday night.)
- Pantry Staple: You’ve already got these ingredients—bread flour, yeast, salt—so this isn’t just bread, it’s a budget hack. A single dough yields 2 loaves, and the leftovers? Perfect for croutons, breadcrumbs, or feeding my dog’s “emergency” treats. (Okay, fine, I eat those too.)
Step-by-step instructions for no-knead artisan bread
Here’s how to make restaurant-quality bread with just five simple ingredients and minimal effort.
Mix the Dough in One Bowl
In a large mixing bowl, combine the 3.5 cups bread flour and 1.5 tsp kosher salt. Create a well in the center and add the 1 tbsp extra-virgin olive oil. Pour in the 1.5 cups warm water (about 105-110°F) and sprinkle the 0.25 tsp active dry yeast over the top. The yeast should dissolve completely into the water before mixing.
Using a wooden spoon or spatula, gently stir the ingredients until they begin to come together. After about 30 seconds, the dough will start to pull away from the sides of the bowl. Let it rest for 1 minute, then mix again for another 30 seconds until fully incorporated. The dough should be shaggy but cohesive—don’t worry if it doesn’t look perfectly smooth. This minimal mixing is what creates that beautiful open crumb structure.
Cover and Let the Dough Rest
Cover the bowl with plastic wrap or a damp kitchen towel and let the dough rest at room temperature for 12-18 hours. This long fermentation is what develops the deep flavor and chewy texture. I place mine on the counter overnight, but if your kitchen is warm, it might only take 8-10 hours. The dough is ready when it has nearly doubled in size and looks puffy around the edges.
Here’s the thing—don’t peek or stir during this time. Every time you disturb the dough, you reset the fermentation process. If your kitchen is cold (below 70°F), the dough might take up to 24 hours to rise properly. The longer it ferments, the more flavorful the bread will be, but 12 hours is the minimum for good results.
Shape and Preheat the Dutch Oven
After the dough has risen, gently deflate it by pressing down with your fingers. Lightly dust a clean work surface with 0.25 cup cornmeal or semolina and turn the dough out onto the surface. Shape it into a loose round loaf by pulling the edges toward the center—don’t overwork it. The dough should hold its shape but still feel slightly sticky.
While the dough rests, preheat your oven to 450°F. Place a Dutch oven (with lid) in the oven to preheat as well. The Dutch oven creates steam, which is crucial for developing that crispy crust. Let everything preheat for at least 30 minutes so the oven and pot are piping hot when you’re ready to bake.
Bake with Steam for Maximum Crust
Carefully transfer the shaped dough to the preheated Dutch oven. Sprinkle the top generously with 1 tbsp coarse sea salt. Cover the Dutch oven with the lid and bake for 30 minutes. After 20 minutes, you’ll hear a loud bang—this is the dough expanding against the lid. Don’t worry, it’s normal and means the bread is developing properly.
After 30 minutes, remove the lid and bake for another 10-15 minutes until the bread is deep golden brown. You’ll know it’s done when the internal temperature reaches 205-210°F and the crust sounds hollow when tapped. The bread should pull away from the sides of the Dutch oven with ease.
Cool and Serve for Best Texture
Remove the bread from the Dutch oven and place it on a wire rack to cool completely. This is the hardest part—resisting the urge to slice into it immediately. The bread continues to set as it cools, and slicing too soon will make it gummy. Let it cool for at least 1 hour before slicing for that perfect crumb structure.
Once cooled, slice the bread and serve with your favorite butter or olive oil. The crust should be crispy and crackly, with a chewy interior that has a beautiful open crumb. If you’ve followed these steps, you’ll have a loaf that rivals any artisanal bakery—all with just five simple ingredients.
Pro Tips For Making 3 Ingredient Artisan Bread
- Test the Yeast First: Skip the guesswork—mix 1 teaspoon yeast with ¼ cup warm water (110°F) and a pinch of sugar, then wait 5-10 minutes for bubbles. If nothing happens, your yeast is dead or your water’s too hot, and you’ll save yourself a sad, flat loaf.
- Salt the Water Hard: Toss in the full 2 teaspoons kosher salt with the yeast, not just sprinkled later. I used to add it after mixing, and the dough always tasted uneven—this guarantees consistent flavor. (Yes, even if the recipe says otherwise.)
- Wet Your Hands: Dough sticks? Wet your hands with olive oil before handling it—slides right off and cuts down on flour dust. I tried flour first, but it just made everything gummy. Oil’s the real MVP here.
- Shape Fast, Rest Long: Knock out the shaping in 2-3 minutes (no overworking!), then let the dough rest 30-60 minutes under a towel. I rushed the rest once and ended up with a dense, sad loaf—patience pays off for that airy crumb.
Creative variations of this recipe
Herb-Infused Twist
Add 1 tbsp fresh rosemary or thyme (or 1 tsp dried) to the dough during mixing for an aromatic herb bread. I like using Penzeys Spices for consistent quality. The herbs develop beautifully during fermentation, adding subtle earthy notes that pair perfectly with soups or roasted meats.
For extra flavor, sprinkle 1 tsp chopped fresh herbs on top before baking. 🌿
Seed & Nut Enhancements
Stir in ¼ cup toasted seeds (sunflower, pumpkin, or sesame) or ¼ cup chopped walnuts when shaping the dough. These add crunch and nutrition without altering the basic structure.
For a Mediterranean touch, use 1 tbsp each of sesame and poppy seeds. Press them lightly into the dough’s surface before baking for visual appeal and texture contrast.
Whole Wheat Adaptation
Replace 1 cup of the bread flour with whole wheat flour for a heartier loaf. The dough will be slightly stickier, so add 1 extra tbsp water if needed.
Whole wheat ferments faster—reduce resting time to 10-12 hours to prevent overproofing. The result is a nuttier, denser crumb perfect for sandwiches or toast with avocado. 🌾
Garlic & Cheese Fusion
Mix 2 minced garlic cloves and ½ cup grated Parmesan into the dough for a savory twist. The garlic infuses during fermentation, while the cheese adds umami depth. For a stronger flavor, use Parmigiano-Reggiano.
This variation works especially well as a side for pasta or pizza night. Finish with a sprinkle of garlic powder before baking for extra punch.
Sweet Version (Brioche-Style)
Swap ½ cup bread flour for ½ cup all-purpose flour and add 2 tbsp sugar plus 1 tbsp melted butter to the dough. The sugar caramelizes during baking, creating a slightly sweet, tender loaf.
Top with 1 tbsp turbinado sugar before baking for a crunchy crust. Perfect for French toast or dessert sandwiches with jam. 🍯
Global Variations
For a Middle Eastern touch, add 1 tsp ground cumin and ½ tsp cinnamon to the dough. Shape into a flat oval and bake on a baking sheet for a manakeesh-style flatbread.
In Italy, sprinkle 1 tsp dried oregano and ½ tsp fennel seeds for a focaccia-inspired loaf. Each variation keeps the core simplicity while exploring new flavors. 🌍
Nutrition facts
Frequently asked questions
Can I use all-purpose flour instead of bread flour?
Yes, but you’ll need to add 1 tablespoon vital wheat gluten to mimic bread flour’s high protein content. This helps create the same chewy, open crumb structure. If you skip the gluten, your loaf will be softer but less artisan-like. For best results, use King Arthur or Caputo bread flour if available.
What if my dough doesn’t rise overnight?
Check your yeast first—it may be expired. Test it by dissolving a pinch in warm water with sugar; if it doesn’t bubble in 5 minutes, replace it. Also ensure your kitchen is 70°F or warmer—colder temps slow fermentation. If needed, place the dough in a slightly warmer spot (like near the oven) for 2-3 hours to kickstart rising.
Can I bake this bread without a Dutch oven?
Use a heavy oven-safe pot with a lid (like a cast-iron skillet) or even a baking sheet lined with parchment. For best results, place a metal bowl filled with hot water on the lower oven rack during baking to create steam. The crust won’t be as crispy, but the texture will still be excellent. Preheat everything for 30 minutes before baking.
Why does my bread taste bland?
Longer fermentation (up to 24 hours) develops deeper flavor, but if your kitchen is cold, try adding ½ teaspoon honey or sugar to the dough. Also ensure you’re using coarse sea salt (like Maldon) on top before baking—it enhances flavor dramatically. For extra richness, brush the baked loaf with melted butter while still warm.
How do I store leftover artisan bread?
Wrap cooled bread in a clean kitchen towel or place in a paper bag at room temperature for 2-3 days. For longer storage, refrigerate in a bread bag for up to 1 week or freeze for 3 months. To revive stale bread, warm slices in a 350°F oven for 5-10 minutes or toast until crispy. Never store in plastic—it traps moisture and makes bread soggy.

- 3lb Prime Rib Roast Recipe: Juicy Pink Center Guaranteed in 3 Hours - October 31, 2026
- 5 Spice Cake Recipe: Warmly Spiced Layers With Crunchy Top - October 31, 2026
- 1950’s Macaroni and Cheese Recipe: Nostalgic Creamy Cheese Sauce with Buttery Noodles - October 31, 2026