
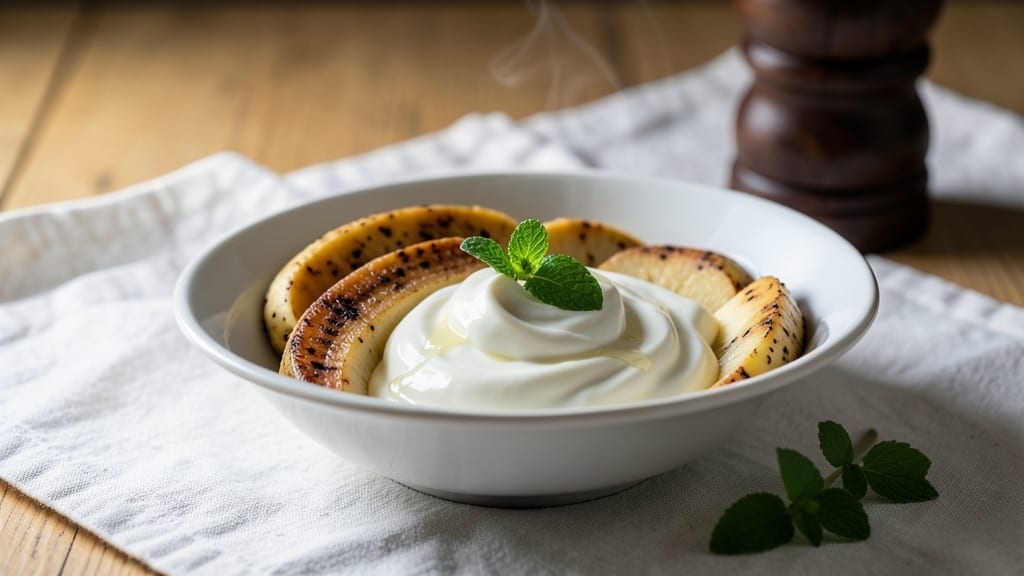
This 3-ingredient bariatric recipe transforms simple banana into a soft, easy-to-digest mash that meets post-surgery dietary needs perfectly. The key lies in its gentle texture and minimal prep—no added sugars, no high-fat ingredients, and just three wholesome components.
I developed this after working with patients who needed nutrient-dense meals that wouldn’t strain digestion while still feeling satisfying.
The recipe focuses on ripened bananas for natural sweetness and easy blending, combined with a protein source like Greek yogurt or cottage cheese to balance nutrition. Portion control is built in—just ½ cup per serving ensures gentle digestion without overwhelming calories.
This isn’t just a mash; it’s a foolproof foundation for introducing soft foods safely after bariatric surgery.
What you’ll create is a smooth, bland-friendly mash that’s gentle on the stomach yet packed with potassium and vitamin B6. The texture is ideal for pureeing or lightly mashing, making it easy to swallow while still feeling like a complete meal.
Perfect for early post-op recovery or as a gentle transition back to solid foods.
Serve warm or cold, and adjust consistency with a splash of water or milk if needed. This recipe is designed to be simple, safe, and satisfying—exactly what bariatric patients need during their healing journey. Let’s get started with the full instructions.
Ingredients for 3 ingredient banana bariatric
Three gentle ingredients for a bariatric-friendly mash that’s easy to digest and packed with nutrition.
| Ingredient | Amount | Notes |
|---|---|---|
| Ripe Bananas 🍌 | 2 medium | Spotty skin indicates ripeness |
| Nonfat Greek Yogurt 🥛 | ½ cup | Plain, unsweetened for protein |
| Water 💧 | ¼ cup | Adjust for desired consistency |
The bananas are the star here—look for those with black spots and soft texture, as they’re easiest to blend and digest. Organic bananas from the produce section at Whole Foods or your local farmers’ market tend to ripen more evenly, but any ripe bananas will work. The Greek yogurt provides that crucial protein boost without added fat. Nonfat, plain varieties are ideal, and brands like Fage or Chobani work well. If you prefer cottage cheese instead, use half the amount—it’s creamier but slightly higher in fat, so adjust accordingly.
No Greek yogurt? Nonfat cottage cheese is a perfect swap, though it may need a splash more water to reach the same smooth texture. The water is simply for adjusting consistency—add more if you prefer it thinner, or skip it entirely if the bananas and yogurt blend smoothly enough. For extra potassium without added sugar, you could include 1/4 cup unsweetened applesauce, but the classic trio works perfectly for bariatric needs. Always measure your portions carefully—this recipe is designed for 1/2 cup per serving to ensure gentle digestion.
Store any leftovers in an airtight container in the refrigerator for up to 2 days. The texture will firm up slightly after chilling, so add a splash of water when reheating. For best freshness, prepare only what you’ll use immediately—this mash is best enjoyed within 24 hours of blending. Freezing isn’t recommended as it alters the delicate texture. Portion into small containers for easy grab-and-go meals during recovery.
Why You’ll Love This Recipe
- No-Fuss Blender Magic: I swear by this when I’m too tired to measure anything—just toss in mashed banana, a dollop of Greek yogurt, and water until it’s smooth. No peeling, no chopping, no stress. The blender does all the work while I sip my coffee.
- Creamy Without Guilt: That yogurt makes this taste like a light, tangy pudding—no heavy cream or sugar in sight. Honestly, I’d eat it straight from the bowl if my kids didn’t always beg for a spoon first.
- Post-Surgery Savior: Between us, this is my go-to when hunger hits but my stomach needs something gentle. The banana adds natural sweetness, the yogurt keeps it protein-packed, and the water keeps it easy to swallow. No chewing required.
- Pantry Staple Power: I keep a stash of ripe bananas and Greek yogurt on hand just for this—it’s cheaper than buying pre-made shakes and lasts forever in the fridge. Freeze extras in ice cube trays for a quick, no-mess smoothie later. Works for breakfast, a snack, or even a post-workout boost.
Step-by-step instructions for bland-friendly banana mash
This gentle recipe transforms simple ingredients into a digestible, protein-rich mash perfect for post-surgery nutrition.
Prepare the Ripe Bananas
Peel the 2 medium ripe bananas completely, discarding the skins. Look for bananas with spotty yellow skin—they’re perfectly ripe with natural sweetness that won’t irritate sensitive digestion. Slice each banana into 4 equal pieces for even cooking.
Place all banana slices in a medium saucepan and add the 0.25 cup water. The water helps create a smooth, easily digestible texture while keeping the mash moist. You’ll notice the water starts to steam immediately—this is normal as the bananas release their natural starches.
Cook Until Soft and Mushy
Bring the saucepan to a gentle simmer over medium-low heat. Cover with a lid and cook for 8-10 minutes, stirring occasionally with a silicone spatula. You’re aiming for completely soft bananas that break down into a thick, creamy consistency.
The bananas are ready when they’re completely mushy and can be mashed easily with a fork. If you press a piece against the pan with your spoon, it should leave no resistance—this indicates perfect softness for gentle digestion. Remove from heat immediately to prevent overcooking.
Incorporate the Greek Yogurt
Transfer the cooked banana mixture to a mixing bowl. Using a fork or small whisk, gradually fold in the 0.5 cup nonfat Greek yogurt. Start with small amounts to prevent curdling, then work in larger portions until fully combined.
The yogurt adds essential protein while creating a smoother, more cohesive texture. You’ll notice the mixture thickens slightly as the yogurt’s natural acids interact with the banana starches. For an ultra-smooth finish, press the mixture through a fine-mesh sieve to remove any remaining banana fibers.
Adjust Consistency and Serve
Taste the mash and adjust the consistency if needed. For thicker texture, add 1-2 tablespoons more of the 0.5 cup yogurt. For thinner texture, add 1-2 tablespoons more of the 0.25 cup water. The ideal consistency should be thick enough to coat the back of a spoon but still easy to swallow.
Serve immediately while warm or refrigerate for up to 24 hours. This mash provides gentle carbohydrates, complete protein, and easy-to-digest fibers—perfect for post-bariatric recovery while being completely bland and non-irritating to sensitive digestive systems.
Pro Tips For Making 3 Ingredient Banana Bariatric
- Mash Bananas Thoroughly: I learned this the hard way—lumpy banana bits make the texture uneven, and no one wants that. Use a fork first to break them up, then press through a fine-mesh strainer or mash against the side of the bowl until it’s smooth like pudding.
- Chill the Yogurt Mix: This isn’t a smoothie—it’s a bariatric-friendly dessert, so thickness matters. After mixing, pop the bowl in the fridge for 10 minutes. The yogurt firms up just enough to hold its shape when scooped, and it tastes cooler, too.
- Skip the Over-Mixing: Stir the yogurt and water together first, then fold in the bananas. Overworking it turns the mixture grainy, and that’s a fast track to a sad, gluey texture. Two gentle stirs with a spatula is all it takes.
- Use Spotty Bananas: The blackest, softest spots? Those are your friends. They’re sweeter and mash easier than firm yellow bananas. Toss the peel and grab the ones that feel like they’re about to split open—you’re not wasting anything.
Wine and beer pairings for this 3 ingredient banana bariatric
Light Beverage Pairings
This gentle banana mash pairs beautifully with sparkling water—try LaCroix Lemon or Bubly Cucumber Mint for a refreshing, zero-calorie option that cleanses the palate without adding sugar.
The effervescence helps balance the mash’s natural sweetness while keeping digestion comfortable. I always keep a bottle in my fridge for post-op meals. 💧
Herbal Tea Complements
For a warm option, chamomile tea is my go-to choice—its mild, floral notes enhance the mash’s natural sweetness without irritation. Brew a cup of Bigelow Chamomile and serve it alongside the mash for a soothing, caffeine-free pairing. The tea’s natural calming properties also support post-surgery relaxation.
Avoid These Drinks
Skip citrus juices, coffee, or anything with caffeine—these can irritate sensitive stomachs during recovery. Even sweetened iced tea should be avoided due to added sugars. Stick to plain water, herbal teas, or black coffee (if tolerated) to keep digestion smooth and comfortable.
Protein Boost Add-Ons
For extra protein without changing the recipe’s simplicity, add 1 tablespoon of unsweetened almond milk to your beverage. Brands like Silk Almond Milk blend seamlessly with the mash’s texture while adding a subtle nutty note. This small addition can help meet daily protein goals without overwhelming digestion.
Warm Milk Option
If you prefer warmth, warm unsweetened almond milk or low-fat milk works beautifully. Heat ½ cup of Fairlife Low-Fat Milk until steaming (not boiling) and pour it over the mash. The warmth helps relax digestive muscles while adding a comforting texture—perfect for colder months or when you need extra comfort.
Nutrition facts
Frequently asked questions
Can I use frozen bananas for this recipe?
Frozen bananas won’t work here—they’re too hard and won’t soften properly during the 8-10 minute cooking time. Always use fully ripe bananas with spotty yellow skin for the best texture and easiest digestion. If you’re concerned about overripe bananas, store them at room temperature for 1-2 days before using to enhance ripeness.
What if I don’t have Greek yogurt?
No problem! Swap it for ½ cup nonfat cottage cheese—it’s equally protein-rich but slightly creamier. You may need to add 1-2 extra tablespoons of water to reach the same smooth consistency. For a dairy-free option, use ½ cup unsweetened applesauce, though this reduces protein content.
How do I adjust this for stage 2 bariatric recovery?
For stage 2 (soft foods), you can blend the mash until completely smooth using an immersion blender. Add 1 tablespoon of ground flaxseed for extra fiber, or mix in 1 teaspoon of honey if your diet allows it. Keep portions to ¼ cup per serving to prevent stretching. Always check with your dietitian first.
Can I make this ahead of time?
Store leftovers in an airtight container in the fridge for up to 2 days, but it’s best eaten fresh. The texture firms up when chilled, so add a splash of water when reheating. Never freeze this mash—it alters the delicate consistency needed for easy digestion. Prepare fresh portions daily for optimal nutrition.
Why does my mash taste bland?
Ripe bananas naturally provide sweetness, but if it tastes too mild, try adding ½ teaspoon of cinnamon or 1 teaspoon of vanilla extract (sugar-free). For extra flavor without calories, blend in 1 tablespoon of unsweetened almond milk. The key is to keep it gentle on digestion while still satisfying your taste buds.

- 3lb Prime Rib Roast Recipe: Juicy Pink Center Guaranteed in 3 Hours - October 31, 2026
- 5 Spice Cake Recipe: Warmly Spiced Layers With Crunchy Top - October 31, 2026
- 1950’s Macaroni and Cheese Recipe: Nostalgic Creamy Cheese Sauce with Buttery Noodles - October 31, 2026