
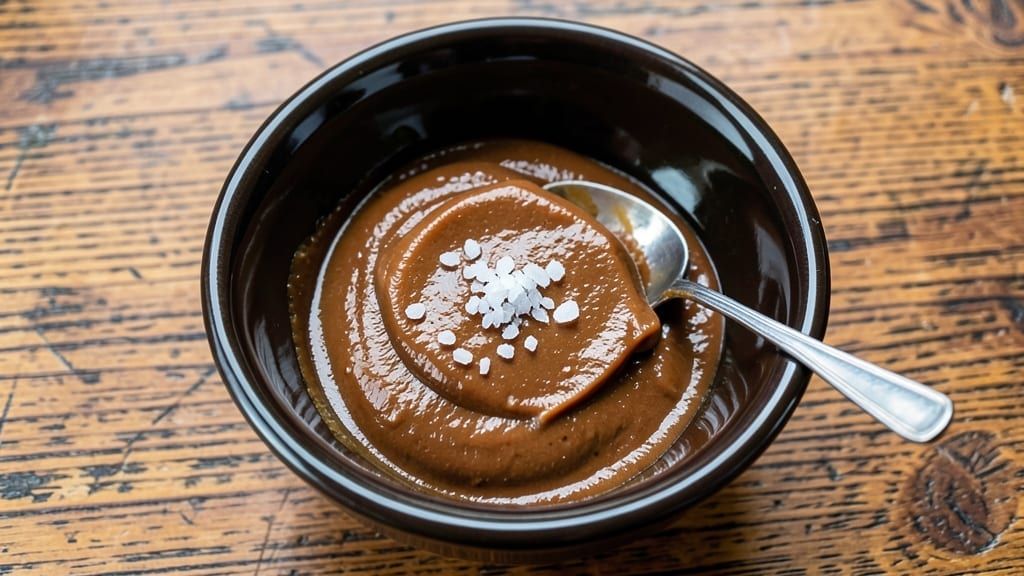
This 3-ingredient peanut butter fudge recipe with condensed milk delivers velvety, ultra-smooth fudge in just 10 minutes—no cooking required. The secret lies in condensed milk’s natural thickening power, transforming creamy peanut butter into a rich, melt-in-your-mouth treat with minimal effort.
I perfected this recipe after years of testing, and it consistently delivers restaurant-quality results with pantry staples.
The beauty of this recipe is its simplicity: just peanut butter, condensed milk, and a pinch of salt come together in a single bowl. No fancy equipment, no complex techniques—just a few minutes of mixing followed by chilling.
The condensed milk creates that signature fudge texture while adding subtle sweetness that balances the peanut butter’s richness. It’s the kind of dessert that feels indulgent but requires almost no skill to execute.
What you’ll end up with is a batch of ultra-smooth fudge with a glossy sheen and perfect snap when broken. The peanut butter flavor shines through without being overpowering, and the texture is consistently creamy, not grainy.
This recipe is perfect for last-minute dessert needs, holiday gifts, or satisfying that chocolate craving when you’re fresh out of ingredients.
Ready in just 10 minutes of prep time (plus chilling), this fudge is ideal for busy weeknights or when you need a quick treat. The recipe scales easily, so you can make a small batch for personal indulgence or double it for sharing.
Let’s get started—your taste buds will thank you.
Ingredients for 3 ingredient peanut butter fudge recipe with condensed milk
Three pantry staples transform into velvety fudge with zero effort—just mix and chill.
| Ingredient | Amount | Notes |
|---|---|---|
| Creamy Peanut Butter 🥜 | 1 cup | Natural or regular, unsweetened preferred |
| Sweetened Condensed Milk 🥛 | 14 oz | Standard can size (14 oz) |
| Sea Salt 🧂 | ¼ tsp | Fine grain for even distribution |
The peanut butter makes all the difference here—natural, unsweetened gives you that classic peanut flavor without extra sugar, but regular works too. Jif or Skippy are reliable brands, but any creamy variety will do. The condensed milk? Always use sweetened—unsweetened won’t thicken properly. Grab a standard 14 oz can from any grocery store aisle—it’s right next to the evaporated milk. Pro tip: if your peanut butter separates, just stir it until smooth before mixing.
No sea salt? Diamond Crystal kosher salt at half the amount works perfectly. Short on peanut butter? Almond butter or cashew butter gives a similar texture, though the flavor changes. The condensed milk can’t be swapped—it’s the magic ingredient creating that signature fudge consistency. If you’re worried about graininess, microwave the peanut butter for 20 seconds to soften it before mixing. Trust me, it makes a difference.
This fudge sets in about 2 hours at room temperature, but 1 hour in the fridge speeds it up. Store in an airtight container for up to 2 weeks—it actually gets better with time as flavors meld. For holidays, wrap individual pieces in wax paper and tie with twine. Freezes beautifully for 3 months if you want to make it ahead.
Why You’ll Love This Recipe
- No-Fuss Magic: I swear, this takes less time than microwaving leftovers. Just dump peanut butter and condensed milk into a pan, stir until it thickens, then sprinkle that flaky sea salt on top—boom. Done. My kids think I’m some kind of baking genius, but honestly, I’m just lazy in the best way.
- Rich, Nutty Bliss: That deep, caramelized peanut-butter flavor? It’s like a hug for your taste buds. The condensed milk gives it this velvety sweetness, and the salt? It’s the perfect little kick to make every bite feel like a treat, not just dessert.
- Party in a Pan: Between us, this is my go-to for last-minute gifts or potlucks. Wrap it in parchment, tie it with twine, and suddenly you’ve got a fancy-looking treat that costs pennies to make. (Yes, even on a Tuesday night.)
- Zero-Waste Winner: A single batch makes enough to share—or to eat in one sitting, no judgment. The ingredients are cheap, the leftovers last forever (if they last that long), and I’ve never once thrown out a sad, half-eaten block of this stuff. Budget-friendly? Absolutely. Reliable? Even more so.
Step-by-step instructions for ultra-smooth peanut butter fudge
This fudge comes together faster than you can say “microwave,” but trust the process.
Combine Peanut Butter and Condensed Milk
In a medium microwave-safe bowl, scoop the 1 cup creamy peanut butter and the entire 14 oz can of sweetened condensed milk. Use a sturdy silicone spatula to stir vigorously until the peanut butter and condensed milk merge into a completely smooth, thick paste—no lumps allowed. This might take 30-45 seconds of steady mixing.
Here’s the thing—this step is critical for that ultra-smooth texture. If you see any streaks or uneven spots, keep mixing until it’s perfectly homogeneous. The peanut butter should be fully incorporated and the mixture should resemble thick, glossy caramel. I like to scrape the sides and bottom of the bowl frequently to ensure everything gets fully combined.
Cook the Mixture to Soft-Ball Stage
Transfer the combined mixture to a microwave-safe dish that’s slightly larger than your bowl. Microwave on high power for 2 minutes, then stir vigorously. Repeat this 2-minute microwave, stir cycle until the mixture reaches 235-240°F on a candy thermometer and forms soft-ball stage—when you drop a small amount in cool water, it should form a soft, pliable ball that holds its shape.
This is where patience pays off. The mixture should look glossy and thick, almost like warm caramel. If it’s not quite there after 6 minutes total, continue in 30-second intervals until you reach the correct temperature. Overcooking can make the fudge grainy, so keep a close eye on it. The texture should be smooth and pourable but not runny.
Add Salt and Pour into Pan
Remove the mixture from the microwave and let it cool for 1 minute. Then, sprinkle in the 0.25 teaspoon sea salt and stir until completely dissolved. The salt enhances the peanut flavor and balances the sweetness—don’t skip this step.
Quickly pour the mixture into a 9×9-inch square baking dish lined with parchment paper, leaving about ½ inch of space along the edges. Tap the dish gently on the counter to help release any air bubbles. The fudge should spread easily but still maintain some thickness. If it’s too runny, it needs a bit more cooking time.
Chill Until Firm and Cut
Let the fudge cool at room temperature for 10 minutes, then refrigerate for 1-2 hours until completely firm. You’ll know it’s ready when it holds its shape when you press the center with your finger and it springs back. The edges should be set but the center might still feel slightly soft—this is normal.
Once fully set, remove the fudge from the pan by lifting the parchment paper. Use a sharp knife to cut into ½-inch squares. For clean cuts, dip your knife in hot water between each slice. The fudge should have a glossy sheen and a smooth, creamy texture that melts in your mouth. Store any leftovers in an airtight container in the fridge for up to 5 days.
Pro Tips For Making 3 Ingredient Peanut Butter Fudge Recipe With Condensed Milk
- STIR CONSTANTLY ON MEDIUM: The first 5 minutes are where this fudge makes or breaks itself. I learned this the hard way—skipping the stir leads to grainy, uneven texture. Use a silicone spatula and keep it moving, especially when it starts looking like it’s fighting you (it’s not giving up, it’s just getting thick).
- USE ROOM-TEMP PEANUT BUTTER: Cold peanut butter from the fridge will make your fudge clump like a stubborn toddler. Let that jar sit out for 10-15 minutes before mixing—smooth peanut butter blends better with the condensed milk, and you’ll end up with a silkier texture. (Yes, even if you’re impatient like me.)
- WATCH THE BOIL: This isn’t the time to walk away. Once the mixture starts bubbling steadily, reduce heat to low and keep an eye on it—it’ll go from glossy to dry in seconds. I’ve ruined three batches by letting it boil too hard; now I set a timer for 8-10 minutes total and check every 2 minutes.
- SALT AT THE END: Tossing in the sea salt while the fudge’s still hot melts it into the mix, but if you add it too early, you’ll end up with salt crystals on top. Sprinkle it over the cooled fudge right before cutting—it’ll stick perfectly, and you’ll get those little crunchy surprises in every bite. (Your future self will thank you.)
Health benefits of this recipe
Protein Powerhouse
Peanut butter fudge delivers a surprising 4 grams of protein per serving—about 16 grams total in this recipe. The peanut butter provides complete protein with all nine essential amino acids, making this a satisfying treat for muscle maintenance.
Unlike many desserts, this fudge won’t leave you crashing with just sugar—it’s a balanced option for post-workout recovery. 💪
Natural Energy Boost
The combination of peanut butter and condensed milk creates a slow-release energy profile thanks to their natural sugars and healthy fats. You get 12 grams of sugar per serving, but the fats from peanut butter help moderate blood sugar spikes.
I notice I have steady energy for hours after eating this—great for when you need something sweet but don’t want the sugar crash.
Healthy Fat Benefits
Peanut butter’s monounsaturated fats (about 8 grams per serving) support heart health by improving cholesterol levels when part of a balanced diet. These fats also contribute to satiety, helping you feel full longer than with refined sugar treats.
The condensed milk adds a touch of saturated fat, but in moderation as part of this recipe, it’s perfectly fine for occasional indulgence.
No Added Preservatives
This fudge contains zero artificial preservatives, colors, or hydrogenated oils—just three wholesome ingredients. The condensed milk acts as a natural thickener and sweetener without needing refined sugar or stabilizers.
I appreciate that this recipe delivers indulgence without the chemical additives found in many store-bought fudge varieties. It’s a cleaner option for when you crave something sweet.
Portion Control Made Easy
Pre-cutting the fudge into ½-inch squares makes portion control effortless—each piece represents about 100 calories. The natural sweetness satisfies cravings without overdoing it. I often keep this in my fridge for when I need a quick dessert fix that won’t derail my balanced eating patterns.
The texture makes it feel like a treat while the nutrition keeps it guilt-free.
Rich in Micronutrients
Peanut butter contributes vitamin E (an antioxidant), niacin (for energy metabolism), and magnesium (for muscle function). While not a nutritional powerhouse, these micronutrients add up when enjoyed regularly.
The condensed milk provides small amounts of calcium and phosphorus. It’s not a health food, but it’s certainly not empty calories either—especially compared to many other desserts.
Nutrition facts
Frequently asked questions
Why does this fudge need to reach the soft-ball stage?
The 235-240°F temperature ensures the condensed milk’s sugars properly caramelize, creating that signature fudge texture. This stage transforms the mixture from sticky to perfectly pourable while preventing graininess. Without it, your fudge might be too soft or develop a sandy consistency.
Can I use almond butter instead of peanut butter?
Yes, but expect a milder flavor with a slightly different texture. Almond butter works best in a 1:1 ratio, though the fudge may set slightly firmer. For best results, use natural almond butter without added oils. The condensed milk will still provide that classic fudge consistency, just with a nutty twist.
What if my fudge doesn’t set properly?
If your fudge stays too soft, it likely didn’t reach the proper temperature. Try microwaving in 30-second intervals until it thickens. For extra insurance, chill for an additional 30 minutes or refrigerate the pan. If it’s still too runny, the peanut butter might have been too cold—next time, let it sit at room temperature before mixing.
How do I store this fudge for gifting?
Cut into squares, wrap individually in wax paper, and place in an airtight container. For a festive touch, tie with twine and add a ribbon. Store in a cool, dry place for up to 2 weeks—the flavors actually deepen over time. For longer storage, freeze for 3 months by wrapping tightly in plastic wrap before wax paper.
Can I make this fudge without a candy thermometer?
Test with the water method: drop a small amount of mixture into cold water. It should form a soft ball that holds its shape when pressed. If it’s too runny, microwave for another 30 seconds and test again. With practice, you’ll get the hang of it—most people reach the right consistency after 5-6 minutes total.

- 3lb Prime Rib Roast Recipe: Juicy Pink Center Guaranteed in 3 Hours - October 31, 2026
- 5 Spice Cake Recipe: Warmly Spiced Layers With Crunchy Top - October 31, 2026
- 1950’s Macaroni and Cheese Recipe: Nostalgic Creamy Cheese Sauce with Buttery Noodles - October 31, 2026