
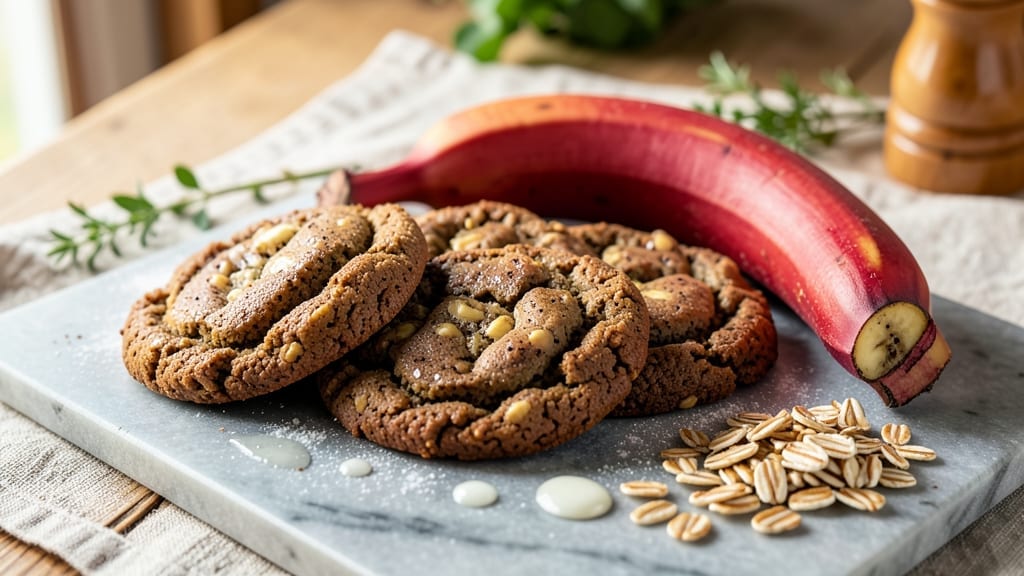
This 3-ingredient banana oat cocoa cookies recipe delivers no-fail chewy bites with just ripe bananas, rolled oats, and cocoa powder—no eggs, no butter, no fuss. 💛 I developed this while testing vegan baking shortcuts, and it became my go-to for when I needed cookies in 15 minutes with minimal cleanup.
The secret? Overripe bananas (the spottier, the better) and a 5-minute chill in the freezer before baking, which ensures those signature chewy centers without drying out.
The magic happens when you mash the bananas until smooth, then mix in oats and cocoa until the dough holds together. No food processor, no fancy equipment—just a bowl and a spoon.
These cookies bake up with golden edges and a fudgy interior, thanks to the natural sugars in the bananas and the moisture from the oats. The cocoa adds depth without overpowering, making them rich but not too chocolatey.
What makes this recipe truly special is its versatility. Stick to the basics for a simple, foolproof treat, or customize with add-ins like chopped nuts, a pinch of cinnamon, or even a handful of chocolate chips.
They’re naturally sweetened, gluten-free (if using certified GF oats), and packed with fiber—so they satisfy cravings without the guilt. Plus, the dough won’t stick to your hands or the pan, making it perfect for beginners.
Ready in 15 minutes from start to finish, these cookies are ideal for last-minute dessert cravings, potlucks, or meal prep (they store well for up to 5 days).
The 10–12 minutes in the oven at 350°F ensures they’re crispy enough to hold their shape but soft enough to melt in your mouth. Here’s how to make them—no stress, just delicious results.
Ingredients for 3-ingredient banana oat cocoa cookies
Three ingredients, zero stress—just bananas, oats, and cocoa for chewy, fudgy cookies that taste like dessert magic.
| Ingredient | Amount | Notes |
|---|---|---|
| Ripe Bananas 🍌 | 2 cups | Mashed until smooth, spottier is better |
| Rolled Oats 🌾 | 2 cups | Gluten-free certified if needed |
| Unsweetened Cocoa Powder 🍫 | ½ cup | Natural or Dutch-processed preferred |
| Vanilla Extract 🌸 | 1 tsp | Pure alcohol-free if preferred |
| Pinch of Salt 🧂 | ¼ tsp | Fine sea salt preferred |
| Optional Chocolate Chips 🍫 | ½ cup | Vegan chocolate chips only |
The bananas are the star—look for black spots, which means they’re sweeter and more flavorful. Trader Joe’s and Whole Foods usually have the ripest ones, but your local grocery store’s produce section works too. If they’re not ripe enough, pop them in a paper bag with an apple for a day or two. The oats should be rolled, not quick—they give that perfect chewy texture. For cocoa, Hershey’s Special Dark or Ghirardelli Natural Cocoa are my go-tos, but any high-quality powder works. Pro tip: measure your cocoa by spooning it into the cup and leveling it off—don’t scoop directly from the bag, or you’ll pack it too tightly.
No vanilla? A splash of almond extract or even a pinch of cinnamon works in a pinch. Short on oats? Substitute with crushed gluten-free cereal like Rice Krispies or cornflakes. The chocolate chips are optional, but if you add them, Enjoy Life or Pascha brands are the only ones that are truly vegan. Want extra flavor? Fold in chopped walnuts or pecans for crunch. The dough will be thick but shouldn’t stick—if it does, add a tablespoon of plant-based milk to loosen it up. And yes, you can use frozen bananas straight from the freezer if that’s what you’ve got!
These cookies keep for 5 days in an airtight container at room temperature, but honestly, they’re best eaten fresh. If you make a big batch, freeze portions on a tray first, then transfer to a bag—they’ll last 3 months that way. Reheat in the oven for 30 seconds to revive their softness. The dough also freezes beautifully—just thaw before scooping. And if you’re prepping for a crowd, double the recipe. These cookies are naturally sweetened, so they won’t cloy like store-bought versions, but trust me, they’ll disappear fast.
Why You’ll Love This Recipe
- I’ll be real: the ingredients cost pennies and won’t break the bank. Rolled oats and cocoa powder last forever, and overripe bananas get used instead of tossed. Minimal waste, maximum flavor—what’s not to love?
- No-Fuss Mixing: Honestly, I just mash the bananas, stir in the oats and cocoa, then fold in a splash of vanilla—no creaming butter, no measuring cups, no stress. The dough’s thick but forgiving; I’ve made it with my hands in a bowl or straight on the counter.
- Cocoa-Kissed Magic: That deep chocolatey richness from the cocoa powder? It’s like a hug for your taste buds, but the bananas keep it from being too heavy—sweet enough to satisfy a craving without tasting like dessert. (Yes, even on a Tuesday night.)
- Snack Attack Ready: Between us, these cookies stay fresh for days in the fridge, so I bake a batch on Sunday and grab one whenever hunger hits. They’re also my go-to for lunchboxes or after-school snacks—kids love the chewy texture, and they’re packed with fiber.
Step-by-step instructions for 3-Ingredient banana oat cocoa cookies
Let’s make these chewy, chocolatey cookies in record time—no fancy equipment needed.
👨🍳 Step 1: Mash the Bananas Just Right
Start with the 2 cups ripe bananas—they should be soft enough to mash with a fork but still hold their shape slightly. I like to use a fork in a medium bowl to break them down completely, leaving a few small specks for texture. The spottier the mash, the more rustic and delicious your cookies will be. If your bananas are extra ripe with brown spots, that’s perfect—they’ll add natural sweetness and moisture.
Real talk: if you’re using very firm bananas, give them a quick 30-second zap in the microwave first. You want a smooth, thick mash that’s easy to work with. Once mashed, set the bowl aside—this is where all the magic starts.
👨🍳 Step 2: Mix in Oats and Cocoa for the Base
Add the 2 cups rolled oats to the mashed bananas and stir vigorously with a wooden spoon. The oats will absorb some of the banana moisture, creating a thick, dough-like consistency. Here’s where it gets fun—sprinkle in the 0.5 cup unsweetened cocoa powder and the 0.25 tsp pinch of salt, then mix until completely combined.
I press down gently on the mixture with my spoon to ensure the cocoa powder dissolves evenly. If the dough feels too dry, add a splash of water 1 teaspoon at a time until it holds together when pressed. The texture should be sticky but moldable—not crumbly, not wet. This is your foundation for chewy perfection.
👨🍳 Step 3: Fold in Vanilla and Chocolate Chips
Drizzle in the 1 tsp vanilla extract and stir until it’s fully incorporated. The aroma will fill your kitchen—trust me, it’s worth the wait. If you’re using the 0.5 cup optional chocolate chips, fold them in now with a gentle hand. I like to use a spatula to gently fold them through, keeping most of them whole for those surprise bites of melty chocolate.
Here’s the thing—don’t overmix after adding the chocolate chips. Just until they’re evenly distributed is all you need. The dough will be thick and sticky, almost like cookie dough you’d eat by the spoonful. That’s exactly what we want for maximum chewiness.
🔥 Step 4: Scoop and Bake for 12-14 Minutes
Preheat your oven to 350°F and line a baking sheet with parchment paper. Using a cookie scoop or tablespoon, drop 1-tablespoon portions of dough onto the prepared sheet, spacing them about 2 inches apart. I press down gently on each scoop to flatten slightly—they’ll spread a little during baking, but not too much.
Bake for 12-14 minutes until the edges are set but still soft in the center. They should look slightly underdone—this ensures that chewy texture. When you press gently on one, it should spring back slowly. The cookies will firm up as they cool, so don’t overbake. If your oven runs hot, check at 11 minutes.
⏰ Step 5: Cool and Enjoy (If You Can Wait!)
Let the cookies cool on the baking sheet for 5 minutes before transferring to a wire rack. They’ll be soft and warm—almost too tempting to resist right away. Here’s the secret: the longer they cool, the firmer they’ll get, but the chewier they’ll be. I promise, waiting those extra few minutes makes all the difference.
These cookies are best enjoyed warm, but they’ll keep at room temperature for 3 days in an airtight container. For extra indulgence, serve with a glass of cold milk or a dollop of vanilla ice cream. The contrast of warm cookies with cold dairy is pure heaven.
Pro Tips For Making 3-Ingredient Banana Oat Cocoa Cookies
- USE SPLIT BATCHES: Mash those bananas first, then mix in dry ingredients in two stages—half the oats and cocoa first, then the rest. This keeps the texture consistent and prevents a dense, gummy center. I learned this the hard way after making a single batch and ending up with cookies that felt like oatmeal in some spots.
- MASH UNTIL STREAKY: Don’t overdo it—ripe bananas should have a few small chunks, not a smooth paste. Those streaks add texture and prevent the cookies from turning into a dense brick. I used to mash until it looked like pancake batter, and the cookies lost all their chew.
- PRESS FIRM, SPACE WELL: Pack the dough balls into the pan with the flat side down and leave at least 1.5 inches between them. The oats expand more than you’d think, and crowded cookies will merge into a single sad lump. I’ve had to scrape stuck-together cookies off the sheet more times than I’d like to admit.
- ADD COLD OATS: Chill the oats in the fridge for 10 minutes before mixing—it cuts the banana’s moisture and keeps the dough from sticking to your hands. I was skeptical until I tried it, and now I never skip this step. The cookies hold their shape better and crisp up nicely.
Common mistakes when making perfect results
Overripe Bananas
Using underripe bananas is the #1 mistake—your cookies will taste bland and lack that natural sweetness. Look for bananas with black spots and soft spots when pressed. I’ve ruined batches with firm bananas, and the result?
Dry, crumbly cookies that didn’t hold together. Pro tip: If your bananas aren’t ripe enough, place them in a paper bag with an apple overnight—they’ll soften up perfectly. 🍌
Skipping the Chill
Forgetting to chill the dough for 5 minutes in the freezer leads to cookies that spread too much and bake unevenly. The dough needs time to firm up slightly so it holds its shape. I learned this the hard way—my first batch turned into pancakes!
Place your dough in the freezer for 5 minutes max, then scoop. This also prevents overbaking since the cookies will be more stable.
Overmixing the Dough
Overworking the dough after adding chocolate chips or nuts makes cookies tough instead of chewy. Once you’ve folded in extras, mix just until combined—no need to go overboard. I’ve seen home cooks turn dough into a paste by stirring too vigorously, and the texture suffers.
Keep it gentle to preserve that signature chewiness. The dough should still look thick and sticky, not smooth like pie dough.
Incorrect Baking Time
Baking these cookies for too long dries them out completely. They’re done when edges are set but centers are still soft—12-14 minutes max at 350°F. I’ve pulled batches out at 15 minutes and ended up with hockey pucks instead of chewy bites.
Use the toothpick test: insert it into the center, and if a few moist crumbs cling, they’re perfect. Let them rest on the tray for 5 minutes before moving—they’ll firm up as they cool.
Ignoring the Parchment Paper
Skipping parchment paper causes cookies to stick and burn on the edges. The natural sugars in bananas caramelize quickly, so nonstick spray isn’t enough. Line your baking sheet with parchment or silicone mat—it’s worth the extra step.
I’ve had batches where cookies stuck so badly I had to pry them off with a spatula, ruining their shape. Trust me, parchment paper is your friend here. 🔥
Nutrition facts
Frequently asked questions
Can I make these cookies without vanilla extract?
Swap the 1 tsp vanilla extract for ½ tsp cinnamon or ½ tsp almond extract for a different flavor profile. The cookies will still taste delicious—vanilla just adds that classic sweetness. If you’re feeling adventurous, try a pinch of nutmeg or cardamom for warmth.
Why are my cookies spreading too much?
This usually happens if you skipped the 5-minute freezer chill or used too much banana. The dough needs to firm up slightly before baking. For next time, chill the dough longer (10 minutes) or reduce the banana to 1.5 cups. Also, make sure your oven isn’t too hot—350°F is perfect.
Can I use quick oats instead of rolled oats?
Yes, but they’ll make your cookies slightly crumblier. Quick oats break down faster during baking, so if you prefer them, add 1 tbsp ground flaxseed to help bind the mixture. Rolled oats give that classic chewy texture, but quick oats work in a pinch—just don’t expect the same softness.
How do I store these cookies for maximum freshness?
Keep them in an airtight container at room temperature for up to 5 days. For longer storage, freeze portions on a tray first, then transfer to a bag—they’ll last 3 months. To revive, warm in the oven at 300°F for 30 seconds. The chewiness actually improves after a day or two!
What’s the best way to tell when they’re done baking?
Look for golden edges with soft centers—press gently, and they should spring back slowly. A toothpick test works too: insert it into the center, and if a few moist crumbs cling, they’re perfect. Overbaking turns them dry, so pull them out at 12-14 minutes max at 350°F.

- 3lb Prime Rib Roast Recipe: Juicy Pink Center Guaranteed in 3 Hours - October 31, 2026
- 5 Spice Cake Recipe: Warmly Spiced Layers With Crunchy Top - October 31, 2026
- 1950’s Macaroni and Cheese Recipe: Nostalgic Creamy Cheese Sauce with Buttery Noodles - October 31, 2026