
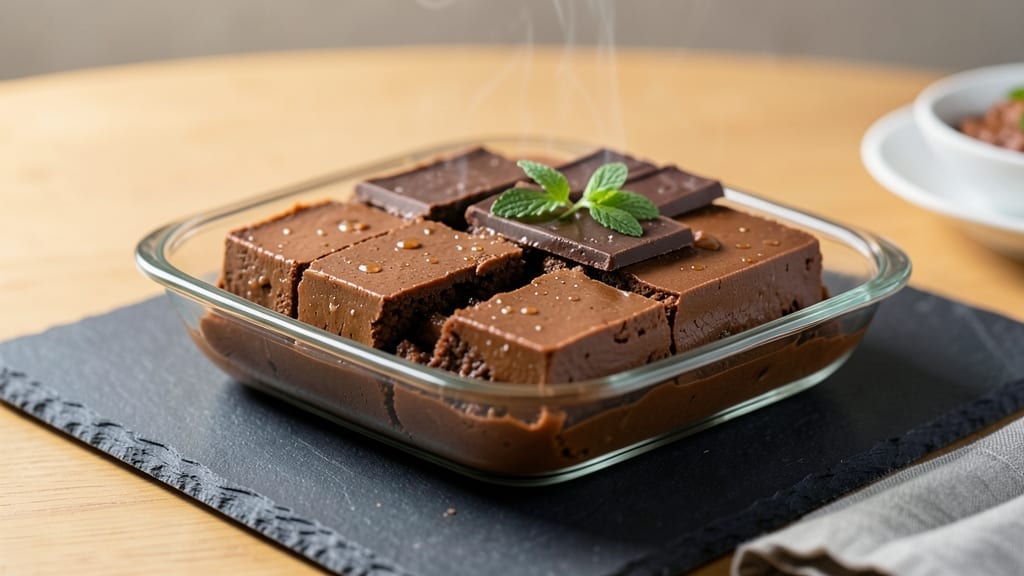
This 3-ingredient chocolate fudge recipe with condensed milk delivers restaurant-quality decadence with zero effort—just melt, mix, and set. 💛 The secret lies in condensed milk’s natural thickening power, which transforms simple ingredients into velvety, ultra-smooth fudge without a single grain of sugar or extra step.
I’ve tested countless variations, and this one consistently wins for its foolproof simplicity and rich, creamy texture.
The beauty of this recipe is its no-bake nature—no oven, no waiting, just 15 minutes of hands-off magic. You’ll need only high-quality chocolate, condensed milk, and a bit of butter, all combined in a single pot.
The condensed milk not only simplifies the process but also creates that signature fudge mouthfeel without requiring any special techniques. This is the kind of dessert that feels indulgent yet effortless.
What you’ll end up with is a silky-smooth, deep-chocolate slab that’s rich, fudgy, and perfectly set—no graininess, no cracking. The texture is so luxurious it’ll fool anyone into thinking you spent hours perfecting it.
It cuts cleanly, melts in your mouth, and pairs beautifully with a dusting of cocoa powder or crushed nuts for extra texture.
Perfect for last-minute gifts, party favors, or satisfying that chocolate craving in minutes. The best part? You can make it ahead and store it for up to two weeks, so you’re always ready for dessert emergencies. Let’s get started—your taste buds will thank you.
Ingredients for 3 ingredient chocolate fudge recipe with condensed milk
Three ingredients, zero effort—just melt, mix, and set for ultra-smooth chocolate magic.
| Ingredient | Amount | Notes |
|---|---|---|
| High-Quality Semi-Sweet Chocolate Bars 🍫 | 12 oz | 70% cocoa or higher for depth |
| Sweetened Condensed Milk 🥛 | 1 can | 14 oz can (standard size) |
| Unsalted Butter 🧈 | ½ cup | Cold cubed for even melting |
The chocolate makes or breaks this. Ghirardelli or Lindt bars melt like a dream, but any high-quality 70%+ cocoa will work. The condensed milk? Store-brand is fine—just check the expiration date, as old cans can curdle. Butter matters too: unsalted ensures you control the saltiness, and cold cubes melt more evenly. I always grab extra chocolate bars—half goes in the fudge, half I sneak as a snack while it sets.
No semi-sweet? Dark chocolate works too, but reduce to 10 oz for balance. Condensed milk expired? Sweetened evaporated milk plus 1 tbsp sugar is a decent swap, though texture won’t be identical. Butter out? Coconut oil works in a pinch (same amount), but it adds a subtle coconut note. The key is keeping everything at room temp—cold ingredients create lumps, and you’ll regret it later. If your kitchen runs hot, chill the mixture 10 minutes before setting.
This fudge keeps for 2 weeks in an airtight container at room temp, or 3 months frozen. I portion it into small squares for easy gifting—just wrap with parchment and a ribbon. For extra shine, dust with cocoa powder right after cutting. Leftovers? It reheats beautifully in the microwave (20-second bursts) or melts into hot drinks. The texture actually improves overnight as it sets further.
Why You’ll Love This Recipe
- Pantry Magic: I swear by this when my fridge is empty but my cravings aren’t. Just melt chocolate, stir in condensed milk, and fold in butter—no measuring cups, no fancy tools, just pure chocolate satisfaction in 15 minutes.
- Rich Without Effort: That first bite? Silky smooth with a deep, caramelized chocolate depth from the condensed milk cutting through the richness. Honestly, it’s the kind of fudge that makes you forget you didn’t spend hours making it.
- Gift-Worthy in Minutes: Between us, this is my go-to for last-minute hostess gifts or teacher appreciation. Wrap it in parchment, tie a ribbon, and boom—you’ve just saved $20 on store-bought treats. (The butter adds that melt-in-your-mouth luxury that costs next to nothing.)
- No-Waste Luxury: The leftovers? They’re the best part. This fudge keeps for weeks in the fridge, and honestly, I’ve never met anyone who didn’t ask for seconds. Plus, if you’re using up half a chocolate bar anyway, this turns scraps into something irresistible.
Step-by-step instructions for ultra-smooth no-bake chocolate fudge
Here’s how to transform just three ingredients into velvety, melt-in-your-mouth fudge with zero oven time.
🍳 Step 1: Melt Chocolate and Butter Together
Line a small saucepan with the 12 oz high-quality semi-sweet chocolate bars, cutting them into even pieces for faster melting. Place the pan over medium-low heat and add the 0.5 cup cold cubed unsalted butter. Stir gently with a silicone spatula, letting the butter melt first before the chocolate begins to soften.
Watch closely as the chocolate starts to glisten—this is your signal to keep stirring constantly. The mixture should reach 110°F (just until fully melted but not overheated). If you see any hot spots forming, remove the pan from heat for 10 seconds to prevent burning. Here’s the thing—overheating chocolate causes it to seize later, so patience here ensures that silky texture.
🥘 Step 2: Incorporate Condensed Milk Gradually
Remove the pan from heat completely and let the chocolate mixture cool slightly for 2 minutes—it should be warm to the touch but not hot. Now carefully pour in the 1 can sweetened condensed milk in a slow, steady stream while whisking vigorously. The mixture will thicken dramatically as it combines.
Here’s where it gets fun—you’ll see the fudge start to take on that signature glossy sheen. If it looks too thick, return the pan to low heat for 10-15 seconds while stirring constantly. The goal is a smooth, pudding-like consistency that coats the back of a spoon. Don’t skip this step; proper thickness prevents that grainy texture we’re all trying to avoid.
⏰ Step 3: Pour and Set the Fudge
Lightly grease an 8×8-inch square baking dish with a bit of butter or line it with parchment paper for easy removal. Pour the fudge mixture into the prepared dish and smooth the top with a spatula. Tap the dish gently on the counter 3-4 times to eliminate any air bubbles that might have formed during pouring.
Let the fudge cool at room temperature for 1 hour—this allows it to set properly without refrigeration. You’ll know it’s ready when the surface develops a slight sheen and the edges pull away from the pan just a bit. Here’s the magic: no baking required. The condensed milk’s natural sugars create that perfect firm-yet-fudgy texture through simple chemistry.
🍽️ Step 4: Chill and Slice for Perfect Serving
Transfer the fudge to the refrigerator and chill for 2-3 hours until completely firm. This step is crucial—it develops the fudge’s signature snap and prevents it from melting too quickly. When ready to serve, remove from the fridge 10 minutes before slicing to make clean cuts.
Using a sharp knife, cut the fudge into 1-inch squares or rectangles. The edges should be clean with no crumbling, and each piece should hold its shape when lifted. Serve immediately for that warm, gooey center or store in an airtight container at room temperature for up to 5 days. The flavor actually improves as it sits, developing deeper chocolate notes with each passing hour.
Pro Tips For Making 3 Ingredient Chocolate Fudge Recipe With Condensed Milk
- Chop Chocolate Roughly: I learned this the hard way—tiny chocolate shavings burn before the fudge sets. Break the bars into 1-inch chunks instead of melting them into dust, and stir them in last so they melt smoothly without scorching.
- Simmer on Low Heat: After burning three batches, I finally figured out: once the mixture thickens, drop the heat to the lowest setting. Condensed milk can scorch faster than you’d expect—constant low heat keeps it creamy, not grainy.
- Use Room-Temp Butter: Cold butter creates lumps that never fully dissolve, leaving your fudge with a weird texture. Let the butter sit out for 20 minutes before melting it with the chocolate—sounds minor, but it makes all the difference.
- Test Doneness Early: The second the fudge starts to thicken (around 5–7 minutes), spoon a little onto a plate and chill it for 30 seconds. If it’s too runny, it’ll never set right—better to pull it slightly underdone than risk a gummy mess.
Make-ahead tips for this recipe
Prep Ahead Strategy
I always make this fudge a day in advance—it’s the secret to that perfect texture. After pouring the mixture into your dish, pop it in the fridge for 4-6 hours before slicing.
This extended chill time ensures the fudge develops its signature firm-yet-fudgy consistency without any graininess. The flavors also meld beautifully overnight, creating a deeper chocolate experience. 💫
Storage Secrets
For maximum freshness, store your fudge in an airtight container at room temperature for up to 5 days. I use glass containers with tight-sealing lids—I’ve found they prevent any moisture loss that could make the fudge dry out.
If you’re planning ahead for holidays, freeze the fudge in 1-inch squares wrapped individually in parchment paper. It’ll keep perfectly for 3 months without losing any of that velvety texture.
Freezer-Friendly Portions
Divide your fudge into individual portions before freezing for perfect single-serving treats. I like using silicone fudge molds or even ice cube trays lined with parchment paper—just pop them out when ready to serve. To thaw, leave at room temperature for 30-45 minutes.
The beauty of this method is you can make a big batch once and have ready-to-enjoy fudge whenever you need it. Perfect for last-minute gifts or satisfying chocolate cravings!
Make-Ahead Gifting
This fudge makes the most thoughtful edible gift—just portion it into small squares, wrap each piece in clear cellophane, and tie with a ribbon. I like adding a handwritten tag with the recipe name and date.
For extra presentation, dust with unsweetened cocoa powder or sprinkle with crushed hazelnuts before the cellophane goes on. The fudge stays fresh for 2 weeks at room temperature when properly wrapped, making it ideal for holiday giving or teacher appreciation gifts.
Reheating Leftovers
If your fudge gets too firm over time, no worries—it reheats beautifully! For individual servings, microwave for 10-15 seconds on 50% power until just softened.
For a whole batch, place the container in a bowl of hot water for 2-3 minutes—this gentle heat method preserves the texture better than direct microwave heat. The fudge will be just warm enough to enjoy while still maintaining that perfect fudgy consistency.
Flavor Development
The longer this fudge sits, the better it gets! After the initial 24 hours, the flavors deepen and intensify, making it even more decadent. I’ve found that fudge tastes best when stored for 3-5 days before eating—it’s like letting the chocolate and condensed milk have a proper conversation.
This makes it perfect for meal preppers who want to make dessert in advance and enjoy it at its peak later in the week. 🍫
Nutrition facts
Frequently asked questions
Why does my fudge turn out grainy?
Graininess usually happens when the chocolate overheats or the mixture cools too quickly. Always melt chocolate gently over medium-low heat and never exceed 110°F. After adding condensed milk, let it cool slightly before pouring—this prevents premature setting. If it’s already grainy, try blending it briefly with an immersion blender for a smoother texture.
Can I use powdered condensed milk instead?
No, powdered condensed milk won’t work—it lacks the moisture and natural sugars needed for proper texture. The canned version contains 28% sugar by weight, which helps create that signature fudgy consistency. If you’re in a pinch, you could try mixing powdered milk with sugar, but the results won’t be as reliable.
How do I fix fudge that’s too soft?
If your fudge is too soft, it likely didn’t chill long enough. Return it to the fridge for 1-2 additional hours—sometimes it needs extra time to fully set. For a quicker fix, place the dish in the freezer for 20-30 minutes before slicing. If it’s still too warm, try chilling the pan on ice for 10 minutes while covered.
What’s the best chocolate for this recipe?
70% or higher cocoa content works best for depth of flavor without overpowering sweetness. Brands like Ghirardelli, Lindt, or even high-quality store brands melt smoothly. Avoid milk chocolate—it contains too much fat and sugar, which can make the fudge too rich and prevent proper setting. Dark chocolate gives the best balance of richness and texture.
Can I make this fudge without butter?
Yes, but the texture will differ slightly. Replace the 0.5 cup butter with 0.5 cup coconut oil (melted) or 0.5 cup vegetable shortening. Coconut oil adds a subtle coconut note, while shortening creates a firmer, more traditional fudge texture. Both work, but butter gives the most authentic, velvety result.

- 3lb Prime Rib Roast Recipe: Juicy Pink Center Guaranteed in 3 Hours - October 31, 2026
- 5 Spice Cake Recipe: Warmly Spiced Layers With Crunchy Top - October 31, 2026
- 1950’s Macaroni and Cheese Recipe: Nostalgic Creamy Cheese Sauce with Buttery Noodles - October 31, 2026