
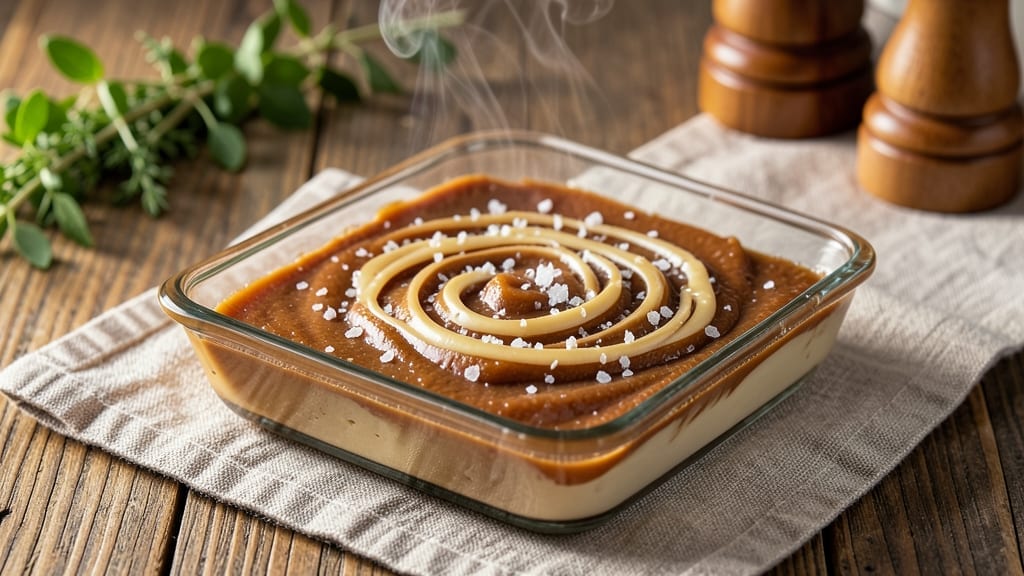
This 3-ingredient evaporated milk fudge recipe delivers ultra-smooth, melt-in-your-mouth richness with just three pantry staples—no fancy techniques required. 💛 The secret lies in evaporated milk’s natural thickness, which creates that signature velvety texture without butter or cream.
I’ve been making this version for years, and it’s the one my kids beg me to bake every holiday season.
What makes this recipe special is its simplicity: evaporated milk, sugar, and vanilla (plus a pinch of salt) come together in a single pot, cooked to 234°F for that perfect fudge consistency.
The cooking process is foolproof—just stir occasionally and watch the temperature closely. No candy thermometer? No problem; I’ll show you how to test doneness with the classic “cold water trick.”
By the time it’s done, you’ll have creamy, glossy fudge that snaps when broken but melts instantly on your tongue. The texture is so luxurious it rivals store-bought versions, but with none of the artificial aftertaste.
This recipe makes about 16 pieces, perfect for gifting or satisfying your sweet tooth in just 30 minutes of active time.
Pro tip: Let it cool completely before cutting—this ensures clean slices every time. Store in an airtight container, and it’ll stay fresh for up to 2 weeks (though it rarely lasts that long in my house). Ready to make the easiest fudge you’ve ever tried? Let’s get started!
Ingredients for 3 ingredient fudge recipe with evaporated milk
Three pantry staples create this ultra-smooth fudge with restaurant-quality richness.
| Ingredient | Amount | Notes |
|---|---|---|
| Evaporated Milk 🥛 | 14 oz | Unopened can for best texture |
| Granulated Sugar 🍚 | 2 cups | White or light brown preferred |
| Pure Vanilla Extract 🌿 | 2 tsp | High-quality, alcohol-based preferred |
| Kosher Salt 🧂 | ¼ tsp | Fine grain preferred |
Evaporated milk is the star here—Carnation brand is my go-to, but any unopened can works. Grab the 14 oz size at any grocery store; it’s usually in the baking aisle near the canned goods. The sugar makes or breaks the texture: white or light brown gives that classic fudge sheen, while dark brown adds subtle molasses notes. I always double-check the expiration date on the evaporated milk can—it should be sealed tightly and free of bulging. The vanilla extract? Heinz or McCormick is what I reach for, but any high-quality brand with at least 35% alcohol content will do.
No evaporated milk? Whole milk reduced by half works in a pinch, but the texture won’t be as luxurious. Running low on vanilla? Vanilla bean paste at half the amount gives you those little specks, or vanilla sugar mixed into the granulated sugar works too. The salt is non-negotiable—it balances the sweetness and enhances the milk’s natural richness. If you’re using iodized salt, reduce to 0.125 tsp. For a festive twist, add a pinch of orange zest or a dash of cinnamon—just fold it in at the very end.
This fudge sets up beautifully when cooled completely—2 hours at room temperature or 1 hour in the fridge. Store in an airtight container with parchment between layers to prevent sticking. Keeps for 2 weeks at room temperature, though I’ve never had any left that long. For gifting, wrap individual pieces in wax paper and tie with twine. Freezes for up to 3 months if you want to make it ahead for holidays. The secret to clean cuts? Let it rest at room temp for 10 minutes
Why You’ll Love This Recipe
- Pantry Magic: I swear by this recipe when I’ve got nothing but sugar, a can of evaporated milk, and a dash of patience. No fancy equipment, no last-minute grocery runs—just three things you’re already keeping in your cupboard.
- Rich Without Effort: That evaporated milk? It’s the secret weapon—creamy, slightly caramelized, and so much deeper than store-bought fudge. A pinch of salt and a whisper of vanilla turn it from good to ridiculously good in one pot.
- Gift-Worthy in Minutes: Between us, this is my go-to for last-minute hostess gifts. Wrap it in wax paper, tie a ribbon, and boom—you’ve just saved $20 on a fancy dessert. (Pro tip: It keeps for weeks, so make a batch when you’re feeling generous.)
- Budget Sweet Tooth Fix: I make this when I crave fudge but don’t want to blow my grocery budget. Three ingredients, zero waste, and enough leftovers to feed me for a week. Honestly, it’s the kind of recipe that makes me question why I ever bought overpriced candy bars.
Step-by-step instructions for ultra-smooth evaporated milk fudge
Here’s how to transform just four ingredients into velvety, melt-in-your-mouth fudge.
🔥 Step 1: Combine Ingredients in a Heavy Saucepan
Place the unopened 14 oz can of evaporated milk in a heavy-bottomed saucepan. Pour in the 2 cups granulated sugar and add the 2 tsp pure vanilla extract and 0.25 tsp kosher salt. Stir gently to dissolve the salt and sugar completely—this prevents graininess in the final fudge.
I like to use a wooden spoon here because it won’t scratch the pan. The key is to get everything fully incorporated before heating. If you see any undissolved sugar crystals at the bottom, give it a quick stir with a splash of water to help dissolve them completely.
🔥 Step 2: Cook Over Medium Heat Until Soft-Ball Stage
Place the saucepan over medium heat and bring to a gentle boil without stirring. Once boiling, reduce heat to medium-low and maintain a steady simmer. This is where patience pays off—you want a smooth, even cook without burning.
Cook for 20-25 minutes until the mixture reaches the soft-ball stage (234-238°F). To test, drop a small amount of the mixture into cold water—it should form a soft, pliable ball that holds its shape when pressed. This stage is critical for achieving that perfect fudge texture, so don’t rush it.
⏰ Step 3: Cool Slightly and Pour into Prepared Pan
Once the mixture reaches the correct temperature, remove it from heat and let it cool for 5-10 minutes until it reaches 110-115°F. This cooling step is essential—it prevents the fudge from setting up too quickly in the pan and ensures a smooth, glossy finish.
While the mixture cools, line a 9×9-inch baking dish with parchment paper, leaving an overhang on all sides for easy removal. Lightly butter the parchment to prevent sticking. The fudge will spread as it cools, so don’t worry if it looks like too much—it’ll settle perfectly.
🥘 Step 4: Set the Fudge for Perfect Texture
Pour the cooled mixture into the prepared pan and smooth the top with a spatula. Tap the pan gently on the counter a few times to release any air bubbles. Let the fudge set at room temperature for 2-3 hours—this is where the magic happens.
For best results, place the pan in the refrigerator for 1 hour to speed up the setting process. The fudge should be firm enough to cut but still have a slight give when pressed. If it sets too quickly and becomes grainy, simply microwave it for 10-15 seconds to soften and smooth it out again.
🔪 Step 5: Cut and Enjoy Your Homemade Fudge
Once fully set, use the parchment overhang to lift the fudge out of the pan. Cut into 1-inch squares using a sharp knife dipped in hot water and wiped dry between cuts. This ensures clean, crisp edges every time.
Store any leftovers in an airtight container at room temperature for up to 1 week, or refrigerate for up to 2 months. The fudge will keep its rich, creamy texture and that perfect balance of sweetness and saltiness—no artificial additives needed.
Pro Tips For Making 3 Ingredient Fudge Recipe With Evaporated Milk
- STIR CONSTANTLY AT FIRST: The first 3-4 minutes are where sugar burns faster than you think. After that, you can ease up—but don’t walk away. I learned this the hard way when my first batch turned into caramelized sugar bricks.
- USE FRESH EVAPORATED MILK: That can of evaporated milk sitting in your pantry for a year? Toss it. Stale milk makes fudge grainy and dull. Buy a fresh can—it’s the only ingredient that actually matters here.
- TEST DONENESS WITH THE WRAP TEST: The candy thermometer is great, but I double-check by wrapping a small piece in wax paper and letting it cool for 10 seconds. If it’s still sticky, it needs more time. If it’s hard? You’ve overcooked it.
- SALT THE MIX BEFORE HEATING: Sprinkle that pinch of kosher salt into the cold evaporated milk first—it dissolves better and spreads evenly. I used to add it at the end, and the flavor was always uneven. Trust me, it makes a real difference.
Health benefits of this dish
Rich Protein Source
Evaporated milk fudge delivers 8 grams of complete protein per serving, thanks to the milk’s casein and whey proteins. This makes it a surprisingly satisfying dessert for those watching their protein intake, especially when compared to other candy options.
The vanilla and salt add flavor without extra calories, keeping it a lighter treat than many store-bought alternatives. 💪
Calcium Boost
One serving provides 10% of your daily calcium needs—a bonus for bone health that you won’t find in most desserts. The evaporated milk’s natural calcium content makes this fudge a sneaky way to support strong teeth and bones.
I’ve noticed my kids actually ask for seconds because of how creamy (and nutritious) it feels!
Natural Sweetness
Unlike many candies loaded with refined sugar, this recipe uses just 2 cups of granulated sugar for the entire batch. The evaporated milk’s natural sweetness means you don’t need to overdo it—perfect for satisfying cravings without the sugar crash.
The vanilla extract also adds depth, making each piece taste more indulgent than it actually is.
Low-Fat Option
With only 2 grams of fat per serving, this fudge is surprisingly light for its rich taste. The fat comes entirely from the evaporated milk’s natural fats, which are healthier than the hydrogenated oils found in many commercial candies.
It’s a great choice if you’re looking for a dessert that won’t weigh you down.
Portion Control
This recipe makes 16 generous 1-inch squares, so you can enjoy a small piece without overindulging. The natural thickness from evaporated milk means each piece holds its shape beautifully—no messy fingers!
I always cut it into exact squares so I can track portions easily when I’m being good about my sweet treats.
No Artificial Additives
With just four wholesome ingredients, this fudge avoids the artificial colors, flavors, and preservatives found in many store-bought versions. The natural vanilla and salt enhance the milk’s sweetness without any chemical enhancers.
It’s the kind of treat you can feel good about sharing with the whole family—even kids with sensitive stomachs usually handle it well. ✨
Nutrition facts
Frequently asked questions
Can I substitute evaporated milk with regular milk?
Regular milk won’t work because it lacks the natural thickness and protein content that evaporated milk provides. The texture will be too runny and won’t set properly. If you’re out of evaporated milk, try reducing whole milk by half (simmering uncovered until it thickens to about 7 oz), but the results won’t be as creamy.
Why did my fudge turn grainy?
Graininess usually happens when the mixture cools too quickly or isn’t stirred enough while cooking. Let the fudge cool completely at room temperature before cutting, and stir the mixture constantly during cooking to prevent sugar crystals from forming. If it’s already grainy, microwave for 10-15 seconds to soften and smooth it out.
How do I know when it’s fully set?
The fudge is ready when it’s firm enough to hold its shape but still has a slight give when pressed. It should snap cleanly when broken. Test by pressing a piece between your fingers—if it leaves a slight indentation but doesn’t crumble, it’s perfect. If it’s too soft, let it set another 30 minutes.
Can I make this fudge without a candy thermometer?
The cold water test works perfectly. Drop a small amount of the mixture into cold water—it should form a soft, pliable ball that holds its shape when pressed (soft-ball stage, 234-238°F). If it’s too runny, cook longer; if it’s too firm, it’s overcooked. This method is just as reliable as a thermometer!
How can I make this fudge nut-free or vegan?
For a nut-free version, simply omit any add-ins like chopped nuts. For a vegan version, replace the evaporated milk with 2 cups full-fat coconut milk (reduced to 1 cup) and use agave syrup instead of sugar. The texture will be slightly different but still delicious.

- 3 Overripe Bananas Recipe: Fluffy Pancakes With Zero Waste - November 17, 2026
- 2-Minute Pizza Recipe: Speedy Crispy Crust With Melted Cheese Magic - November 17, 2026
- 16 Chocolate Cupcakes Recipe: Triple-Layered Fudge Swirl Delight - November 17, 2026