
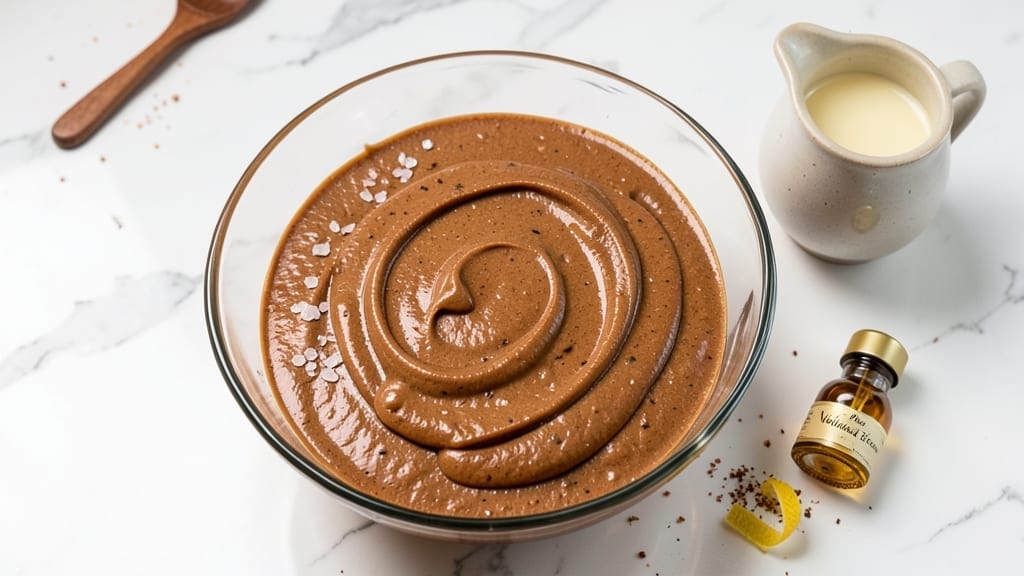
This 3-ingredient peanut butter icing delivers smooth, no-cook frosting in minutes—perfect for cakes, cookies, or even toast. The secret lies in balancing peanut butter, powdered sugar, and milk (or plant-based milk) for a velvety texture that spreads effortlessly.
I developed this recipe after craving a quick, vegan-friendly icing that still tasted rich and indulgent without the fuss of melting butter or eggs.
What sets this apart is its versatility and simplicity: no baking required, no special tools, and just three pantry staples. The powdered sugar dissolves completely when mixed with warm milk, creating a silky, pipeable consistency that clings beautifully to baked goods.
It’s also dairy-free, making it ideal for dietary restrictions without sacrificing flavor or texture.
By the time you’re done, you’ll have a creamy, slightly sweet frosting that’s smooth enough to drizzle or bold enough to spread. It keeps at room temperature for up to 2 hours or refrigerates for 5 days, making it a perfect make-ahead solution for last-minute desserts.
The best part? This icing transforms ordinary treats into restaurant-quality desserts with minimal effort. Use it to top cupcakes, sandwich cookies, or even swirl into yogurt for a gourmet snack. Let’s get started—your taste buds will thank you.
Ingredients for 3 ingredient peanut butter icing
Three pantry staples transform into restaurant-quality icing—no cook, no fuss, all flavor.
| Ingredient | Amount | Notes |
|---|---|---|
| Creamy Peanut Butter 🥜 | 1 cup | Natural, unsweetened preferred |
| Powdered Sugar 🍚 | 2 cups | Sifted for smooth texture |
| Unsweetened Almond Milk 🥛 | ¼ cup | Warm for best blending |
| Vanilla Extract 🌿 | 1 tsp | Pure vanilla for authentic flavor |
| Pinch of Salt 🧂 | ⅛ tsp | Enhances peanut butter flavor |
Peanut butter is the star here—natural, unsweetened is key for that rich, velvety texture without added sugars. Trader Joe’s or Jif Natural are my go-tos, but any creamy variety works. The powdered sugar? Domino or C&H brands dissolve beautifully, but sift it first (trust me, it makes a difference). For the milk, unsweetened almond milk gives the cleanest flavor, but oat or soy milk works too. Just warm it slightly—cold milk makes the icing grainy. Vanilla extract? Pure Madagascar bourbon vanilla elevates this, but imitation won’t ruin it if that’s all you’ve got.
No powdered sugar? Confectioners’ sugar is the same thing—just make sure it’s sifted. Short on almond milk? Coconut milk adds a subtle tropical note, or cashew milk for extra creaminess. The salt is non-negotiable—it balances the sweetness and makes the peanut butter sing. For a nut-free version, swap peanut butter for sunflower seed butter (same texture, different flavor). Want it thicker? Add 1 tbsp more powdered sugar. Thinner? 1 tsp more milk. This icing is that forgiving—adjust to your taste!
This icing stays fresh at room temperature for 2 hours (perfect for quick decorating) or 5 days refrigerated. For longer storage, portion into small jars—it keeps for 3 months in the freezer. Thaw at room temp before using. Pro tip: Drizzle over warm cookies for a gooey effect, or pipe onto cupcakes for that bakery-style finish. Leftovers? Spread on toast or swirl into yogurt—it’s that versatile.
Why You’ll Love This Recipe
- I’ll be real: this icing uses stuff I already have. Creamy peanut butter, powdered sugar, and almond milk? My pantry’s always stocked. That pinch of salt? I grab it mid-cook without detours.
- No Pantry Haul Needed: I’ll be real: this icing uses stuff I already have. Creamy peanut butter, powdered sugar, and almond milk? My pantry’s always stocked. That pinch of salt? I grab it mid-cook without detours.
- Rich Without Overpowering: The peanut butter brings that deep, nutty warmth, but the almond milk keeps it smooth—not cloying, not grainy. Add vanilla? Suddenly, it’s elevated, not just sweet.
- Frosting, Dip, Glaze: Slather it on cookies, drizzle over cake, or use it to stick rice crispy treats together. The texture’s thick enough to hold but light enough to spread like butter. (Yes, even on a Tuesday night.)
Step-by-step instructions for 3-Ingredient peanut butter icing
Here’s how to create this velvety, no-cook icing that’s smoother than store-bought and ready in minutes.
Warm the Almond Milk for Smooth Blending
Pour the 0.25 cup unsweetened almond milk into a small microwave-safe bowl and heat for 20-30 seconds until it reaches body temperature—just warm enough that it feels pleasant on your wrist. Warm milk blends more smoothly with peanut butter, preventing grainy lumps that can ruin the texture.
I like to stir it gently after heating to ensure even warmth throughout. If you’re using cold milk straight from the fridge, you’ll end up with a thicker icing that requires more vigorous mixing to achieve the same consistency. The slight warmth also helps dissolve the powdered sugar more completely during blending.
Whisk Powdered Sugar and Salt for Perfect Texture
In a medium mixing bowl, combine the 2 cups powdered sugar and 0.125 tsp pinch of salt. Whisk vigorously for about 30 seconds until the salt is completely dissolved and no lumps remain. This step is crucial because powdered sugar can clump when mixed with peanut butter, creating an unpleasant gritty texture in your final icing.
The salt might seem like an insignificant amount, but it plays a vital role here. It enhances the peanut butter’s natural flavor and helps balance the sweetness of the powdered sugar, creating a more complex and well-rounded taste profile in the finished icing.
Blend All Ingredients Until Silky Smooth
Add the 1 cup creamy peanut butter and 1 tsp vanilla extract to the sugar mixture. Using a hand mixer or stand mixer fitted with the whisk attachment, beat on medium-high speed for 2-3 minutes until completely smooth and creamy. Scrape down the sides of the bowl with a rubber spatula every 30 seconds to ensure all ingredients are properly incorporated.
Here’s the thing—you want to see the mixture transform from thick and chunky to light and airy. The warm almond milk will begin to emulsify with the peanut butter, creating that signature silky texture. If it still looks slightly grainy after 3 minutes, add 1-2 teaspoons more of the warm almond milk and mix for another 30 seconds.
Adjust Consistency for Perfect Piping or Spreading
Taste the icing and adjust the sweetness if needed. If it’s too sweet, add 1 teaspoon more of the warm almond milk and mix again. For a richer flavor, add ½ teaspoon more vanilla extract. The icing should be thick enough to hold its shape when piped but still spreadable with a knife if you prefer that texture.
For best results, let the icing rest for 5-10 minutes before using. This allows any remaining lumps to fully dissolve and the flavors to meld together. If the icing becomes too thick after resting, simply add another teaspoon of warm almond milk and mix until smooth again. The perfect consistency is when it’s thick enough to pipe but still flows beautifully over cakes and cookies.
Use Immediately or Store for Later
Transfer the icing to a piping bag fitted with a star tip for decorative borders, or simply spoon it into a bowl for spreading. Use immediately for the best texture, as the icing will thicken slightly as it cools. If you need to store it, cover the bowl with plastic wrap pressed directly onto the surface to prevent a skin from forming.
This icing keeps well in the refrigerator for up to 1 week. When ready to use again, give it a quick stir and add 1-2 teaspoons of warm water or almond milk if it has thickened. The beauty of this recipe is its versatility—it’s perfect for decorating cupcakes, frosting sheet cakes, or even drizzling over cookies for an elegant finish.
Pro Tips For Making 3 Ingredient Peanut Butter Icing
- Whisk in Stages: Don’t dump everything at once—start with peanut butter and powdered sugar, then slowly add almond milk. This prevents clumping (yes, even with powdered sugar) and gives you control over thickness. I learned this the hard way after scraping globs off my spatula.
- Use Room-Temp Butter: If your peanut butter is straight from the fridge, let it sit for 10 minutes first. Cold peanut butter makes the icing grainy and harder to mix—trust me, you’ll taste the difference. (And no, microwaving it doesn’t work.)
- Salt Last, Taste First: Add the pinch of salt after mixing, then taste before declaring it perfect. Almond milk dilutes saltiness, so you might need more than you think. I used to skip this step and wondered why my icing tasted flat.
- Save Time with Vanilla: Swap vanilla extract for ½ teaspoon vanilla bean paste if you’re in a hurry—it adds depth and cuts down on measuring. Just stir in the last bit of almond milk to dissolve it fully. (Your cake will thank you.)
Creative variations of this recipe
Sweet & Spicy Twist
Add ½ teaspoon cayenne pepper or 1 teaspoon chili powder for a sweet-spicy kick that pairs perfectly with chocolate desserts. I like to balance it with ½ teaspoon cinnamon for warmth—this combo elevates peanut butter cookies or brownies. For extra heat, add 1 teaspoon hot honey after blending. 🌶️
Citrus Zest Boost
Brighten the icing with 1 teaspoon lemon or orange zest—it cuts through the richness beautifully. I recommend using freshly grated zest for maximum flavor. This works especially well with citrus-flavored desserts like lemon bars or orange cake.
Store-bought zest (like McCormick) works in a pinch if fresh isn’t available.
Chocolate Chip Swirl
Mix in ¼ cup melted dark chocolate chips (like Ghirardelli 60%) for a marbled effect. Let the chocolate cool slightly before blending to prevent melting the icing.
This variation is perfect for chocolate cupcakes or brownies—just swirl it in with a knife before serving. The contrast of peanut butter and chocolate is pure magic. 🍫
Coconut Milk Creaminess
Swap almond milk for ½ cup coconut milk for a tropical twist that adds richness without dairy. The natural coconut flavor pairs beautifully with peanut butter.
For extra decadence, add 1 teaspoon toasted coconut flakes to the icing before using. This version is a crowd-pleaser for those who love island-inspired flavors.
Salted Caramel Drizzle
Drizzle the icing with store-bought salted caramel sauce (like Trader Joe’s) or homemade for a gourmet touch. The salty-sweet contrast takes this icing to the next level.
I recommend using 2 tablespoons caramel sauce per cup of icing—just swirl it in right before serving. Perfect for caramel apple cakes or peanut butter cookies.
Nut-Free Adaptation
Replace peanut butter with sunflower seed butter for a nut-free version that still delivers creamy texture. Use 1 cup sunflower seed butter (like SunButter) and add ½ teaspoon extra vanilla extract to compensate for the milder flavor.
This works great for allergy-friendly desserts while keeping the same smooth consistency. 🌱
Nutrition facts
Frequently asked questions
Can I use this icing on warm or cold baked goods?
For best results, apply the icing to cooled treats—it will spread more evenly and set properly. If you must use it on warm items, like fresh cookies, let them sit for 10 minutes first so the icing doesn’t melt immediately. Pro tip: Warm icing slightly with 10 seconds in the microwave before drizzling for a gooey effect!
Why did my icing turn grainy?
Graininess usually means the powdered sugar didn’t dissolve fully or the peanut butter was too cold. Always use warm milk and mix on medium-high speed for 2-3 minutes. If it happens, add 1 tsp more warm milk and blend again. For extra smoothness, strain through a fine-mesh sieve if needed.
How can I make this icing thicker or thinner?
Need thicker? Add 1 tbsp more powdered sugar and mix until smooth. Too thin? Stir in 1 tsp more peanut butter or let it sit 10 minutes—it thickens as it cools. For instant adjustments, use a spoon to scrape the sides of the bowl during mixing to ensure even consistency.
Is this icing safe for people with peanut allergies?
No—this recipe contains peanut butter and isn’t safe for those with peanut allergies. For an allergy-friendly version, swap the peanut butter for sunflower seed butter (like SunButter) and add ½ tsp extra vanilla extract to enhance flavor. Always check labels on all ingredients for cross-contamination warnings.
Can I color this icing for special occasions?
Use gel food coloring (like Wilton) for vibrant colors without altering the texture. Start with ½ tsp—gel colors are potent. For pastel shades, add 1 tsp milk to lighten the color. Mix well and let it sit 5 minutes before using to ensure even distribution. Perfect for birthdays or holidays!

- 3lb Prime Rib Roast Recipe: Juicy Pink Center Guaranteed in 3 Hours - October 31, 2026
- 5 Spice Cake Recipe: Warmly Spiced Layers With Crunchy Top - October 31, 2026
- 1950’s Macaroni and Cheese Recipe: Nostalgic Creamy Cheese Sauce with Buttery Noodles - October 31, 2026