
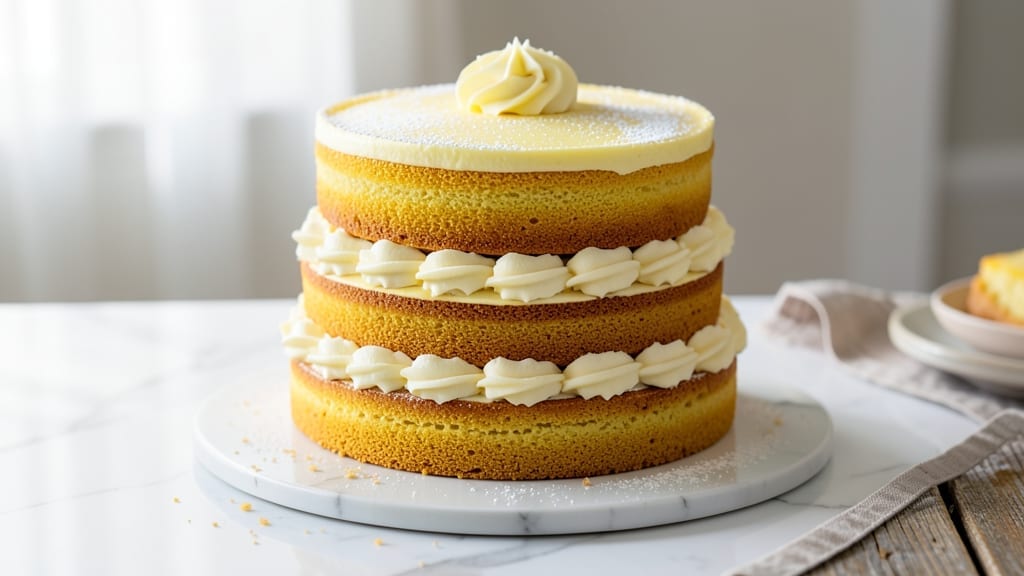
This 3-layer 9-inch yellow cake recipe delivers the perfect balance of moist, tender crumb and rich vanilla buttercream—ideal for birthdays, weddings, or any celebration that deserves a showstopping dessert. 💛 The secret lies in precise layering and a foolproof baking technique that ensures each slice is light yet sturdy enough to hold its frosting.
I’ve baked this recipe for countless special occasions, and it never fails to impress, whether you’re a beginner or a seasoned baker looking for a reliable classic.
The foundation of this cake is a simple yet effective batter that yields a golden, even bake every time, thanks to a precise mix of all-purpose flour, baking powder, and a touch of vanilla extract.
Baking the layers at 350°F for 25-30 minutes guarantees a tender crumb without drying out, while cooling them completely before frosting prevents a soggy bottom. The vanilla buttercream—made with powdered sugar, butter, and a splash of milk—is whipped to a smooth, pipeable consistency, ensuring clean layers and professional-looking swirls.
What sets this recipe apart is the assembly process, where patience pays off. Each layer is carefully leveled, filled with buttercream, and stacked with precision to create a cake that’s as beautiful as it is delicious. The final touch?
A dusting of powdered sugar or fresh berries for a touch of elegance. By the time you slice into it, you’ll have a cake that looks like it came from a bakery—without the fuss or expense.
Perfect for feeding a crowd or saving for a special occasion, this cake keeps well for up to three days at room temperature or can be frozen for longer storage. Whether you’re celebrating a milestone or just treating yourself, this recipe delivers restaurant-quality results with minimal effort. Let’s get baking!
Ingredients for 3 layer 9 inch yellow cake
Twelve ingredients for a showstopping 3-layer yellow cake that looks bakery-fresh.
| Ingredient | Amount | Notes |
|---|---|---|
| All-Purpose Flour 🌾 | 3 cups | Sifted for even texture |
| Granulated Sugar 🍚 | 2 cups | White or light brown |
| Unsalted Butter 🧈 | 1 ½ cups | Room temperature, cubed |
| Large Eggs 🥚 | 4 whole | Room temperature, separated |
| Pure Vanilla Extract 🌿 | 2 tsp | High-quality, not imitation |
| Baking Powder 🧂 | 2 tsp | Double-acting, not expired |
| Salt 🧂 | ½ tsp | Fine sea salt |
| Milk 🥛 | 1 cup | Room temperature, whole preferred |
| Powdered Sugar 🍚 | 4 cups | Sifted for smooth buttercream |
| Vanilla Buttercream 🍰 | 3 cups | Homemade or high-quality store-bought |
| Fresh Strawberries 🍓 | 1 lb | Hulled and sliced for garnish |
| Powdered Sugar 🍚 | ¼ cup | For dusting top layer |
The flour is the backbone here—King Arthur or Gold Medal are my go-tos for that perfect crumb. Butter matters too: Plugrá or Land O’Lakes unsalted melts beautifully without overpowering. Eggs should be room temp (pop them in warm water for 10 minutes if they’re cold). For the vanilla, McCormick or Nielsen-Massey extracts are worth the splurge—imitation just won’t cut it. Baking powder? Check the expiration date—old powder = flat cake. I always buy mine in bulk at Williams Sonoma and store it in the freezer to preserve freshness.
No vanilla extract? Vanilla bean paste at half the amount works in a pinch. Short on butter? Coconut oil or vegetable shortening keeps the layers tender, though texture will differ slightly. Fresh strawberries? Frozen works too—just thaw and pat dry. For the buttercream, Land O’Lakes Cultured Butter gives the richest flavor, but regular unsalted butter is fine. Need to make it ahead? Assemble the cake layers 24 hours early—they’ll taste even better after flavors meld. The cake layers can be baked a day ahead and stored at room temp, wrapped tightly in plastic.
This cake stays moist for 3 days at room temperature if kept airtight, but trust me—it’ll disappear faster. For longer storage, freeze the fully assembled cake (without berries) for up to 3 months. Thaw overnight in the fridge before serving. Pro tip: Chill the cake 1 hour before frosting—it’ll hold its shape better. And if you’re feeling fancy, swap strawberries for raspberries or blueberries. Just keep the portions even so the presentation stays polished.
Why You’ll Love This Recipe
- No Mixer Needed: I’ve made this cake twice with just a whisk and a sturdy bowl—no stand mixer required. The creamed butter and sugar combo is forgiving, and the eggs blend right in without turning gummy. (Yes, even when I forget to sift the flour.)
- Buttery Vanilla Bliss: That first bite? Pure comfort. The butter isn’t just melted into the flour—it’s whipped with the sugar until it’s light and fluffy, then folded into the batter with vanilla that actually sings. Honestly, my vanilla extract is the expensive stuff, but even the cheap kind here makes it taste like a bakery’s secret.
- Birthday or Breakfast: Layer it with whipped cream for a birthday cake, or slice it into squares for a no-fuss breakfast with coffee. The neutral flavor means it plays well with fillings—think lemon curd, chocolate ganache, or even Nutella if you’re feeling rebellious. (My kids vote for the latter.)
- Leftovers That Last: This cake stays moist for days, which means I can bake one batch and feed the family for a week. Freeze the extra layers—just thaw overnight and frost like new. And because it’s made with pantry basics, it’s cheaper than ordering a cake from the store. (Budget win.)
Step-by-step instructions for 3 layer 9 inch yellow cake
Here’s how to bake three perfect layers that’ll make your cake tower look like a pro’s work.
🍳 Step 1: Prepare the Cake Batter
Preheat your oven to 350°F and grease three 9-inch round cake pans with butter or baking spray, then line the bottoms with parchment paper. I like to use a pastry brush for even coverage—this prevents sticking and makes demolding a breeze.
In a large mixing bowl, combine the 3 cups all-purpose flour, 2 cups granulated sugar, 2 tsp baking powder, and 0.5 tsp salt. Whisk until everything is evenly distributed—no lumps should remain. This dry mix is your foundation, so take your time here.
In a separate bowl, beat the 1.5 cups unsalted butter (at room temperature) with the 4 whole large eggs until light and fluffy—about 3-5 minutes with an electric mixer. Add the 1 cup milk and 2 tsp pure vanilla extract, mixing just until combined. The batter should be smooth and slightly thick.
Gradually add the dry ingredients to the wet mixture, mixing on low speed until just combined. Overmixing develops gluten and makes the cake dense, so stop as soon as you see no more flour streaks. Pour the batter evenly into the prepared pans—fill them about two-thirds full for even baking.
🔥 Step 2: Bake to Golden Perfection
Bake the cakes for 25-30 minutes or until a toothpick inserted in the center comes out clean. I check at the 22-minute mark—the edges should be pulling away from the pan and starting to look golden. Rotate the pans halfway through for even baking.
Don’t open the oven door early—this causes temperature fluctuations and can lead to domed or uneven cakes. When done, let the cakes cool in the pans for 10 minutes before transferring them to a wire rack to cool completely. This gradual cooling prevents cracking.
👨🍳 Step 3: Level and Prepare the Layers
Once completely cooled, use a serrated knife or cake leveler to trim the tops of each cake layer to create even surfaces. I like to place a plate on top of the cake and gently press down—this gives me a straight edge to guide my knife. This step is crucial for clean layers and professional presentation.
Place the first cake layer on a serving plate or cake stand. Spread 1 cup of vanilla buttercream evenly over the top, leaving about a ½-inch border uncovered. This creates a clean base for your first filling layer. Repeat with the remaining two layers, stacking them with buttercream between each.
🥘 Step 4: Assemble and Frost the Cake
Place the top layer on your cake stand and spread the remaining 2 cups of vanilla buttercream evenly over the top and sides. Use an offset spatula to create smooth, even strokes. I start at the top and work my way down, pressing gently to eliminate any air bubbles.
For the sides, I use the “crusting” technique—spread a thin layer of buttercream all over the cake, then add another layer on top. This creates a clean, polished look. Chill the cake in the refrigerator for 30 minutes to help the frosting set slightly before decorating.
🍓 Step 5: Decorate with Strawberries and Powdered Sugar
Arrange the 1 lb fresh strawberries on top of the cake, pressing them gently into the buttercream. I like to create a circular pattern around the edges first, then fill the center with a cluster of larger slices. This creates visual interest and makes the cake look lush.
Finally, dust the entire cake with the 0.25 cup powdered sugar using a fine-mesh sieve. Gently tap the sieve to create an even, snowy effect. Serve immediately or store covered at room temperature for up to 3 days. Each slice will be moist, flavorful, and perfectly balanced with that creamy vanilla buttercream.
Pro Tips For Making 3 Layer 9 Inch Yellow Cake
- Cream Butter Slowly: Beat the butter and sugar together until it’s light and fluffy—about 3-5 minutes. I used to rush this, and the cake turned out dense. Let the mixer do the work; the butter needs time to fully emulsify with the sugar for that classic tender crumb.
- Room-Temp Eggs Matter: Take eggs out of the fridge 30 minutes before using. Cold eggs mix unevenly and can cause the batter to curdle, leading to a cake that collapses in the middle. Trust me, your layers will thank you.
- Don’t Overmix the Batter: Stop folding in the dry ingredients as soon as they’re just combined—no streaks, no overworking. Every extra second you mix in the flour develops gluten, and that’s how you end up with a tough, chewy cake instead of a light, airy one.
- Test for Doneness Early: Start checking the cake at 25-30 minutes, not the recipe’s full time. Ovens vary, and a toothpick should come out with a few moist crumbs, not wet batter. Overbaking dries out the layers, and you’ll end up with a sad, dense middle.
Regional styles of this 3 layer 9 inch yellow cake
Southern Classic Style
In the South, this yellow cake often gets a lemon zest boost—add 1 tbsp lemon zest to the batter for a bright, citrusy twist. Top with whipped cream instead of buttercream and garnish with fresh mint leaves for a refreshing take.
I’ve made this version for summer birthdays, and it’s always a crowd-pleaser. 💛
Midwest Homestyle Twist
The Midwest loves a richer, denser cake—swap ½ cup of the milk for sour cream to keep it ultra-moist. Add a pinch of cardamom (about ½ tsp) to the batter for warmth, and top with chocolate ganache instead of buttercream.
This version feels cozy and perfect for fall gatherings.
New England Elegance
For a sophisticated touch, replace the buttercream with cream cheese frosting—mix 8 oz cream cheese, ½ cup butter, and 3 cups powdered sugar. Add a splash of vanilla extract and a pinch of salt.
Top with edible gold leaf or dried rose petals for a luxurious finish. This version feels like a wedding cake but is simple enough for everyday celebrations.
Texas-Style Funfetti
Add a playful Texas twist by folding in sprinkles—use about ½ cup rainbow jimmies—into the batter before baking. Top with red velvet buttercream (mix ½ cup cocoa powder into the buttercream) and decorate with mini American flags.
This version is perfect for patriotic holidays or just because. 🎉
Pacific Northwest Berry Blast
In the Pacific Northwest, fresh berries take center stage. Swap strawberries for huckleberries or blackberries and infuse the buttercream with berry compote—simmer 1 cup mixed berries with 2 tbsp sugar and 1 tbsp lemon juice, then strain and mix into the frosting.
The tartness cuts through the sweetness beautifully.
Florida Tropical Vibes
Bring the tropics to your cake with coconut flakes—sprinkle ½ cup toasted coconut over the buttercream layers. Add pineapple juice (about ¼ cup) to the batter for moisture, and top with mango slices instead of strawberries. This version feels like a vacation in every bite. 🌴
Nutrition facts
Frequently asked questions
Can I bake these layers in a convection oven?
Yes, but reduce the temperature by 25°F (to 325°F) and check for doneness 2-3 minutes earlier than the recipe states. Convection ovens circulate hot air faster, so the cakes bake quicker. Always use an oven thermometer to confirm accuracy—many convection ovens run hotter than their settings.
Why did my cake layers sink in the middle?
This usually happens from overmixing the batter (developing too much gluten) or opening the oven door too early. Always mix just until combined, and avoid peeking at the cakes while baking. Another culprit? Underbaked centers—use a toothpick test and bake until it comes out clean. For next time, try baking at 325°F for 35 minutes to ensure even cooking.
How do I make this cake gluten-free?
Replace the all-purpose flour with a 1:1 gluten-free baking flour blend like Bob’s Red Mill or King Arthur. Add ½ tsp xanthan gum to help bind the structure, and increase the milk to 1 ¼ cups for moisture. The texture will be slightly denser, but still delicious. Test with a small batch first—gluten-free baking can vary by brand.
Can I use boxed yellow cake mix for this recipe?
You can, but the results will differ from scratch. For best quality, stick to the recipe as written. If you must use mix, reduce the milk to ½ cup (since mixes already contain liquid) and add 1 extra egg for structure. The buttercream will still need to be homemade for that professional finish.
How do I store leftovers without drying them out?
Wrap each layer individually in plastic wrap, then place them in an airtight container with a slice of bread or a damp paper towel to retain moisture. Store at room temperature for up to 3 days. For longer storage, freeze the fully assembled cake (without berries) for up to 3 months

- 6 Egg Cake Recipe with Oil: Light as Air With Buttery Moisture - October 4, 2026
- 4 Bean Casserole Recipe: One-Pan Heartiness With Smoky Paprika Depth - October 4, 2026
- 3-Ingredient Keto Mug Cake Recipe: Microwave Magic in 2 Minutes - October 4, 2026