
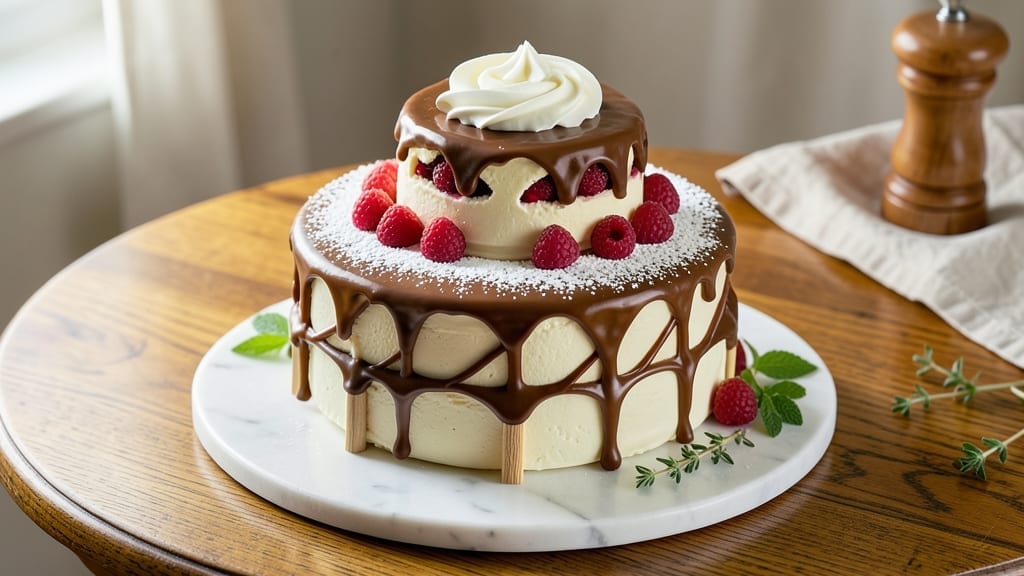
Creating a 2-tier birthday cake that wows every time requires precision—moist vanilla sponge layers, velvety buttercream swirls, and flawless tier stacking. This recipe delivers restaurant-quality height and texture without the complexity, using a foolproof method for even baking and stable assembly.
The secret lies in proper cooling, dowel placement, and a buttercream so rich it holds swirls without sliding.
Start with two 8-inch layers baked at 350°F for 25-30 minutes, then cooled completely before filling. American buttercream (not Swiss) is the star here—it’s stable enough for dramatic swirls while staying light enough to avoid a heavy cake.
For stacking, 3/8-inch dowels at the base ensure structural integrity, while a crumb coat prevents filling from seeping through. The result? A cake that stands tall with professional precision.
Decorate with smooth buttercream rosettes or fondant flowers for a polished finish, and top with a single candle for that classic birthday moment. This recipe adapts easily to gluten-free flour or vegan buttercream if needed, ensuring everyone can celebrate in style. Ready to bake a cake that steals the show?
Perfect for birthdays, anniversaries, or special milestones, this cake balances elegance with approachability. With clear steps for tier assembly and frosting techniques, even beginners can achieve showstopping results. Let’s get started—your celebration deserves this level of detail.
Ingredients for 2 tier birthday cake
Precision ingredients for restaurant-quality tiered cake with flawless buttercream swirls and stable stacking.
| Ingredient | Amount | Notes |
|---|---|---|
| All-Purpose Flour 🌾 | 3 ½ cups | Sifted for smooth batter |
| Unsalted Butter 🧈 | 2 cups | Room temperature, European preferred |
| Granulated Sugar 🍚 | 2 ½ cups | Divided for layers and buttercream |
| Large Eggs 🥚 | 6 whole | Room temperature, separated |
| Vanilla Extract 🌿 | 2 tsp | Pure, high-quality extract |
| Baking Powder 🧂 | 2 tsp | Diamond Crystal preferred |
| Salt 🧂 | ½ tsp | Fine sea salt |
| Whole Milk 🥛 | 1 cup | Room temperature |
| Powdered Sugar 🍚 | 4 cups | Sifted for smooth buttercream |
| Heavy Whipping Cream 🥛 | 1 ½ cups | Cold, full-fat for stability |
| Vanilla Bean Paste 🌿 | 1 tbsp | For deeper vanilla flavor |
| Food Coloring 🎨 | 1 tsp | Optional, gel-based preferred |
| Wooden Dowels 🪵 | 6 whole | 3/8-inch diameter, 8-inch length |
| Cardboard Cake Boards 📦 | 2 whole | 8-inch diameter, sturdy |
| Parchment Paper 📄 | 1 sheet | For easy transfer |
The butter and flour are non-negotiable for texture—European-style butter adds richness, while King Arthur flour ensures tender layers. For the buttercream, powdered sugar from Wholesale Club dissolves smoothly, avoiding graininess. Vanilla bean paste elevates flavor beyond extract, and gel food coloring maintains consistency without thinning. Dowels? 8-inch lengths from a baking supply store prevent cracking when stacking tiers. Pre-sift all dry ingredients to eliminate lumps, and chill your cake boards for 30 minutes before assembly to prevent warping.
No European butter? Plugrá or Land O’Lakes unsalted works in a pinch, though texture may vary slightly. Substitute vanilla bean paste with 2 tsp pure extract plus 1/4 tsp almond extract for depth. For gluten-free adaptation, use King Arthur Measure for Measure flour—add 1/2 tsp xanthan gum per cup. The heavy whipping cream must be cold; if it’s warm, chill the bowl and beaters for 10 minutes before whipping. For a lighter buttercream, replace 1/4 cup of the powdered sugar with cornstarch, but this reduces stability for swirls.
Store cake layers at room temperature, wrapped in plastic, for up to 2 days before assembly. Buttercream keeps 5 days refrigerated, covered tightly. For longer storage, freeze layers between parchment, then transfer to airtight containers. Thaw at room temperature before decorating. Dowels can be reused—clean with warm soapy water and dry completely. The entire cake should be assembled within 4 hours of frosting to maintain structural integrity, so plan accordingly for your celebration.
Why You’ll Love This Recipe
- No Mixer Needed: I swear by this recipe when my mixer’s on the fritz—just cream the butter and sugar by hand until light and fluffy. The eggs and vanilla blend in like magic, and the flour comes together with zero fuss. (Yes, even my toddler could help with the stirring.)
- Vanilla Buttercream Bliss: That rich, buttery vanilla frosting? It’s the kind people actually finish—not just admire. The sugar and eggs create a silky base, and the butter gives it that melt-in-your-mouth perfection. Honestly, I’ve been known to eat it straight from the bowl.
- Double the Celebration: Two tiers mean one cake can feed a crowd or stretch into leftovers that won’t disappoint. Want to add sprinkles? Go for it. Prefer a naked look? Done. It’s the same simple batter—just dressed up for any birthday, shower, or “just because” moment.
- Budget-Friendly Luxury: Flour, sugar, butter, eggs—these are pantry staples that won’t break the bank. I’ve made this for $15 and still had enough frosting to share. Plus, the leftovers? Perfect for cupcakes or cake pops later. No waste, all win.
Step-by-step instructions for stacking a 2-Tier birthday cake
Mastering the stack creates a showstopping centerpiece—here’s how to build height with structural integrity.
Prepare Cake Boards and Dowels for Stability
Line both cardboard cake boards with the parchment paper, smoothing out any wrinkles to prevent tearing. Insert three wooden dowels vertically into each board, spacing them evenly around the perimeter. These dowels create channels for the buttercream supports that will hold your tiers together. I press them in firmly so they stand upright—this prevents shifting when you add weight later.
The key here is symmetry. Use a ruler to mark dowel placement at 1-inch intervals from the edge, ensuring they’re perfectly parallel. The dowels should extend 1-2 inches above the board surface, which gives you enough buttercream room to create sturdy supports without overfilling the gaps. This structural prep is what transforms a simple cake into an architectural masterpiece.
Bake and Cool Layers for Perfect Flatness
Divide the 2.5 cups granulated sugar evenly—1.5 cups for the cake batter and 1 cup for the buttercream. Bake your 8-inch cake layers according to your recipe, then cool completely on a wire rack before leveling. I use a long serrated knife to trim any domed tops, rotating the cake 90 degrees between each pass for an even surface. This flatness is non-negotiable for a clean stack.
While cooling, prepare your work surface by placing a clean parchment paper sheet underneath. This prevents the cake from sticking when you transfer it later. The layers should be completely cool before assembly—warm cake will melt the buttercream supports and cause collapse. I test doneness by pressing a toothpick into the center; if it emerges clean, the cake is ready.
Create Buttercream Supports for Tiered Height
In a stand mixer fitted with the paddle attachment, beat the 2 cups unsalted butter and 1 cup granulated sugar until light and fluffy—about 3-4 minutes. Gradually add the 4 cups powdered sugar, mixing on low to avoid a powder cloud. Incorporate the 1.5 cups heavy whipping cream, 2 tsp vanilla extract, and 1 tbsp vanilla bean paste, mixing until smooth. If using 1 tsp food coloring, add it now and mix until evenly distributed.
Transfer half the buttercream to a piping bag fitted with a star tip. Pipe 1-inch diameter columns of buttercream around the perimeter of the bottom cake board, centering them between the dowels. These columns will serve as the foundation for your top tier. I pipe them 2-3 inches tall—taller than you think you’ll need, as they’ll compress slightly under weight. Let them set for 10 minutes at room temperature before proceeding.
Stack and Secure Tiers with Precision
Place the bottom cake layer onto the buttercream columns, centering it perfectly. Gently press down to create a 1/4-inch thick buttercream “crust” around the edges—this seals the stack and prevents crumbs. Transfer the assembled bottom tier to the refrigerator for 15 minutes to firm up the buttercream.
Repeat the buttercream column process on the top cake board, then place the second layer on top. Use a leveling tool or ruler to ensure both tiers are perfectly horizontal. If the stack feels unstable, add small buttercream “feet” underneath any wobbly areas. This refrigeration step is critical—it prevents the stack from toppling when you add decorations later.
Final Buttercream Swirls and Decoration
Return the stacked cake to room temperature. Using the remaining buttercream in the piping bag, pipe decorative swirls around the sides, starting from the bottom tier and working upward. I use a Wilton 1M tip for smooth, even swirls, keeping the pressure consistent to avoid breaks in the design. For extra height, pipe small rosettes on the top tier’s sides before adding final decorations.
The final touch is dusting powdered sugar through a fine-mesh sieve for a snowy finish. Let the cake sit for 30 minutes before adding any top decorations to ensure the buttercream fully sets. This patience prevents smudging and keeps your masterpiece intact for slicing. The result? A structurally sound, visually stunning two-tier cake that stands tall and delicious.
Pro Tips For Making 2 Tier Birthday Cake
- Cream Butter Properly: Beat your unsalted butter and sugar together until it’s light and fluffy—about 3-5 minutes with a stand mixer. I learned this the hard way: under-creaming leads to dense cake layers that won’t hold their shape for stacking, and overmixing just turns it into butter soup.
- Room-Temp Eggs Matter: Take your eggs out of the fridge 30 minutes before using them. Cold eggs won’t emulsify as well, and you’ll end up with a cake that’s uneven in texture—one side could be cakey, the other gummy. Trust me, your tiers will thank you.
- Don’t Overbake the Layers: Pull your cake pans out of the oven when the center still has a slight bounce—about 1-2 minutes before the recipe’s suggested time. Overbaking dries out the layers, making them brittle and impossible to stack neatly. A toothpick with moist crumbs is your goal, not clean.
- Chill Before Frosting: Let your cake layers cool completely, then refrigerate them for 30 minutes before frosting. Warm layers melt buttercream faster than you can spread it, and you’ll end up with a sad, sloppy mess. Patience here = perfect tiers.
Make-ahead tips for 2 tier birthday cake
Bake Layers Ahead
Bake your cake layers up to 2 days in advance and store them at room temperature in airtight containers wrapped with plastic wrap. This allows flavors to meld and makes assembly easier on the day of the celebration.
I always bake mine 48 hours ahead—it gives the buttercream time to firm up slightly when stacked. 💫
Buttercream Prep
Prepare your buttercream 1 day before assembly and store it in the refrigerator. The cold temperature helps stabilize the texture, making it easier to pipe clean swirls later. When ready to use, let it sit at room temperature for 30-45 minutes to soften slightly.
This trick prevents buttercream from being too stiff or too runny during piping. 🥄
Dowel Prep
Pre-cut and dry your wooden dowels in advance and store them in a dry place. I keep mine in a small wooden box to prevent warping. When you’re ready to assemble, simply insert them into the cake boards—no last-minute prep needed.
This small step saves 10 minutes of stress on the day of the event. 🪵
Crumb Coat First
Apply a thin crumb coat of buttercream to both layers 24 hours before stacking. Chill the cakes in the fridge overnight—this prevents crumbs from mixing into your final buttercream layer.
The crumb coat also helps seal the cake, keeping it moist and preventing filling from seeping through. Trust me, this makes all the difference! ✨
Decorate in Stages
If you’re decorating with fondant or intricate details, do this 2-3 hours before serving. Buttercream decorations can soften in warm environments, so keep your cake in a cool place until the last minute.
I often decorate the top tier first, then add the final buttercream swirls to the bottom tier right before serving. This keeps everything looking fresh and crisp. 🎂
Final Chill Before Serving
Place your fully assembled cake in the refrigerator for 1-2 hours before serving to ensure stability. This final chill helps the buttercream set completely, preventing any potential wobbling when you slice.
I always do this, especially if I’m serving the cake outdoors or in warm conditions. It’s a simple step that adds confidence to your presentation. 💪
Nutrition facts
Frequently asked questions
Can I use this recipe for a 3-tier cake?
This recipe is designed for two tiers, but you can adapt it for three! Use three 6-inch layers instead of 8-inch for proportionate height, and increase your buttercream supports to 4-5 columns per tier. The key is reducing each layer’s size while maintaining the same thickness to prevent structural issues. For a 3-tier cake, consider adding a third dowel for extra stability.
How do I prevent my tiers from sliding when stacked?
Proper buttercream supports are crucial! Pipe your buttercream columns 2-3 inches tall and let them set for 10 minutes before stacking. Use a leveling tool to ensure perfect horizontality, and refrigerate the stacked cake for 15 minutes before adding decorations. If needed, add small buttercream “feet” under wobbly areas for extra support.
Can I make this cake gluten-free or vegan?
For gluten-free, substitute with King Arthur Measure for Measure flour and add 1/2 tsp xanthan gum per cup. For vegan, replace butter with vegan butter and use coconut milk instead of heavy cream. The buttercream can be made vegan by using plant-based butter and powdered sugar. Always test your substitutions in a small batch first to ensure texture.
What’s the best way to transport a stacked cake?
Wrap the entire cake in plastic wrap, then place it on a sturdy cake board or tray. Secure it with a cake carrier or box to prevent shifting. Keep it in a cool, dry place (like a car with air conditioning) and transport it vertically. Avoid temperature changes—never leave it in a hot car! For long distances, consider transporting the tiers separately and assembling at your destination.
How do I fix a cake that’s leaning or wobbling?
Don’t panic! First, check if the buttercream supports are too soft—chill the cake for 30 minutes to firm them up. If the issue persists, add small buttercream “feet” underneath the wobbly tier or use a cake leveler to adjust the angle. For severe cases, disassemble and rebuild the supports, ensuring even height and spacing. Patience is key—take your time to adjust!

- 6 Egg Cake Recipe with Oil: Light as Air With Buttery Moisture - October 4, 2026
- 4 Bean Casserole Recipe: One-Pan Heartiness With Smoky Paprika Depth - October 4, 2026
- 3-Ingredient Keto Mug Cake Recipe: Microwave Magic in 2 Minutes - October 4, 2026