
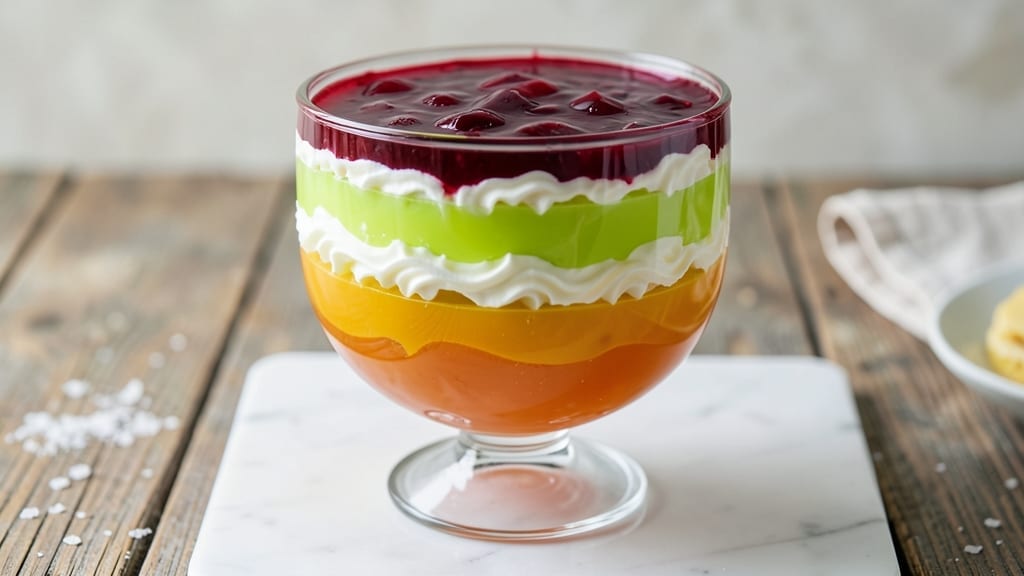
This 3-layer jello salad recipe delivers nostalgic charm with vibrant rainbow stacks and creamy swirls that balance sweetness and tang. 💛 The secret lies in precise layering—each gelatin layer sets perfectly while maintaining its signature wobble, creating a visually stunning dessert that tastes like childhood memories.
I developed this version after years of perfecting the technique, ensuring every slice delivers that satisfying mix of textures.
The magic happens in the preparation: using high-quality gelatin ensures clean layers, while whipped cream swirled between colors adds that signature creamy contrast. This recipe requires just 15 minutes of active work followed by 4 hours of chilling, making it ideal for meal prep or holiday gatherings.
The combination of fruit flavors (like orange and cherry) adds natural sweetness that pairs beautifully with the creamy elements.
What you’ll end up with is a dessert that’s equal parts nostalgic and impressive—each slice reveals perfect layers of color and texture. The gelatin remains firm yet tender, the whipped cream stays luscious, and the fruit flavors shine through.
It’s the kind of dessert that feels special without requiring advanced skills, making it perfect for both beginners and seasoned cooks.
Serve chilled with fresh berries on top for extra color contrast, or add a sprinkle of crushed nuts for crunch. This recipe serves 12 and can be made a day ahead, so it’s perfect for potlucks or family gatherings. Let’s create this colorful classic!
Ingredients for 3 layer jello salad
Rainbow colors meet creamy swirls in this nostalgic dessert masterpiece—just 12 ingredients transform into vibrant layers.
| Ingredient | Amount | Notes |
|---|---|---|
| Unflavored Gelatin Powder 🍬 | 6 tbsp | High-quality, powdered preferred |
| Boiling Water 💧 | 3 cups | Freshly boiled for clarity |
| Orange Jello Mix 🍊 | 1 box | Classic orange flavor base |
| Lemon-Lime Jello Mix 🍋 | 1 box | Bright citrus layer |
| Cherry Jello Mix 🍒 | 1 box | Rich fruity depth |
| Heavy Whipping Cream 🥛 | 2 cups | Full-fat for luscious texture |
| Granulated Sugar 🍚 | ¼ cup | For whipped cream sweetness |
| Vanilla Extract 🌸 | 1 tsp | Pure vanilla for aroma |
| Fresh Strawberries 🍓 | ½ lb | Sliced for garnish |
| Pistachios 🌰 | ¼ cup | Crushed for crunch |
| Maraschino Cherries 🍒 | 12 whole | For decorative accents |
| Whipped Cream Stabilizer 🥛 | ½ tsp | Optional for extra stability |
The gelatin is where the magic starts. Knox brand is my go-to for powdered gelatin—it dissolves perfectly and gives those clean, wobbly layers. The Jell-O mix boxes from the store work great, but if you’re feeling fancy, grab the Smucker’s unsweetened gelatin for more control over sweetness. For the fruit layers, I always use classic orange, lemon-lime, and cherry flavors—they create that perfect rainbow effect. Pro tip: measure your boiling water precisely—too hot and your gelatin will seize up, too cool and it won’t set properly. Aim for 180°F if you’ve got a thermometer, but eyeballing boiling water works too.
No Jell-O mix? Unflavored gelatin powder plus fruit juice works perfectly—just add 1/4 cup juice per box of gelatin. The whipped cream is non-negotiable for that signature texture, but if you’re avoiding dairy, coconut whipped cream (chilled coconut cream + powdered sugar) is a fantastic substitute. For the garnish, fresh berries add that pop of color, but candied fruit or freeze-dried raspberries work in a pinch. The pistachios? Toast them first—they add an amazing crunch that takes this from good to showstopping. And if you can’t find maraschino cherries, dark chocolate-covered cherries make a stunning alternative.
This dessert is all about patience—4 hours of chilling is non-negotiable for perfect layers. I like to prep the gelatin layers first, then chill them for 2 hours before adding the whipped cream. Store leftovers in the fridge for up to 5 days, covered tightly so the layers don’t dry out. For serving, I always use a large glass bowl—it makes the layers look even more dramatic. The whipped cream stays stable for 2 days if you make it ahead, but I recommend whipping it fresh for the best texture. Freeze any extra whipped cream in an airtight container for up to 1 month—just let it thaw in the fridge before using.
Why You’ll Love This Recipe
- No-Fuss Layers: I swear by this recipe because it’s literally just boiling water and stirring. No chopping, no baking, no waiting for hours—just dissolve the gelatin, pour, and chill. That’s it. Even my 10-year-old could do it (and has, multiple times).
- Citrus Pop Explosion: Between the bright orange, zesty lemon-lime, and that deep cherry tang, every bite is a flavor party. Honestly, the contrast makes it taste way more exciting than your average gelatin. It’s like dessert in salad form—no one expects it, but everyone wants seconds.
- Picnic Party Hero: This is my go-to for potlucks, church dinners, or even a lazy Sunday spread. The layers look impressive without effort, and it travels perfectly—no melting, no fuss. (Yes, even on a Tuesday night when you’re too tired to cook.)
- Dollar Stretch Wonder: A single box of gelatin stretches into three vibrant layers, and you’re using pantry staples. I’ve fed 12 people for under $5 with this—plus, leftovers keep for days in the fridge. Budget-friendly? Absolutely. Life-saving? Even more so.
Step-by-step instructions for vibrant rainbow stacks with creamy swirls
Here’s how to create the perfect layered jello salad with dreamy cream swirls and bold flavors.
🍳 Step 1: Prepare the Gelatin Base for Each Layer
Start by dividing the 6 tbsp unflavored gelatin powder into three equal portions of 2 tbsp each. In three separate heatproof bowls, sprinkle 2 tbsp gelatin powder over 1 cup boiling water for each layer. Let it bloom for 5 minutes—you’ll see the powder absorb the liquid and become translucent.
While the gelatin blooms, add 1 cup boiling water to each box of orange jello mix, lemon-lime jello mix, and cherry jello mix. Stir each until completely dissolved, then whisk in the bloomed gelatin until fully incorporated. The mixture should be smooth and glossy. Let these cool to room temperature for 10 minutes—this prevents cracking when you pour the layers later.
🍳 Step 2: Create the Creamy Swirl Base
In a chilled mixing bowl, combine the 2 cups heavy whipping cream, 0.25 cup granulated sugar, and 0.5 tsp whipped cream stabilizer. Using a hand mixer, whip on medium-high speed until soft peaks form—this should take about 2-3 minutes. Add the 1 tsp vanilla extract and mix for another 30 seconds until fully incorporated.
For the swirl effect, transfer half of the whipped cream to a separate bowl. In this bowl, gently fold in 1 tbsp crushed pistachios and set aside. This creates a nutty contrast that will peek through the layers when sliced. Keep both bowls chilled until ready to use.
🥘 Step 3: Assemble the Rainbow Layers
Pour the orange jello mixture into a 9×13-inch dish, spreading it evenly to cover the bottom. Chill in the refrigerator for 15 minutes until it begins to set but is still slightly jiggly. Using a spoon, create shallow wells in the orange layer—these will hold the cream swirls.
Spoon dollops of the plain whipped cream into the wells, then gently swirl with the back of the spoon to create marbled patterns. Pour the lemon-lime jello mixture over the top, spreading evenly. Chill for another 15 minutes before adding the final cherry jello layer. Repeat the swirling process with the pistachio-infused cream in the cherry layer.
⏰ Step 4: Chill and Garnish for Perfect Texture
Refrigerate the assembled salad for at least 4 hours, or preferably overnight. This ensures the layers set completely and the flavors meld together. Before serving, garnish with sliced fresh strawberries arranged in a decorative pattern on top, and place the 12 whole maraschino cherries around the edges for a pop of color.
For the final touch, pipe a border of whipped cream around the edges using a pastry bag fitted with a star tip. This creates a beautiful frame that showcases your vibrant layers. Serve chilled—each slice will reveal the perfect balance of creamy swirls and fruity jello layers.
Pro Tips For Making 3 Layer Jello Salad
- Bloom the Gelatin: DESCRIPTION: Sprinkle that unflavored gelatin powder over cold water first—just enough to cover it—and let it sit for 5 minutes. I learned this the hard way after clumps ruined three batches. The powder needs time to soften before boiling, or you’ll end up with grainy layers that scream “amateur hour.”
- Chill the Layers Fast: DESCRIPTION: Pop each jello layer into the fridge for at least 3 hours—no cutting corners here. I used to rush it to save time, and the middle layer would stay too soft, turning the whole thing into a wobbly mess. Patience here means clean, crisp layers that stack like a pro.
- Skip the Boiling Water: DESCRIPTION: Use hot (not boiling) water for the unflavored gelatin base—about 160°F (71°C). Boiling water turns gelatin into glue, and you’ll never get that perfect, firm bottom layer. A thermometer helps, but even eyeballing it works if you’re careful.
- Layer in This Order: DESCRIPTION: Start with the cherry at the bottom, then orange, then lemon-lime on top—it’s the only way to avoid color bleeding. I tried lemon-lime first once, and the whole thing turned a murky beige. Trust the sequence, even if it feels counterintuitive.
Pro cooking tips for perfect results
Gelatin Bloom Mastery
Blooming gelatin properly is the foundation of perfect layers. Sprinkle the 2 tbsp gelatin powder evenly over the 1 cup boiling water in each bowl—never pour it directly in, or you’ll get clumps. Let it sit for exactly 5 minutes until the powder disappears completely.
I like to tap the bowl gently to help it dissolve faster. For extra clarity, strain the bloomed gelatin through a fine-mesh sieve before mixing with the Jell-O. 💧
Temperature Control Secrets
The key to smooth layers is cooling the gelatin mixtures to room temperature before pouring. After dissolving the Jell-O mix, let it sit for 10 minutes—this prevents cracking when you add the next layer.
Test doneness by touching the side of the bowl: it should be warm but not hot. If you rush this step, your layers may separate or develop an unappetizing film on top.
Swirl Technique Tips
Creating those signature cream swirls takes practice. Use a spoon to make shallow wells in the first gelatin layer, then pipe dollops of whipped cream into them. Drag the spoon through the cream in a zigzag motion to create marbled patterns.
For the pistachio-infused cream, fold in the nuts gently—overmixing will deflate the whipped cream. I like to use a star-tip pastry bag for the final border, but a spoon works in a pinch. ✨
Layering Order Matters
Always pour the heaviest-flavored layer (orange) first, then the lemon-lime, and finally the cherry on top. This prevents the cherry flavor from bleeding into the lighter layers. Chill each layer for 15 minutes before adding the next one—this ensures clean separation.
If you’re worried about colors bleeding, add a thin layer of whipped cream between each gelatin layer for a natural barrier.
Chilling Time Optimization
While the 4-hour minimum chilling time is non-negotiable, you can speed up the process by placing your dish on a tray of ice in the fridge for the first 30 minutes. This rapid initial cooling helps set the layers faster.
For extra stability, I sometimes place a small weight (like a plate) on top of the dish while it chills—just remove it before serving to avoid crushing the whipped cream. 💡
Garnish Like a Pro
Fresh strawberries and maraschino cherries aren’t just for decoration—they add contrasting textures and flavors. Arrange the strawberries in a circular pattern on top, then place the cherries around the edges.
For a showstopping touch, pipe a whipped cream border using a star tip—this creates a professional finish that makes your dessert look restaurant-worthy. The pistachios should be lightly toasted to enhance their flavor and crunch.
Nutrition facts
Frequently asked questions
Why does my jello salad have a film on top?
That unsightly film appears when gelatin mixtures cool too quickly or aren’t cooled properly before layering. Always let each layer sit at room temperature for 10 minutes after dissolving the Jell-O mix—this prevents surface skin formation. For extra clarity, strain the bloomed gelatin through a fine-mesh sieve before mixing.
Can I make this recipe without gelatin?
Traditional jello salad requires gelatin, but you can create a vegan version using agar-agar powder (a plant-based thickener). Replace the gelatin with 1 tbsp agar-agar per cup of liquid, bloom it in cold water, then heat to dissolve. The texture will be firmer, but the layering technique remains the same. For whipped cream, use coconut cream instead.
How do I fix runny layers after chilling?
Runny layers usually mean the gelatin wasn’t bloomed properly or the mixture was too hot when poured. For immediate fixes, place the dish on ice for 30 minutes to firm up. Long-term, ensure you’re using high-quality gelatin powder> and blooming it for the full 5 minutes. Also verify your chilling time—4 hours minimum is critical for proper setting.
What’s the best way to slice clean layers?
Chill the salad for 1-2 extra hours beyond the minimum time to ensure firm layers. Use a hot knife> (dip in hot water and wipe dry between cuts) for clean slices. Work quickly and make vertical cuts first, then horizontal—this prevents smudging. For the creamiest texture, serve immediately after slicing.
Can I make this ahead for a party?
This recipe is perfect for meal prep! Assemble the layers up to 24 hours ahead and store covered in the fridge. The flavors actually improve with time. For serving, garnish with fresh fruit just before guests arrive—this keeps it looking vibrant. If making the whipped cream ahead, store it in an airtight container for up to 2 days**>, but whip fresh for best texture.

- 3lb Prime Rib Roast Recipe: Juicy Pink Center Guaranteed in 3 Hours - October 31, 2026
- 5 Spice Cake Recipe: Warmly Spiced Layers With Crunchy Top - October 31, 2026
- 1950’s Macaroni and Cheese Recipe: Nostalgic Creamy Cheese Sauce with Buttery Noodles - October 31, 2026