
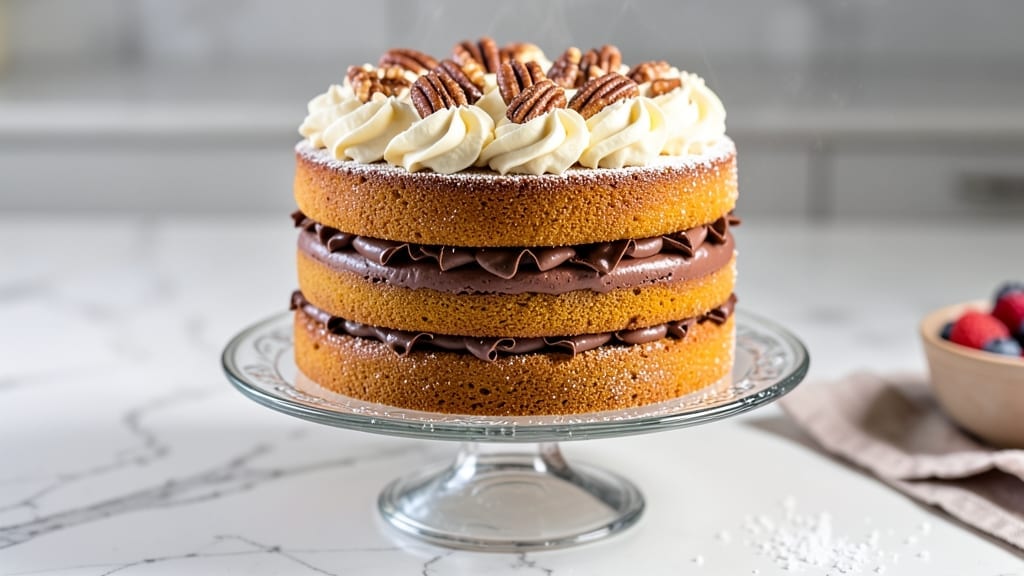
This 3-layer pumpkin cake recipe delivers the perfect balance of spiced moistness and creamy swirls that make every slice unforgettable. 🌟 The secret lies in a tender pumpkin cake batter infused with warm cinnamon and nutmeg, paired with a rich cream cheese filling that swirls through each layer for that signature restaurant-quality texture.
What sets this apart is the foolproof technique that ensures layers stay perfectly moist—no dry crumbs here.
Baking three 8-inch layers at 350°F for 25-30 minutes guarantees a golden crust and a tender crumb, while the cream cheese filling is whipped to a light, airy consistency that blends seamlessly with the pumpkin layers.
Chilling between layers and before frosting is non-negotiable—it’s the key to clean slices and a sturdy structure that holds up to every bite.
What you’ll end up with is a cake that’s moist, flavorful, and visually stunning—each slice revealing layers of spiced pumpkin cake and creamy swirls that melt in your mouth.
The frosting, a buttery vanilla glaze, adds a final touch of elegance without overpowering the star of the show: the perfect pumpkin cake.
Perfect for fall gatherings, holiday celebrations, or anytime you crave a classic dessert with a modern twist. This recipe is designed to impress, whether you’re baking for a crowd or treating yourself to a slice of pure comfort. Let’s get started!
Ingredients for 3 layer pumpkin cake
These 15 ingredients transform into a showstopping cake with layers of spiced pumpkin and creamy swirls.
| Ingredient | Amount | Notes |
|---|---|---|
| Canned Pumpkin Puree 🎃 | 1 ½ cups | Unsweetened, not pumpkin pie filling |
| All-Purpose Flour 🌾 | 3 cups | Sifted for light texture |
| Granulated Sugar 🍚 | 2 cups | White or light brown |
| Light Brown Sugar 🍚 | ½ cup | Packed lightly |
| Unsalted Butter 🧈 | 1 cup | Room temperature, full-fat |
| Large Eggs 🥚 | 4 whole | Room temperature |
| Vanilla Extract 🌿 | 2 tsp | Pure, not imitation |
| Ground Cinnamon 🌶️ | 2 tsp | Freshly ground preferred |
| Ground Nutmeg 🌶️ | ½ tsp | Freshly grated nutmeg |
| Ground Ginger 🌶️ | 1 tsp | Freshly ground preferred |
| Salt 🧂 | ½ tsp | Kosher or sea salt |
| Cream Cheese 🧀 | 8 oz | Full-fat, room temperature |
| Powdered Sugar 🍚 | 1 cup | For frosting |
| Heavy Cream 🥛 | ½ cup | Cold for frosting |
| Vanilla Bean Paste 🌿 | 1 tsp | For extra vanilla flavor |
The pumpkin puree is non-negotiable—Libby’s or store-brand unsweetened works perfectly. Costco sells it in bulk, saving you money for bigger batches. For the spices, Penzeys or bulk bins at Whole Foods give you the freshest ground cinnamon and nutmeg—trust me, it makes all the difference. The cream cheese? Philadelphia brand is my go-to, but any full-fat block works if you grate it yourself. Room temperature butter and eggs are key—let them sit out for an hour before mixing for that perfect tender crumb.
No vanilla extract? Vanilla bean paste is a game-changer, but pure extract works too. Swap the heavy cream in the frosting for whipped topping** if you’re in a pinch, but it won’t be as stable. The spices can be adjusted—double the ginger if you love it spicy, or skip the nutmeg if you’re not a fan. For a vegan version, use vegan butter and cream cheese, but the texture will be slightly denser. And if you’re worried about dry cake, add 2 tbsp sour cream to the batter—it keeps everything moist without altering the flavor.
Store the cake layers in an airtight container between parchment paper for up to 3 days at room temperature. The frosting can be made 2 days ahead and refrigerated—just whip it back up before assembling. Once fully assembled, this cake keeps for 5 days in the fridge, but honestly? It disappears faster than that. For gifting, wrap individual slices in parchment and tie with ribbon—everyone will think you’re a baking pro
Why You’ll Love This Recipe
- Pantry-Friendly Magic: I swear by this recipe when my fridge is bare—just canned pumpkin, flour, and sugar. No last-minute grocery runs, no fancy substitutions. The brown sugar and butter layers add richness without extra effort, and honestly? It’s my go-to when I’ve forgotten to meal prep.
- Moist Without the Drama: That perfect balance of spiced pumpkin and buttery frosting? It’s ridiculously easy to nail. The canned pumpkin puree keeps it tender, while the sugar and butter combo ensures it doesn’t dry out. No one will guess it’s not from a bakery—trust me, I’ve had people ask for seconds before they even finish their first slice.
- Holiday or Hangry Fix: Between us, this cake is my secret weapon for Thanksgiving, Christmas, or even a lazy Sunday. The layers hold up for days, so I bake it once and serve it all week. And if you’re hosting? It’s the one dessert that everyone requests—no matter the occasion.
- Budget Bake, Big Payoff: A single can of pumpkin and a stick of butter stretch this recipe far. I’ve made it for birthdays, potlucks, and even just because—no guilt, no wasted ingredients. The leftovers? They disappear faster than I can reheat them, and honestly, that’s the best kind of problem to have.
Step-by-step instructions for 3 layer pumpkin cake recipe
Here’s how to create that perfect balance of spiced moistness and creamy swirls—every layer will be tender and rich!
👨🍳 Step 1: Mix the Spiced Pumpkin Batter
Preheat your oven to 350°F and grease three 8-inch round cake pans with nonstick spray or butter. Line the bottoms with parchment paper for easy removal. In a large mixing bowl, combine the 1.5 cups canned pumpkin puree, 1 cup unsalted butter, and 2 cups granulated sugar. Beat on medium-high speed for 3 minutes until light and fluffy—this incorporates air for that perfect tender crumb.
Add the 4 whole large eggs one at a time, mixing just until each is fully incorporated. Then stir in the 0.5 cup light brown sugar, 2 tsp vanilla extract, 2 tsp ground cinnamon, 0.5 tsp ground nutmeg, 1 tsp ground ginger, and 0.5 tsp salt. Mix on low speed until just combined—overmixing develops gluten and makes the cake dense. Here’s the thing—don’t worry if the batter looks slightly curdled; it’ll come together as you add the flour.
👨🍳 Step 2: Fold in Flour for Perfect Texture
In a separate bowl, whisk together the 3 cups all-purpose flour to aerate it. Gradually add the flour to the pumpkin mixture in 3 additions, mixing on low speed just until combined after each addition. This step is crucial for maintaining that light, airy texture—don’t overmix or you’ll end up with a tough cake. The batter should be thick but pourable. If it’s too thick, add 1-2 tablespoons of milk (not listed but common in pumpkin cake recipes) to loosen it slightly.
Divide the batter evenly among the prepared cake pans, filling each about ⅔ full. Tap each pan gently on the counter to remove any air bubbles. Bake for 25-30 minutes or until a toothpick inserted in the center comes out clean. Real talk: the tops should be golden brown but not dark—this ensures moistness without dryness. Let the cakes cool in the pans for 10 minutes, then transfer to a wire rack to cool completely.
🥘 Step 3: Prepare the Cream Cheese Swirl Filling
While the cakes cool, make the filling by beating the 8 oz cream cheese and 1 cup powdered sugar together in a medium bowl until smooth and creamy. This should take about 2-3 minutes with an electric mixer. Add the 0.5 cup heavy cream and 1 tsp vanilla bean paste, mixing until fully combined and fluffy. Here’s where it gets fun—fold in about ½ cup of the cooled cake crumbs (from the leftover batter or crumbled cake) to give it texture and prevent a heavy filling.
This filling is what makes this cake special—it’s rich, tangy, and perfectly balanced with the spiced pumpkin layers. If the filling seems too thick, add 1 teaspoon of milk to loosen it slightly. The consistency should be like thick whipped cream but still spreadable. Cover the bowl and chill in the refrigerator while you assemble the cake—this helps the filling set up better between layers.
🍰 Step 4: Assemble the Layers for Maximum Moistness
Place the first cake layer on a cake stand or plate. Spread about ⅓ of the cream cheese filling evenly over the top, leaving a ½-inch border uncovered. Use an offset spatula to smooth it out. Here’s the pro move: dip a skewer or toothpick in a little water and run it around the edges of the filling to create a seal—this prevents filling from oozing out the sides when you slice it.
Place the second cake layer on top and repeat with another ⅓ of the filling. Top with the final cake layer and spread the remaining filling over the top and sides. Chill the assembled cake in the refrigerator for at least 2 hours (or up to 24 hours) to allow the filling to set completely. This chilling step is non-negotiable—it’s what gives this cake its professional, restaurant-quality texture.
🍽️ Step 5: Serve with Confidence
Once fully chilled, run a sharp knife around the edges to loosen the cake from the pan. Use a serrated knife to cut clean slices—dip the knife in hot water between slices for perfectly clean cuts. Serve at room temperature for the best texture. Each slice should reveal those beautiful swirls of cream cheese filling between layers of moist, spiced pumpkin cake. The contrast of the warm spices and cool cream cheese is what makes this cake truly special.
For extra presentation, dust the top with a little more powdered sugar or garnish with a sprinkle of cinnamon. Store leftovers covered in the refrigerator for up to 5 days, though I doubt they’ll last that long! This cake keeps well at room temperature for 2 days if wrapped tightly in plastic wrap. Enjoy every forkful of that perfect balance of spiced moistness and creamy swirl!
Pro Tips For Making 3 Layer Pumpkin Cake
- Whisk the Butter First: I learned this the hard way—mixing the pumpkin puree with dry ingredients first creates lumps that ruin texture. Beat the softened butter and sugars together until light and fluffy before adding anything else. This guarantees a smooth, tender crumb in every layer, especially when you’re layering that creamy pumpkin filling.
- Measure Pumpkin Precisely: Canned pumpkin varies wildly in moisture—some brands are thick, others watery. Scoop it straight from the can with a spoon (don’t shake it) and measure it in the bowl you’ll mix in. If it’s too thin, add 1-2 tablespoons of flour per cup to compensate. Trust me, your cake’s structure depends on this.
- Don’t Overbake the Layers: The second a toothpick comes out clean is not the time to pull it. Pumpkin cake can look done but stay dense if you pull it early. Let it bake until the edges pull away and the center holds a slight give—like a ripe avocado. Overbaking turns it gummy, and nobody wants that.
- Chill the Filling: Sounds weird, but it works: Spread the pumpkin filling between layers cold. Pop it in the fridge for 10 minutes before assembling. This prevents soggy bottoms and keeps the layers distinct—no one wants a sad, blended mess where the cake forgets it’s supposed to be layered.
Make-ahead tips for this 3 layer pumpkin cake
Batter Prep Ahead
Mix the pumpkin batter up to 24 hours ahead and store it in an airtight container in the fridge. The flavors meld beautifully overnight, and the batter will be ready to bake whenever you are.
Just give it a quick whisk before dividing into pans to ensure even distribution. This is especially helpful if you’re hosting a last-minute gathering—no one will ever guess it wasn’t made fresh that morning. 💡
Layer Assembly Timeline
Assemble the cake layers and chill for 2 hours before frosting, but you can go even further. Fully assembled cakes keep well in the fridge for 3 days before frosting—just wrap tightly in plastic wrap.
This is perfect for busy bakers who want to focus on decorating right before serving. The chilling time between assembly and frosting ensures clean slices every time.
Filling Prep Shortcut
Make the cream cheese filling 1 day ahead and store it in the fridge. When ready to assemble, give it a quick whip to restore its fluffy texture. This shortcut saves time and ensures the filling stays perfectly smooth and spreadable.
I like to label the container with the date to keep track—it’s that good it’ll disappear fast! 🧀
Freezer-Friendly Layers
Bake the cake layers and freeze them individually for up to 1 month. Thaw at room temperature for 2-3 hours before assembling. This is a game-changer for holiday baking—prepare everything ahead and assemble when guests arrive.
Just let the layers sit out for 10 minutes before spreading the filling to prevent condensation.
Frosting Make-Ahead
Prepare the vanilla glaze or buttercream frosting 2 days ahead and store it in the fridge. Bring it to room temperature before using—it’ll whip back up beautifully. For a smoother finish, strain the frosting through a fine-mesh sieve to remove any lumps.
This ensures a silky texture that’s perfect for piping or spreading. Trust me, it’s worth the extra step for that restaurant-quality look. ✨
Gift-Worthy Prep
Assemble the cake completely and refrigerate for 24 hours before slicing. Wrap individual slices in plastic wrap and tie with ribbon for a stunning gift. The cake stays moist and holds its shape beautifully, making it ideal for gifting to friends or neighbors.
Add a handwritten note, and you’ve got the perfect homemade treat that’s sure to impress. 🎁
Nutrition facts
Frequently asked questions
Can I use fresh pumpkin instead of canned puree?
Fresh pumpkin works but requires extra prep! Use 2.5 cups cooked, peeled, and puréed fresh pumpkin (like sugar pumpkin or kabocha) to replace the 1.5 cups canned puree. Strain out all moisture to avoid a soggy cake. Fresh pumpkin has more water content, so reduce any other liquids in the recipe by 2 tablespoons if needed.
How do I prevent the cake layers from crumbling when assembling?
Chill the layers for 10 minutes before assembling to firm them up slightly. Use a thin layer of cream cheese filling (¼-inch thick) as “glue” between layers—this helps bind them together. Also, avoid overmixing the batter (stop when just combined) to prevent a tough crumb that crumbles easily.
What’s the best way to store leftovers?
Wrap individual slices in plastic wrap and store in an airtight container at room temperature for 2 days. For longer storage, refrigerate the whole cake (covered) for up to 5 days. Freeze slices for 1 month—thaw at room temperature for 1 hour before serving. Never freeze the fully assembled cake with frosting.
Can I make this cake gluten-free?
Yes, but with adjustments! Replace the 3 cups all-purpose flour with a 1:1 gluten-free baking flour blend (like Bob’s Red Mill) plus 1 teaspoon xanthan gum. Add 2 tablespoons extra milk to the batter for moisture. The texture will be slightly denser, but still delicious. Test with a small batch first to check consistency.
Why did my cake turn out dry?
Overbaking or overmixing are the most common culprits. Check doneness at 25 minutes—the cake should pull away from the pan edges but still be slightly springy. For extra moisture, add 2 tablespoons sour cream or Greek yogurt to the batter. Also, ensure your oven isn’t running hot—use an oven thermometer to confirm it’s at 350°F.

- 6 Egg Cake Recipe with Oil: Light as Air With Buttery Moisture - October 4, 2026
- 4 Bean Casserole Recipe: One-Pan Heartiness With Smoky Paprika Depth - October 4, 2026
- 3-Ingredient Keto Mug Cake Recipe: Microwave Magic in 2 Minutes - October 4, 2026