
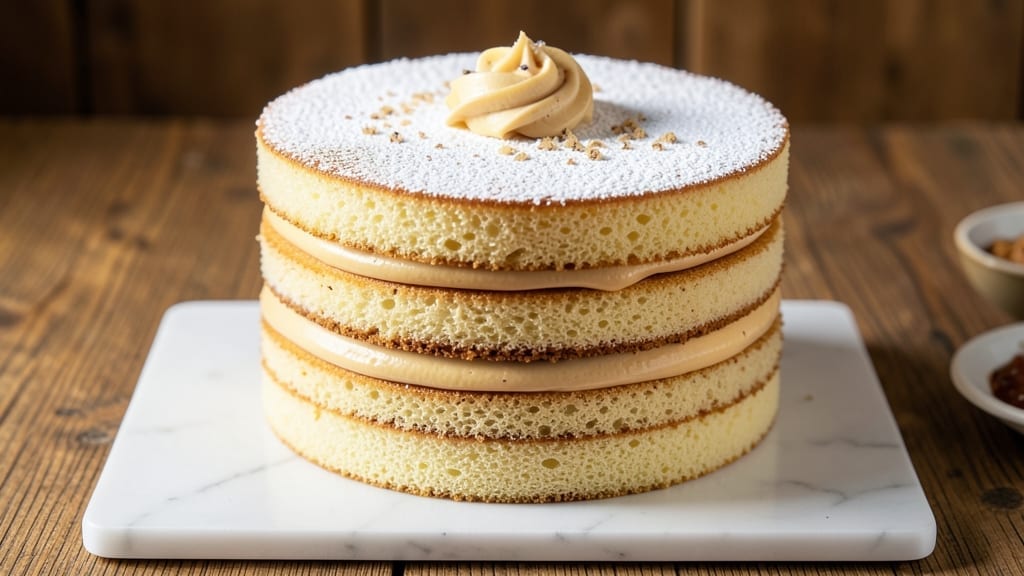
A 3-layer sponge cake with vanilla bean swirls and airy layers is the ultimate showstopper for celebrations—no one will believe it’s homemade. The secret lies in whipped egg whites that create a light, fluffy texture, while vanilla bean paste infuses every layer with rich, aromatic depth.
This recipe delivers restaurant-quality results with a foolproof method that even beginners can master.
What sets this cake apart is the buttercream filling—smooth, stable, and perfectly balanced with vanilla extract. Each layer is baked to a golden finish, then stacked with precision to avoid crumbs, while the swirls of vanilla-infused buttercream tie the whole dessert together.
The result? A cake that’s tender, moist, and impossibly light, yet sturdy enough to slice cleanly.
This recipe includes step-by-step assembly instructions to ensure your cake stands tall and looks as stunning as it tastes. Whether you’re baking for a birthday, wedding, or just because, the techniques here guarantee a professional finish without the fuss. Ready to impress? Let’s get started.
For extra flair, consider adding fresh berries or edible flowers between layers, or dusting with powdered sugar for a classic touch. The cake keeps well at room temperature for up to 3 days, making it perfect for ahead-of-time prep. Every bite will be worth the effort!
Ingredients for 3 layer sponge cake
Twelve essential ingredients transform into a restaurant-worthy 3-layer vanilla sponge cake with signature swirls.
| Ingredient | Amount | Notes |
|---|---|---|
| Large Egg Whites 🥚 | 8 whole | Room temperature, no yolks |
| Granulated Sugar 🍚 | 2 ½ cups | Superfine preferred for smoothness |
| All-Purpose Flour 🌾 | 2 ½ cups | Sifted, spooned lightly |
| Unsalted Butter 🧈 | 1 ½ cups | Cold, cubed, European-style preferred |
| Vanilla Bean Paste 🌿 | 2 tbsp | High-quality, split 1 tbsp per layer |
| Vanilla Extract 🍯 | 1 tsp | Pure, not imitation |
| Salt 🧂 | ½ tsp | Fine sea salt |
| Cream of Tartar 🧂 | ¼ tsp | Stabilizes egg whites |
| Heavy Cream 🥛 | 3 cups | Cold, 35% fat minimum |
| Powdered Sugar 🍚 | 4 cups | Sifted, for buttercream |
| Fresh Vanilla Beans 🌿 | 2 whole | Split lengthwise for seeds |
| Unflavored Gelatin 🍬 | 1 tsp | Bloomed in 2 tbsp cold water |
| Lemon Juice 🍋 | 1 tbsp | Freshly squeezed |
| Edible Gold Leaf 🏆 | 1 sheet | Optional, for garnish |
The egg whites are non-negotiable here—room temperature is critical for maximum volume. European-style butter from brands like Plugrá or Miyoko’s delivers superior flavor and texture. For vanilla, Madagascar bourbon beans from specialty stores like Williams Sonoma elevate the swirls beyond basic extract. Sift your flour twice to eliminate any lumps that could disrupt the delicate crumb structure. Cream of tartar isn’t just an additive—it’s what stabilizes those egg whites to stiff peaks without overbeating.
No vanilla bean paste? Pure vanilla extract plus a pinch of xanthan gum mimics the thickness, though texture won’t be identical. Substituting powdered sugar for granulated in the sponge? Sift it first—this prevents graininess. The heavy cream must be cold and full-fat—store-brand won’t cut it here. For the gelatin, Bloom it properly (5 minutes in cold water) or your swirls will be too runny. Edible gold leaf is optional but transforms this into a showstopper—24k gold from Leaf International is my go-to for that luxurious finish.
Assembled cake keeps at room temperature for 3 days when wrapped airtight in parchment. For longer storage, freeze fully assembled (without gold leaf) for up to 3 months. Thaw overnight at room temperature before serving. The buttercream can be made 2 days ahead—store in an airtight container with parchment between layers. For professional presentation, chill the cake 30 minutes before slicing to achieve clean cuts. Each slice should reveal those signature vanilla swirls—proof you’ve nailed the technique.
Why You’ll Love This Recipe
- No Stand Mixer Needed: I’ll be real—the meringue base is the star here, and you don’t need fancy tools. Whisk those egg whites until stiff peaks form (that’s the magic), then fold in the sugar and flour like you’re tucking in a blanket. Even my non-baker cousin nailed it.
- Vanilla-Perfect Balance: That vanilla bean paste? It’s the secret weapon. Not too sweet, not too artificial—just pure, warm vanilla that makes every bite feel like a hug. The buttercream layers in between? Rich but not heavy, thanks to the sugar and egg whites keeping it light.
- Birthday to Brunch: This cake is my go-to for anything. Frost it with chocolate ganache for a birthday, dust with powdered sugar for a café-style breakfast, or slice it into squares for a potluck. Same recipe, endless excuses to make it.
- Leftovers? Better Than Fresh: Honestly, the second day is when this cake shines. The sponge holds up beautifully, and the buttercream stays creamy—no dry crumbs here. Plus, it’s budget-friendly: one batch feeds six, with enough slices left to stash for emergencies (or just because).
Step-by-step instructions for 3 layer sponge cake
Mastering this delicate structure requires precision—each layer must be perfectly light and evenly baked.
Prepare the Egg White and Sugar Meringue
In a spotlessly clean, grease-free mixing bowl, combine the 8 whole large egg whites and 0.5 teaspoon salt with 0.25 teaspoon cream of tartar. Whisk gently to fully dissolve the salt and cream of tartar—this stabilizes the egg whites and prevents weeping. Place the bowl over a double boiler or in a heatproof container set over simmering water, ensuring the bottom of the bowl doesn’t touch the water.
Gradually whisk in the 2.5 cups granulated sugar while maintaining a steady stream of heat. The mixture should reach 160°F on an instant-read thermometer—this is your signal to transfer the bowl to a stand mixer fitted with the whisk attachment. Beat on high speed until the meringue is glossy, thick, and holds stiff peaks when the whisk is lifted. This process typically takes 8-10 minutes, but don’t rush it; proper hydration of the sugar is critical for a stable cake.
Fold in Flour for the Sponge Layers
Sift the 2.5 cups all-purpose flour into the meringue using a fine-mesh sieve, ensuring no lumps remain. Using a spatula, gently fold the flour into the meringue in three additions, cutting through the center and lifting from the bottom to incorporate air without deflating the structure. The batter should be smooth and ribbon-like, with no visible streaks of flour.
Divide the batter evenly among three 8-inch round cake pans lined with parchment circles. Tap each pan firmly on the counter to eliminate air bubbles, then smooth the tops with an offset spatula. Bake in a preheated 350°F oven for 18-22 minutes, rotating the pans halfway through, until the edges are set and a toothpick inserted in the center comes out clean. Cool in the pans for 10 minutes, then transfer to a wire rack to cool completely.
Prepare the Vanilla Bean Swirl Filling
Split the 2 whole fresh vanilla beans lengthwise and scrape out the seeds. Bloom the 1 teaspoon unflavored gelatin in 2 tablespoons cold water for 10 minutes. In a saucepan, combine the 3 cups heavy cream, 1 tablespoon lemon juice, 1 tablespoon vanilla bean paste, and the scraped vanilla seeds. Heat over medium-low until the cream reaches 170°F, then whisk in the bloomed gelatin until fully dissolved. Remove from heat, cover, and chill for 2 hours until thickened to a pudding-like consistency.
Once set, whip the chilled mixture with an electric mixer until smooth and fluffy. Fold in the 1 teaspoon vanilla extract and reserve 1 cup of the filling for assembly. This swirl filling is the heart of your cake—its stability ensures clean layers and no soggy bottoms.
Assemble and Frost the Cake
Level the cooled sponge layers if necessary, then place the first layer on a cake stand or plate. Spread ½ cup of the reserved vanilla bean filling evenly over the layer, leaving a ½-inch border. Repeat with the second layer, then the third. The reserved filling acts as a glue, preventing the layers from sliding.
Prepare the buttercream by beating the 1.5 cups unsalted butter until smooth, then gradually add the 4 cups powdered sugar and remaining 1 tablespoon vanilla bean paste, mixing until light and fluffy. Spread a thin crumb coat over the entire cake, then chill for 30 minutes to set. Apply the final layer of buttercream, smoothing with a bench scraper for a flawless finish. For an elegant touch, press the edible gold leaf onto the top while still slightly tacky.
Pro Tips For Making 3 Layer Sponge Cake
- WHIP EGGS TO STIFF PEAKS: I learned this the hard way—under-whipped egg whites mean dense layers. Use a stand mixer and whip until the meringue forms stiff peaks that hold their shape when you lift the whisk. If your bowl’s too small, the eggs won’t get enough air, and that’s when your cake turns into a sad, flat pancake.
- MELT BUTTER SLOWLY: Dump cold butter into hot water or a double boiler—never microwave it straight up. Butter burns faster than you think, and that acrid smell ruins the whole cake. Once melted, cool it to body temperature before folding into the batter, or you’ll kill the egg whites’ happy little bubbles.
- SIFT FLOUR LIKE YOUR CAKE DEPENDS ON IT: Yes, even if the recipe doesn’t say it. Sifting flour removes lumps and aerates the batter, which means lighter layers. Use a fine-mesh sieve and tap the bowl lightly to catch every last bit of flour clinging to the sides—those pockets of dry flour are where tunnels form.
- CHILL BATTER BEFORE BAKING: Let the batter sit at room temp for 10 minutes after mixing, then refrigerate for 20. This gives the gluten time to relax, so your cake doesn’t overproof and collapse in the oven. Pro move: Grease your pans and line them with parchment—no sticking, no stress.
Regional styles of this 3 layer sponge cake
Classic French Génoise
In France, the 3-layer sponge cake takes center stage as génoise, a delicate almond-infused version that’s lighter than air. The key difference? Replace ½ cup of all-purpose flour with ½ cup ground almonds (finely ground) for a nutty depth.
Bake at 325°F for 25-30 minutes—the slightly higher temp ensures a crisp shell while keeping the interior tender. Serve with crème pâtissière instead of buttercream for a true Parisian touch. 🥖
Italian Pan di Spagna
Italy’s pan di Spagna (Spain cake) swaps vanilla for orange zest and amaretto in the batter, creating a fragrant twist. Use 1 teaspoon orange zest and 1 tablespoon amaretto folded into the meringue before adding flour.
Bake in 8-inch pans at 350°F for 18-20 minutes, then fill with mascarpone cream (mix 1 cup mascarpone, 2 cups powdered sugar, and 1 tsp vanilla). Dust with powdered sugar for a rustic finish. 🍊
Japanese Sponge with Matcha
For a Japanese-inspired version, replace 1 tablespoon vanilla bean paste with 2 teaspoons high-quality matcha powder (sifted) in the sponge batter. Whisk the matcha into the egg whites before adding sugar for even distribution. Bake at 325°F for 22-25 minutes until edges are set.
Fill with white chocolate ganache (melt 1 cup white chocolate with ½ cup heavy cream) and top with red bean paste for a traditional wagashi touch. 🍵
American Buttercream Twist
In the U.S., the 3-layer sponge cake often features a brown sugar buttercream filling. Replace the vanilla bean filling with 1 cup brown sugar buttercream (beat 1 cup butter, 2 cups powdered sugar, ½ cup brown sugar, and 1 tsp vanilla).
Add ½ teaspoon cinnamon to the sponge batter for warmth. Decorate with caramel drizzle and toasted pecans for a Southern-inspired dessert. 🍯
British Victoria Sponge
The British Victoria sponge skips buttercream entirely, using jam between layers instead. Bake the sponge at 375°F for 12-15 minutes (higher heat = crispier texture). Fill with raspberry jam and whipped cream (whip 2 cups heavy cream with 2 tbsp powdered sugar).
Dust with flour (not powdered sugar) for a classic finish. Serve with clotted cream for a true Cornish tea treat. ☕
Nutrition facts
Frequently asked questions
Why do my sponge layers collapse after baking?
Collapsed layers usually happen from overmixing the egg whites or underbaking. Make sure your egg whites reach 160°F and form stiff peaks before folding in flour. Also, bake until a toothpick comes out clean—18-22 minutes at 350°F is key. Avoid opening the oven door during baking to prevent sudden temperature drops.
Can I make this cake without a stand mixer?
Yes! Use a hand mixer or even a whisk with strong arm muscles. Whip the egg whites over a double boiler first to reach 160°F, then transfer to a large bowl for beating. Work in short bursts to avoid overheating. For folding, use a spatula and work quickly to maintain airiness.
How do I prevent the layers from sliding during assembly?
Use ½ cup of reserved vanilla bean filling as “glue” between layers—it’s thicker than buttercream and holds the cake together. Chill the cake for 30 minutes after crumb coating to set the buttercream before adding final decorations. Also, level your layers perfectly with a serrated knife for even stacking.
What’s the best way to store a fully assembled cake?
Wrap the cake tightly in plastic wrap, then place it in an airtight container. Store at room temperature for up to 3 days. For longer storage, freeze the fully assembled cake (without gold leaf) for up to 3 months. Thaw overnight in the fridge before serving for perfect texture.
Can I substitute buttercream with another filling?
Try crème pâtissière (French vanilla pastry cream) or mascarpone cream for a lighter texture. For a fruit twist, use raspberry jam between layers (like a Victoria sponge) and top with whipped cream. Just ensure your filling is stable enough to prevent soggy layers.

- 3lb Prime Rib Roast Recipe: Juicy Pink Center Guaranteed in 3 Hours - October 31, 2026
- 5 Spice Cake Recipe: Warmly Spiced Layers With Crunchy Top - October 31, 2026
- 1950’s Macaroni and Cheese Recipe: Nostalgic Creamy Cheese Sauce with Buttery Noodles - October 31, 2026