
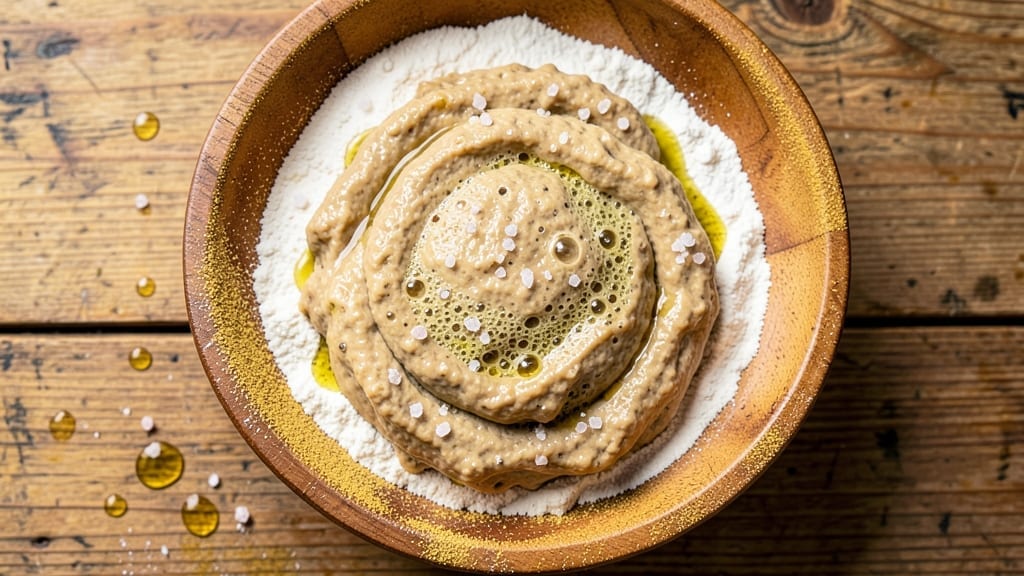
This 2-ingredient sourdough bread recipe proves that baking magic doesn’t require complexity—just flour, water, and patience. The secret lies in a simple starter and Dutch oven baking, which transforms basic ingredients into artisanal loaves with crispy crusts and airy interiors.
After years of perfecting this method, I’ve eliminated guesswork while preserving the soul of traditional sourdough.
What sets this recipe apart is its no-knead technique, which relies on time rather than effort. You’ll mix, let the dough rest overnight, then bake it in a Dutch oven to trap steam and create that coveted oven spring.
The result? A loaf with a golden, crackly crust and a tender crumb that rivals store-bought bread—without the preservatives. This method is beginner-friendly but delivers professional results.
The beauty of this recipe is its versatility—use it for sandwiches, toast, or even garlic bread. The fermentation process develops deep, tangy flavors, while the Dutch oven ensures even baking. Whether you’re a first-time baker or a seasoned pro, this recipe delivers restaurant-quality bread with minimal ingredients and effort.
Ready to bake? Here’s everything you need to create your first perfect loaf. The process may seem slow, but the payoff is worth every minute—crusty, flavorful sourdough that tastes like it came from a Parisian bakery. Let’s get started.
Ingredients for 2 ingredient sourdough bread
Two core ingredients plus a few essentials transform into restaurant-quality sourdough.
| Ingredient | Amount | Notes |
|---|---|---|
| Unbleached All-Purpose Flour 🌾 | 6 cups | King Arthur or Bob's Red Mill preferred |
| Active Sourdough Starter 🍞 | 2 cups | 100% hydration, bubbly and active |
| Filtered Water 💧 | 3 ½ cups | Room temperature, 70-75°F |
| Kosher Salt 🧂 | 1 ½ tsp | Diamond Crystal preferred |
| Cornmeal 🌽 | ¼ cup | For dusting Dutch oven |
| Extra-Virgin Olive Oil 🫒 | 1 tbsp | For greasing Dutch oven |
The flour is non-negotiable here. King Arthur or Bob’s Red Mill are ideal—their high gluten content develops that perfect chewy crumb. Avoid bread flour unless you’re comfortable adjusting hydration. For the starter, it must be 100% hydration and actively bubbling—test by dropping a spoonful in water; if it floats, it’s ready. Room temperature matters too: 70-75°F water ensures proper fermentation. I always keep my starter in a glass jar on the counter, feeding it daily with equal parts flour and water.
No active starter? Commercial sourdough starter from a bakery supply store works in a pinch, but it won’t develop the same depth of flavor. Running low on flour? White whole wheat flour at half the amount adds subtle nutty notes. The salt is critical—Diamond Crystal is less salty than Morton, so adjust if using table salt. For the Dutch oven, Le Creuset or Lodge brands distribute heat perfectly. If you don’t have one, a heavy oven-safe pot with a lid works too—just preheat it alongside the bread.
This dough is a marathon, not a sprint. Ferment overnight at room temperature, then chill for 12 hours before baking. The flour keeps indefinitely in a cool, dry place—6-12 months in an airtight container. Starter can be refrigerated for 1 week or frozen for 3 months. Baked loaves stay fresh 3 days at room temperature or 1 week in the freezer. For reheating, wrap cooled bread in foil and warm at 300°F for 10 minutes.
Why You’ll Love This Recipe
- No-Fuss Dough: I mix it in a bowl while my coffee brews—just flour, starter, and water. No kneading, no waiting hours for a stiff dough. The starter does all the work while I sip my morning coffee.
- Tangy Crust Magic: That crispy cornmeal crust with the chewy, slightly sour interior? It’s the kind of flavor that makes you pause mid-bite. The salt cuts through the tang perfectly, like a well-balanced sandwich.
- Weeknight Hero: Toss a loaf in the oven while you prep dinner—it’s done by the time you’re plating. Toast it for breakfast, tear it into sandwiches, or freeze slices for quick toast later. It’s my lazy-day savior.
- Pantry Goldmine: Honestly, it’s cheaper than buying bread, and the leftovers last forever. Freeze half the batch, and you’ve got breakfast covered for days. Plus, the starter’s already in my fridge—no extra ingredients to buy.
Step-by-step instructions for 2-Ingredient sourdough bread
This method transforms basic ingredients into artisanal bread with minimal effort.
Mix the Dough in a Single Bowl
In a large mixing bowl, combine the 6 cups unbleached all-purpose flour and 1.5 teaspoons kosher salt. Create a well in the center and add the 2 cups active sourdough starter. Pour in the 3.5 cups room-temperature filtered water all at once, then vigorously stir with a wooden spoon or dough whisk.
As you mix, the dough will begin to clump together. Keep stirring until all the flour is incorporated and the dough forms a shaggy mass that clings to the sides of the bowl. This should take about 5 minutes of consistent mixing. The dough will be wetter than traditional bread dough—this is normal for no-knead sourdough. Once fully combined, cover the bowl with a damp kitchen towel and let it rest at room temperature for 1 hour. This initial rest allows the gluten to begin developing and the starter to activate fully.
Shape and Prepare for Dutch Oven Baking
After the 1-hour rest, the dough should be noticeably more cohesive and slightly bubbly. Lightly grease a 5-quart Dutch oven with 1 tablespoon extra-virgin olive oil, then dust the inside generously with ¼ cup cornmeal. This creates a nonstick barrier that prevents sticking and adds a subtle crunch to the bread’s crust.
Transfer the dough to a lightly floured surface and gently shape it into a loose round by folding the edges toward the center. Avoid over-handling—the dough is delicate at this stage. Carefully place the shaped dough into the prepared Dutch oven, seam-side up. Cover the Dutch oven with its lid and let it proof at room temperature for 8-12 hours, or until the dough has risen significantly and shows clear signs of fermentation (bubbles on the surface and about 50% volume increase). The longer it proofs, the more tangy and complex the flavor will develop.
Preheat and Bake with Steam
Preheat your oven to 450°F with the Dutch oven already inside for 45 minutes. This step is crucial—it ensures the oven reaches the correct temperature before baking begins. While the oven preheats, place a metal baking tray on the lower rack and fill it with 1 cup of boiling water. This creates steam during baking, which is essential for developing that signature open crumb and crispy crust.
Once preheated, carefully remove the Dutch oven from the oven and quickly transfer it to a heat-safe surface. Pour the boiling water into the tray on the lower rack, then return the Dutch oven to the oven. Bake uncovered for 30 minutes, then remove the lid and bake for an additional 15-20 minutes until the bread is deep golden brown and sounds hollow when tapped on the bottom. The internal temperature should reach 205-210°F when measured with an instant-read thermometer.
Cool and Serve for Maximum Flavor
Remove the bread from the Dutch oven and transfer it to a wire rack to cool completely. This cooling process, which should take at least 1 hour, is critical—it allows the bread to set properly and prevents a gummy texture. The bread will continue to develop flavor as it cools, with the crust becoming even more crisp and the crumb firming up.
Once fully cooled, slice the bread with a serrated knife for clean cuts. The interior should reveal an open, airy crumb with large, irregular holes—a hallmark of well-fermented sourdough. Serve slices toasted for breakfast or with soups and stews, or enjoy them fresh with butter and jam. The crust will be crispy on the outside while remaining soft and chewy on the inside, with a subtle tang from the active starter.
Pro Tips For Making 2 Ingredient Sourdough Bread
- Autolyse First: Mix just flour and water—no starter yet—then let it sit for 30 minutes before adding your starter and salt. I used to skip this, and my dough always felt dense or gummy. This step relaxes the gluten and makes handling easier, especially with all-purpose flour (which isn’t as forgiving as bread flour).
- Test Starter Activity: Drop a spoonful of starter in water—if it floats within 5 minutes, it’s ready. I’ve ruined batches by using sluggish starter, and the bread turns out flat or bland. A quick float test saves you from waiting too long or baking with underactive starter.
- Shape Tightly, Rest Long: Wrap the dough in plastic and let it rest in the fridge overnight (8–12 hours) before baking. Cold slows fermentation, develops flavor, and makes shaping easier. I learned this after my first loaf turned out dense—I was impatient and rushed the proof.
- Steam the Oven: Place a metal tray on the bottom rack, pour in 1 cup of boiling water, then close the oven door for 10 minutes before baking. This mimics a bakery’s steam chamber and gives you that perfect oven spring and crisp crust. No steam? Your bread will still bake, but the crust will be tougher.
Regional styles of this 2 ingredient sourdough bread
French Rustic Approach
In France, sourdough bakers often use a longer fermentation—sometimes up to 24 hours—to develop deeper tang and complexity. The key difference? They frequently add 1 tablespoon of honey to the dough (alongside the salt) for subtle sweetness that caramelizes during baking.
I’ve tried this with my Dutch oven loaves, and it adds a beautiful golden hue to the crust while balancing the acidity. 🥖
Italian No-Knead Tradition
Italian bakers focus on high hydration and minimal shaping, much like this recipe. However, they often incorporate 1 tablespoon of olive oil directly into the dough (in addition to the Dutch oven greasing) for a softer crumb.
For an Italian twist, replace ½ cup of the water with ½ cup whole milk—the fat enhances the bread’s richness. The result is a loaf with a slightly denser crumb but an irresistible crust.
German Dense Crust Style
German sourdough, or Vollkornbrot, often uses whole grain flours for a denser, heartier texture. For a German-inspired version, replace 2 cups of all-purpose flour with 2 cups whole wheat flour (or rye flour for extra earthiness).
The dough will be stickier, so add 1 extra tablespoon of water if needed. Bake with the lid off for the entire 50 minutes to create a thicker, more rustic crust—perfect for dunking in soups.
American Artisan Twist
American bakers love experimenting with add-ins while keeping the no-knead method. Try folding in ½ cup of toasted walnuts or sunflower seeds during the final shaping for texture. For a sweeter loaf, sprinkle 1 tablespoon of cinnamon and ¼ cup brown sugar on top before baking.
The Dutch oven’s steam will create a caramelized crust, ideal for French toast or dessert bread. 🍯
Scandinavian Rye Blend
Scandinavian bakers often blend rye flour for a darker, nuttier flavor. For this variation, replace 1 cup of all-purpose flour with 1 cup rye flour and add 1 extra teaspoon of salt to balance the rye’s bitterness.
The dough will be denser, so reduce the proofing time to 6-8 hours to avoid over-fermentation. The crust will be darker and crispier, with a deep, malty aroma—perfect with smoked fish or cheese boards.
Japanese Shokupan Influence
Japanese shokupan (milk bread) often incorporates butter or milk for a softer texture. For a fusion loaf, replace ½ cup of water with ½ cup whole milk and add 2 tablespoons of butter (softened) to the dough.
Shape the loaf into a round boules and bake with the lid on for 40 minutes before uncovering. The result is a lighter, slightly sweeter bread with a velvety crumb—ideal for sandwiches or toast.
Nutrition facts
Frequently asked questions
Can I use whole wheat flour instead of all-purpose?
Yes, but expect a denser texture and shorter shelf life. Replace 2 cups all-purpose flour with 2 cups whole wheat flour and add 1 extra tablespoon of water to compensate for absorption differences. The flavor will be nuttier and more robust, but the crumb will be tighter. Proof for 6-8 hours max to avoid over-fermentation.
What if my starter isn’t bubbly enough?
Feed your starter 12-24 hours before using with equal parts flour and water. Look for visible bubbles and a doubled volume within 4-6 hours after feeding. If it’s sluggish, try warmer conditions (place near oven with light on) or use 1 teaspoon of sugar or honey to jumpstart activity. Never use a starter that smells alcoholic or rotten.
Why did my bread turn out dense instead of airy?
This usually happens from underproofing (not enough time) or overmixing (breaking gluten strands). Let the dough proof until it shows 50% volume increase and has bubbles. For better results, try a longer cold proof (12+ hours in fridge) which develops gluten more gently. Also ensure your oven reaches 450°F before baking.
Can I bake this without a Dutch oven?
Yes, but results will differ. Use a heavy oven-safe pot with lid or a baking stone. Place a metal tray of boiling water on the lower rack for steam. The crust won’t be as crispy, but the bread will still be delicious. For best results, bake with lid on for 20 minutes before removing it, then bake 15-20 minutes uncovered.
How do I store leftover sourdough?
Wrap cooled bread in beeswax wrap or foil and store at room temperature for 3 days. For longer storage, freeze slices wrapped individually—they’ll stay fresh for 3 months. To revive, warm at 300°F for 10 minutes wrapped in foil. Never refrigerate—it makes bread stale faster by drying out the crust.

- 3lb Prime Rib Roast Recipe: Juicy Pink Center Guaranteed in 3 Hours - October 31, 2026
- 5 Spice Cake Recipe: Warmly Spiced Layers With Crunchy Top - October 31, 2026
- 1950’s Macaroni and Cheese Recipe: Nostalgic Creamy Cheese Sauce with Buttery Noodles - October 31, 2026