
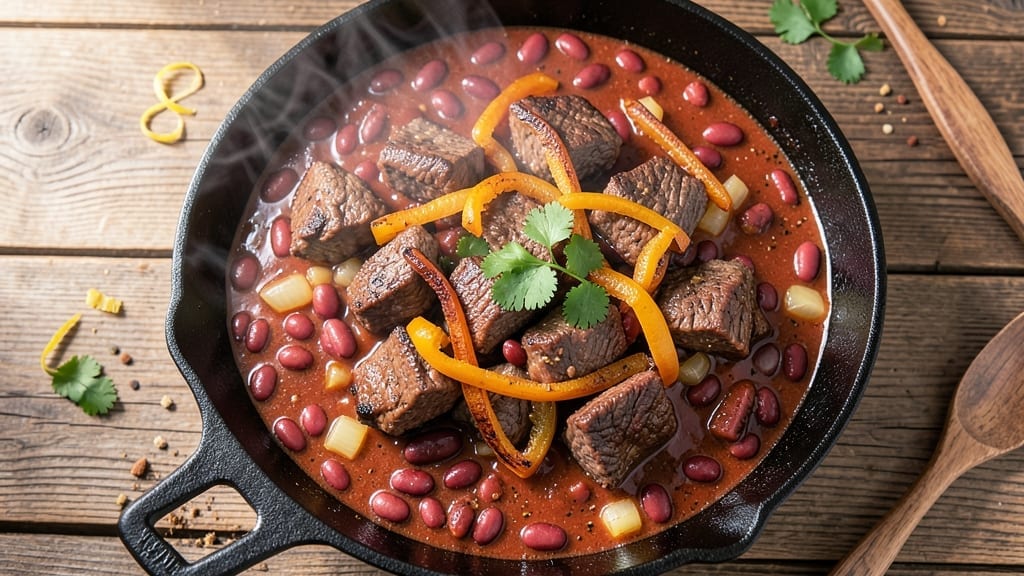
This 3 lb beef chili recipe delivers the smoky, meaty depth that makes chili night a tradition—rich enough to feed a crowd but simple enough for weeknight dinners. The secret lies in browning the beef first, which builds layers of caramelized flavor that no shortcut can match.
After hours of slow simmering, the meat becomes fork-tender while the spices meld into a harmonious blend that lingers long after the last bite.
What sets this chili apart is the balance: bold enough to satisfy hearty appetites but flexible enough to adapt to dietary preferences. A proper 30-minute sear on the beef creates a crust that dissolves into the pot, releasing deep, savory notes.
Meanwhile, a mix of chili powder, cumin, and smoked paprika works together to create that signature chili aroma that fills your kitchen—and makes everyone gather around the table.
By the time it’s done, you’ll have a pot of chunky, smoky beef chili with tender meat, vibrant vegetables, and a sauce thick enough to coat every spoonful. The texture is perfect—meaty, not mushy—and the flavors only deepen as it sits, making leftovers just as satisfying as the first bowl.
Serve it with crusty bread, cornbread, or a dollop of sour cream for the full experience.
This recipe scales beautifully for gatherings but works just as well for a cozy night in. Whether you’re feeding a family or prepping for meal prep, the techniques here ensure restaurant-quality results without the fuss. Let’s get cooking—your taste buds will thank you.
Ingredients for 3 lb beef chili
Pantry staples meet smoky magic—here’s what you need for a chili pot that’ll feed a crowd.
| Ingredient | Amount | Notes |
|---|---|---|
| Chuck Roast 🥩 | 3 lb | Cut into 1-inch cubes |
| Yellow Onion 🧅 | 2 whole | Diced into 1/4-inch pieces |
| Bell Pepper 🌶️ | 2 whole | Any color, diced |
| Garlic Cloves 🧄 | 6 cloves | Minced finely |
| Kidney Beans 🌱 | 2 cans | 15 oz each, drained |
| Tomato Paste 🍅 | ½ cup | No-sugar-added preferred |
| Beef Broth 💧 | 4 cups | Low-sodium preferred |
| Chili Powder 🌶️ | 2 tbsp | Smoked variety preferred |
| Ground Cumin 🌿 | 1 ½ tbsp | Toasted for depth |
| Smoked Paprika 🌶️ | 1 tbsp | For authentic smokiness |
| Salt 🧂 | 1 ½ tsp | Kosher or sea salt |
| Black Pepper 🌶️ | ½ tsp | Freshly ground |
| Olive Oil 🫒 | 2 tbsp | For browning beef |
| Dark Brown Sugar 🍚 | 1 tbsp | Balances heat |
The chuck roast is where the magic starts. Costco or Walmart usually have it pre-cut into cubes, which saves time, but if you’re buying a whole roast, ask the butcher to cut it into 1-inch pieces. Look for good marbling—those little white fat streaks mean more flavor. The kidney beans? Libby’s or Great Northern from the bulk section both work well, but drain and rinse them to cut down on sodium. For the bell peppers, any color does the trick, but red has the sweetest flavor. If you can’t find fresh, frozen diced peppers work too—just thaw and drain them first.
No chili powder? Mix 1 tbsp smoked paprika with 1 tsp cayenne for a close substitute. Running low on cumin? Ground coriander at half the amount adds a similar earthy note. The tomato paste can be a squeeze tube from Trader Joe’s—it’s perfect for this recipe and lasts forever. Want to stretch this further? Add a 15 oz can of black beans or 1 cup of corn for extra heartiness. The brown sugar might seem odd, but it rounds out the heat and balances the acidity from the tomatoes—don’t skip it!
This chili tastes even better the next day, so make a big batch. It keeps for 5 days in the fridge or 3 months in the freezer. I like to portion it into quart-sized containers for easy lunches—just reheat with a splash of water or broth. For serving, top with sour cream, shredded cheese, or chopped green onions. The flavors meld beautifully overnight, so if you can wait, do it!
Why You’ll Love This Recipe
- One-Pot Magic: I swear by this—dump everything in, stir once, and walk away. No chopping small, no fancy techniques, just a big pot of rich, smoky goodness that tastes like you spent hours.
- Chuck Roast Secret: That 3 lb cut turns tender and melty, almost falling apart, while the onions caramelize right in the pot. Honestly, the beef alone makes this worth it—juicy, deep, and way better than ground beef.
- Meal Prep Hero: Between us, this is my go-to for lunches all week. The beans hold up perfectly, and I just reheat portions with a splash of water. Even my picky husband asks for it on Wednesdays.
- Budget-Friendly Feast: Three pounds of chuck roast stretches over six servings, and the bell pepper adds color without costing much. It’s the kind of dish where you get more than you pay for—both in taste and leftovers.
Step-by-step instructions for 3 lb beef chili recipe
Here’s how to build a rich, smoky chili that simmers into perfect heartiness.
Brown the Chuck Roast for Deep Flavor
Heat the 2 tablespoons olive oil in a large Dutch oven over medium-high heat. Working in batches, add the 3 lb chuck roast cut into 1-inch cubes, spreading them out in a single layer. Let them sear undisturbed for 3-4 minutes until they develop a deep golden-brown crust on all sides.
This browning step is where all the magic happens – those caramelized edges create layers of flavor that no pre-packaged chili can match. I press down gently on the beef with a wooden spoon during the first minute to prevent curling, which ensures even contact with the pan. Once all the beef is browned, transfer it to a plate and set aside.
Sauté the Aromatics and Build the Base
In the same Dutch oven, add the 2 whole yellow onion diced into ¼-inch pieces and the 2 whole bell pepper diced similarly. Cook for 5-6 minutes until they soften and begin to caramelize at the edges. Add the 6 cloves garlic cloves that have been minced finely and cook for another 30 seconds until fragrant.
Here’s where it gets good – stir in the 2 tablespoons chili powder, 1.5 tablespoons ground cumin, 1 tablespoon smoked paprika, 1.5 teaspoons salt, and ½ teaspoon black pepper. Let the spices toast in the pan for 1 minute until you can smell their warm, earthy aroma filling your kitchen. This step develops the chili’s complex flavor profile.
Simmer the Chili for Maximum Flavor Development
Return the browned beef to the pot and stir to coat in the spices. Add the 0.5 cup tomato paste, scraping up any browned bits from the bottom of the pan. Pour in the 4 cups beef broth and bring everything to a gentle boil. Reduce heat to low, cover partially, and let it simmer for 2 hours – this is where the beef becomes fork-tender and all the flavors meld together.
After 2 hours, stir in the 2 cans kidney beans (drained), 1 tablespoon dark brown sugar, and any accumulated juices from the beans. The sugar helps balance the heat while adding a subtle caramel note. Continue simmering uncovered for another 30-45 minutes until the chili has thickened to your desired consistency and the flavors have deepened even more.
Taste and Adjust for Perfect Balance
Let the chili rest for 10 minutes off the heat. This resting period allows all the flavors to settle and the chili to thicken slightly. Taste and adjust the seasoning – you might need a bit more salt or a touch of acid (like a splash of vinegar or lemon juice) to brighten the flavors. The chili should be rich, smoky, and complex with layers of heat and sweetness.
For serving, I like to top each bowl with a dollop of sour cream or shredded cheese, and serve with warm cornbread. The chili will taste even better the next day as the flavors continue to develop, so it’s perfect for meal prep or freezing for future meals.
Pro Tips For Making 3 Lb Beef Chili
- Trim the Fat First: Chuck roast comes with a thick fat cap—slice it off before browning. I learned this the hard way when my first batch turned greasy instead of caramelized. The meat still cooks just fine, but the chili won’t taste like it’s been simmered for hours if that fat isn’t rendered properly.
- Sweat Onions Low: Don’t rush the onions—cook them on medium-low for 8-10 minutes until they’re translucent and slightly sticky. I used to crank the heat, and my chili always tasted raw. The onions need time to break down, or they’ll just sit like sad, crunchy bits in your final dish.
- Add Beans Late: Drain and rinse the kidney beans, then stir them in only during the last 15 minutes of cooking. I skipped this once and ended up with mushy beans that turned the chili into a thick, gloopy mess. Beans absorb flavor fast—give them time to warm through without overcooking.
- Deglaze Aggressively: After browning the beef, pour in 1 cup of broth immediately and scrape the bottom of the pot like your life depends on it. That crust is where all the flavor hides, and I’ve lost count of how many times I’ve skipped this step only to regret it later. Use a wooden spoon—it’s less likely to scratch your pot.
Make-ahead tips for leftovers
Prep Ahead Strategy
I always start by prepping the beef and aromatics the night before. Cut the 3 lb chuck roast into 1-inch cubes and store in an airtight container in the fridge.
Dice the 2 yellow onions and 2 bell peppers into ¼-inch pieces and store separately. This saves 20 minutes of active prep time on cooking day. 💡
For the spices, measure out all your dry ingredients—2 tbsp chili powder, 1.5 tbsp cumin, and 1 tbsp smoked paprika—into a small bowl. Store in a sealed container with the rest of your ingredients. This keeps everything organized and ready to go.
Slow Cooker Adaptation
Make this chili completely hands-off by using a 6-quart slow cooker. Brown the beef in a skillet first, then transfer everything to the slow cooker. Cook on low for 8 hours or high for 4-5 hours.
The slow cooker method is perfect for busy days—just dump everything in and let it work its magic. 🌡️
For best results, add the kidney beans only in the last 30 minutes of cooking to prevent them from turning mushy. This keeps their texture intact while still allowing them to absorb the rich chili flavors.
Freezer-Friendly Packaging
Portion the chili into quart-sized freezer bags or airtight containers, leaving 1-inch headspace for expansion. Label each bag with the date and freeze for up to 3 months.
When ready to eat, thaw overnight in the fridge and reheat on the stovetop with ¼ cup water or broth to restore moisture. ❄️
I like to freeze the chili in individual portions so I can grab one for a quick lunch without thawing the whole batch. This also makes it easy to share with friends or neighbors—just grab a bag and go!
Make-Ahead Flavor Boost
The chili actually tastes better the next day as the flavors meld together. If you’re prepping for a meal prep week, cook the chili fully, then refrigerate it overnight.
The next morning, reheat it gently on the stove and adjust the seasoning if needed. The resting time deepens the smoky, savory notes. 💫
For an extra boost, add a splash of 1 tbsp apple cider vinegar or ½ tsp lemon juice when reheating. This brightens the flavors and cuts through any richness, making each bowl taste fresh and vibrant.
Nutrition facts
Frequently asked questions
Can I use ground beef instead of chuck roast for this recipe?
You can absolutely substitute! Use 2 pounds of ground beef (80/20 lean-to-fat ratio) for the 3 lb chuck roast. Brown it thoroughly in batches to render the fat, then proceed with the recipe. The texture will be slightly different—more tender than chunky—but still delicious. Just reduce the beef broth to 3 cups since ground beef releases more moisture during cooking.
How can I make this chili spicier without adding cayenne?
Boost the heat by adding ½ teaspoon of chipotle powder or 1 teaspoon of smoked cayenne along with the other spices. For a smoky kick, swap ½ teaspoon of the chili powder for ½ teaspoon of crushed red pepper flakes. If you love fresh heat, stir in 1-2 chopped jalapeños with the beans during the final simmer. Always taste first—you can adjust as you go!
Why did my chili turn out too thin? How can I fix it?
Thin chili usually happens when the beans release too much liquid or the broth wasn’t reduced enough. To thicken it, simmer uncovered for 10-15 minutes longer to evaporate excess liquid. For instant thickening, mix 1 tablespoon cornstarch with 2 tablespoons cold water, stir it into the chili, and simmer for 2-3 minutes. If it’s still too thin, consider adding ½ cup cooked rice or diced potatoes next time to absorb moisture.
Can I make this chili in an Instant Pot?
Yes! Follow the same steps for browning the beef and sautéing aromatics. Then, add all ingredients (including beans) and cook on high pressure for 25 minutes. Quick-release the pressure, then adjust seasoning and let it sit for 10 minutes before serving. The Instant Pot version cooks 50% faster but still delivers deep flavor. For extra richness, add ½ cup beef stock after pressure cooking.
What are the best toppings to serve with this chili?
Classic toppings include shredded cheddar cheese, sour cream, and chopped green onions. For extra crunch, try crushed tortilla chips or avocado slices. If you love freshness, add diced avocado or radishes. For heat lovers, sprinkle with crumbled queso fresco or hot sauce. The key is balancing textures—creamy, crunchy, and fresh all work beautifully!

- 3lb Prime Rib Roast Recipe: Juicy Pink Center Guaranteed in 3 Hours - October 31, 2026
- 5 Spice Cake Recipe: Warmly Spiced Layers With Crunchy Top - October 31, 2026
- 1950’s Macaroni and Cheese Recipe: Nostalgic Creamy Cheese Sauce with Buttery Noodles - October 31, 2026