
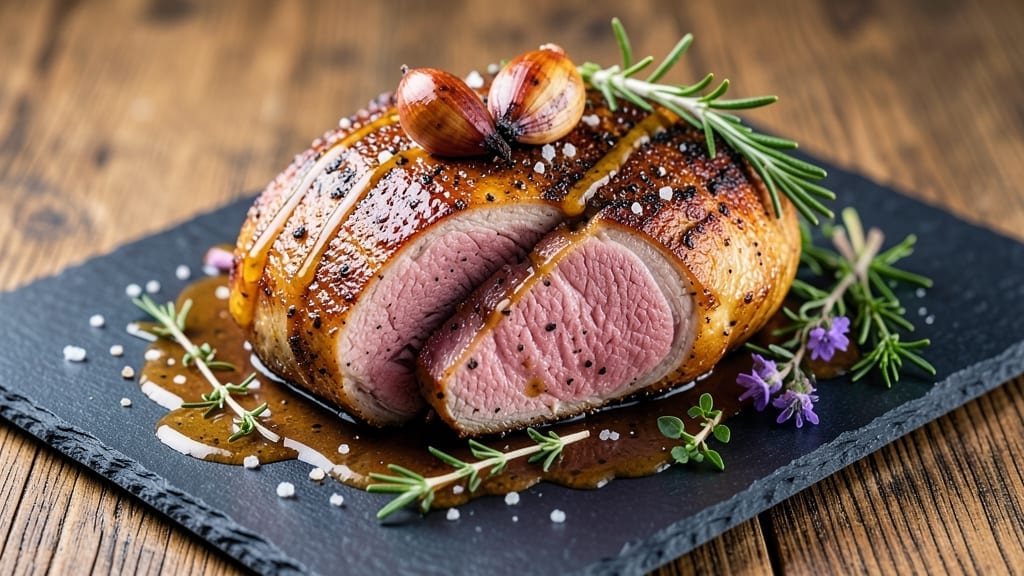
A 3 lb eye of round roast transformed from tough to tender and juicy is the kind of cooking victory that turns weeknight dinners into memorable meals. This slow-cooked method—whether in an oven or slow cooker—unlocks the beef’s potential without requiring fancy techniques or expensive equipment.
The secret lies in patience: letting the collagen break down over time while building deep, savory flavors through simple seasoning and proper temperature control.
What sets this recipe apart is its foolproof approach to cooking a lean cut like eye of round, which typically needs extra care to avoid dryness.
By using a combination of salt, pepper, and aromatic herbs, we create a flavorful crust while the slow cooking process ensures the meat stays moist and fork-tender. The result is a dish that feels restaurant-quality but comes together with minimal effort—perfect for feeding a family or hosting guests.
When sliced against the grain, this roast delivers perfectly tender bites with just enough moisture to keep every mouthful satisfying. The crust remains flavorful and slightly crisp, adding texture contrast to the tender interior.
Serve with classic sides like roasted vegetables, mashed potatoes, or a fresh salad to complete the meal.
Whether you’re preparing for a special occasion or simply craving a hearty dinner, this method guarantees juicy, restaurant-worthy results without the guesswork. The key steps—proper seasoning, controlled cooking temperatures, and resting time—are all explained in detail to ensure success every time.
Ingredients for 3 lb eye of round roast
Transform tough eye of round into restaurant-quality tenderness with these carefully selected ingredients.
| Ingredient | Amount | Notes |
|---|---|---|
| Eye of Round Roast 🥩 | 3 lb | Center-cut for even tenderness |
| Kosher Salt 🧂 | 1 ½ tbsp | Diamond Crystal preferred |
| Freshly Ground Black Pepper 🌶️ | 1 tbsp | Coarse grind for texture |
| Garlic Cloves 🧄 | 6 cloves | Smash lightly for aroma |
| Fresh Rosemary 🌿 | ½ cup | Chopped sprigs, not dried |
| Fresh Thyme 🌿 | ¼ cup | Leaves only, stems removed |
| Yellow Onion 🧅 | 1 whole | Quartered, skin on |
| Carrots 🥕 | 4 whole | Large, peeled, halved |
| Celery Stalks 🌿 | 4 whole | Cut into 2-inch pieces |
| Beef Broth 💧 | 2 cups | Low-sodium preferred |
| Red Wine 🍷 | 1 cup | Dry, bold variety |
| Olive Oil 🫒 | 2 tbsp | Extra-virgin for searing |
| Cornstarch 🌾 | 1 tbsp | For thickening gravy |
| Cold Water 💧 | 2 tbsp | For cornstarch slurry |
The eye of round roast is the star here—center-cut pieces deliver the best tenderness. Look for a well-marbled cut at Whole Foods or your butcher’s counter, where they can trim excess fat for you. If buying pre-cut, ensure it’s uniformly sized (about 1.5-inch thick slices) for even cooking. The rosemary and thyme should be fresh, vibrant stems—Trader Joe’s often carries pre-bundled sprigs at a good price. For the aromatics, yellow onions with papery skins and carrots with bright orange flesh work best; avoid anything soft or sprouting.
No beef broth? Vegetable broth with 1 tbsp soy sauce mimics depth, though the flavor will differ slightly. Substituting white wine for red wine works, but the dish loses some richness. Dried herbs can replace fresh at one-third the amount, though fresh imparts better aroma. If you’re short on time, pre-minced garlic from a jar is fine—just avoid the kind with added oils. For the cornstarch slurry, ensure it’s smooth and lump-free by whisking vigorously; this is critical for a glossy gravy. The red wine can be swapped for additional beef broth, but the acidity helps tenderize the meat.
The roast develops best when rested uncovered at room temperature for 30 minutes before cooking. Store any unused fresh herbs in a glass of water like flowers, wrapped in a damp paper towel in a bag. Beef broth keeps for 6 months frozen, while red wine lasts 1 year unopened. The cooked roast reheats beautifully—sliced and simmered in its juices for 10 minutes on the stove. For gravy leftovers, store in an airtight container for up to 5 days or freeze for 3 months. Always slice against the grain for maximum tenderness.
Why You’ll Love This Recipe
- Five-Ingredient Magic: I swear by this combo—just salt, pepper, garlic, rosemary, and the roast itself. No fancy sauces or last-minute shopping runs. Honestly, the simplicity is what keeps me coming back.
- Crispy-Garlicky Bliss: That crust? Chef’s kiss. The garlic cloves smashed into the sear caramelize into something irresistible, while the rosemary adds this bright, herby punch that makes every bite feel like a little celebration. (Yes, even on a Tuesday night.)
- Weeknight Workhorse: Slice it for sandwiches, shred it into tacos, or serve it cold the next day—this roast does it all. Between us, I’ve turned it into breakfast hash, lunch wraps, and even a potluck centerpiece. It’s my go-to for when I’m too tired to plan.
- Budget-Friendly Powerhouse: Eye of round is lean, affordable, and packs serious flavor without breaking the bank. A single roast feeds four for dinner and leaves enough for leftovers that taste just as good reheated. Not the prettiest, but the taste makes up for it—every time.
Step-by-step instructions for slow-cooked eye of round roast
Mastering this cut requires patience and precision—here’s how to transform tough eye of round into melt-in-your-mouth perfection.
Prepare the Roast and Seasoning
Remove the eye of round roast from the refrigerator and pat it completely dry with paper towels. This step is crucial—excess moisture prevents proper browning and creates steam instead of a flavorful crust. Place the roast on a wire rack set over a rimmed baking sheet to allow air circulation on all sides.
In a small bowl, combine the 1.5 tablespoons kosher salt and 1 tablespoon freshly ground black pepper. Rub this mixture all over the roast, pressing firmly so the seasoning adheres to the meat. Let it sit at room temperature for 30 minutes before cooking. This resting period ensures even cooking and prevents temperature shock when it hits the hot oven.
Sear the Roast for Depth of Flavor
Heat a large oven-safe skillet over medium-high heat and add the 2 tablespoons olive oil. Once the oil shimmers but isn’t smoking, carefully add the roast. Sear for 4-5 minutes per side until deep golden brown. You’re building flavor here—the caramelized crust will lock in juices during the slow cook.
Transfer the skillet to a preheated 325°F oven (convection if available) and continue cooking. The residual heat from searing will help jumpstart the cooking process while maintaining that precious crust. This low-and-slow approach is key to tenderizing the tough eye of round muscle fibers.
Build the Aromatic Vegetable Base
While the roast begins cooking, prepare the vegetables. In a separate large pot, combine the 1 whole yellow onion (quartered), 4 whole carrots (peeled and halved), and 4 whole celery stalks (cut into 2-inch pieces). Add the 6 cloves garlic (lightly smashed) and the 0.5 cup fresh rosemary and 0.25 cup fresh thyme leaves.
Pour in the 1 cup red wine and 2 cups beef broth, bringing the mixture to a gentle simmer. This aromatic base will infuse the roast with deep flavor as it cooks. Let it reduce by about one-third (approximately 15-20 minutes) before combining with the roast—this concentrated liquid ensures maximum flavor transfer.
Braise for Maximum Tenderness
After the roast has cooked for 1 hour in the oven, carefully remove it and place it in a large Dutch oven or heavy pot. Pour the reduced vegetable mixture over the roast, ensuring it’s fully submerged. The liquid should come at least halfway up the sides of the roast.
Return the Dutch oven to the oven and continue cooking at 325°F for an additional 2-2.5 hours. The roast is done when a meat thermometer inserted into the thickest part reads 195-200°F and the meat is fork-tender. This long, slow braising process breaks down collagen and transforms tough muscle fibers into silky, juicy meat.
Finish and Thicken the Gravy
Once the roast reaches the proper internal temperature, remove it from the oven and let it rest for 15-20 minutes before carving. This resting period allows the juices to redistribute throughout the meat, ensuring each slice remains moist and flavorful.
For the gravy, strain the cooking liquid through a fine-mesh sieve into a saucepan. In a small bowl, whisk together the 1 tablespoon cornstarch and 2 tablespoons cold water to form a slurry. Slowly whisk the slurry into the strained liquid and bring to a gentle simmer until thickened (about 3-5 minutes). Taste and adjust seasoning with additional salt or pepper if needed. Serve the gravy alongside the sliced roast for maximum flavor impact.
Pro Tips For Making 3 Lb Eye Of Round Roast
- Sear First, Then Roast: Get that pan screaming hot—cast iron or stainless steel—before adding the roast. I used to rush this, and the meat just steamed instead of building flavor. A 2-3 minute sear on each side locks in juices and sets the stage for that rosemary-garlic crust you’re after.
- Smash Those Garlic Cloves: Skip the mincer—peel and smash the garlic with the flat side of your knife. This releases more flavor into the pan when you sear the roast. (Yes, it looks like a crime scene, but your meat won’t taste like it.)
- Don’t Crowd the Rosemary: Sprinkle the rosemary after searing, not before—it burns fast and turns bitter. A handful of sprigs is enough; you’re not making a potpourri. Tuck the stems into the meat so the leaves infuse, not just sit on top like decorative garnish.
- Rest Under Foil: The moment that roast hits 130°F (medium-rare), transfer it to a cutting board, tent loosely with foil, and walk away for 10 minutes. I learned this the hard way—slicing too soon turns your perfect roast into a sad, dry pile. (Your knife will thank you too.)
Regional styles of this recipe
Classic American Style
In traditional American homes, this roast becomes the centerpiece of Sunday dinners or holiday feasts. The key here is a rich red wine reduction paired with herbaceous thyme and rosemary—classic flavors that feel comforting yet sophisticated.
I often serve it with creamy mashed potatoes and roasted Brussels sprouts for a balanced plate. The gravy, thickened with cornstarch, becomes the star of the meal, soaking up every bit of flavor from the braising liquid. 🍽️
Southern Comfort Twist
Down South, this roast takes on a smoky, spiced profile. Add 1 teaspoon smoked paprika and ½ teaspoon cayenne pepper to the seasoning rub, then finish with a splash of hot sauce in the gravy. Serve with buttery cornbread and collard greens for a true Southern spread.
The heat from the cayenne cuts through the richness, making each bite exciting. I like using Whole Foods’ hot honey drizzled over the top for extra depth.
French-Inspired Braise
For a French bistro touch, swap the red wine for dry white wine and add 1 sprig fresh tarragon to the braising liquid. Deglaze the pan with the wine after searing for extra flavor. Serve with crusty baguette slices and ratatouille for a refined yet approachable dish.
The tarragon adds a subtle anise note that pairs beautifully with the beef’s natural richness. I often finish the gravy with a pinch of freshly grated nutmeg for warmth. 🥖
Mexican Fiesta Adaptation
Transform this into a fiesta-worthy dish by adding 1 chopped chipotle pepper in adobo to the braising liquid and finishing with cilantro and lime in the gravy. Serve with warm tortillas, black beans, and charred corn.
The smoky chipotle gives the roast a bold, spicy kick that’s perfect for Taco Tuesday or Cinco de Mayo. I like using Penzeys’ chipotle powder if fresh peppers aren’t available—just ½ teaspoon does the trick.
Italian Sunday Roast
For an Italian-inspired version, replace the thyme with 1 tablespoon fresh oregano and add 1 teaspoon fennel seeds to the braising liquid. Serve with polenta and roasted zucchini. The fennel seeds add a subtle licorice note that complements the beef beautifully.
I often finish the dish with a sprinkle of grated Parmesan over the sliced roast for extra umami. A glass of Chianti pairs perfectly with this rustic yet elegant meal. 🍷
Nutrition facts
Frequently asked questions
Why does eye of round need slow cooking?
Eye of round is a lean, tough cut with long muscle fibers that require low-and-slow cooking to break down collagen and transform it into tender, juicy meat. The 325°F temperature over 3-4 hours ensures moisture retention while the muscle fibers soften—something quick cooking methods simply can’t achieve.
Can I use a slow cooker instead of an oven?
Transfer the seared roast to a slow cooker with the braising liquid, then cook on low for 8-10 hours or high for 5-6 hours. The key is ensuring the roast stays submerged in liquid. Add extra broth if needed—this method works beautifully for hands-off cooking.
How do I know when the roast is done?
Use a meat thermometer inserted into the thickest part—the roast is perfect when it reaches 195-200°F. The meat should also be fork-tender with no resistance. Pro tip: If you don’t have a thermometer, check by inserting a knife into the center—juices should run clear, not pink.
What if my roast turns out dry?
This usually happens from overcooking or not resting properly. Always let the roast rest for 15-20 minutes before slicing—this lets juices redistribute. If it’s still dry, slice thinly against the grain and serve with extra gravy to moisten each bite. A splash of beef broth in the pan before serving can also help revive it.
Can I make this ahead of time?
Yes! Cook the roast up to 2 days ahead and refrigerate in its juices. Reheat gently in the oven at 300°F for 30 minutes, covered with foil. For gravy, reheat separately and thicken with extra cornstarch slurry if needed. The flavors actually deepen overnight!

- 3lb Prime Rib Roast Recipe: Juicy Pink Center Guaranteed in 3 Hours - October 31, 2026
- 5 Spice Cake Recipe: Warmly Spiced Layers With Crunchy Top - October 31, 2026
- 1950’s Macaroni and Cheese Recipe: Nostalgic Creamy Cheese Sauce with Buttery Noodles - October 31, 2026